
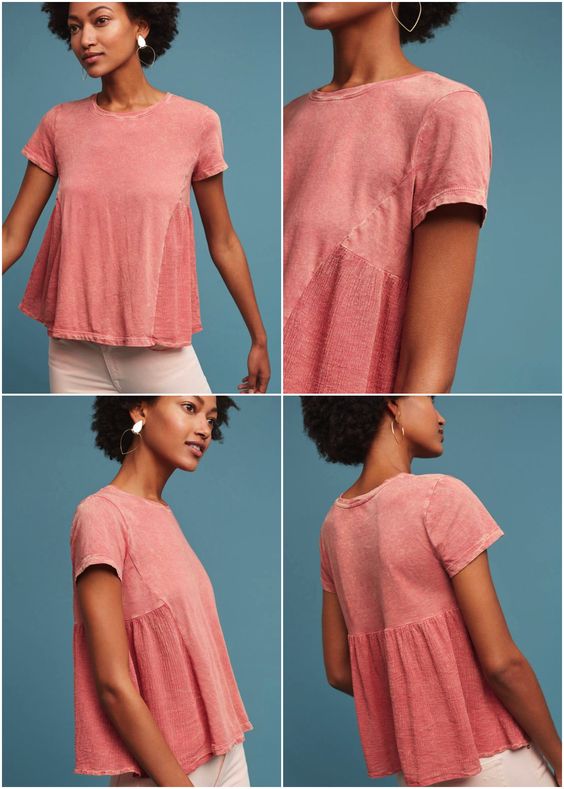
 Hey y’all – today there’s a hack tutorial for you on how to sew a swing t-shirt from the Austin Tee pattern. One of my favorite pastimes is browsing online ready-to-wear shops and figuring out how I can make the things I like. Generally I try to determine how I can hack a pattern that I already have (and preferably, have already made and fitted) rather than drafting it from scratch. So, when a friend posted this Anthropologie top to the Blank Slate facebook group and suggested hacking it, I couldn’t get it out of my head!
(click for source)
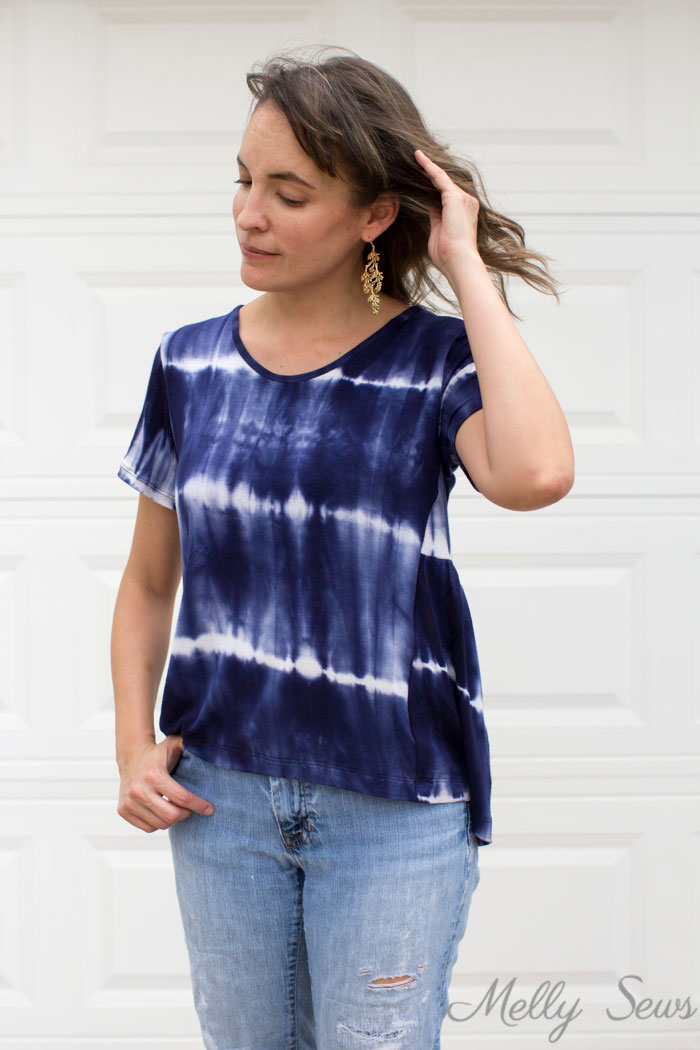
For my version I used a rayon knit fabric in a shibori dye pattern. I bought this fabric because I loved the color and print, but I haven’t sewn it because I hate the vertical stretch issues you get with rayon knits. You can’t make a dress or by the end of the day you’ll be tripping on the hem. But for this top it works; the stretch just makes the style a little slouchier, and I actually like how the back neckline and hemlines got lower as the day went on. 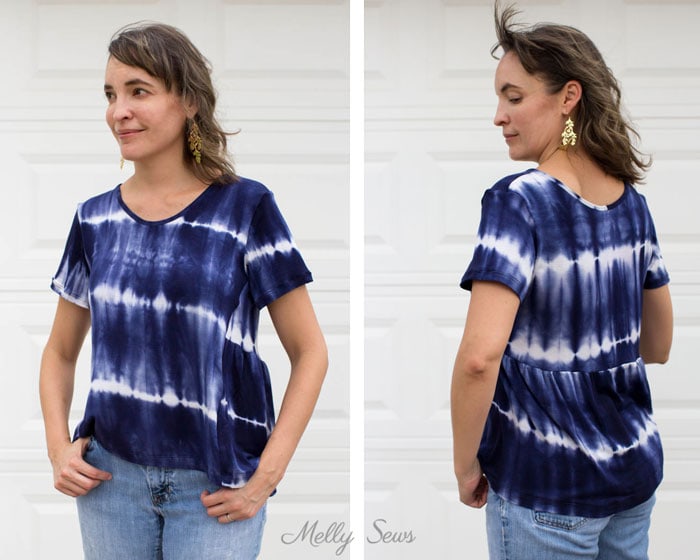 Let’s create the pattern for this top. We’ll start with the Austin Tee pattern from the shop. The graphics below are an approximation of the pattern pieces – they aren’t exact or to scale, but you can create your pattern accurately by working from the real pattern and following these steps.
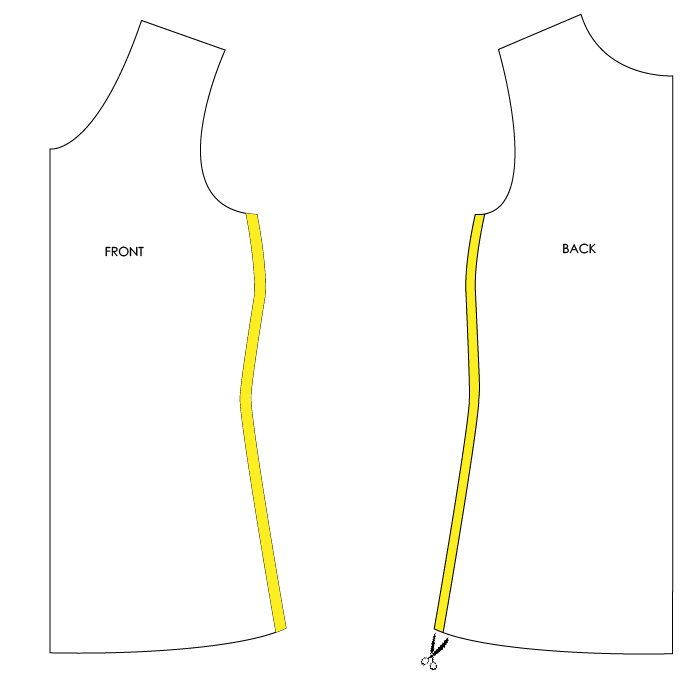
First step – remove the side seam allowances from the front and back pattern pieces. 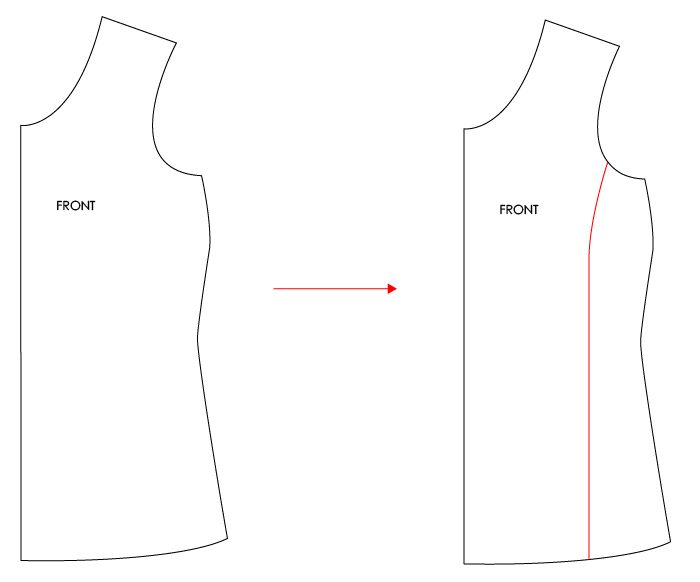
Next, you need to divide the front pattern piece. The inspiration garment uses a style line kind of like a princess seam for this, although it’s not designed to go over the bust apex. So make your line a bit to the outside of that point as shown here. The vertical part of the line should run parallel to the center front fold. 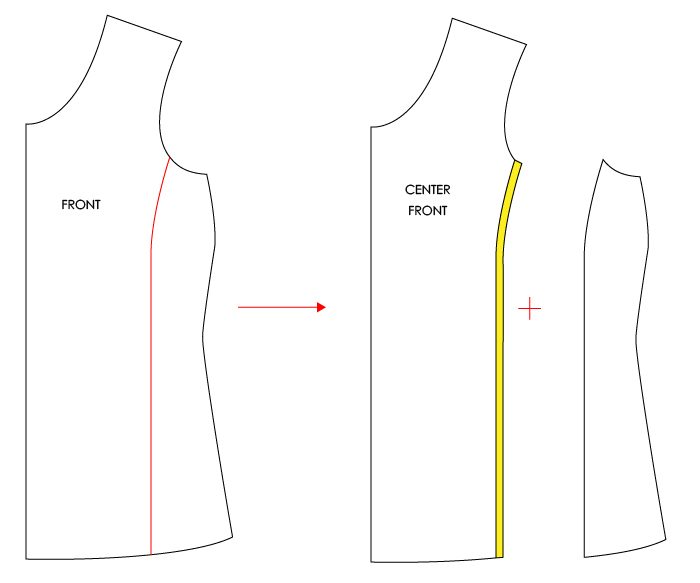
Add a seam allowance to the curved line on your new center front piece. (But not to that side piece yet.) 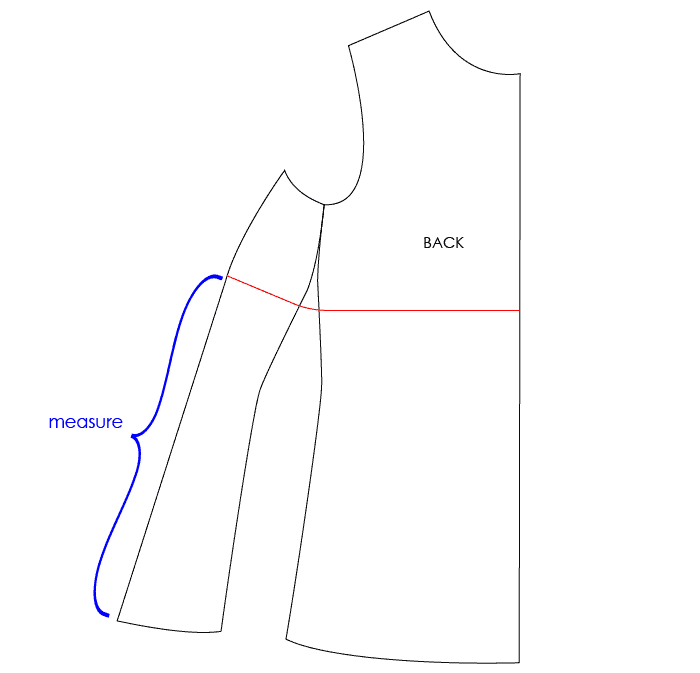
Next, butt the front side piece you cut off up next to the back, so that the armscye/top of the side seam is touching. Tape that together. Put some scrap paper under the pieces at that gap right below where the pieces join. For the red line, I drew it roughly below the fullest part of the bustline to match the inspiration garment. Make sure the line meets both center front and center back at a right angle. Measure the center front below the line as shown above, then cut along the red line. 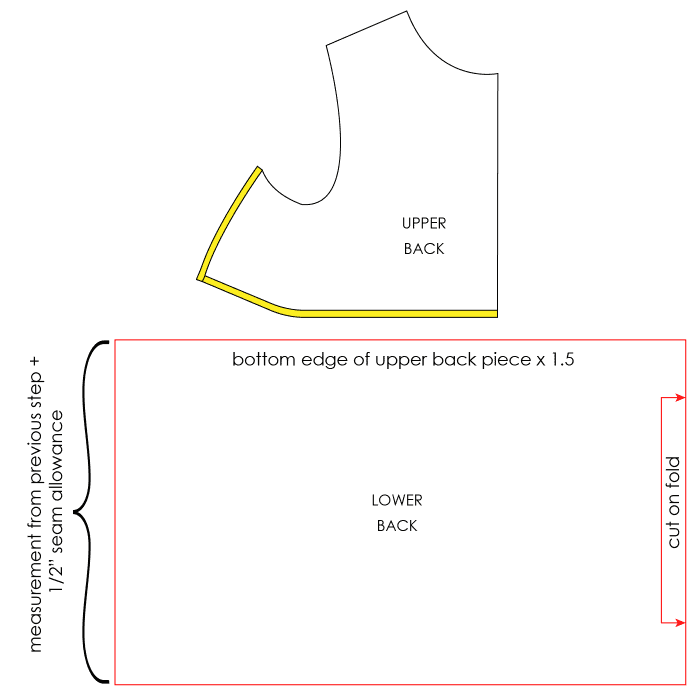
Add seam allowances to the side and the bottom edge of the new Upper Back pattern piece you just created. The last thing you need is a piece for the lower back panel. The graphic above shows the measurements you’ll use to create this. You can change how full it is if you like, by multiplying by 1.25 or 1.75 instead of 1.5 for the top edge. OK, now that you have your pattern pieces, you can make the garment! The inspiration garment uses a knit for most of the pieces, and gauze for the lower back panel. Here are the steps:
- Gather the lower back panel and stitch to the upper back.
- Stitch the shoulder seams and the side seams.
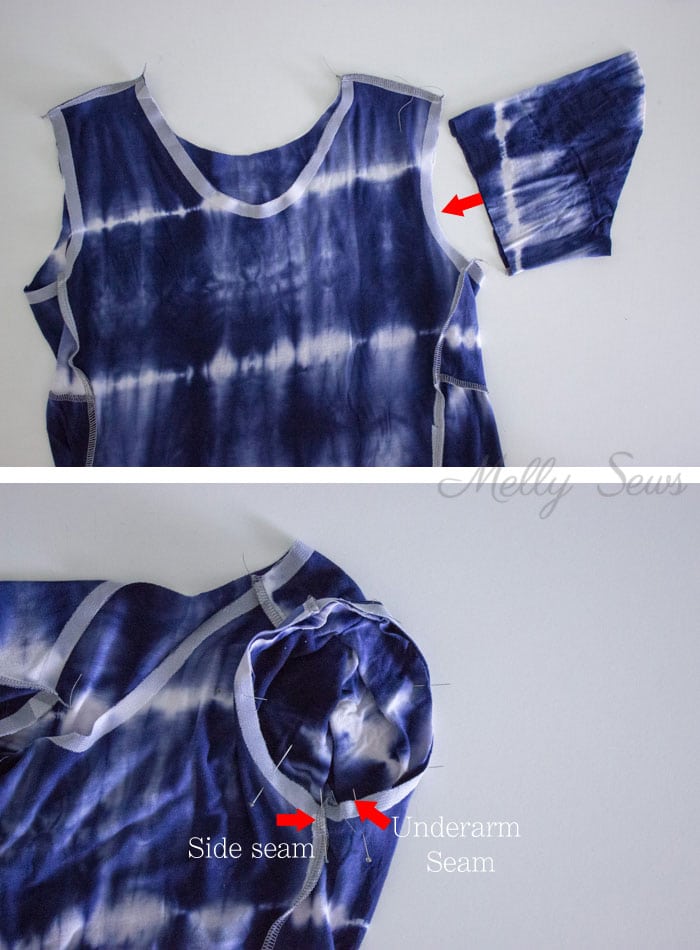
- Set the sleeves in – you’ll have to do this in the round instead of flat, since the side seams have been moved forward and are no longer aligned with the underarm seams. See the photos below.
- Install the neckband as directed in the pattern.
- Finish it up – hem the lower edge and the sleeves.
That’s it! Put it on and proceed to bask in the compliments and questions about where you got it. 😉 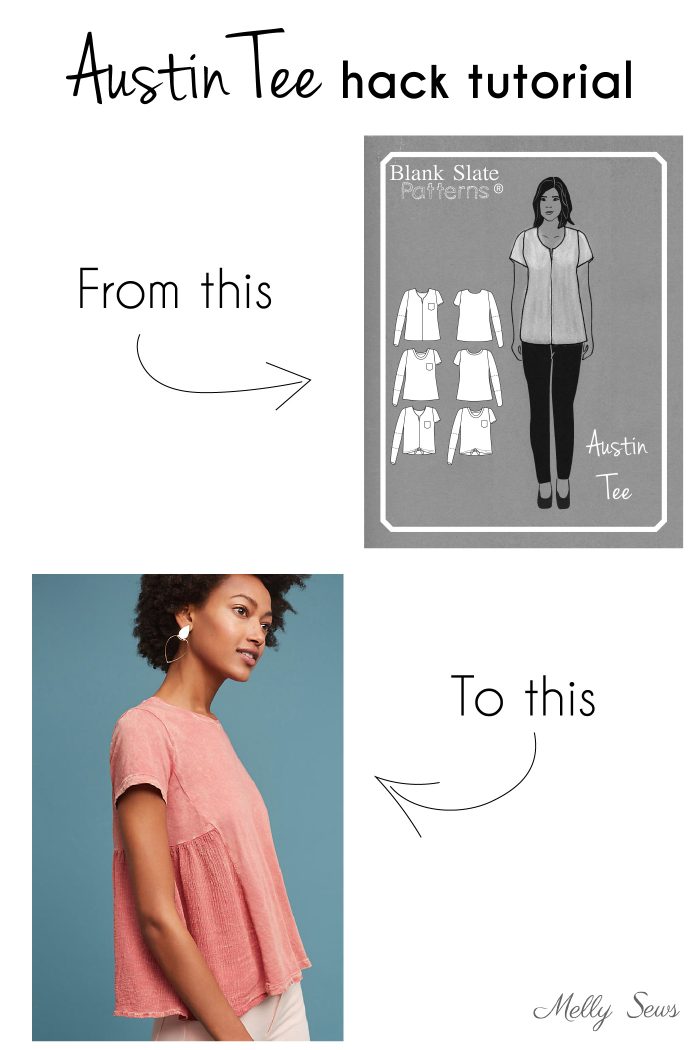
susan hall
Hi Melly,
I Love your patterns and love your hacks. I finished this one this am. I used a white tee and white gauze. I then dyed it orange. Love it!!
Thanks,
Susan