
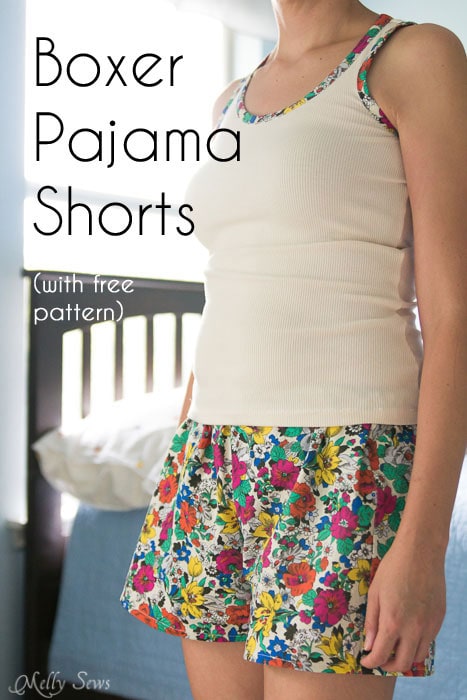
How to Sew Boxer Style Shorts using a free pattern with a step by step video tutorial
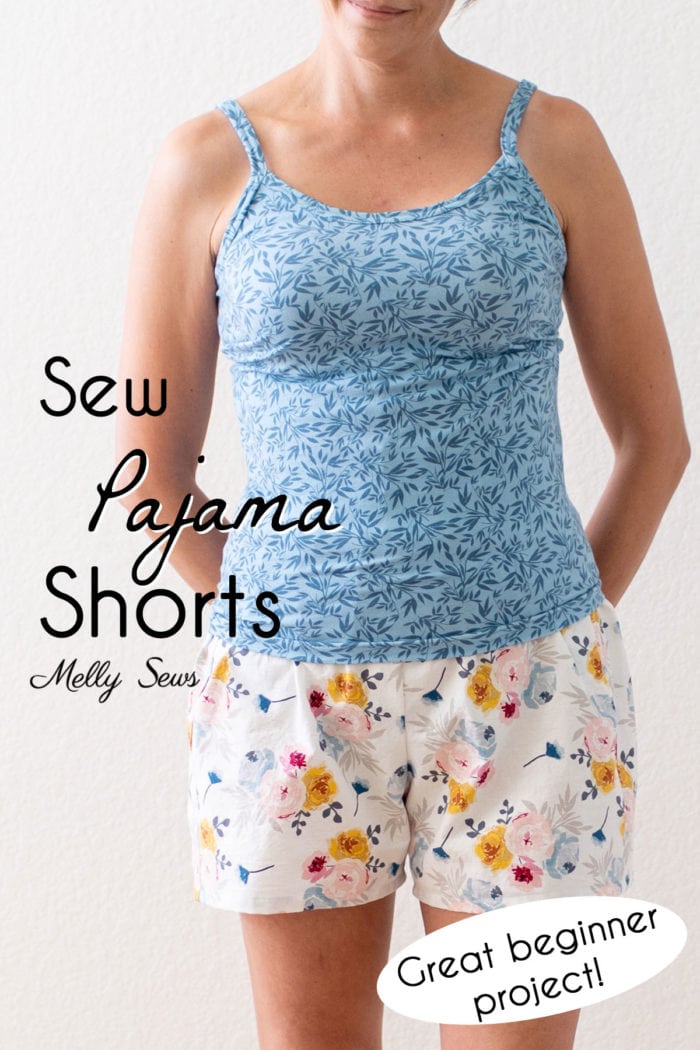
Hey y’all – today I have a free pattern for you to sew pajama shorts, boxer-style. This post was originally published in 2014, but I’ve updated it to add video.
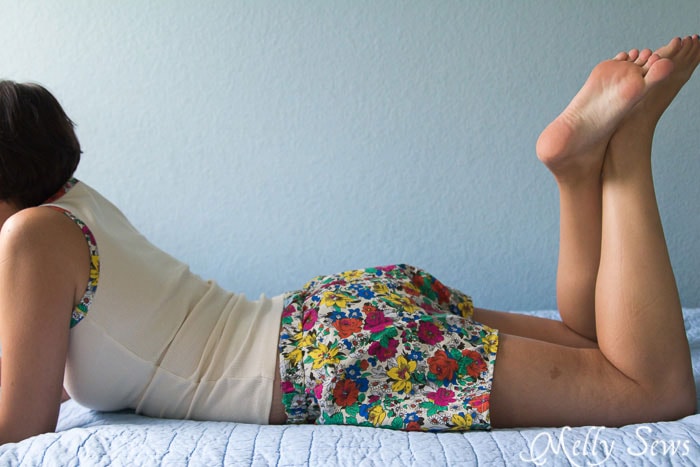
My favorite thing to sleep in for most of the year is a tank top and boxer shorts. Something about the front seams that are typically shifted forward and the easy fit of boxer shorts just makes them soooooo comfy.

BUT – my old boxer shorts had elastic that was shot. So it was time for some new sleepwear. I drafted up a pattern with the same measurements as my favorite pair, leaving off the fly opening (cause why do I need that?)
I like projects where I can use quilting cotton for something other than quilting, and this is a perfect project for that. Quilting cotton isn’t always suited for clothing, however, it’s perfect for these shorts. And after 5 years of washing and sleeping in the pair shown below, I can say that they just get softer over time and that is my FAVORITE!
Supplies to Sew Shorts
This post contains affiliate links. As an Amazon Associate I earn from qualifying purchases. All affiliate links are identified with (affiliate link) after the link or a commissions earned statement above the link(s).
Want to make your own? You’ll need:
- About 1 yard of fabric – this is perfect for quilting cotton. If you re-size these shorts, you’ll need more than 1 yard of fabric
- About 1 yard of 1″ wide elastic (affiliate link) – you’ll need enough to go around where you want the shorts to sit, which will probably be around 1″ below your belly button
How to Get the Pattern
The free pattern is in a women’s size small, for hips up to 36″ and waist 28″. If you need to make it bigger or smaller, check this post.
To get the free size small pattern, you must be a free newsletter subscriber. Or, you can buy the Barton Shorts pattern in my shop. It comes in sizes up to 55 inch hips with printable instructions for $11.95 so you don’t have to figure out how to re-size the pattern on your own. Keep in mind that the purchased pattern has a separate waistband piece, but it also includes instructions to attach that. Click your preferred option from the buttons below to go to the free pattern gallery or buy the pattern.
 |  |  |
Existing newsletter subscribers should look at the bottom of the most recent Friday newsletter for the current free pattern gallery password. New subscribers should look in the welcome email for instructions. Note that the free version of the pattern does not have printable instructions so you’ll need to refer to this post for instructions.
Please note that all my free patterns are licensed for personal use only (no selling items made from this unless you purchase it) and by downloading you are agreeing to this license.
Pyjama Shorts Sewing Project
To sew the shorts, follow the video instructions below, which you can also watch on YouTube here. Or scroll down for written instructions.
Cut out two front and 2 back pieces of the shorts, making sure to cut with the fabric folded so that they are mirror images. Note that the darker line is for the shorts back, and the lighter line is the shorts front.
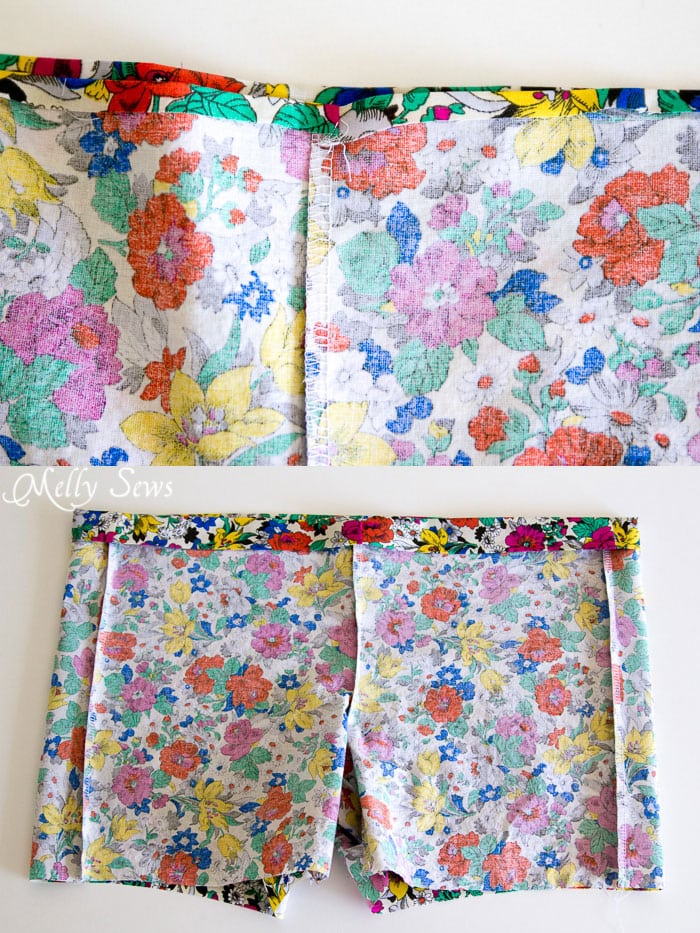
Lay the two back pieces (left in the picture below) and the two front pieces (right in the picture below) right sides together, then sew along the crotch seams. Finish this seam. (Don’t know how to finish seams? Check this post).
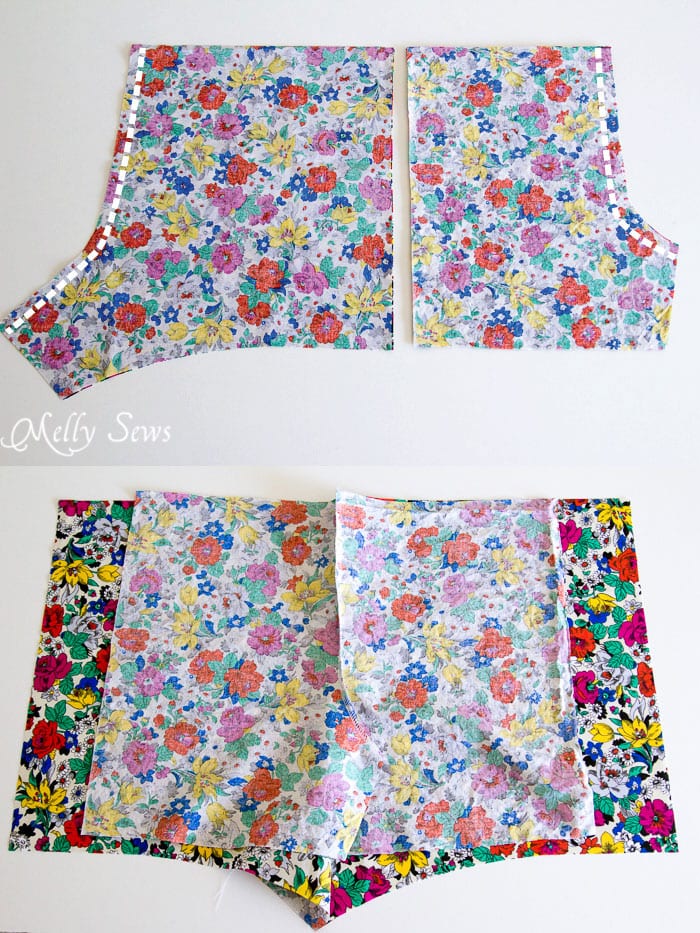
Open the front and back pieces and lay them right sides together. You can see in the picture above how the front side is not as wide as the back. Match the side edges of the front and back to each other and stitch, then finish these seams. Your shorts will look like the picture below.
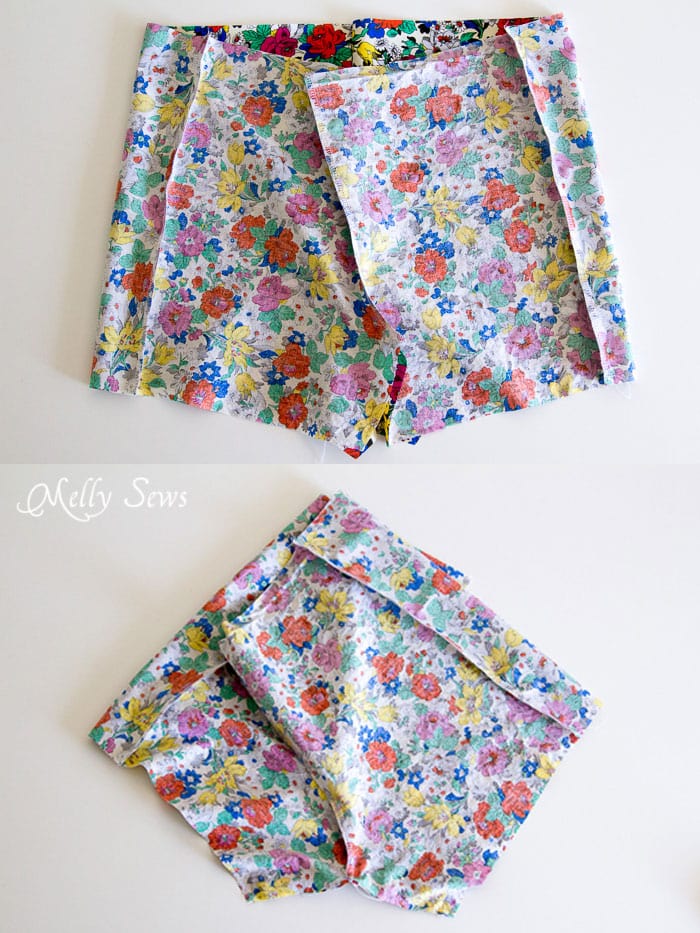
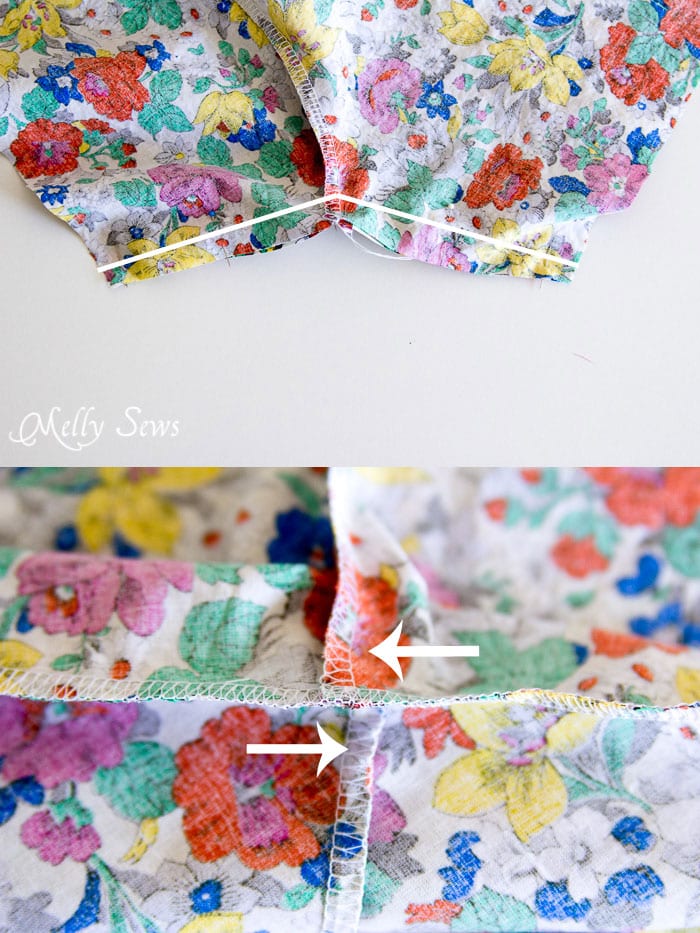
Spread the shorts so that you can match the inseams to each other as shown above. Pin and stitch as shown by the white line below. Make sure one seam allowance goes one way and the other goes the other way (arrows in the second picture below); this will be important when inserting the elastic later.
Fold the top edge of the shorts 1/4″ to the wrong side and then press. Then fold down again, 1 1/8″ to the wrong side and press again to form a casing for the elastic.
If you want to add a tag to the back of the shorts, then stitch it on now. To see how I make my clothing tags check out this post. Next, sew the casing close to the bottom folded edge, leaving an opening to insert the elastic. Measure the elastic so it fits about 1″ below your belly button without stretching. Using a safety pin, insert the elastic in the casing.
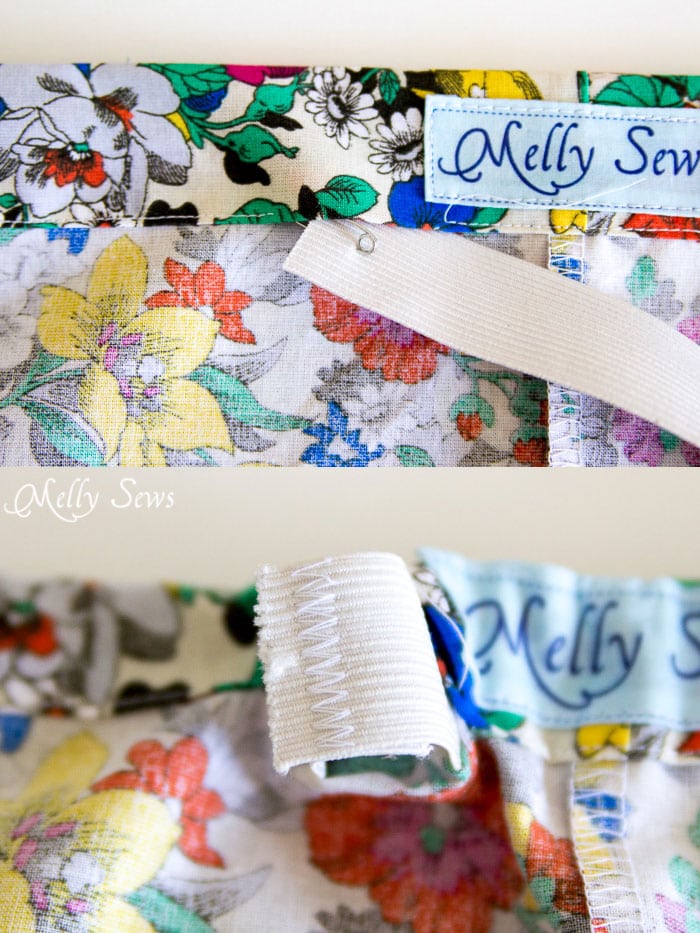
Overlap the two ends of the elastic and zig-zag stitch them together as shown above. Pull the elastic all the way into the casing and then stitch the opening closed.
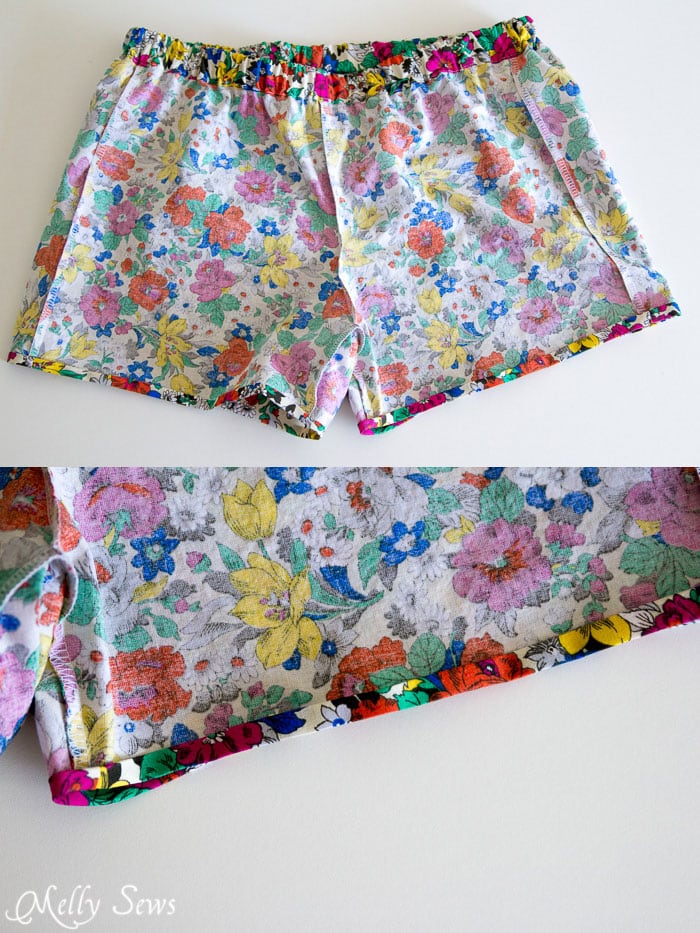
Finally, create a narrow hem as shown above by folding the bottom edge of each leg 1/4″ to the wrong side twice, pressing and stitching.
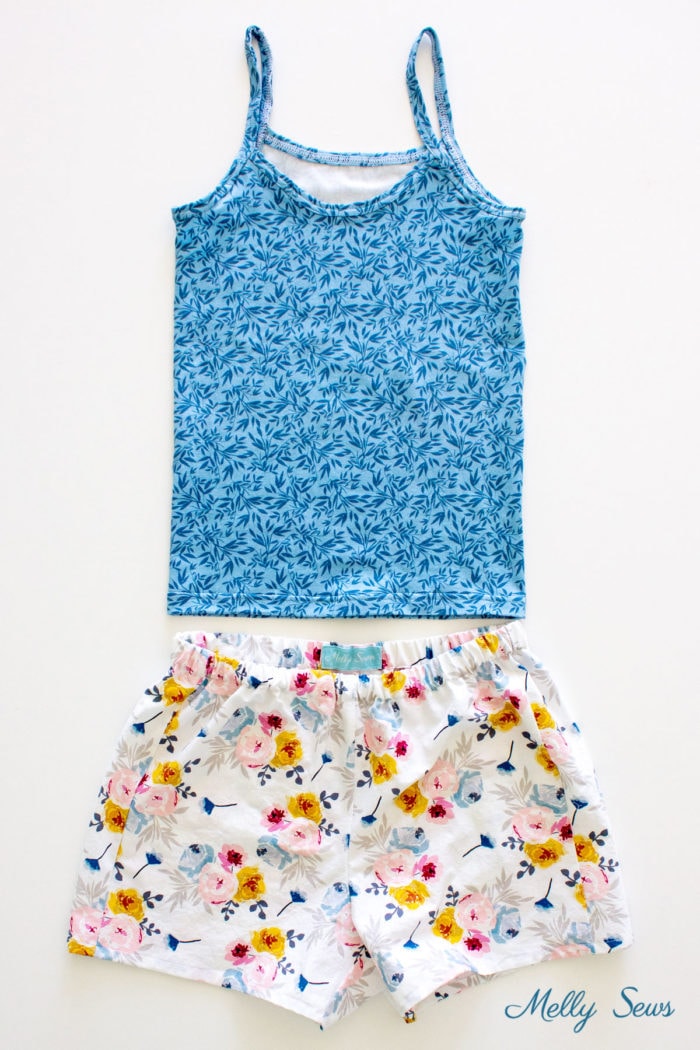
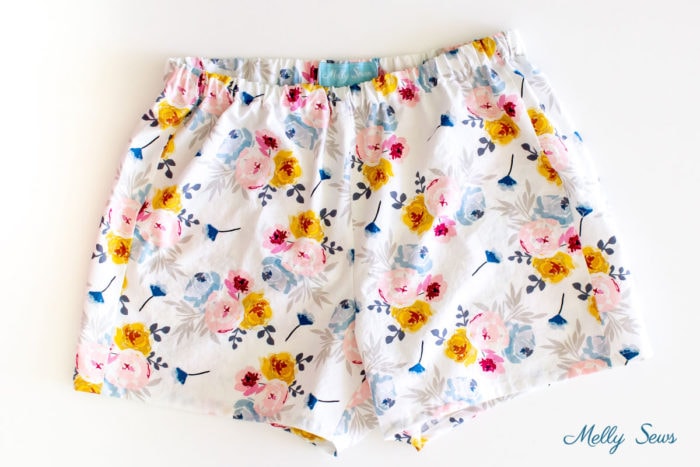
And you’re done! After you finish sewing, the image below shows the completed shorts.
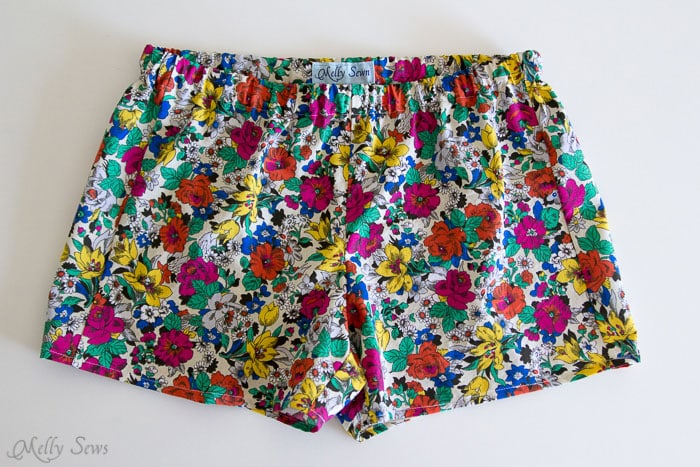
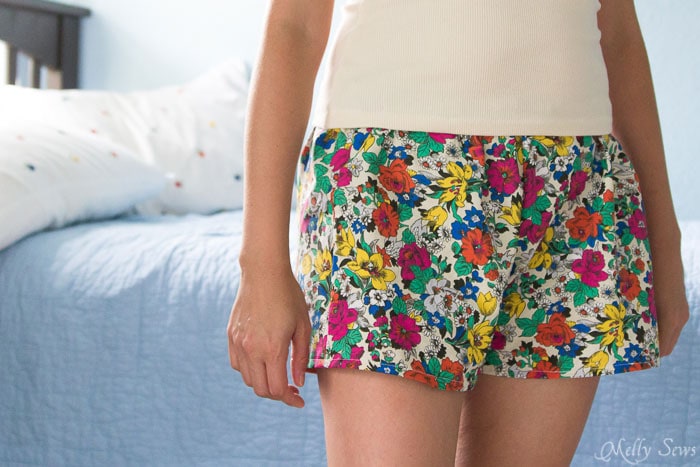
Now wear them for lounging on a lazy morning. Oh, and the tank top I’m wearing? You can find that one here.
Happy sewing! (Want to make the ivory tank top? Then check this post.)
Tara
These are great! Love the fabric! If you’re not a skinny Minnie as you 🙂 how hard would it be to make this pattern bigger, say using your hip measurements?? Because you don’t have a good fit pair to replicate? Lol! Thanks!
Melissa Mora
Added a link to slash and spread pattern grading in the post.
Kelly
I’ve used her slash and spread method to make her other shorts from an XS to a LG. It worked perfectly!!!
kelly t.
Thanks for sharing the pattern! A couple pairs of these & I wont have to sleep in my ugly gym shorts any more. 🙂
Lori Williams
I’m with Tara. I need a way bigger size. Any advice?
Melissa Mora
Added a link to slash and spread pattern grading in the post.
Michelle
These are awesome!! Can’t wait to make these. I love boxers for sleepwear too.
Linda
Thanks so much for the pattern!
Diana
OH dear and I am a subscriber~ LOL no pattern ? May I please have a copy? Thank you !!
yvonne
Melly, these are just soooooooooo cute. I love them! I am going to start on these TODAY! And I love the tank top with the binded neck, and sleeves. You are just too creative. Thank you so much for sharing this with us.
Danita
They look sooooo comfy! I hardly sew anything for me any more, but I might just give it a try. Now to hunt through my stash for the perfect feel and color. LOL! Or maybe a few practice piece since my shape has changed.???
Thanks again Melissa! Beautiful and simple! Just the way this seamstress needs!
Kelly
It so funny that just last week I needed something like this and altered your bias shorts to make them – and now here they are!!! And this method of construction is way simpler! And for others who want a larger pattern, the slash and spread works perfectly. Hers were for a 32 ish waist in knit. Mine were in cotton quilting fabric so I needed an extra inch. I made mine for a 34″ waist by adding 3″ width and 3/4″ length. Maybe that might help you all. Thanks Melissa for the post. Love love love it!!!
Neusa Moraes
Estou tão longe de vc, mas nossa paixão pela costura nos aproxima, muito obrigada por tudo o que vc compartilha, tenho aprendido bastante! bjs
Auroraeva
these shorts are adorable! I also love the tank top, Do you used ribbed cotton and bias tape made with the same fabric?
Kristie
Can’t wait to make some. I love what you did, and was just gifted a bunch of crazy floral fabrics. Perfect for some pj shorts that aren’t yucky gym shorts. Thank you so much for the pattern! And I can’t wait for the tank top. I need a good pattern for a tank, I usually wear tanks under everything! And thanks for doing this self care sewing month. I need to spend a little time improving my wardrobe, and this is great motivation!
Elizabeth
Love this project. Thanks so much for the pattern! Waiting for the tank top tutorial next week. 🙂
Amanda Harvey
Hi Melly thanks so much for the pattern, they’re just right for the hot summer. Can you help with making them bigger please?
Thanks again and take care
Amanda
Melissa Mora
There is a link in the post on how to make these bigger.
Samina
Those are adorable shorts! I’ve been looking @ my old boxers that I sleep in & thinking that I’d love to churn out another couple of them, so your pattern & tutorial couldn’t be more timely. Thank you so much!
Carol
These are fab, thanks for sharing. Look forward to next post for the tank tutorial.
Zaman
Hey Melly,
This looks lovely and what a great idea to use quilters cotton for garments!
Though for some reason I’ve not received the pattern in my inbox :/
Could you look into that kindly…seems to be the case with Diana too.
Stephany
Hi Melly! Thank you so much for the awesome pattern! I’d love to make a couple pairs in some knit fabric because I really need to destash and I just love sleeping in knits much more than wovens. I am going to attempt to make a pair today and see how it goes. I’ll probably have to take them in a bit since I’ll want them to be a bit more fitted. Wish me luck.
Melanie
So sorry…I did not receive the post either….really love the pattern!!
TIA
Melissa Mora
Please check your spam, trash, junk, bulk, social and/or promotional folders for your email. Please also make sure you are subscribed to the WEEKLY newsletter, which is here: http://mad.ly/signups/86876/join
Marie Martinez
Hi Melly,
Thank you so much for the many fine patterns ( I have most of them and working on the tank dress using ITY knit)…always looking forward to your blog posts….Can you give us a link to the store so that I can order labels. many thanks
Anne
Cute!!! And I love that you made the tank match! I’ve got a Craft Gossip post scheduled for tomorrow morning that links to your tutorial:
http://sewing.craftgossip.com/free-pattern-womens-pajama-shorts/2014/09/03/
–Anne
Anne
“…leaving off the fly opening…” hahaha that made me laugh. I love how you write. So funny. Thanks for the free pattern. Buying fabric today for this! 🙂
Stephany
Here is a link to my post on the shorts I made using Ponte de Roma.
http://sewfanny.blogspot.com/2014/09/ponte-de-roma-pj-shorts.html
Thank you once again!
Susan
I made a pair of pajama shorts using your pattern. They turned out great. I had to take them in a 1/2 inch to get the fit I like. I’m going to make some more as soon as I get time. Thank you so much for the free pattern.
Lisa at Mabey She Made It
These look so comfy! (and I just noticed the Little Bow Pleat dress and I’m in love!)
marissa | Rae Gun Ramblings
so cute adding it to my list of things to make
Fiona
Thanks very much for this tutorial and the free pattern, Melly. I made a pair last night while watching the votes come in for the Scottish independence referendum. Actually, the count took so long, I could have whipped up another pair if there had been enough elastic!
These sleeping shorts are very comfortable to sleep in.
Thanks again.
Sarah Jane
Just finished sewing these up. My first time sewing a clothing item. They turned out wonderfully! Thanks!
Michelle
Would these be suitable for men. I want to make my 4 adult sons and husband a matching pair for Christmas morning?
By the way thank you for being so generous and sharing free pattern.! 🙂
Daniela
Love ’em!!!
Acabo de terminar de hacer un par para mi…thank you for sharing this with us…!!!
Rita Vasques
Hi Melly,
Can you pls tell me the finished lenght of the shorts?
Tks
Melissa Mora
The inseam is about 1 1/2″ finished
Rita Vasques
Thank you! I will add some more lenght… I want to make some shorts for the summer!
Tara C
Thanks so much for the pattern and clear instructions! My daughter and I made these together this afternoon and she loves them:)
Mary Jo
I didn’t realize that you would actually send out the patterns for my use. I am tickled to death. After I run out for printer paper I am going to give this a shot.. Thank you so much.
I have been sewing for 50 yrs. for myself and family. There is always something new to try. And someone else has something interesting to read about and try. It goes on and on. What a great hobby.
Thank you for your site and your hard work.
Mary Jo
Jools
Thank you so much for a great tutorial! I’ve always been scared and confused when I’ve looked at patterns and instructions, but today I made these shorts…two pairs in fact and am now excited to try something else! Thank you x
Debbie KW
Thank you very much for the free pattern/tutorial. I made myself a pair last night from owl print flannel. They are SO comfortable! I am definitely going to make more. 🙂
Maureen OConnor
I recently discovered elastic thread!! I am going to try making the waist band with that rather than feeding elastic through the waist. Wish me luck!!
McKenna
These were my first real sewing project. Found it to be a do-able challenge. Definitely a good learning experience for me. Looking forward to making subsequent pairs to see improvements. Thank you so much for drafting and sharing this pattern.
Samantha
Thanks for this! I just made them in flannel for my teenager and she is thrilled. I’ll be making a few more, I think. 🙂 Good thing they are super quick!
Amanda
I made these today after a several year break from sewing and it was a simple enough project to help get back into the swing of things. Thank you for sharing this tutorial. I’ll be adding photos to my blog soon (opshopcreateblog.wordpress.com)!
emily
Super cute. Made my first pair o’shorts in about 30 minutes from pattern cutting to final try on. Excited for my new summer pjs. My mom is going to get her own in the mail soon, too!
Fiona
Many many thanks ….I had fun making these from some Liberty tana lawn in my stash …they are definitely daywear though for my daughter and making them was a learning curve as they had to be sized up and I made them longer in the body too as she is not a fan of hipster height stuff. Fingers crossed that they will fit her well. I made them up with the overlocker/serger all apart from hems and the waist elastic where I put two rows through.
Jacqui
I have never sewn anything before and couldn’t find cotten pj shorts for my son anywhere that weren’t “for little kids”. I found your pattern and was able to modify it smaller to fit him. I used a serger machine for the whole thing as it was already threaded from my mother’s last project here and did a blind hem on the legs and also used it to make a casing for the elastic. My son picked out the material yesterday and today I have made 3 pair for him while he was at school 🙂
Thanks so much for this simple pattern that truly anyone can follow!
natasha
Thank you for such and amazing pattern made my first pair and for me a beginner sewer it was easy to follow the instructions and pattern was so simple to assemble
Hannah Rea
So I sewed these shorts over the weekend and I am very excited about them. This was my first ever sewing project and I loved how easy the directions were to follow.
Thanks again for the pattern!
Lisa
Thanks for the pattern. Just what I was looking for.
Katie
I just made these shorts out of a recycled body pillow case I got second-hand (thick cotton flannel). now I finally have sleeping shorts appropriate to wear in front of people other than my husband, thank you! I am looking forward to using the ammended pattern to make some graphic print shorts – I have a great cotton fabric I’ve been saving for something wonderful, this will be perfect!!
Jenny
My last pair of shop bought pj’s gave up the ghost this week and I finally decided enough is enough! Time to start making my own clothes again! (its been at least 20 years #eeek) In searching for a basic beginner friendly pattern I found your site and I’m well pleased – can’t wait to be rocking a pair of memade pjs tonight!! Thanks so much for making these awesome patterns and tutorials available – youve made this Mumma’s day!
Jay
Hi, just wanted to say thank you for all your effort for sharing these awesome works with us. Appreciates from Korean boy who just started sewing yesterday!
Toby Thompson
Thank you for the video tutorial & free pattern!! Do you offer a pattern for girls size boxer shorts just like the ones in the tutorial? Thank you!!
Bobbi Sather
This is the best & easiest tutorial for making sleep shorts. I couldn’t find my Pattern instructions and didn’t know how to assemble my cut out pieces. So happy I found Melly. I’m making 3 pairs today! Thank you so so much!🤗☺👌
Cheryl evans
I made them!!!! They are amazing. The first thing I’ve made from a pattern. I am beyond thrilled. Can I use the same principle with this pattern amd make wise leg trousers?
I’m hooked after a really tough start at this craft. 😁👖Yay
Maribel Sanchez
Love the pattern!
Danielle
These were quick and easy to make, and they’re very light and comfortable. I sized up to a medium using your instructions, and added in some pockets (those are a must for me!) I was able to put them together in a day, and now am moving on to making a second pair!
Gretchen Salinas
Super easy to make! Whole project only took me a couple hours start to finish. First piece of clothing I’ve ever made. Made a pair for my daughter and she loves them.
Jay
Even though I haven’t not sewn in over 20 years I recently started sewing masks. I went looking for beginner sewing projects so I could do more than masks (and refresh my skills from those years ago) and came across your site. I made these shorts and they turned out great. Thanks for the pattern and the tutorial. I was successful in sewing my first garment in over 20 years thanks to your generosity and clear instructions. I can’t wait to make more of your projects! Thanks so much!
JULIE
Thank you so much for sharing your knowledge with us, you are so kind. I am so excited to try this out. I feel very lucky to have such detailed instructions at my fingertips!
Emma Adams
I need to say thank you! I just bought a used sewing machine with no clue how to use it and 2 days later I have a handmade pair of shorts!! I am amazed and proud and so grateful for your tutorials. I might have to work my way through all of them!!!
Louise
Made the pattern bigger with your link, and 2 inches longer in length-came out so cute! Thank-you!
Christina J
I just made these and love them. It’s a perfect beginner sewer project that gave me a lot of confidence to get back into sewing. Thank you!
Kat
Cute! I think I’m going to make these in a super-low cut to go under this big preggo belly 😍
Btw – your blog has been fantastic for getting my creative juices flowing again after a long postpartum journey of not sewing a single thing. It’s been great to gather ideas and refresh on thinks like knits and whatnot. I appreciate it so much!
Julie
Thank you for this tutorial! I just came back to it to make a third pair of pajama shorts with some leftover flannel and to replace an old pair that was falling apart and will now be turned into hankies. 🙂 I love these shorts and it’s such a useful yet doable weekend project.
Rachel
Yeehaw! I just made my shorts last night in a few hours. I am a beginner who hasn’t sewed in many years, so it really boosted my confidence! Thank you for this free pattern and great instructions! The only thing I could figure out really was what stitch you were using? I went with straight stitch and then a zig zag to secure the elastic as you suggested in the video. I am wearing my shorts as I type!
Bev M.
God bless you for posting this! I was looking for an easy shorts pattern to put with a skirt I’m sewing for a friend’s daughter. I don’t normally sew clothes, but, much like the fool I can be at times, I volunteered to make something I don’t know how to make. Luckily for me, I can google how to put this together. This is perfect, and I agree that we don’t need the fly opening.
Juls
Made these years ago from your previous post. One of the first things I made re-learning how to sew. Decided I need to make a few more pairs. As you say great for quilting cotton so I can use fun designs I can’t otherwise use. 🙂 Thanks for the pattern!
Carol Vale
Love this pattern. It was so easy to follow. I have made about 15 pairs and gave them out to my family members. Thanks Melissa