
Learn how to sew a hat with this DIY tutorial. Free sewing pattern template included to make a hat customized for you.
Hey y’all – today I’m going to show you how to sew a hat. I’ll be sharing how to make a hat like this particular one, but also share a template that will help you draft any kind of hat you want and then sew a hat. Using the tools and information in this post, you can sew up any kind of non-stretchy hat you’d like, from a top hat to a bucket hat to a baseball cap. If you’d like a stretchy beanie hat, check out this post instead.
If you prefer a video tutorial, check out how to make a hat below or on YouTube here. Note that I make the black bucket hat in the video, and the gray sun hat in the photo tutorial in this post. There are slight differences between the construction of the two hats, so I’d suggest both watching and reading to get all the info about your options when drafting and sewing a hat pattern. For the written step-by-step tutorial and so much more useful information, see below the video.
Parts of a Hat
Let’s start by talking about the parts of a hat, as shown below. There are really only 3 main parts – the crown, the side band, and the brim.
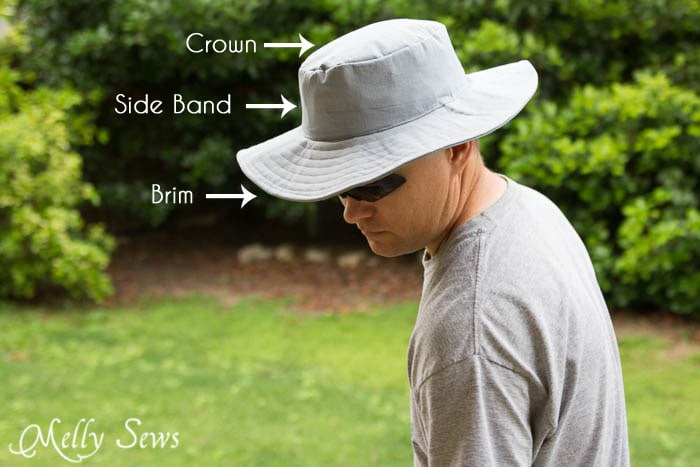
The crown of the hat is the very top. Depending on the style of the hat, it can be the same size as the head circumference, smaller or larger.
The band is the side of the hat. It connects the brim and the crown together. It can be a rectangle if the crown is the same circumference as the head, or more of a trapezoid shape to connect a crown and opening of different sizes.
The brim is the part of the hat that sticks out and provides shade to the face and neck. A hat brim can be the same width all around, or can be wider in some parts than others. For example, the brim of a cowboy hat might be wider on the sides to allow the sides to be shaped upwards and give it that characteristic silhouette.
How to Use the Crown Template
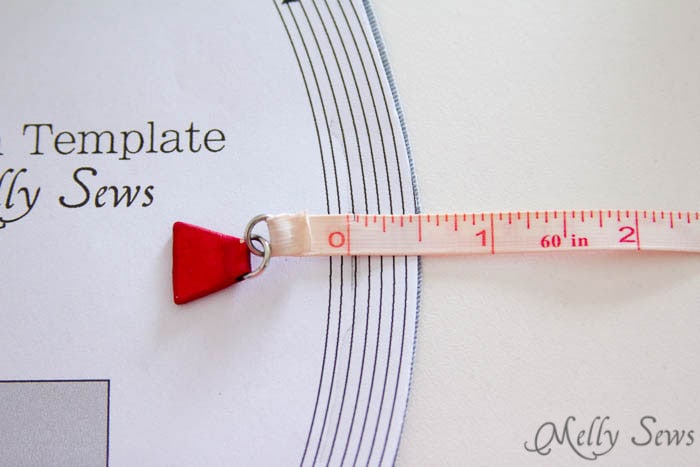
One main measurement is needed to make a hat, and that is the head circumference. You measure around the head where the hat will sit – usually just above the ears. Keep the measuring tape level all the way around. Then you’ll use that measurement to determine both the head opening of the hat in the brim and the size of the crown, and from the brim and crown you’ll make the band.
So, here I have a crown template pattern. When you download the pdf and print it, it looks like this:

It has crown sizes 24 1/2″ all the way down to 19 1/2″. Which means that you could use it for babies up to grown men. But first let’s talk about how to use it.
Depending on the hat style, you may want the crown about the same size as the head circumference (like the flat brim hat shown in this post), slightly smaller (like this rain bucket hat was) or larger (like how you gather in the crown of a chef’s hat).
In general, you’ll want to measure the person’s head and add 1/2″ (this is for the thickness the brim seams will add), then choose the size of the crown based on that. For example, my husband’s head measured 22 1/4″, so adding 1/2″ that gave me 22 3/4″, so I went with the 23″ template to start.
How to Draft Your Hat Sewing Pattern
Once you know what size head circumference you’re drafting for, you can make your pattern. Start by deciding if you want the crown to be the same size as the head circumference or smaller or bigger.
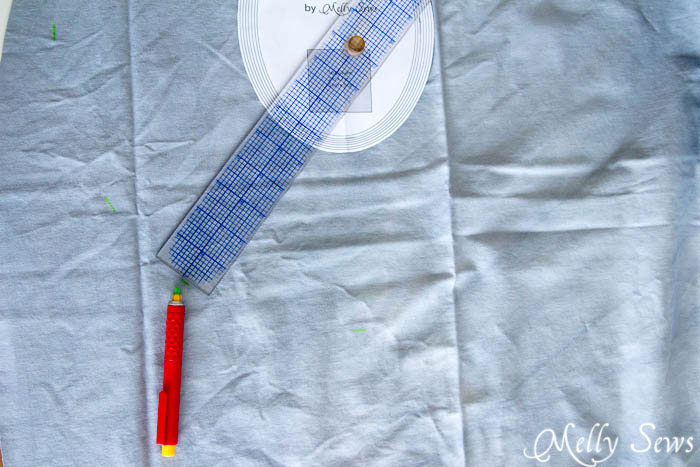
I decided that I wanted the crown on the hat in this post slightly smaller than the head opening. So I used the 23″ template and measured in 1/2″ (the seam allowance I used). You can see this in the image below. You need to know the length of that dashed line in order to draft the top of your band.
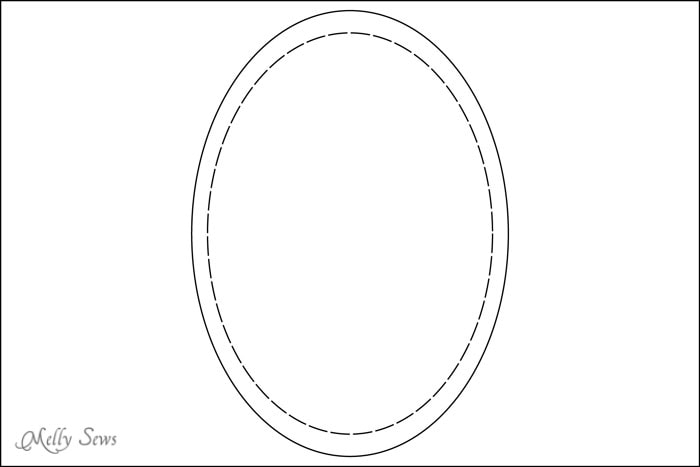
But here’s a trick you can use on the template for some sizes: measure in 1/2″ (or whatever seam allowance you’re using) on the template and then look at which circumference that is. In this case, measuring in got me to the 21″ circumference. So I didn’t have to measure my dashed line, because the template tells me it’s 21″ around. Obviously this doesn’t work with smaller hat sizes. So for those you’d need to draw the seam allowance line and measure it.
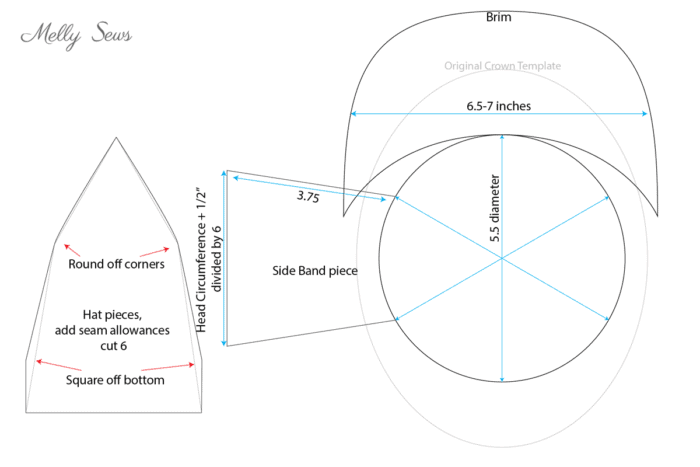
Once you have your crown determined, you can easily draft the rest of the hat. Let’s start with the side band. First, determine the side band height you want. In this case I used a height of 4 inches – which would put the hat above my husband’s ears with the crow resting on top of his head. If I wanted to make a top hat, I’d make a taller band, maybe 6-8 inches tall.
Draw a rectangle that is the height you want by the head circumference plus 1/2″ measurement. Use scissors to cut this rectangle into 8 pieces, starting from the top of the band and cutting to but not through the bottom edge. Then overlap the top edges enough to equal the seam measurement from the crown of the hat. This will create a curved piece.
For example, I started with a 4″ x 23″ rectangle. Do a bit of math: 23 (crown) – 21 (head circumference) = 2, 2 divided by 8 (number of cuts in band) = 0.25 or 1/4. I overlapped each piece 1/4″ so that the top of my side band was 21″ and the bottom was still 23″. Add seam allowances all around the side band, and you’ve got your side band piece.

To draft the brim, first you need to decide if you want a flat brim or a shaped brim. In this case I went with flat, and drafting that is as easy as determining the brim width (in this case I started with 5 1/2″ because the hubs said he wanted a really wide brim, but after showing it to him, ended up doing 4 inches as the brim, including the seam allowances. Don’t forget to add a seam allowance to the inside of the brim when you cut that circle out.
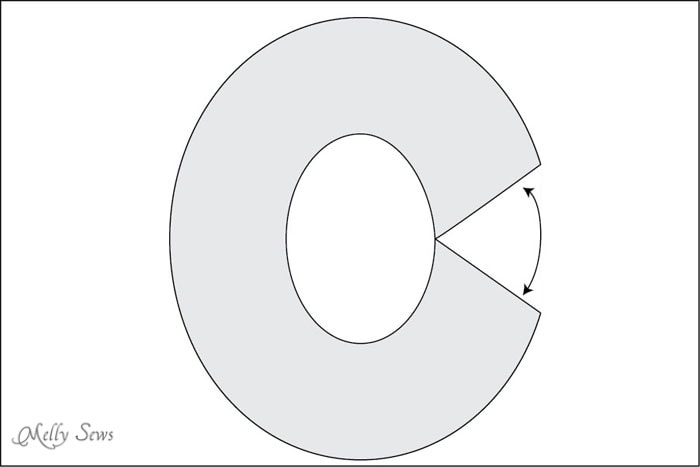
If you wanted a shaped brim, you would take a pie shaped wedge out of the brim and then close the gap – this would create a brim that would either flip up or flip down, depending on how you sew it in. The bigger the pie slice, the more the brim would angle. The idea is illustrated below, but note that you may wish to take your pie slice out of a different piece or you might want
For hats like baseball caps, you combine the crown and the band, then sew up darts and add a brim only to the front edge of the pattern. The images below show how you’d do that. For reference 5 1/2 inches is a good starting number for the diameter of your crown piece for an adult baseball cap, and 3 3/4 inches is a good starting height. Here is an example of how you’d draft the pattern for a baseball cap or trucker hat; the trucker hat would have the sides squared up higher than I show for the baseball cap for a slightly wider in diameter crown.
Before you cut your fabric, it’s a great idea to test your pattern with paper. Cut your pattern pieces out of a sheet of printer paper or use construction paper. Cut off the seam allowances or fold them down. Then you can tape or glue the pieces together to get a good idea of shape and fit before cutting your fabric. When I used to teach theatre, we often did this to make temporary costumes while we worked on the final hat.
This post contains affiliate links. As an Amazon Associate I earn from qualifying purchases. All affiliate links are identified with (affiliate link) after the link or a commissions earned statement above the link(s).
Materials to Sew a Hat
For this hat I used cotton twill, quilting cotton for lining, and heavy weight sew in interfacing. For the bucket hat in the video I used fusible interfacing (affiliate link) Other materials you might use for hatmaking are wool felt, particularly if you’re trying to shape a brim, and buckram (affiliate link) for stiffening the brim. You’ll also need your sewing machine, needle, thread, etc.
Once your pattern is drafted, here’s your cut list:
- Two brims of main fabric and at least 2 of interfacing or 1 of buckram
- 1 side band of each fabric – main, lining and interfacing
- 1 crown of each fabric – main, lining and interfacing
- Grosgrain ribbon to finish the lining
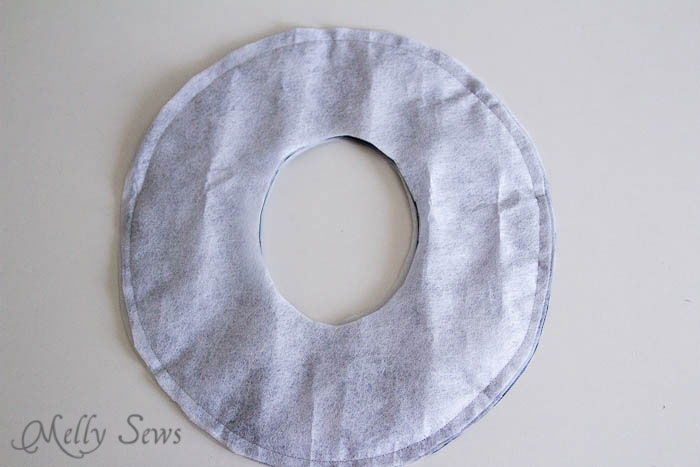
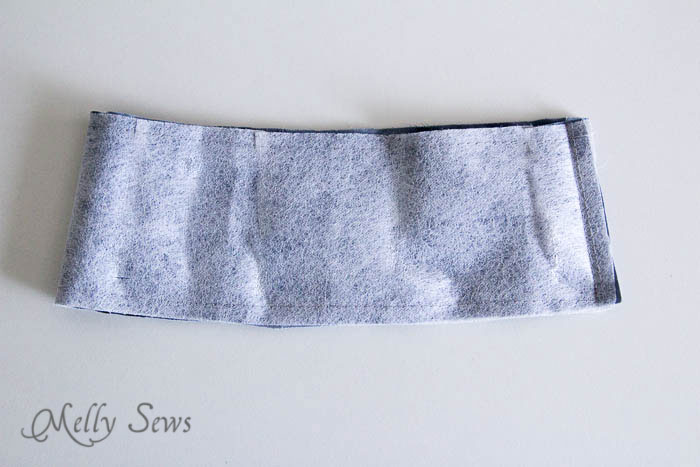
Heavy duty sew in interfacing can give hats body and I find it easier to work with than buckram because it’s not as stiff. For this brim I used 4 pieces, sandwiched on top and bottom of the two brim pieces. Sew around the outside edge.
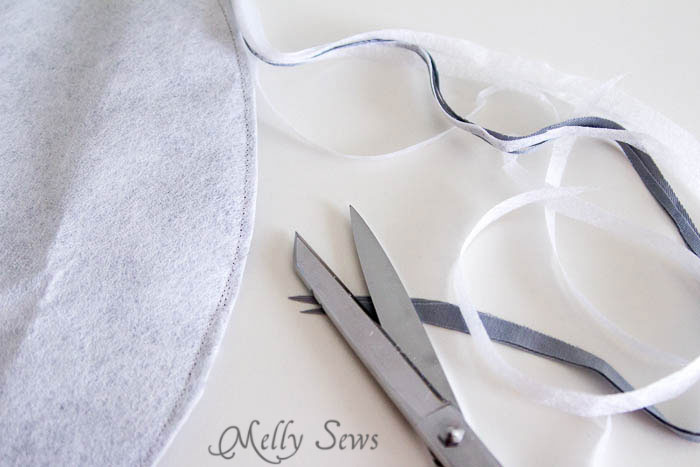
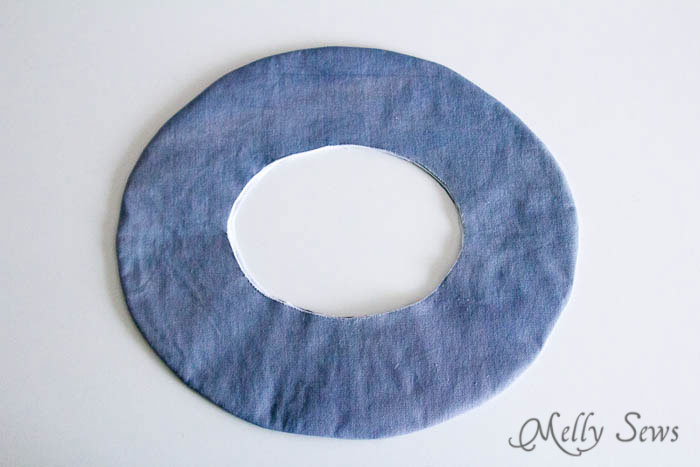
Trim the seam down to 1/4″ or less, then turn the brim right side out.
This post contains affiliate links. As an Amazon Associate I earn from qualifying purchases. All affiliate links are identified with (affiliate link) after the link or a commissions earned statement above the link(s).
Press the brim. A point turner (affiliate link) is helpful for this.
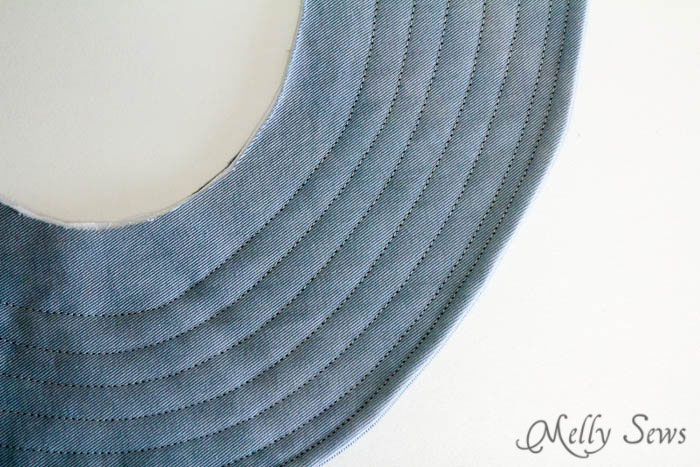
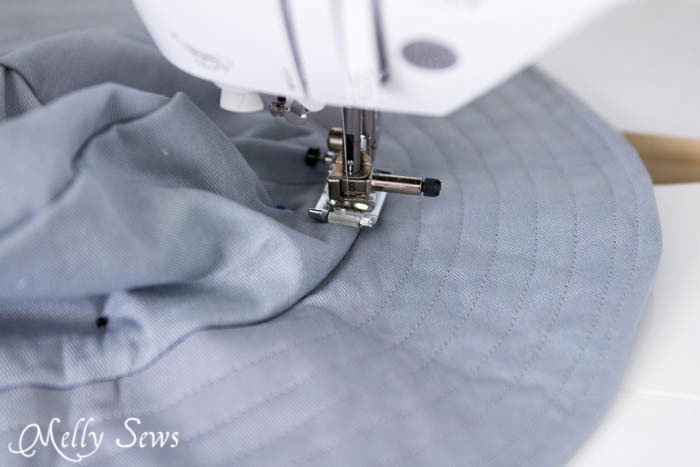
To reinforce the brim even more, I sewed a bunch of lines about 1/2″ apart (except for the two closest to the outside edge those are 1/4″ apart)
Next, sew the side band together at the side seam. I sew the interfacing with the main fabric, and the lining separately.
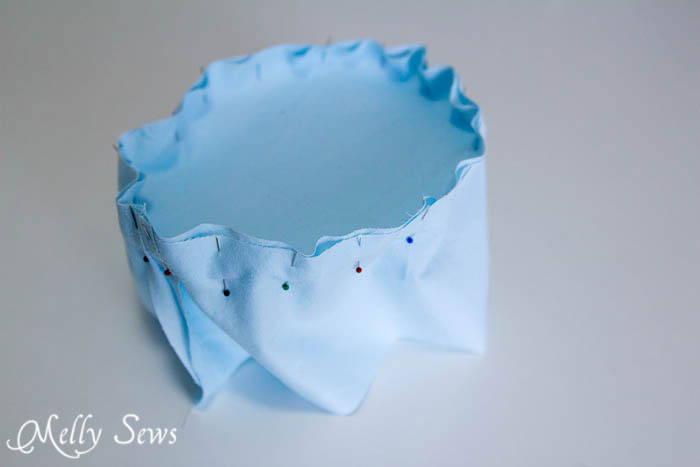
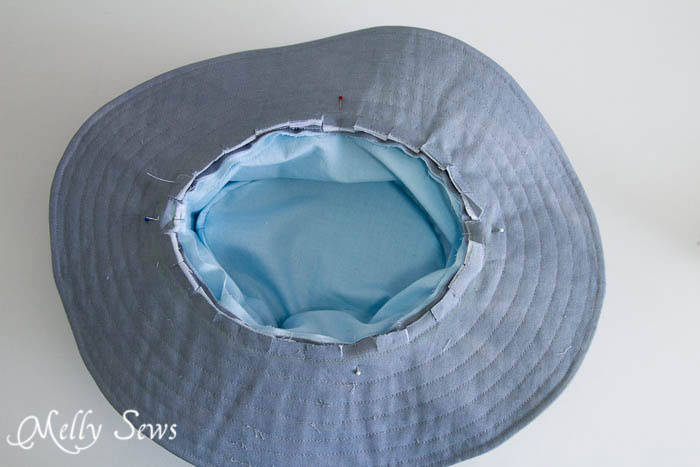
Pin the side band to the crown. As you can see, the crown is flat at the seam line, but not at the edges. This is OK as long as your seamlines match. Stitch. Repeat with main fabric crown/side band. Trim down seam allowances after stitching.
Notch the brim in the seam allowance all around the inside edge.
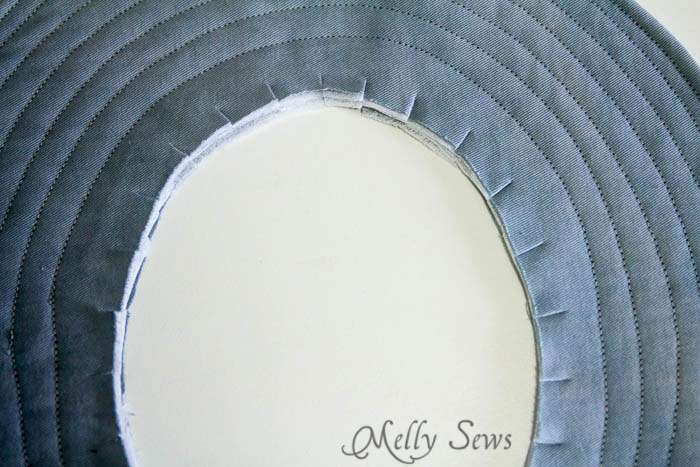
Pin the brim to the crown/side band assembly. Stitch.
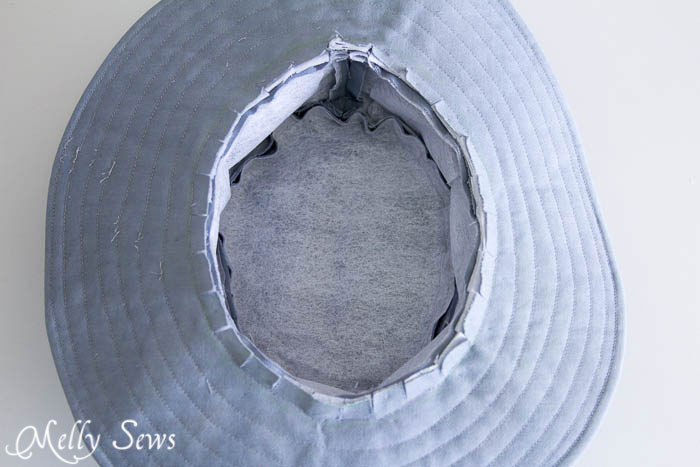
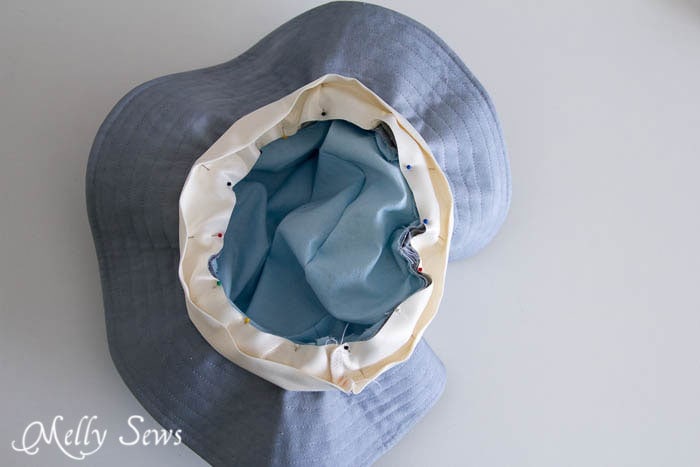
Add the lining into the hat, wrong sides together.
To finish the inside, add ribbon. 1 1/2″ or wider grosgrain or satin ribbon cut to the head circumference plus 1/2″ and seam allowance works best. Sew the ribbon into a loop. Then, pin it over the raw edge of the hat and lining, so that the ribbon is against the brim. Stitch, then flip the ribbon to the inside of the hat.
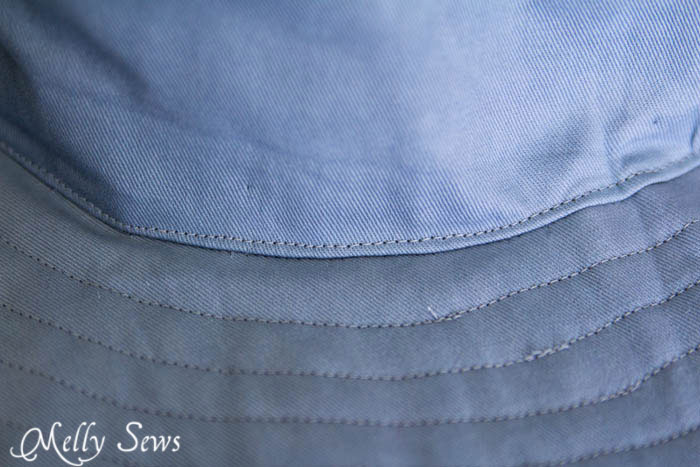
Topstitch around the bottom edge of the side band to hold the ribbon in place and you’re done.
And there we have it – a new hat perfect for mowing the lawn and other outdoor work. I hope this tutorial is helpful for you to create the custom hat of your imagination.
And since I think the hat makes the Halloween costume, check out some other hats I’ve made for my kids in this post.

Hilary
Brilliant – I am going to have to try this out – you have made it sound so simple. Many thanks.
Anne
I was just thinking yesterday that I need to make myself a wide brimmed hat for the pool! I’ve got a Craft Gossip post that links to your tutorial here:
http://sewing.craftgossip.com/tutorial-how-to-draft-and-sew-a-hat-plus-a-template-for-the-crown/2014/05/28/
–Anne
Patricia
Thanks so much! I need to make hats for my husband who was just diagnosed with melanoma. Now I can custom
fit and style what he wants.
Nicole
This is awesome! I can totally use this.
Kathleen
Cool idea! Love your site and creativity. Now if I can only get him to mow the lawn and do yard work…..
talliana
I was looking to buy some new hats for the kids but now I am going to make them hats and swimsuits. This beats spending $30 for a new hat.
Pam @Threading My Way
Pinning this. Thanks!!!
Tammy
You did make this look totally simple! Thank you. Bookmarked and will hopefully get to make one real soon.
Gina B.
Thank you for showing that a hat’s crown is oval, not round, and the sides sloping somewhat, not straight. That is a much more professional approach, and not more difficult than the unflattering “bucket” seen everywhere!
Add a band, a string and some vents, and you’ve got something close to a Tilley hat — at a fraction of the price – and suitable for us girls, too.
Liza
I have a Tilley hat, which is a great hat! I thought I lost it, looked at other hats, which weren’t as good. Knew I wouldn’t be satisfied. With this tutorial I could make something I would be happy with if I had to.
Liza
Also good for those of us whose heads need a larger size than can be found in most stores.
Gina B.
Not sure what you mean by “4 pieces [of interface], sandwiched on top of bottom”. Can you explain?
Thanks in advance.
Gina
Gina B.
Oops! That should have read “top AND bottom”. Sorry.
Mary
Just finished a fireman’s hat for a halloween costume for a 2 year old. You tutorial/expertise has been a blessing.
Thank you for making the process logical! I had to re-design the brim, add a badge to the front and work with vinyl
and it worked. I couldn’t have done it on my own. Thanks so much I will return.
Dan
I started sewing a few weeks back to create a fesitval wagon for my granddaughter.
Simple enough a drop cloth from home depot and a heavy duty Singer from Canadian tire.
I’m hooked !
I made her a Cloche, I made my son a cadet cap and now I have made myself one of these brimmed hats.
It looks similar to my Tilley but without the brass accents.
Thank you for the tutorial it helped a lot.
Being new to the craft the internet is very helpful.
H.
Nice work! Your hat looks fantastic.
Cucicucicoo: Eco Sewing and Crafting
This is really fantastic! Thanks so much for sharing! 🙂 Lisa
stella
This is great its simple to follow im going to try it.Thanks.
Rick
Am I the only one leaving a comment that actually made the hat? I suspect no one cares that you like the idea or plan on making it someday. I made it, in fact I’ve made 3 so far. It is easy. It is well planned. And I am very grateful to Melissa for posting this webpage and pattern.
Thank you, Melissa.
Ann E
I made a hat using this pattern. I only used 2 layers of stiff interfacing and the brim is quite sturdy at 4 inches, for a garden hat. The instructions for the band were a bit confusing until I realized that only the pattern had to be cut and taped together, not the actual brim. The upside is that I got a hat that actually fits my head. I will definitely keep this pattern.
Leena
Thank you so much, Melissa, for the pattern and a wonderfully clear explanation! I’m off to sewing. Bye!
Helen Read
Hi,
I loved your explanation and have made myself a hat. I have a suggestion.
If you make the ribbon that lines the brim a bit wider and fold it over to make a tube you can thread elastic through the tube which can be tied and tightened to hold the hat tight to your head and adjusted as needed. I don’t have any photographs but my hat was sen in exactly the same way but the ribbon was doubled over when sewing and left as a tube so the ends were not closed so elastic could be threaded through.
Andrs Hellstroem
As a retired Swedish veterinarian with a great interest in being in the forest and nature, hiking, picking mushrooms, hunting, a good hat is necessary. Always had a hard time finding the right model and size especially at a reasonable price. Therefore, when my favorite started to fall into bits, I started thinking about sewing my own. Have searched feverishly on the internet after descriptions “how to …” – but without results – TILL NOW. Found your page “How to Sew a Hat”. Perfect, pattern, educational – a big THANK YOU from me in Sweden !!!!
Ru
Hi Melly, thanks for this pattern and directions. Made a hat with yr instructions, it turned out fantastic. Instead of a ribbon I used a stretch Jersey fabric which I first stitched on before turning/rolling it over the raw edges and blind stitching in place. Btw, I also find your YouTube tutes great. Love from Africa. Xoxo
Nancy Hilborn
Thanks for this terrific tutorial. My husband had a head injury and sunlight sneaking in behind his sunglasses gives him a headache. I could not find a brimmed hat appropriate for Canadian winter. Just got some DWR fabric for the outside and a merino wool jersey for lining. Its going to be awesome thanks to you!
Wils in Ulster
Second one made for brother with macrocephaly- first was scaled up several sizes from your pattern but was still too snug so I measured more accurately the next time and it’s perfect. Instructions were clear… was much more confident second time round having seen it work the first time. Very grateful to you.
Hajnic......Perth, Western Australia
This sounds just fabulous 👍. You have inspired me to give this hat a go this week……too late for today…..
…. We have been having ☀️ 40+ degree ☀️ days since before Christmas over here…..😎 Need it for golf and gardening. 😎
Will try and let you know how it goes 🌺
Renee
Thank you for the wonderful tutorial on how to make a hat. I have a small head and have trouble buying hats. I will definitely try making one.
Ariane
Thank you for taking the time to write this extremely detailed and technical tutorial! Was always looking for bucket hat patterns, but they never seem to fit properly. Will definitely give it a go for this summer.