
Learn how to make buttonholes 3 ways – with a one step stitch on a sewing machine, freehand on a sewing machine, or sewing by hand.
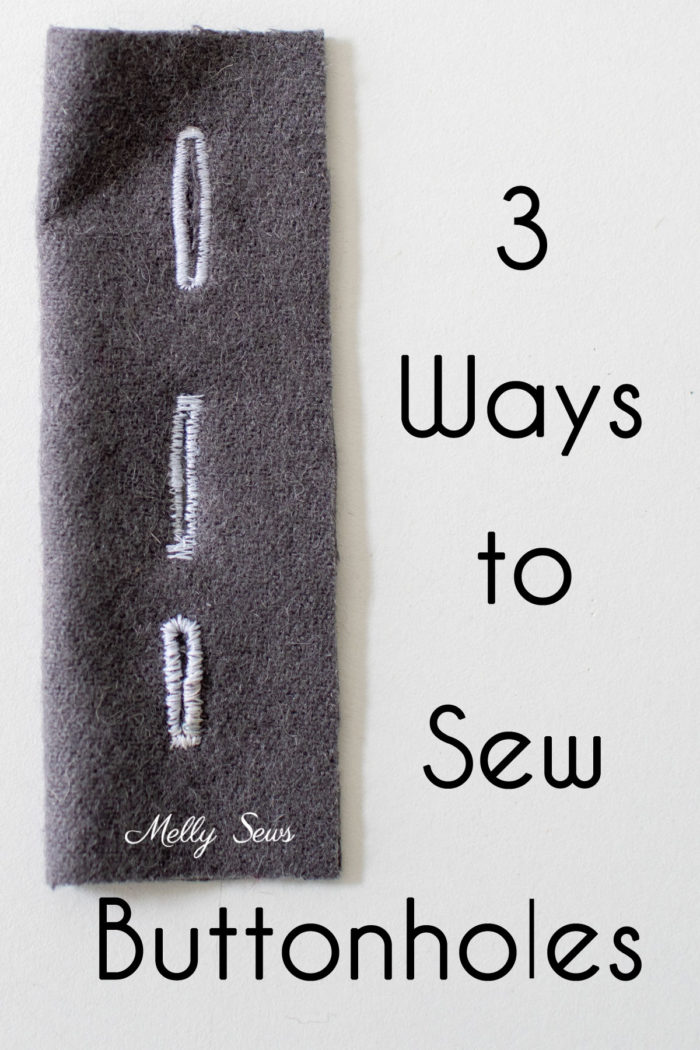
Hey y’all, today we’re going to talk about how to sew buttonholes, because I’ve got some buttoned-up posts coming up! I’ll be showing you 3 ways to make buttonholes – with a one step option on a machine, freehand on a machine, and how to sew a buttonhole by hand.
Below I’ve got a video showing how to sew three types of buttonholes, which you can also watch on YouTube here.
Types of Buttonholes
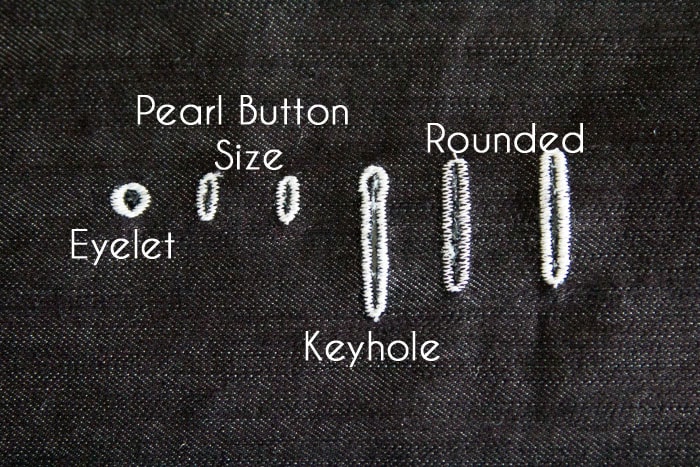
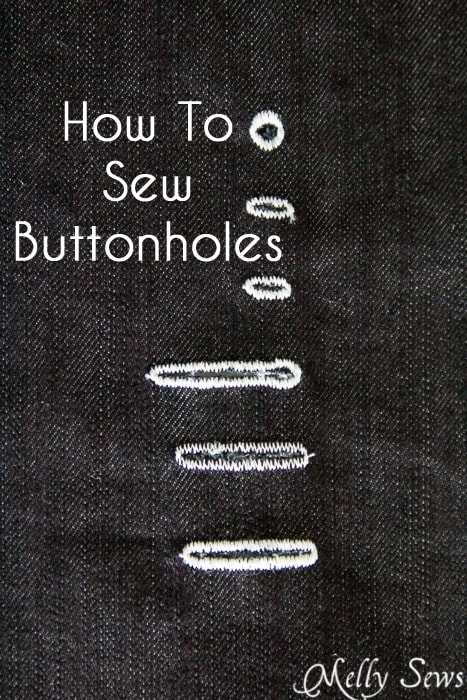
First let’s talk about types of buttonholes. I have some pictured below; the types you can do will depend on your machine or how much hand sewing you’re willing to do. Shown below are an eyelet, pearl button sized, keyhole and rounded buttonholes. Some machines can also do rectangular buttonholes and stretch buttonholes.
Tips for Better Buttonholes
My two biggest tips for sewing nice buttonholes? Interfacing and sewing over the buttonhole more than once.
Interfacing can keep the fabric around the buttonhole from puckering – it is a must, even if you just cut a tiny piece to go under the buttonhole.
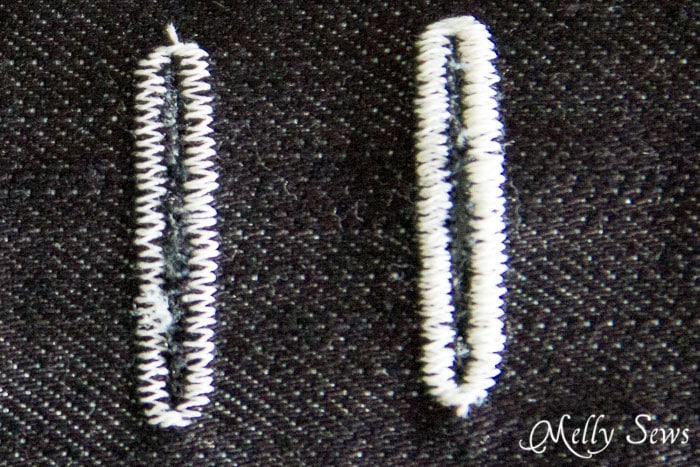
Next is to sew around the buttonhole more than once. See these two buttonholes? They were sewn on the exact same fabric, with the same thread and same settings. But the one on the right looks much better because I sewed around twice.
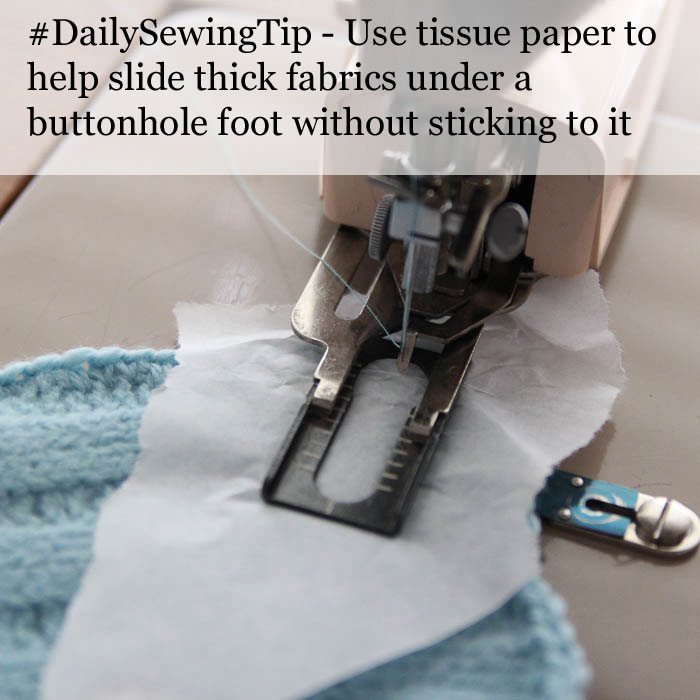
Another of my favorite buttonhole tricks is illustrated here by my friend Jessica of Running with Scissors.

Another is that whether you use an attachment or a buttonhole foot, the underside of that foot is textured and can snag fabric when you’re trying to slide it under. So here’s what I do; once you’re done sewing the buttonhole, the tissue paper rips away easily.
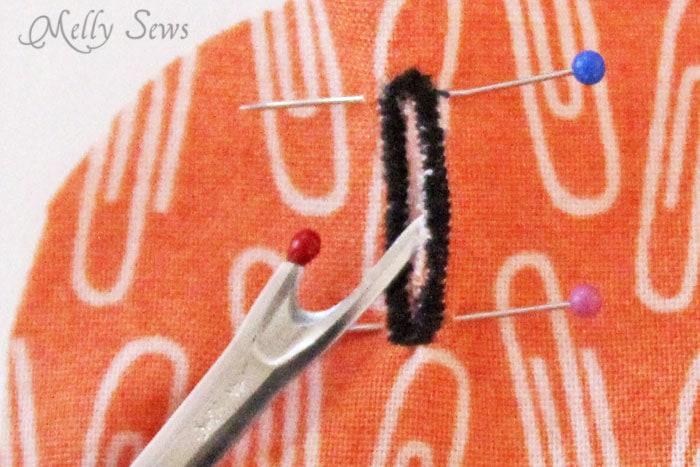
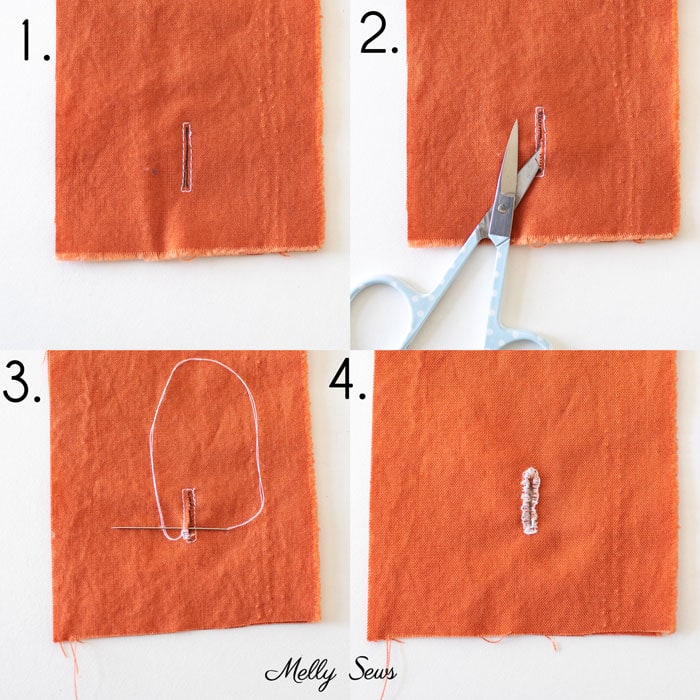
Finally, when you cut the buttonhole center, you can use scissors or a seam ripper. Either way, this is a helpful tip to make sure you don’t cut through the buttonhole.
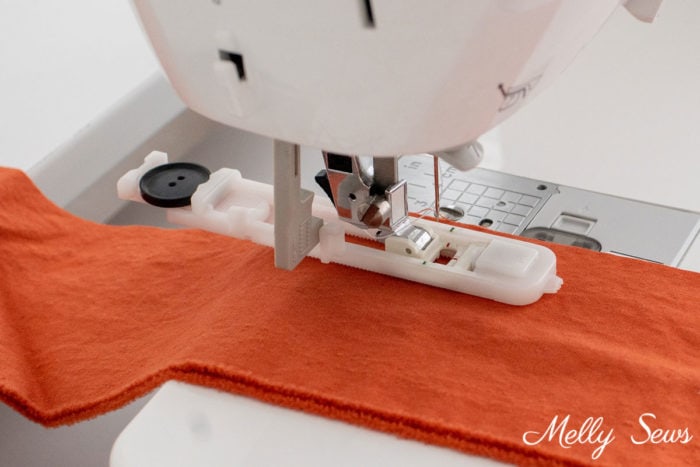
How to Sew a One Step Buttonhole Using a Buttonhole Foot
For me, because I do a lot of garment sewing, a one step buttonhole is a must have on my sewing machine. To do this, you use a buttonhole foot. These look the same for most modern machines. You insert the button in the back of the foot, snap the foot into place, pull the buttonhole lever down, and select the buttonhole stitch on your machine. Then you just press the pedal and stitch away; the machine will automatically go through the steps to make a nice buttonhole. This is demonstrated in the video at the top of this post.
How to Sew a One Step Buttonhole Using a Vintage Machine Attachment
I’ve mentioned my vintage machine before. So when I want to sew buttonholes, I’ve got this attachment to do it. Pros? It makes beautiful buttonholes. Cons? It’s a little tricky to set up and I can only do limited sizes. One more pro – if you have a low shank machine, I think you can used this attachment even if yours is not vintage or a Singer, as long as you have either a way to lower your feed dogs or a screw hole to use with the plate to cover the feed dogs. This type of buttonholer even works on straight stitch only machines, as you’ll see below. In case you ever see one for cheap at an estate sale, this is what they look like.
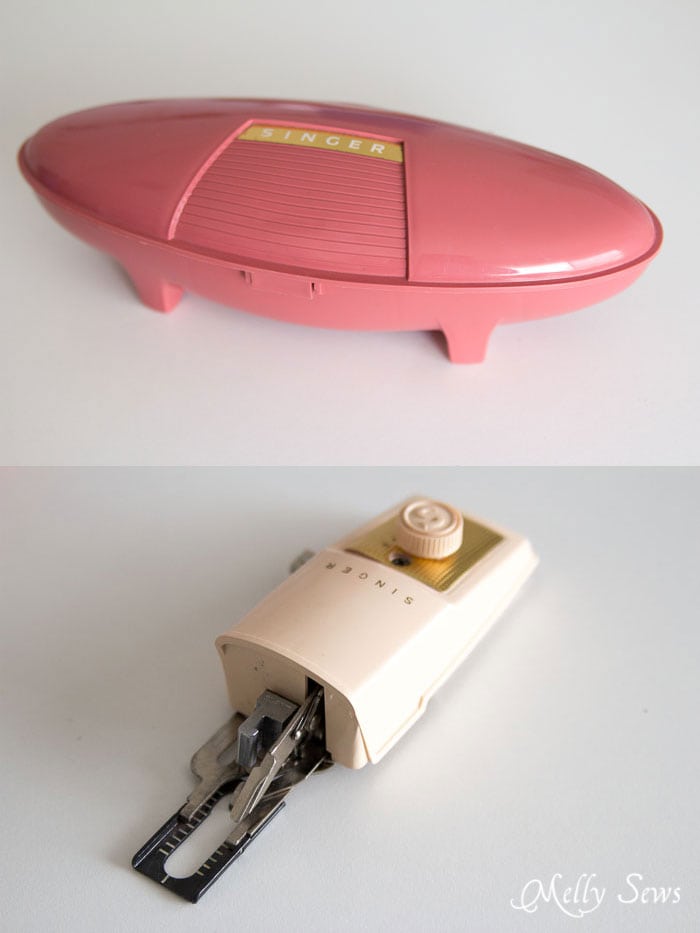
This is the newer model – the one I use most often. It has this space age carrying case.
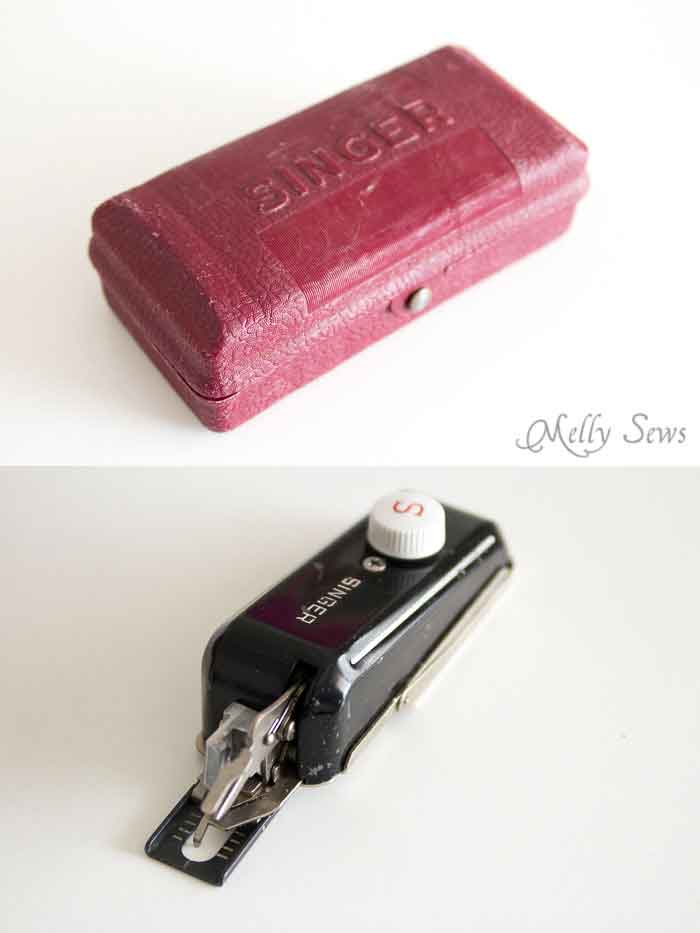
The older model works basically the same way, but it’s all metal, and comes in a case that looks like this.
No matter the model, they each should have a plate that covers the feed dogs on your machine. If you don’t have a place to screw this plate on, but you do have a way to lower or disengage your feed dogs, this should still work. The reason the feed dogs have to be out of the way is because the attachment takes care of moving the fabric for you.
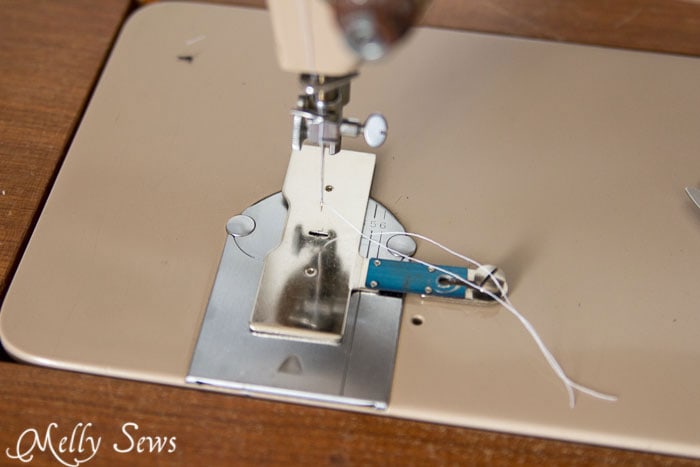
So then I choose which size button I want and the corresponding metal template, which gets inserted underneath the attachment.

And this is how it looks all installed.

To make a buttonhole I insert the fabric and press the pedal. That’s it.
Each brand of modern sewing machine has a pretty similar equivalent foot. To use it you clamp one of the actual buttons you’re going to use in the back part of the foot, and then use your automatic buttonhole selector on your machine and it will stitch out the buttonhole. And remember to sew around twice – which was not done in the picture above.
How to Sew a Freehand Buttonhole Manually on a Sewing Machine
This is my least favorite way to sew a buttonhole, but with practice you can make these look great. The process is shown in the video at the top of this post, but basically you are manually doing the steps that a one step buttonhole stitch does automatically. Here are the steps:
- Measure the button and mark a line for the buttonhole length.
- Sew a box of short straight stitches around the marking, 1mm away on each side of your line
- Sew narrow, short zig zag stitches over one long side of your box.
- Switch to double width zig zag to sew across short end, then turn fabric and sew narrow, short zig zag stitches over the other long side of your box.
- Sew double width zig zag stitches over the other short end of the buttonhole.
- Cut open center of buttonhole.
How to Hand Sew a Buttonhole
If you don’t have a sewing machine, you can still sew a buttonhole. This is also a good way to fix a buttonhole if you don’t have a machine. Here are the steps to hand sew a buttonhole; this is also demonstrated in the video at the top of the post. Which is why my buttonhole looks a little raggedy – it is HARD to sew while watching your hands through a camera monitor instead of being able to look directly at your hands. Also when you aren’t filming you can position your fabric where ever you need it to be instead of worrying about keeping it in the frame.
- Measure the button and mark a line for the buttonhole length.Sew a box of short straight stitches around the marking, 1mm away on each side of your line. Do this on a sewing machine if you can, if not use small backstitches.
- Cut the marked line, being careful not to cut through your stitching.
- Thread your needle and knot the ends. Bring your needle up on one corner of the stitched box, anchoring the knot on the back side. Take point of needle through slit, then bring it up just past the edge of the stitched box on a long side. Make sure to place the needle on top of your thread tail – you’re forming a blanket stitch. Continue stitching down the side, placing the stitches very close together.
- Fan your stitches around the first short end, continue down the other long side, then take long stitches across the entire width of the other short end to finish.
So there you go – multiple ways to stitch successful buttonholes – choose the method that works best for you and your equipment.
Cathy
Yes! LOVE my vintage Singer sewing machine buttonholer. I have the older all metal one. I really don’t find it hard to attach it and it makes sewing buttonholes SO easy!
Fiona Smith
Hi Melly,
I’ve been subscribing to your weekly emails for about a year now and each Friday it feels like someone has dropped a little sweet treat into my inbox. Love them.
Your tutorial on buttonholes is so timely. I am spending lockdown as part of a volunteer army sewing scrubs for the NHS here in the UK and I knew that today I was going to have to tackle the buttonholes for the waist ties to come through. The automatic buttonhole foot/programme on my 30 year old Singer isn’t very reliable any longer and I’ve been dreading doing them freehand. Thank you for giving me the confidence that I can do this.
Pauline
i do so love your informative posts. This one was especially good and, not to be a smartaleck, amusing for me. I have almost given up on machine button holes because they almost never work out right for me. That said, I was looking at the pictures for the hand-sewn button hole and it looks as though you don’t do hand-sewn button holes on a regular basis, do you?! The last picture does, however, show how the stitches should fall around the precut hole and that is a good thing. I have to admit, though, my hand-sewn button holes don’t look as good as they did once since arthritis set into the first joint of my index finger! Keep up the good work! It is wonderful that you take the time to help those of us who need it!
Joe Oliveri
I have tried making button holes on modern machines with the four step setup, the older machine with a zig zag stitch, and of course, the buttonhole attachment. The interfacing is a major bonus to making the hole look smoother. Your pin idea to help stop the ripper is a must do step when learning, and of course, the vintage attachment is my go to way to do this. Maybe with more experience I can make better buttonholes, but the attachment makes it so easy and pretty I can not see any reason to make them any other way.
Zsuzsanna Matika
Thank you very much for this post! I dread button holes and always hold my breath while sewing them. It always looks great on a practice fabric then I put “the” real project under the foot and they turn out so disappointing. Mostly because they are never the same 😅.