
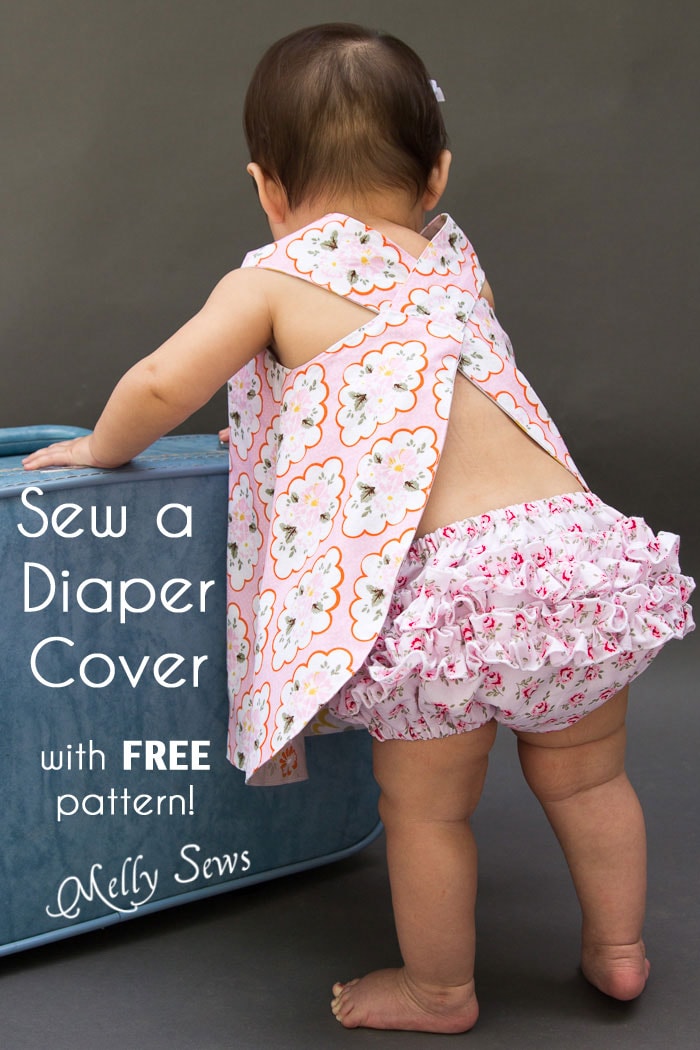
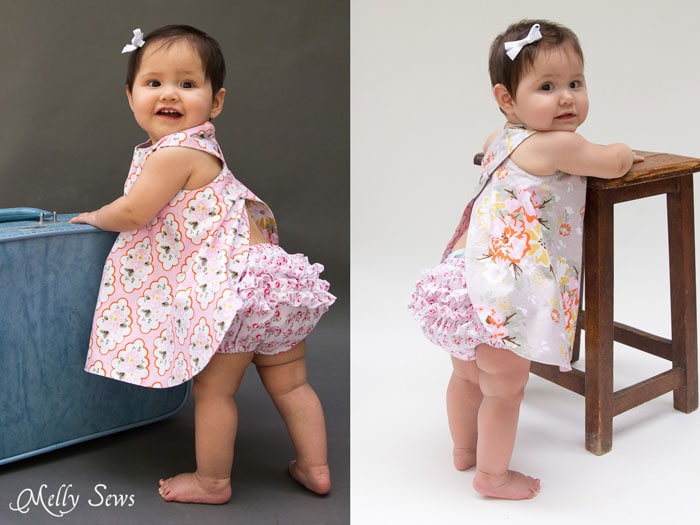
Hey y’all – is there anything more adorable than a diapered baby bottom? Ok, maybe there is ONE thing – RUFFLES on that baby bottom! Sew a diaper cover with ruffles with this pattern and tutorial.
To make the diaper cover you’ll need:
- 1/2 yard of fabric for the bloomers
- 1 yard of 1/2″ wide elastic for the bloomers
- The pattern (see below)
How to Get the Pattern
The free pattern is in size 0-3m. If you need a different size, the Criss Cross Pinafore and Bloomer pattern is available for purchase below in sizes NB-3T. To get it, click your preferred option below to get the free pattern only as a newsletter subscriber, or to buy the digital pattern + printable instructions.
 |  |  |
Please note that all my free patterns are licensed for personal use only (no selling items made from this unless you purchase it) and by downloading you are agreeing to this license.
Here’s the video tutorial below; if you prefer written instructions, you can scroll on by. If you want to watch this directly on YouTube, you can see it here.
To make the bloomers that go with the dress, start by cutting out two strips for ruffles (dimensions are on the first page of the bloomer part of the pattern.
Sew a rolled hem around all 4 sides of the ruffle strips. Need help with rolled hems? See this post.
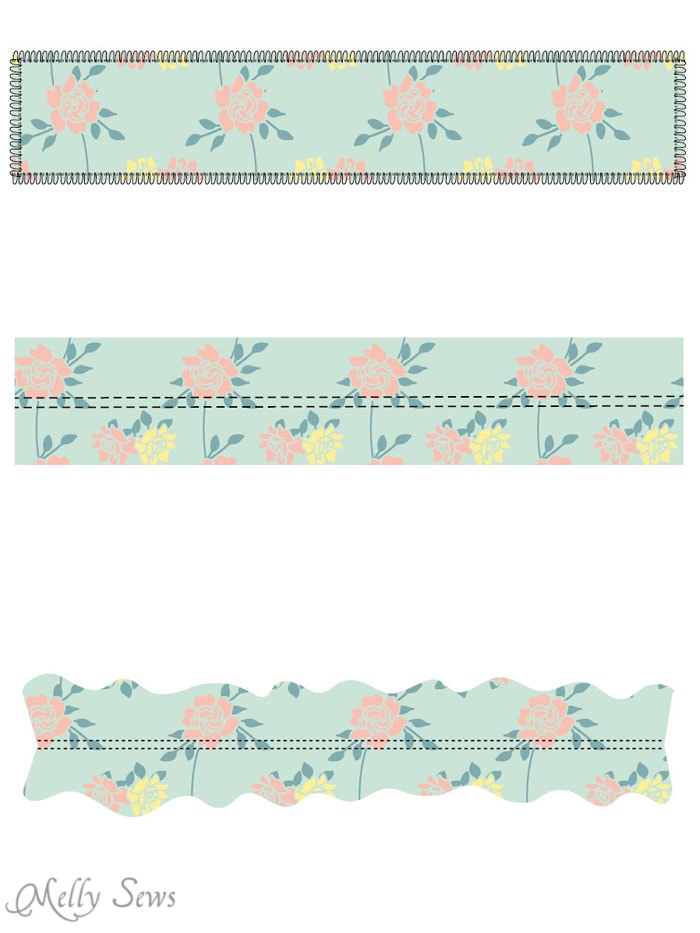
Gather your ruffle strips. Need help with gathering? See this post.
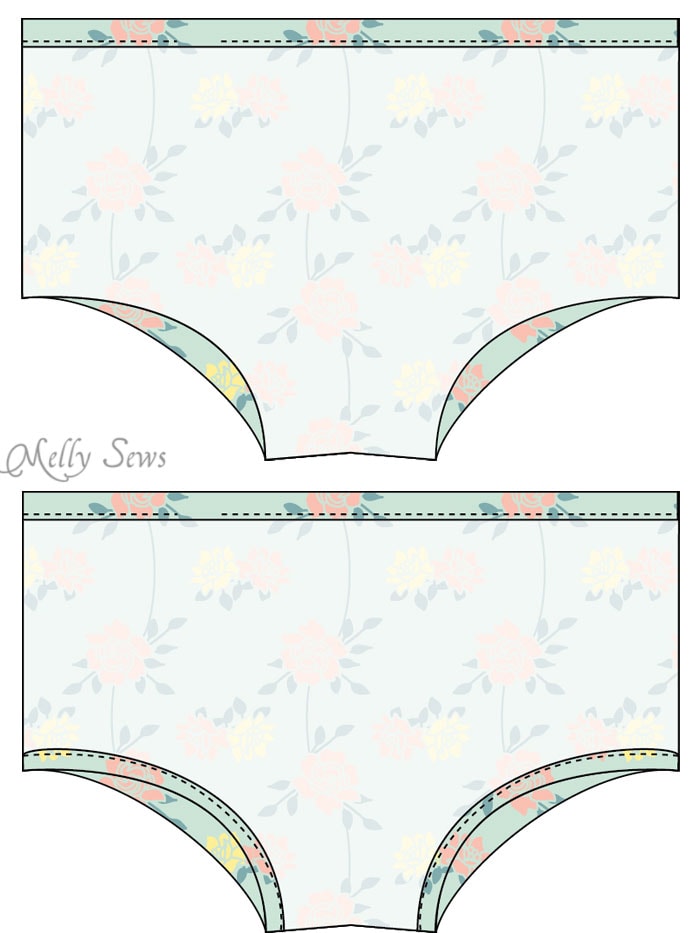
Sew your ruffle strips to the bloomers back on the lines on the pattern.
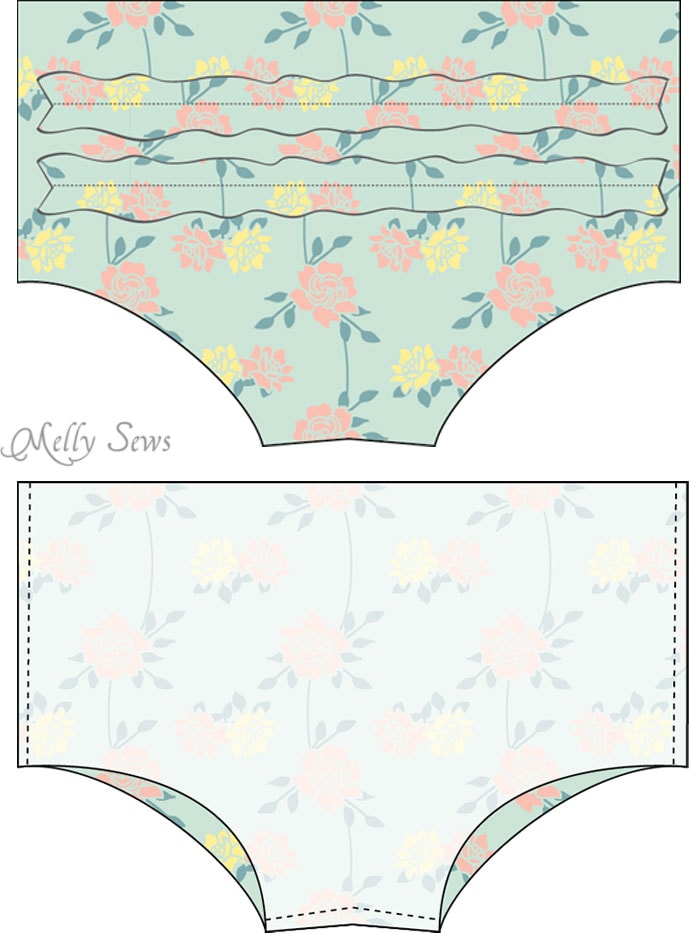
Place the bloomers front and back right sides together and sew the crotch and side seams.
Fold the top edge of the bloomers 1/4″ to the wrong side, then fold again 5/8″ to the wrong side. Stitch to form a waist casing. Leave about a 1 inch opening to insert the elastic.
Form the leg casings the same way, but note that you may have a hard time getting the casings to be perfectly flat. It’s OK if you have a few puckers or wrinkles – they won’t show once you insert the leg elastic.
Cut 17 inches of elastic for the waist and 7 inches for each leg.
Use a safety pin to pull the elastic through the casing.
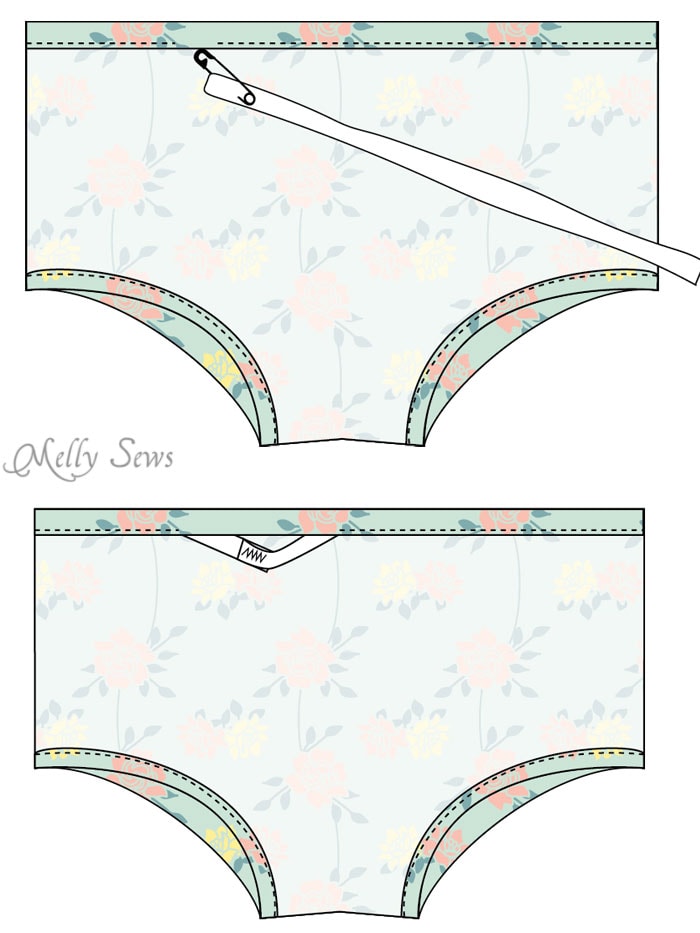
Overlap the ends of the elastic 1/2 inch, making sure you haven’t twisted it, and zig-zag over them to secure. Pull into the casing and then sew the casing closed. Repeat this process for each leg opening.
To make the dress pictured here, go to this post.
Jill Ransom
Hi! Love your tutorial, it inspired me to sign up for your newsletter. I’m a photographer and I really like the ruffled bloomers on the newborns–soooo cute.
Peggy Finch
Thank you for your tip on how to turn the corner on a rolled hem. I practiced on a scrap, and the corners were beautiful! I look forward to more unique projects and adding new skills to my “bag of tricks.” Thanks again for sharing your expertise.
Elizabeth
Thank you for your tip. Just a beginner, I hope I will be able to ff all your baby dress, because they are unique.
Betty
Loved this pattern. Just finished making it for my niece who is due with a little girl later this month. Turned out so cute!!Thanks.
jan michetti
I just started sewing using your YouTube video tutorials and I’m loving it! I just finished the Baby Crisscross Dress with Bloomers 🙂 It’s so adorable! One of my coworkers has become so inspired that she is going to begin sewing again!
Thank you for the great tutorials and patterns!
Susan Lauder
Hi; My name is Sue; lol..I loved your tutorial in YouTube and subscribed immediately; I love to sew and decided to turn my projects into baby clothes.. I have made cultural vests, cultural shawls for dancing and dresses. I have also done a few quilts but have moved on to other projects.. I love the baby clothes patterns and will focus on your sew tutorial.. You exclaim everything so clear and easy to follow. Thank you very much From Sue Lauder..
Maria
Thank for the pattern and the tutorial. I still have4 under5at home so to save time next dress I’m gonna buy white diaper cover then sew on ruffles to match dress.