
Learn how to sew a beanie hat with this sewing tutorial. Detailed instructions with video.

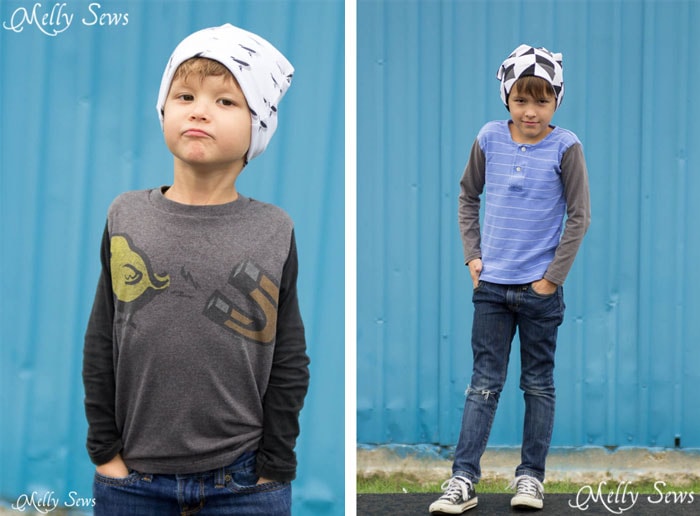
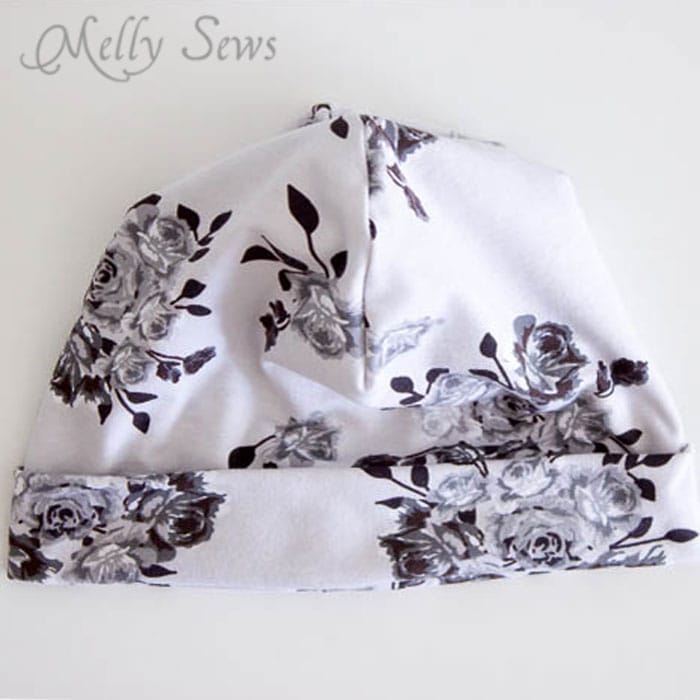
Hey y’all – today I’m sharing a tutorial showing you how to make a beanie hat. This is a super simple sewing project. These seriously take like 10 minutes each to sew, making them a perfect last minute gift. (Ask me how I know – because I sewed the bird hat about 10 minutes before this photo shoot). So, whether you want a quick gift or just a warm head, let’s see how to sew a beanie hat.

Materials
To sew a beanie like this, you need stretch fabric. There are many different types that will work, but you can’t make a beanie without knit fabric. Luckily, as long as your sewing machine can do a stretch stitch (like a zigzag) you can sew these without ever picking up a ball of yarn or knitting needles.
I used Idle Wild Knits (95% cotton 5% spandex jersey knit) to make these hats. You’ll need 1/2 – 3/4 yds because the knit stretches most from selvedge to selvedge, but once you get that amount you can make two hats out of it. Other fabrics that could work are double brushed polyester jersey, stretch fleece (make sure it stretches at least 30%), and stretch French terry (again, with at least 30% stretch). Or you might want to upcycle a beanie from an old sweater – I can see a wool sweater making an especially warm beanie. If you’d like to know more about knit fabrics, see this post.
In addition to fabric, you’ll also need your sewing machine, scissors and thread. For more about how to choose your sewing needles, see this post. If you have questions about sewing thread, see this post. And for more on stretch stitches, see this post.
I have two options for the pattern to make this beanie hat – you can either draft your own pattern with the very specific directions below, or you can buy the PDF pattern from my shop. The digital sewing pattern includes all the sizes preemie – men as well as the printable sewing pattern instructions. To buy it, you can use the button below or visit my shop here.
 |
Drafting the Pattern
To make your pattern, first divide the head circumference for the size you need by 4. Then draw a rectangle that is equal to 1/4 the head circumference wide by the height listed below for the size you need.
Head Circumferences
NB = 14 inches, Baby = 16 inches, Toddler = 17 inches, Child = 19 inches, Tween = 20 inches, Teens/Women = 21 inches, Men = 23 inches
Hat height
NB/Baby = 8 inches, Toddler = 9 inches, Child = 10 inches, Tween = 11 inches, Teens/Women/Men – 12 inches
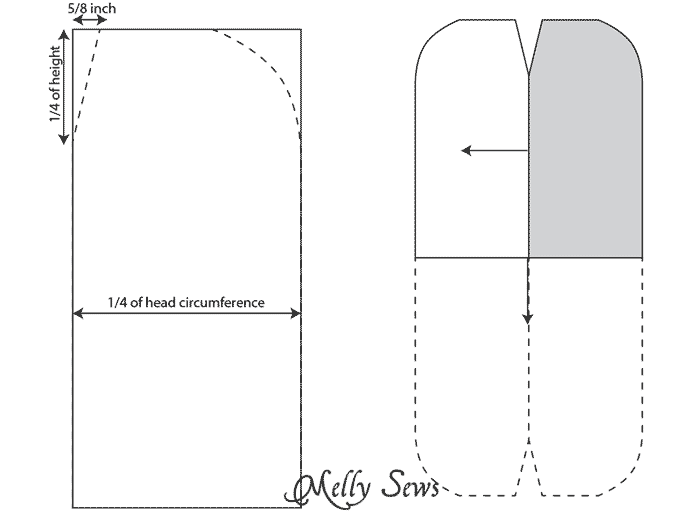
After you draw your rectangle, round off the top right corner, then draw a dart that extends down 1/4 of the hat height and 5/8 inch in from the top left corner (left diagram above). Then use that piece as a template; flip it along the vertical dart edge and trace again, then flip the whole hat pattern piece down along the bottom edge and trace both sides again.
Another option – instead of drawing out the whole pattern and cutting it from a single layer of fabric as shown above, just draft the part from top right part of the diagram above. Then fold your fabric once horizontally and once vertically.
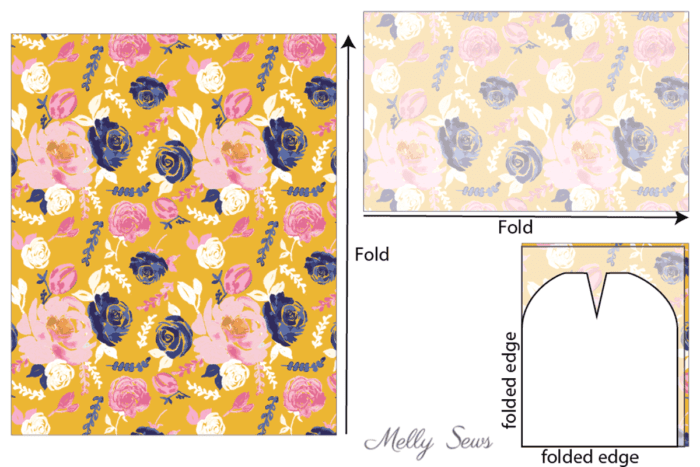
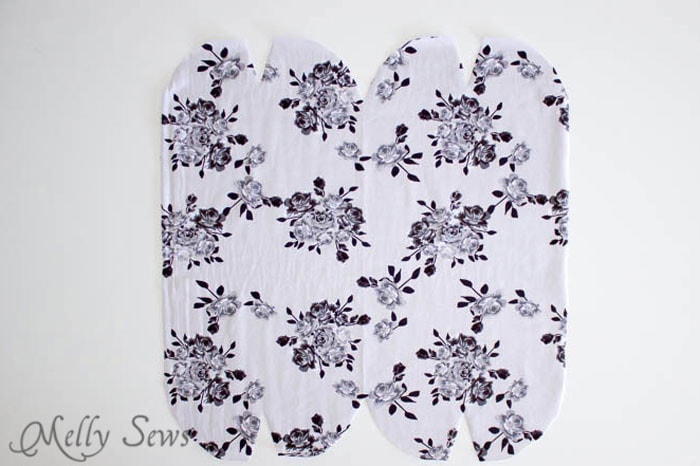
Place the template at the folded corner so that one side and the bottom are on folds and cut around it. When you unfold your fabric it will look like the one below, with a total of 4 darts.
Now I’ve got both a video and written tutorial for you to follow – whichever you prefer. If the video below won’t load for some reason, you can watch how to sew a beanie hat on YouTube here.
How to Make a Beanie Hat
After you’ve cut out your pattern from the fabric, you’ll have 4 darts you need to sew.
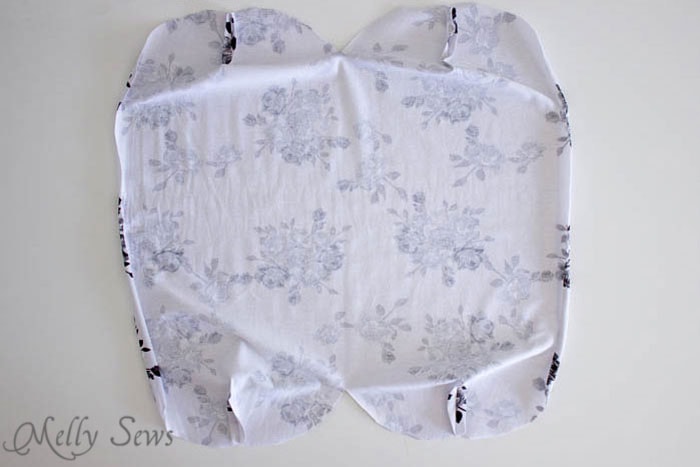
Sew the darts on the pattern as shown above and below, using 1/4 inch seam allowance.
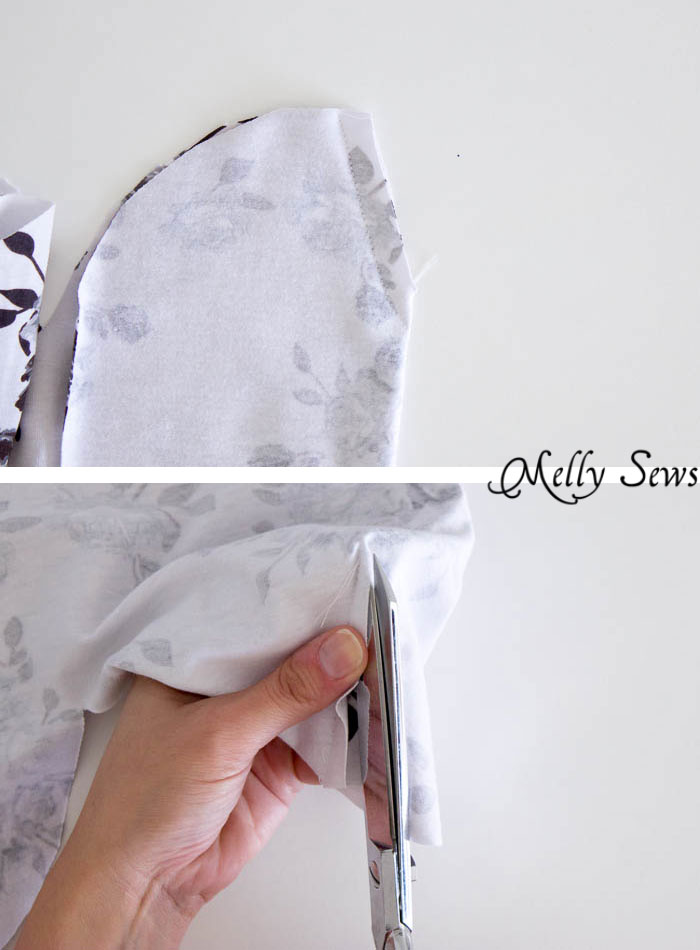
Clip into the angled end of each dart so you can press them open flat as shown above and below.

Fold the hat in half, right sides together, matching the darts. Sew around the open edges, leaving an opening on the long side for turning. Make sure to use a stretch stitch; see tips for sewing knits here.
Turn the hat through the opening.
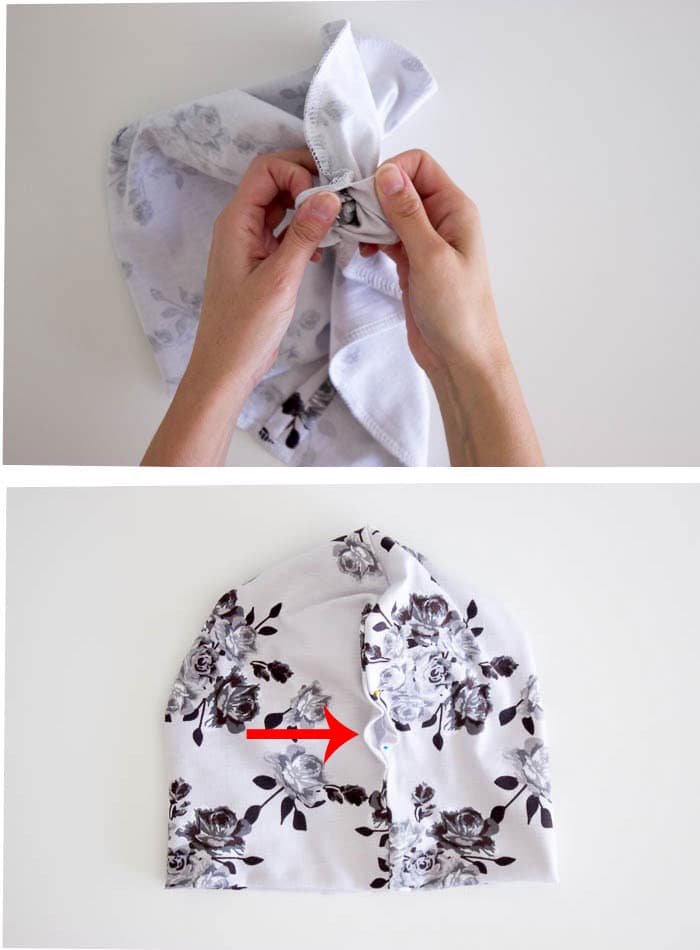
Push half of the hat as lining into the rest of the hat. The last step is to pin the opening together and sew it shut with a blind ladder stitch.
Now you have a fully reversible hat, so you can fold up as much or as little of the brim as you choose to make a cuff.
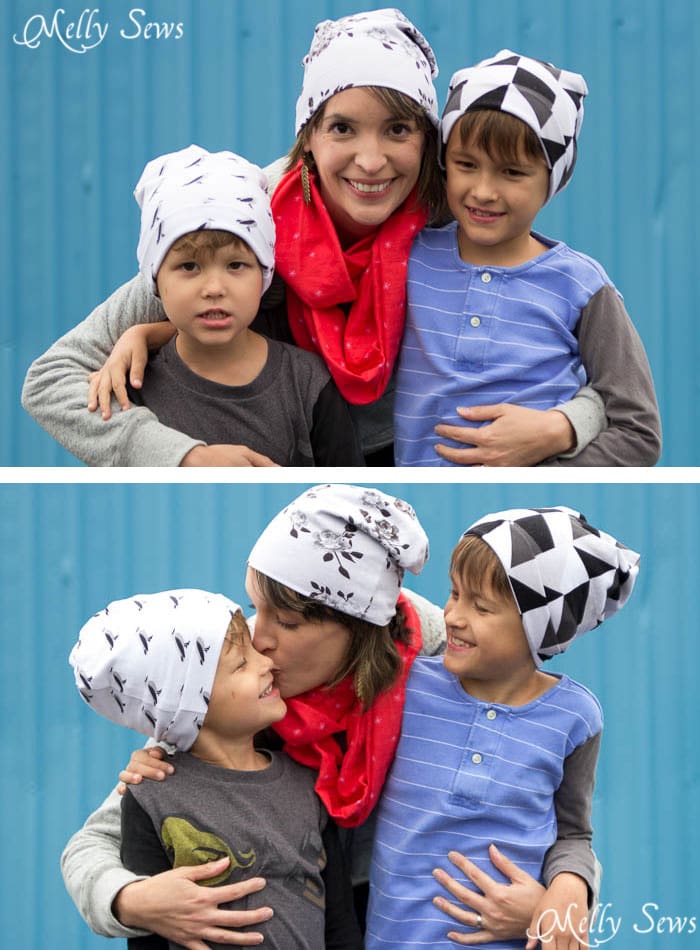
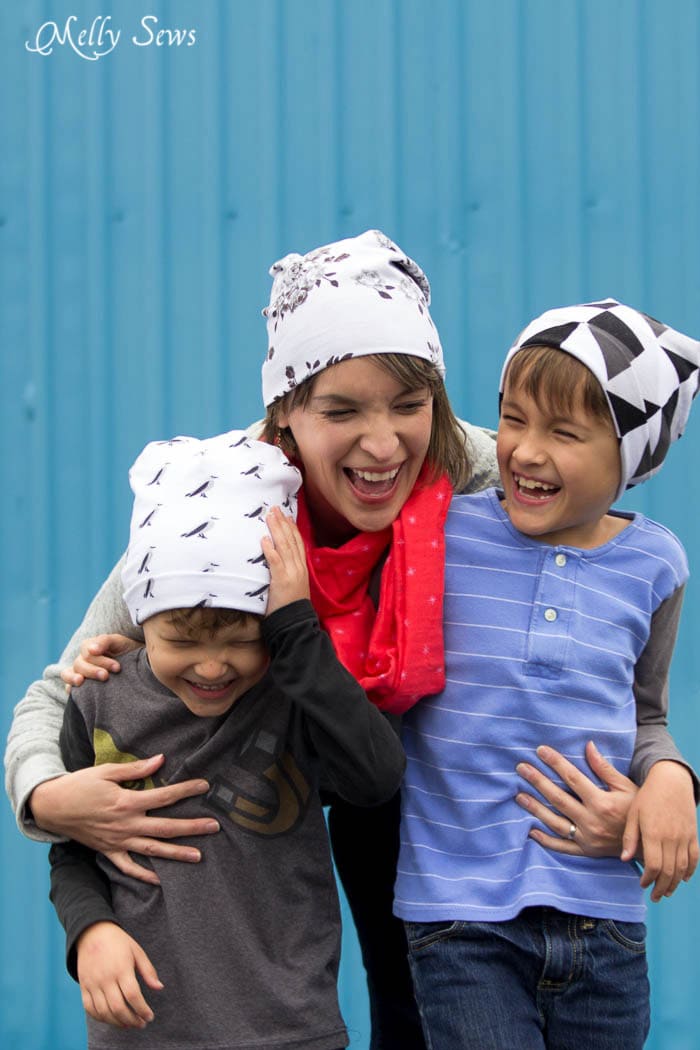
And they even work in mommy and me sets!
More Beanie Hat Ideas
If you’d like to add a pom pom to the top of the hat, you’ll want to pin the pom pom between the darts on one side before your fold the hat in half and sew all the way around. Make sure to catch the yarn tail from the pom pom in the seam. The side you sew the pom pom to will be the top of the beanie when you turn everything right side out. Atelier North has some pretty examples with fur poms on her Instagram.
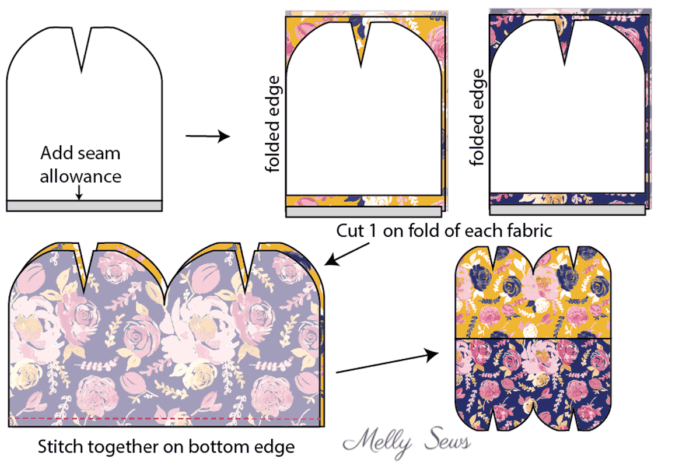
If you’d like to make the inside of your hat a contrasting fabric to the outside, it’s easy. Just add a seam allowance to the bottom edge of your template, then cut one on the fold of one fabric and the other on the fold of another. the first construction step will be to sew these together along that straight edge, then you’ll proceed to sew following the directions above. If you fold a cuff this way, it will show the contrasting fabric.
Happy sewing!
Dara
Very Cute , thanks SEW MUCH!!!☺
KatieP
Those are awesome!
Chelle
As per usual, LOVELY!!!
Frances
Thank you for showing this! I love making hats. This is brilliant!
Antje
The Hat is perfekt !!!
Thanks for showing this.
Antje
Anna
Great Beanie
My Sister has just been told she has stage 4 cancer and will have to go through
a lot of aggressive Chemo
I am going to make some of these for her
Thanks so much for Sharing this Great Tutorial
Anna
adjs
i hope your sister fights cancer and stop suffering from cancer!! Hope it can be cured!
Murielle
Thank You for this great tutorial!
Sandra
Hi Melly. So happy to find your blog on Pinterest. I so heart this project so I included it on my round-up post about sewing projects you can make for your kids.
You can see the post here, http://sewuber.com/make/things-to-sew-for-kids/
Please let me know if I missed something about your blog and do let me know if you want to change or add anything.
Xoxo,
Sandra
P.s. I’m a new fan 😉
Jeanie
Perfect pattern and tutorial! My first try turned out great and I’m making more. Everyone in the family loves them. Thank you!
Stephanie Button
Thank you so much for this easy tutorial! I will have to try this adorable trend out!
Sherre Ruel
WOW – you cannot believe how much i enjoyed this. Long story short – i was in a near fatal car accident which left me with short term memory loss and very difficult in reading pattern. Your video is a life saver! You cannot imagine how grateful i am! It may seem trivial and trite to many but you have just made my life so much easier as now i can make these adorable little hats for my family and friends for holiday stocking stuffers. Thank you so much – you are awesome and I appreciate you taking the time to do this video and the one for the adult cowl neck ponchos. Thank you
Linda Farris
Great tutorial, appreciate it so much. I have a nice beanie that I want to replicate for my nieces and now I feel like I can. Thanks again!
Andrea
Great hats,
Thank you for this tutorial. I m beginner and it was so easy!!!!
Kristina
I love making hats. This is an awesome tutorial. Thank you.
Kate
Bookmarked for future reference , a great tutorial indeed
thanks a million hun
Shea
I have tried this and it was super easy thnkyouuu♡
Melissa
Thank you for this tutorial! I work at Starbucks and everybody hates the dumb hats they give us… But we can wear other hats. Definitely making a few of these for me and my girls!!! ????????
Ginger
Great how to video, Thank you so much for sharing!
Diane L Mason
Thank you so much for the easy to follow directions. I lost my hair during chemo prior to a stem cell transplant and almost all the hats I found in the donate boxes were too small and tight. This way I could make it to fit!
Ellie
Thank you a thoughtful, complete tutorial! I follow you regularly but seems to be late in discovering this one. I love your stuff… so practical but cute. Thanks again. I have 9 grand-ones and each may be getting a new hat in January!
Beth
Thank you SO much for sharing this! Going through chemo now and need my own style of beanie. Plus it’s going to be a little project for this unnerving time that we are all in our homes due to the COVID-19 virus!
Nancy
Thank you, Melly, so very much for not only the pattern with pretty clear instructions but also the video you posted to show me how when I was confused. You are a rockstar!!!! I will be searching for you the next time I want to make something 🙂 THANK YOU!!!!