

Today I’m going to show you how I made my tunic. You’ll need:
- 1 yd 58″ wide knit fabric. I used 1 yard of NearSea Naturals Antique Gold medium jersey. 1 1/4 yards would be better if you can get it; I had to do some creative cutting.
- Some kind of embroidery design transfer method. I’ll talk more about what I used and what I wish I had used below
- Perle cotton and an embroidery needle,
- The pattern….
This tunic pattern is in a women’s size small (34″ bust and 36″ hips). If you need to make the pattern bigger or smaller, check out this post. To get this pattern, click your preferred option from the buttons below as a newsletter subscriber or gallery access pass purchaser. Note that the free version of the pattern does not have printable instructions.
 |  |  |
Please note that all my free patterns are licensed for personal use only (no selling items made from this unless you purchase it) and by downloading you are agreeing to this license.
1/4″ seams are allowed in the pattern
Tips on resizing – I have added slash lines down the shirt front and shirt back. Cut the pattern along these lines and add width here if needed. Add 1/4 of the total additional width at each point. So, for example, if you need to size up 2 inches, spread the pattern apart 1/2″ at the slash mark. You will need to redraw the shoulder lines after spreading. If you need it to be smaller, follow the same process except take width away at the slash marks. If you size up more than 2 inches overall, you’ll probably also want to add a little to the tops of the shoulders and a corresponding amount to the folded edge of the sleeve. Compare the pattern at the armholes to a shirt that fits you to get a better idea of how much to do here.
The finished length of the shirt is 23.75″ if you use a 1/2″ hem. To add length, just add to the bottom of each piece.
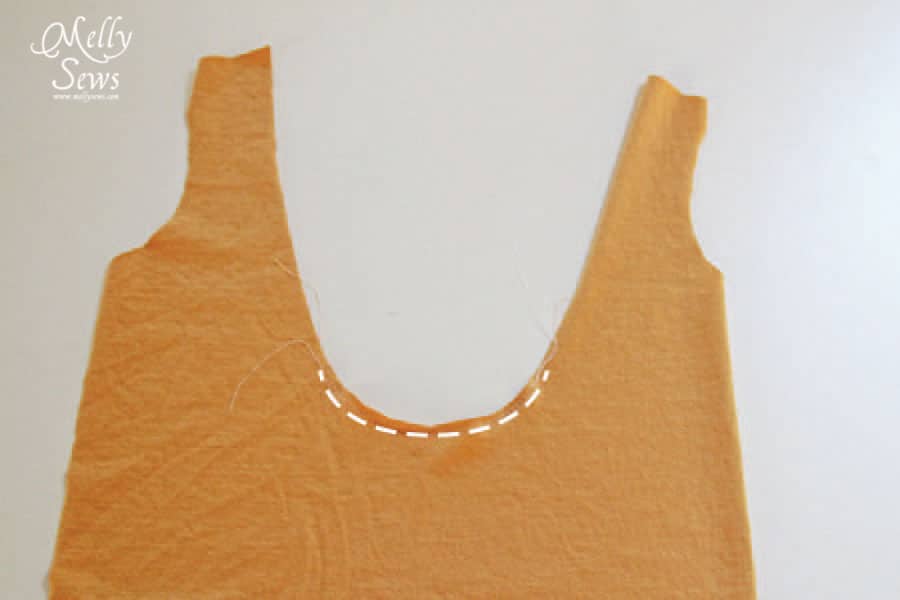
After cutting out your pieces, make sure to mark the bib and shirt front at the lines. Sew a gathering stitch between your marks on the shirt front.
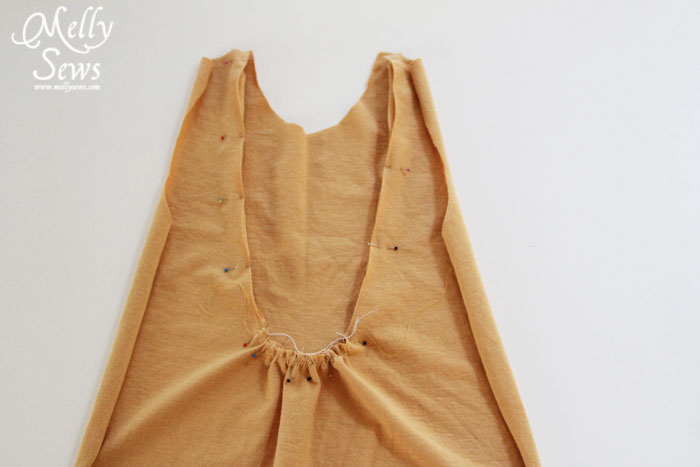
Pull your basting stitches so that the shirt front matches the shirt bib, matching the marks.

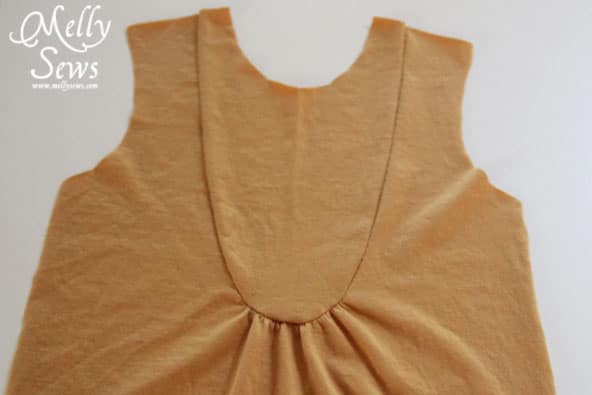
Pin all around the bib, and stitch using a long, narrow zig-zag stitch.
This is what it will look like. Mark the center front, and install the placket following this tutorial.
Assemble the rest of the t-shirt as normal (shoulder seams, sleeves, underarm/side seams). If you don’t know how that normally goes, check this tutorial. Use your neck binding strip to finish the neck edge like this tutorial explains). Now you’re ready to embroider.
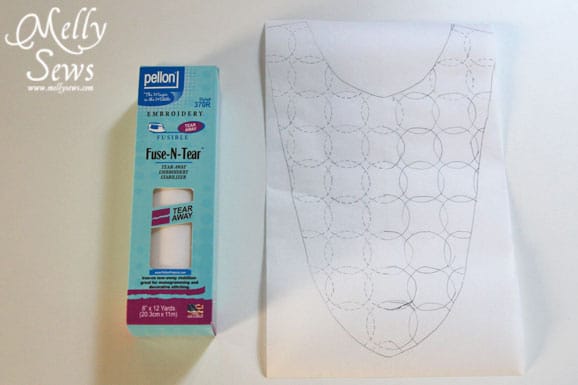
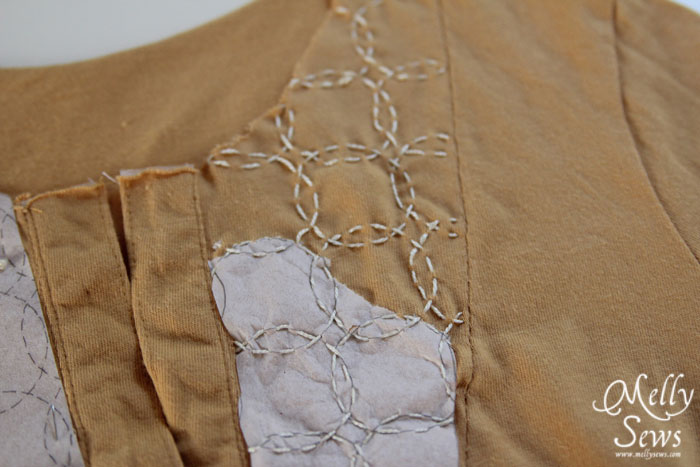
Transfer your printed embroidery design to your fabric. I don’t usually hand embroider, so what I had on hand was machine embroidery stabilizer, Pellon Fuse-n-Tear 317R Package -12″ x 12 yards. I traced the printed design onto this, then ironed it onto my shirt. It was good because it did keep the knit from stretching, but a pain to tear off. If I had had time to go to the store and find Sulky Printable Sticky Fabri-Solvy Stabilizer, that probably would have worked a lot better, as it dissolves in water. Also, the thickness of the Fuse n Tear meant that I used my teeth a lot to pull the needle through. My dentist would not approve.

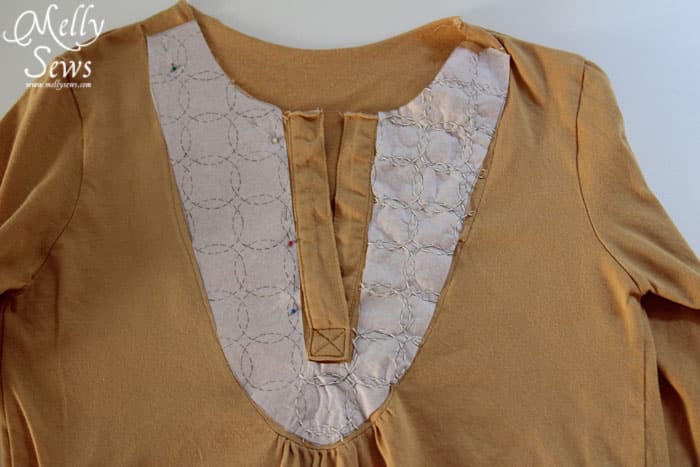
Embroider the design. This tutorial is a helpful explanation of the technique. As you can see, I didn’t hoop mine; the stabilizer kept it from stretching and made it easier to work continuously without having to stop and re-hoop.
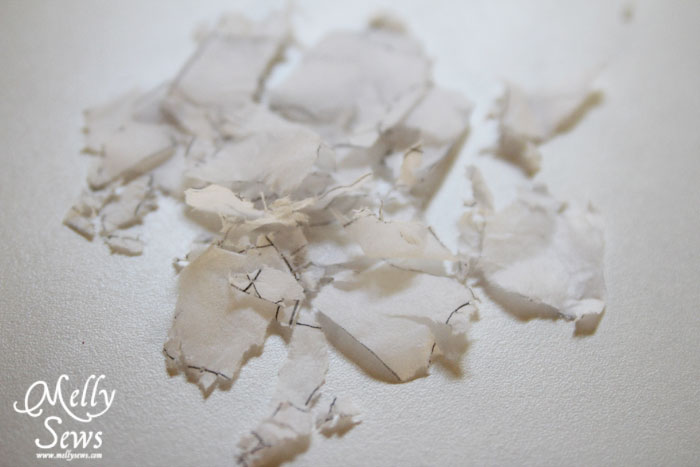
See all the little bits the stabilizer tears into as you pull it off? I had to use tweezers to get it all.
Finally, I added Dritz Decorative Pearl Snap Fasteners because I was impatient at that point and didn’t want to sew buttonholes like the Western flair it lends the shirt.
But in the end, the week I spent drafting, muslining and embroidering this shirt was worth it. I love it.

But next time? I’m totally thinking machine embroidery.
Pam
Thanks so much for sharing this!!!
Samantha
Thank you! I love you very much 🙂 (p.s. yes, I know, it’s a little strong but accurate)
Stef
This is so beautiful, Melissa! What dedication to pick all that stabilizer out! Thanks for the pattern!
Caila
Gorgeous! I love the hand embroidery. I need some new tops, so maybe I’ll make myself a Christmas present. Thanks for the tut! 🙂
Vanessa@Designs By Sessa
I love it! I have your vneck on my list of “to try”, but now I’m loving this a lot more! Thanks for doing the FREE patterns! I know I will try both of them! Thanks!
Emily
What a beautiful shirt!!! 🙂 Great tutorial! Thank you for sharing the pattern. 🙂
folkhaven
This is so beautiful… I love it! I’m pinning it and if I ever get around to sewing for myself, this is the shirt I want!
Vernelle Nelson
Beautiful job. I have seen a demonstration of the Sashiko, and even reviewed one, but this is the first time I’ve actually seen a finished product made by a satisfied owner. Your shirt is absolutely beautiful and your tutorial is so clear and easy to understand, even someone with limited sewing skills could follow it with no problem at all.
Irina
This is so nice! I wished I was better at sewing with knits, I’ve tried only once…
and I’m just picking up embroidery. This is such a nice combination! thanks for sharing the tutorial