
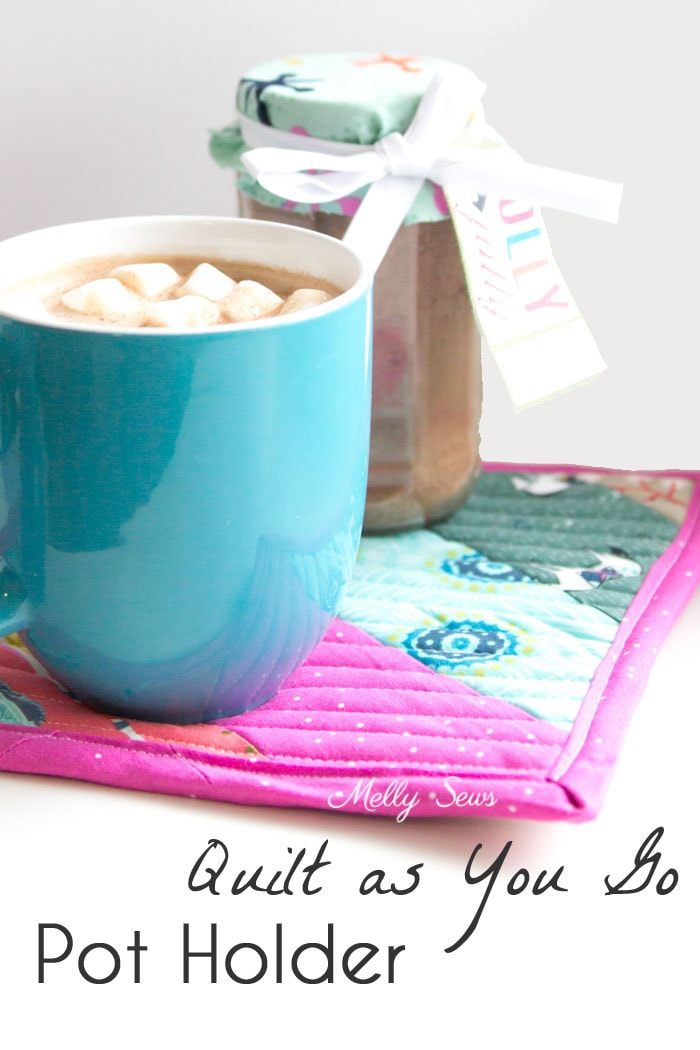
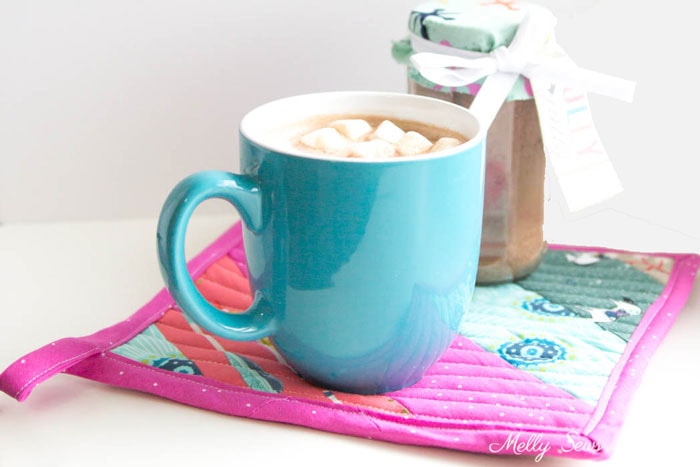
With all the cooking coming up this week for Thanksgiving, I thought I’d share this quilt as you go pot holder tutorial. It’s and easy way to sew a pot holder, a great way to use scraps, and a perfect gift for the cook.
Supplies to Make a Quilted Pot Holder
To make one, you’ll need:
- 1/2” wide double fold bias tape, 1 1/2 yards
- 5 3 inch wide by 16 inch long strips of fabric
- 1 10 inch square piece of batting
- 1 10 inch square piece of fabric
- 1 10 inch by 7 inch rectangle of batting
- 2 10 inch by 7 inch pieces of fabric (one of these will not be seen on the outside of the pot holder)
Instructions to Quilt as You Go
Start with the smaller rectangle of batting. Sandwich it between the two 10×7 pieces of fabric with the fabrics right side out, and quilt the 3 layers together. You may use any quilting design you’d like.
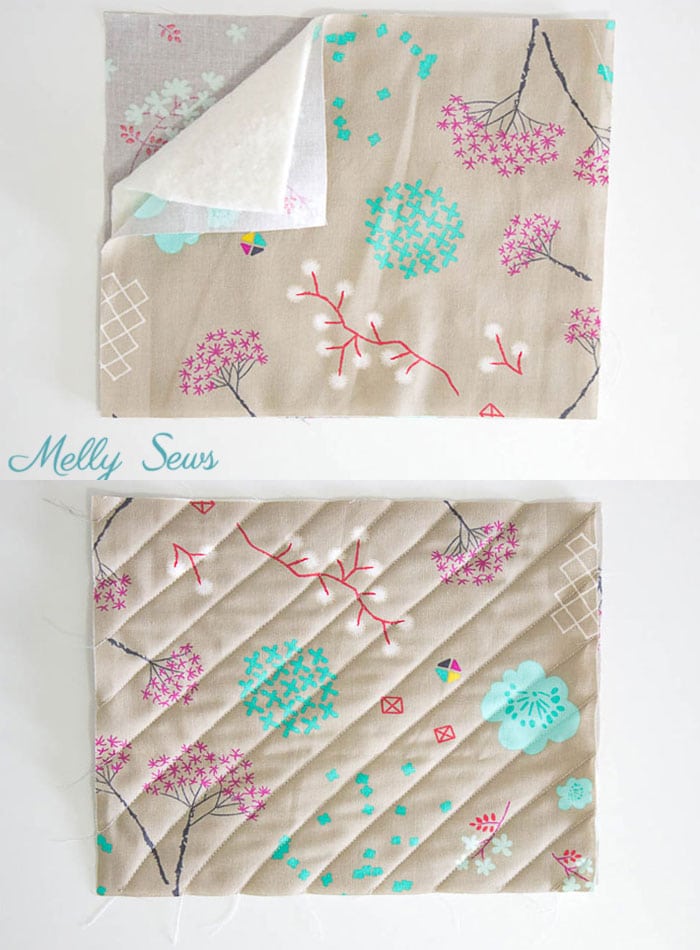
Apply a strip of bias tape to one long edge of the quilted piece. Square and trim the piece so that it is 9 inches wide by 6 1/2 inches tall. Set aside.
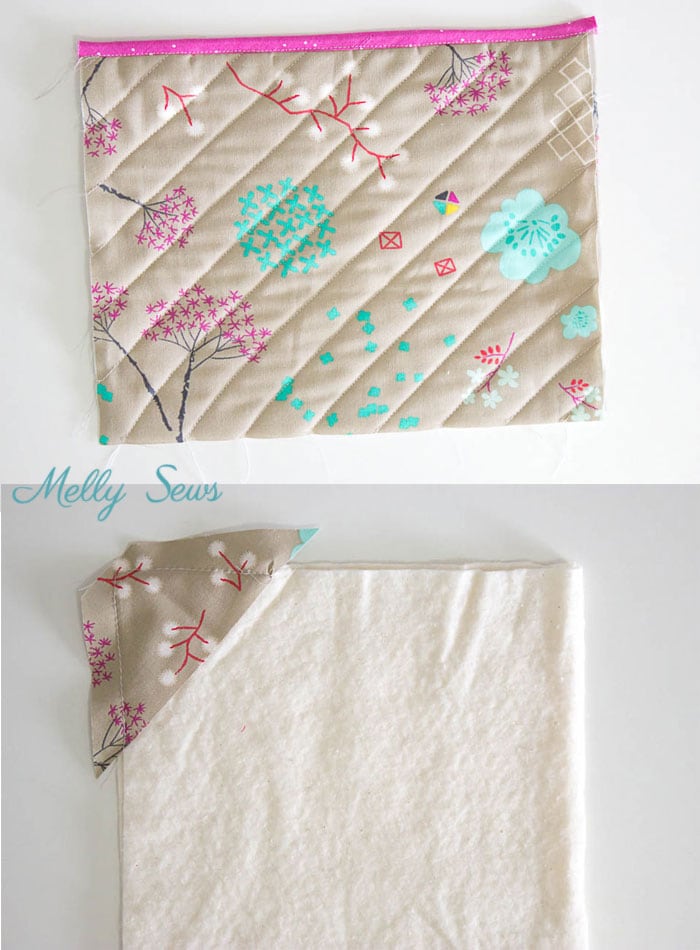
Cut the end of one fabric strip at a 45 degree angle. Position this strip in the corner of the square piece of batting and trim so it covers the corner. Baste the fabric piece to the batting along the outer edges.
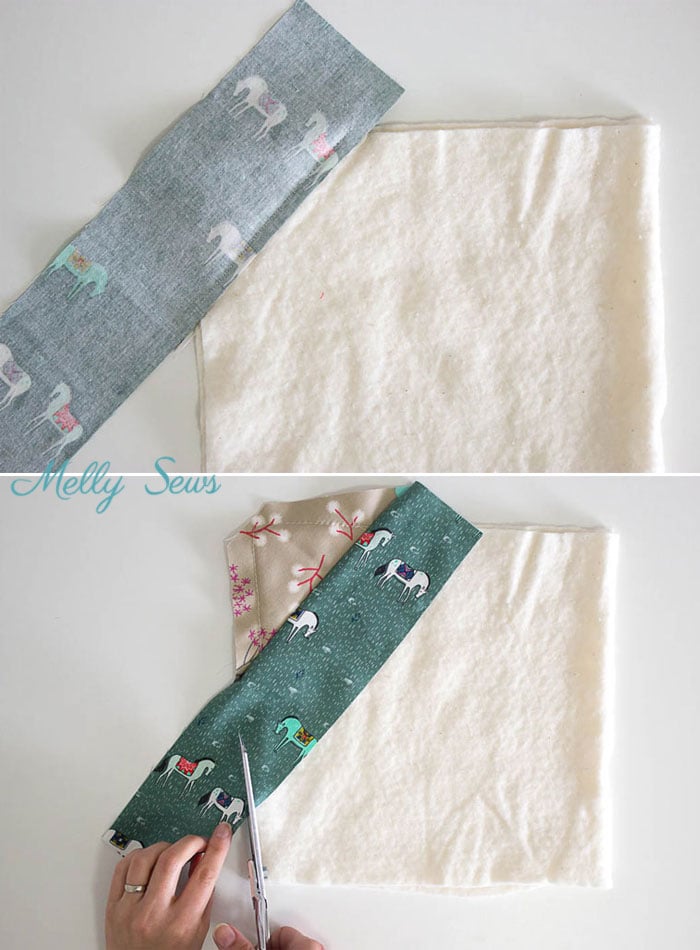
Place another fabric strip right sides together with the corner strip, matching the inside raw fabric edges. Make sure there is overhang beyond the batting. Stitch fabrics along raw edge with a 1/4” seam, stitching to the batting at the same time. Turn the strip right side up and press the seam (finger pressing usually works fine). Trim off overhang.
Repeat these two steps until this side of the batting is covered by fabric.

Place the batting/strip pieced square wrong sides together with the 10 inch square of fabric and quilt the 3 layers together. You may use any quilting design you’d like.
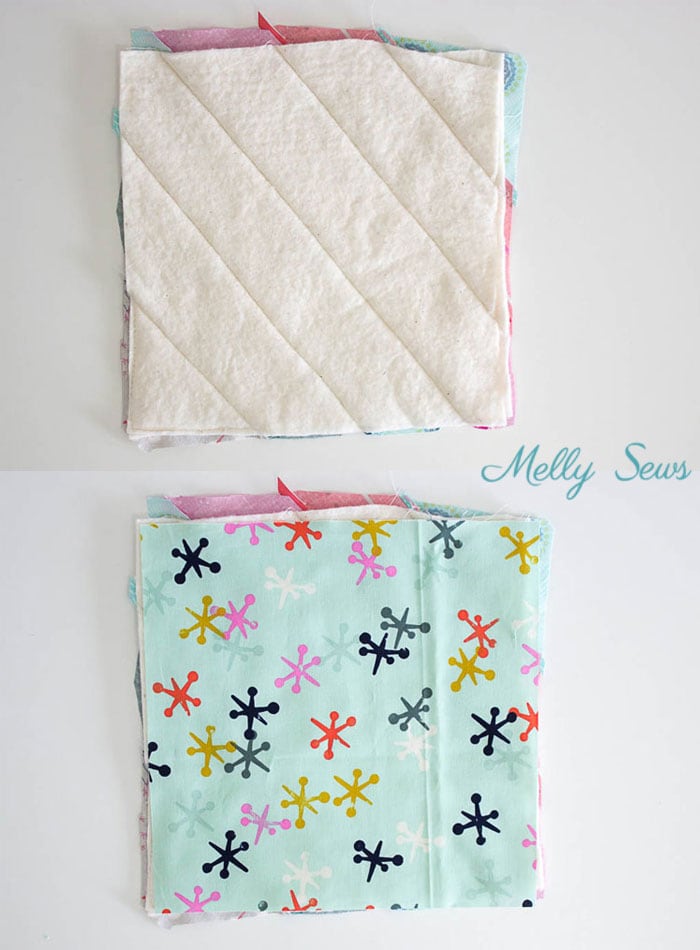
Trim the edges of the quilted square so that it is 9 inches square.
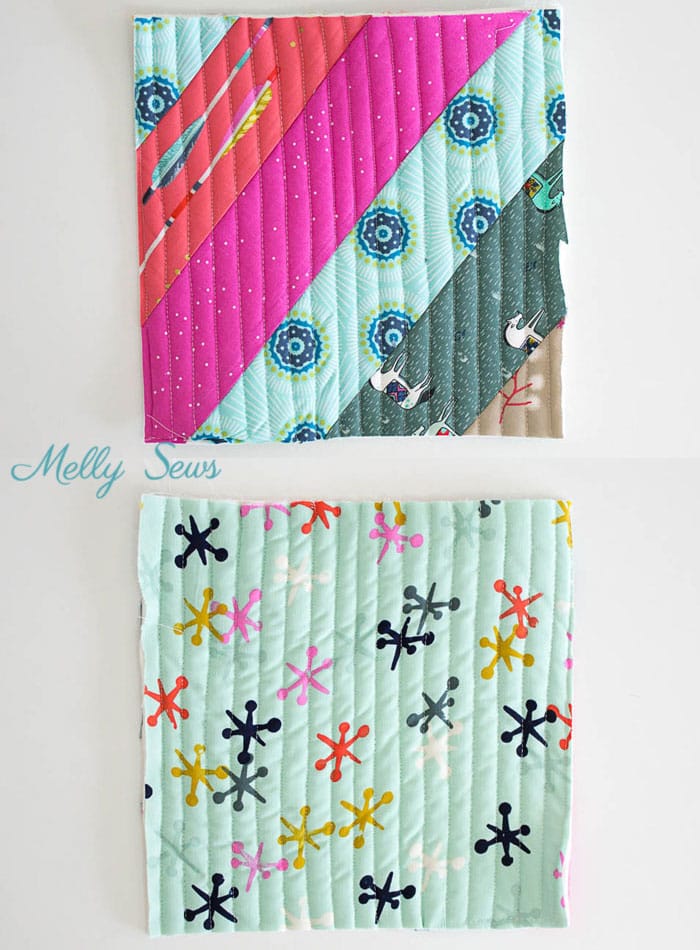
Place the smaller quilted piece against the solid fabric (not pieced) side of the pot holder.
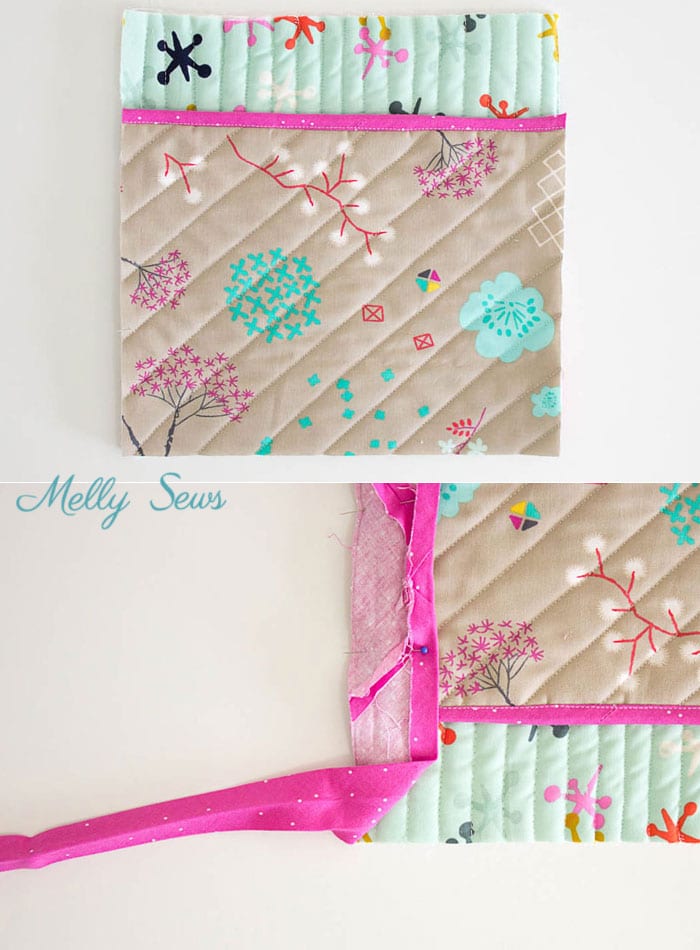
Pin unfolded bias tape around the edges, pinning the two quilted pieces together as you do. When you get to the corners, miter them by folding the tape away from the pot holder at a 45 degree angle, then back toward the pot holder, lining up the next edge. At one corner, you may leave extra bias tape for a pot holder loop; this is optional.
Overlap bias tape where you started, folding starting short raw edge of tape to the wrong side before overlapping it.
Stitch bias tape around edges, in the crease line closest to the raw edge, stopping 1/2” before each corner to lift the needle, refold the bias tape and move to the the other side of the mitered corner. Re start stitching 1/2” from the corner.

Remove pins and fold bias tape around the raw edges of the pot holder. You may wish to trim edges to get bias tape to lay flat. Stitch bias tape close to the folded edge to finish the pot holder.
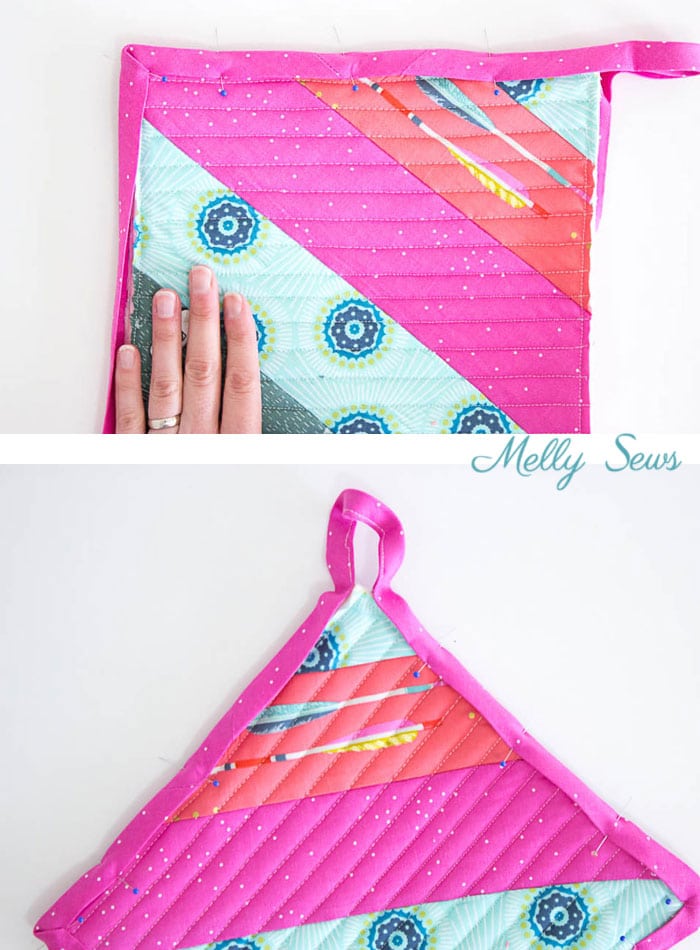
If you chose to leave a loop at one corner, stitch the loop edges together before stitching the rest of the bias tape in place. This corner will not miter, just stitch into the corner.
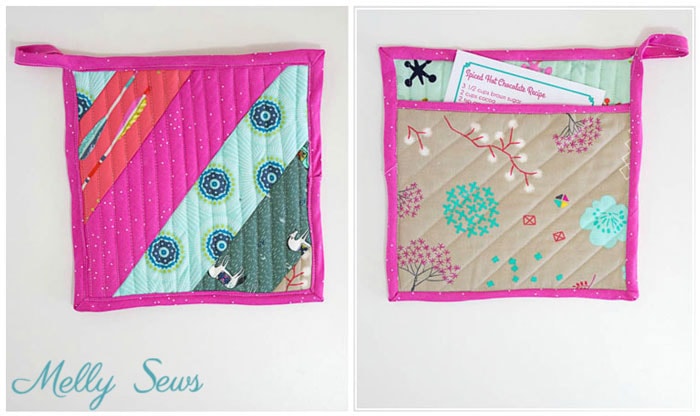
After you sew a pot holder, here’s a suggestion for gift giving – add a favorite recipe to the pocket before gifting. Pictured in this post is my Spiced Hot Chocolate Mix
Spiced Hot Chocolate Recipe
3 1/2 cups brown sugar
2 cups cocoa
2 tsp ground cinnamon
1/2 tsp ground nutmeg
1/2 tsp ground cloves
1/4 tsp salt
Combine ingredients and mix well with a food processor or blender. Store in a jar. To serve, add 1 1/2 tablespoons to 8 oz of hot milk, stir until blended. You can also find a cute tag to go with this here.
Pennyfp
So cute! What a scrap buster! And the perfect homemade gift! I love it!
Margaret Little
Thank you, I was looking for a little gift to give to family for Christmas, this will be a great one as very useful.
Moie
Thank you 🙏🏻 Really love this sweet, thoughtful idea gift. Now, off to raid my overflow scrap baskets… 🏃♀️
DJ
I can’t wait to make these next year for Christmas gifts. So cute!
lynne allitt
thank you for this will start on the week-end , I need four.
A big thank you for taking a teenager into our home, a couple did this for me 60 years ago the best day of my life..