
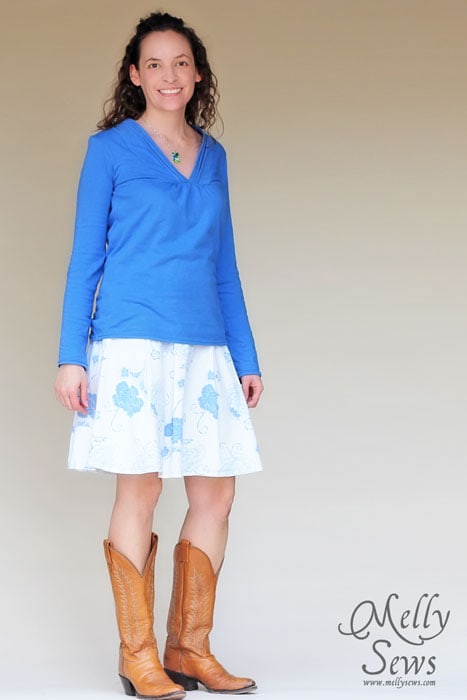
Today I’m going to share the tutorial and pattern for the Pleated Collar Shirt I shared with you yesterday.
Because of the pleating and the way the collar is attached, this is more of an intermediate project than a beginner one. Also, these directions assume that you know basic t-shirt construction, so I focus on the collar which is unique to this project.
To make it you’ll need:
- 1 1/2 – 2 yards of knit fabric. I recommend jersey; interlock would probably be too thick for the neckline. I used Near Sea Naturals Mountain Lake Medium Weight Jersey, and I highly recommend all their knits. You can read more about why I love them here.
- Sewing machine with stretch stitching (zig-zag stitches work great) and thread. I DON’T recommend using a serger on this neckline, though you can use one if you like for the underarm/side seams.
- The pattern, see below.
How to Get the Pattern
This shirt is a size small, made to fit my 34 inch bust and 36 inch hips. There are slash marks indicated on the pattern so you can cut and resize to your measurements if needed. If you need to make the pattern bigger or smaller, check out this post. To get this pattern, click your preferred option from the buttons below as a newsletter subscriber or gallery access pass purchaser. Note that the free version of the pattern does not have printable instructions.
 |  |  |
Please note that all my free patterns are licensed for personal use only (no selling items made from this unless you purchase it) and by downloading you are agreeing to this license.
Print the pattern and cut out fabric according to the directions on the pattern.
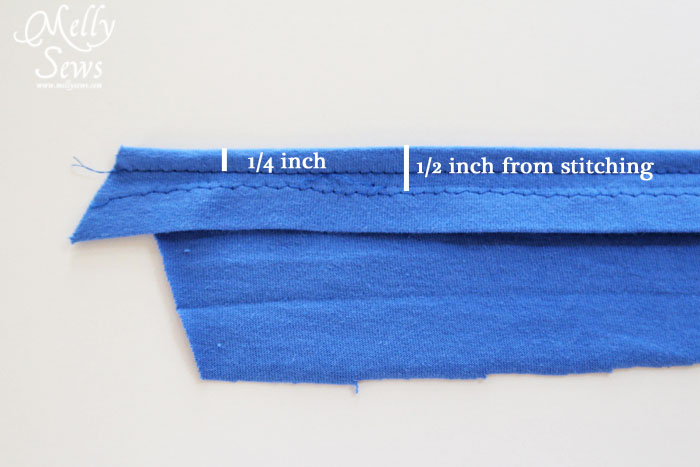
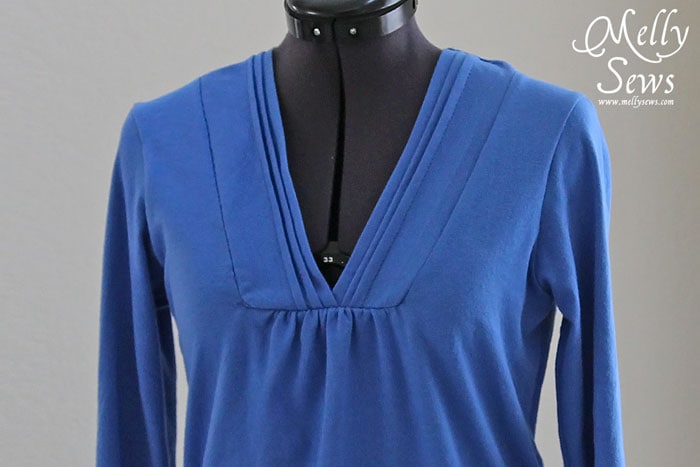
We’ll start by making the collar. Turn the longest edge of the collar pieces under 1/2″ to the wrong side of the fabric. Press and stitch close to the raw edge. I prefer to use the longest stitch length and the narrowest zig-zag my machine is capable of so this looks almost like straight stitching.
Next, press the edge again to the wrong side, so that there is 1/2″ between the folded edge and the stitching line you just made. Stitch 1/4″ from the folded edge. See picture below.
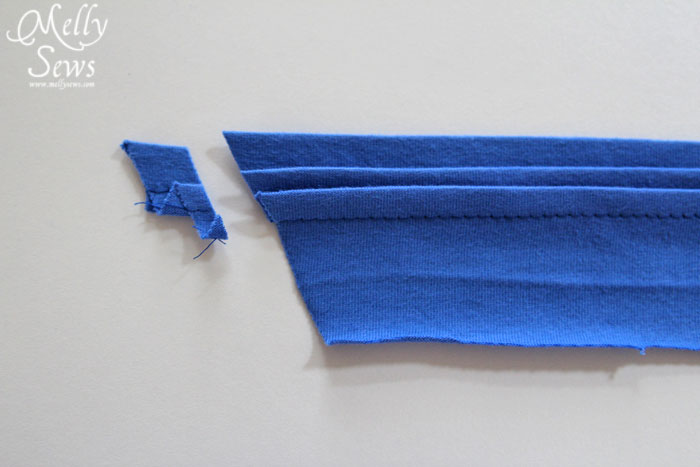
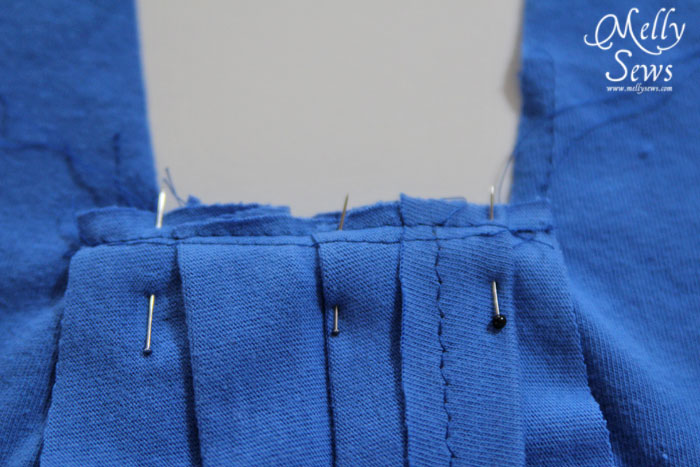
Repeat this procedure twice more on this collar piece. Make the second collar piece to match this one. Press your pleats flat; the edges should just cover the stitching of the pleats before them, so only the last line of stitching is visible. Trim off the edge so it is even as shown below.
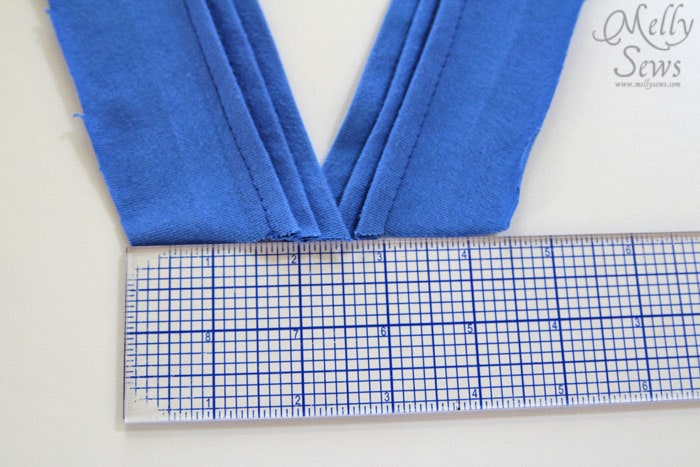
Overlap the angled pleated edges of the collar pieces slightly, so that the total width of the collar is 4 1/2″ as shown below. Baste these together close to the edge.
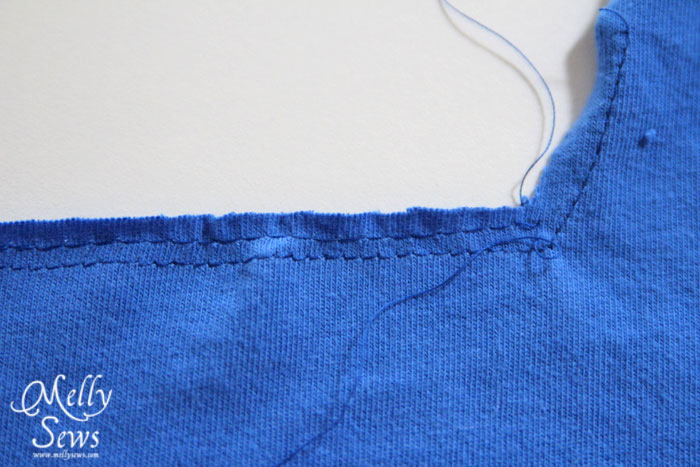
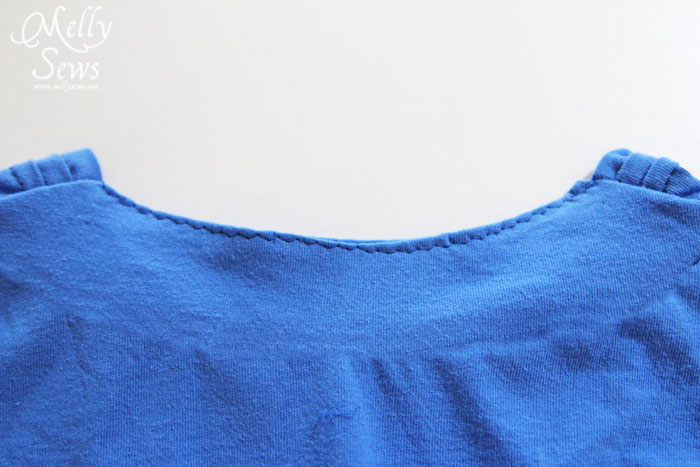
On your front piece, sew a straight stay stitching line 1/4″ from the edge of the fabric around the bottom of the next, turning at the corners and stitching about 1″ up the neckline. 1/8″ of an inch from this line of stitching, stitch a basting stitch for gathering across the bottom of the neckline only.
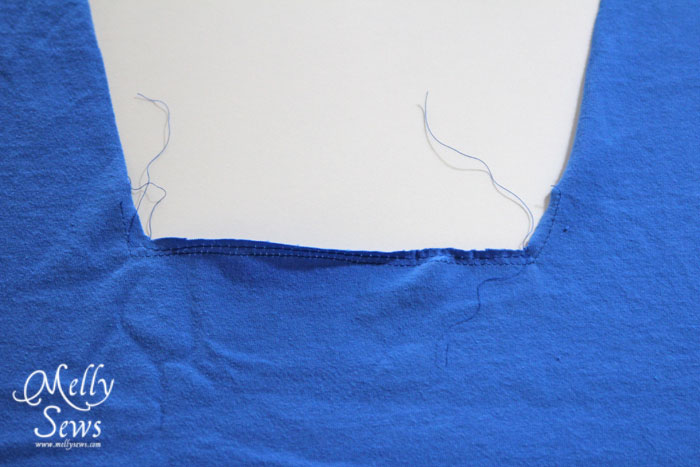
Close up of the neckline corners and basting stitch below.
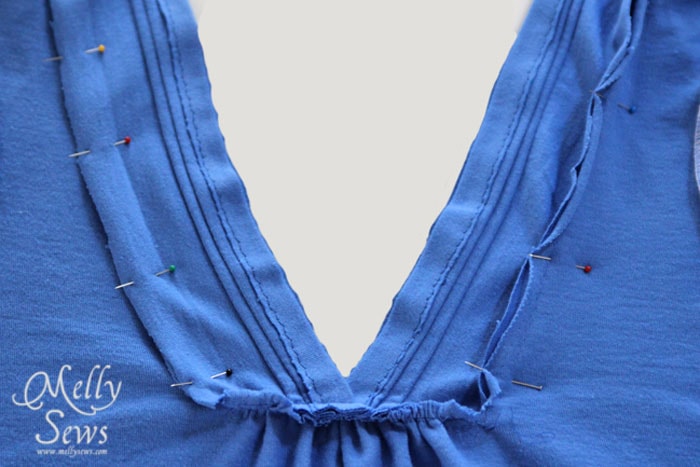
Pull on the basting thread and gather the neckline so that the bottom space is 4″ wide. With right sides together, pin the bottom of the collar to the bottom of the neckline as shown below. The collar will be wider than the neckline by 1/4″ on each side. Stitch across, leaving the first and last 1/4″ of the collar free. Make sure to backstitch at each end.
Flip the collar up and turn to the wrong side of the shirt. Clip into the stay stitching at each corner of the neckline so that you can pin the raw edges of the collar to the raw edges of the neckline, right sides together, as shown below. Stitch each side, starting right at your stitching line from the previous step to make a nice corner, and making sure to backstitch at each end.
Sew the shirt front+collar to the shirt back at the shoulders. The back shoulders should extend 1/4″ past the edge of the collar to allow for the facing to be sewn on. It’s OK to stretch the back fabric a little if you need to to get it to line up correctly.
Sew in the sleeves, then sew down the underarm and side seams in one long seam.
Pin the facing to the outside of the back neckline, right sides together, and stitch. Turn the facing to the inside of the shirt, press, and topstitch. You might also want to attach the facing to the shoulder seams on the inside of the shirt to keep it from flipping back out.
And enjoy wearing your new shirt!
Catate
Very nice! Thanks for the tutorial! I’ll be trying VERY VERY soon!
Natalie
This is an awesome shirt! I definitely want to try it. Thanks for sharing!
Cathy
Thank you so much for the pattern!! I enjoy your blog and your creations!!
Theresa
This top is beautiful! Going on my to-do list STAT. Thank you so much for sharing your pattern!
joanne
Hi,
I’d love ot make this but can’t see the sleeves in the pattern. Is the sleeve pattern somewhere else?
Thanks
Karen U
I follow you in my feedly reader and pinterest. I saw this tunic top on pinterest and would like to know about using a woven fabric (flannel) instead of a knit. What do you think? Thanks!
Billoux Claudine
Hello,
I want to fo the collar shirt and I,don’t find the pattern and don’t know how to,print it. Please can you help me .
Thank you very much.
I did my inscription on the susbcrire last wee.
vonnie
hi, I have downloaded your pattern for the pleated collar t-shirt. does it come in a larger size I need a large size. if not could you please tell me how to enlarge the pattern.
regards
vonnie
Melissa Mora
This is the only size it comes in. This article is a good place to start to learn about grading (making patterns bigger and smaller) http://www.threadsmagazine.com/item/4368/making-sense-of-pattern-grading/page/all