
Sewing piping is not hard. Learn how to make custom piping in this post and DIY video

Today we’re going to talk about how to sew piping. We’ll cover what it is, how to make custom piping, and how to sew it. Piping is what you see in the above picture – the white line between the two fabrics. It is a dimensional trim that can be used to accent seams. Piping is also often used in upholstery to add structure to the edges of cushions or to hide staples and gaps in other forms of upholstery.
Video Tutorial to Make Piping
I’ve got a video showing how to make it and how to sew it into seams below, or if you prefer you can also watch how to sew piping on YouTube here.
Different Types of Piping
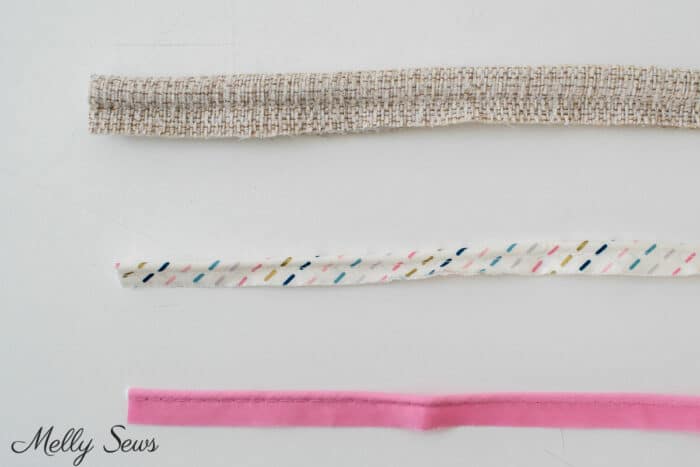
When piping is not sewn into a seam, it looks like the image below. From top to bottom you can see 1/2 inch cord custom sewn piping, 1/4 inch cord custom sewing piping with bias fabric, and 1/4 inch cord pre- packaged piping.
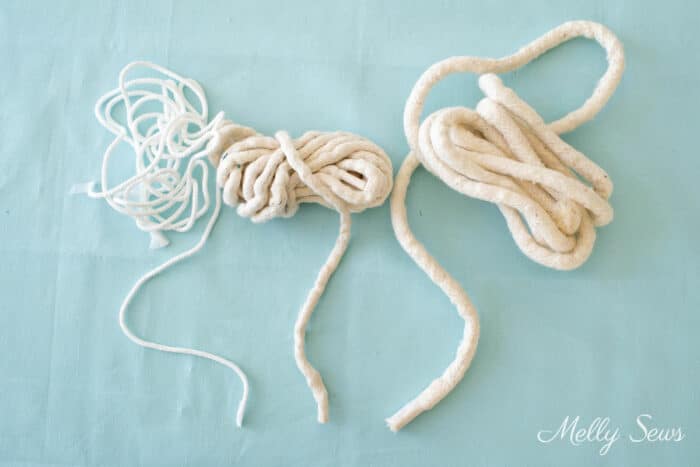
Piping is made from either strips bias tape or fabric strips wrapped around cord filler. You can buy it pre-packaged or make your own. The cording is usually in the upholstery section of the store. It comes in different widths, from thin to thick. Below you can see some different diameters of piping cord – 1/4 inch, 3/8 inch and 1/2 inch.
Tools And Materials You Need to Sew Cording
To make your own piping, you’ll need
- Zipper foot
- Cotton cording
- Strips of fabric
- General sewing notions – sewing machine, pins or clips, thread, etc.
There are different kinds of zipper feet. I have 3 shown below. The first is the typical zipper foot included with most modern sewing machines. The second is a narrow zipper foot. The third is an adjustable zipper foot. Instead of changing the needle position with this foot, you can use the screw on the back to adjust the foot from side to side.
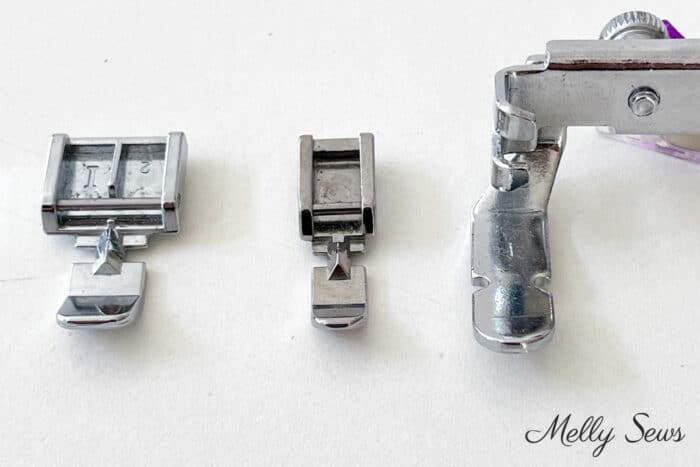
I prefer to use the adjustable zipper foot when I sew piping instead of either of the other two zipper presser feet. Since it is on a low shank, it doesn’t wiggle as much as the snap on feet can, and for this application I prefer that firmness.
Best Fabrics For Piping
I’ve made piping from all kinds of fabric, but I generally prefer tightly woven fabrics. If I’m using the piping in a garment, I like quilting cotton cut in bias strips. Fabric cut on the bias grain is more flexible. So this way the trim is easier to mold around curves.
If I’m sewing upholstery cording, I use the matching upholstery fabric. For this application I cut either on the cross grain or straight grain. It depends on which way I can get more fabric strips from my yardage.
If I am sewing piping for a pillow or other home decor, I choose the fabric based on how much give I want the piping to have in the finished item. So for a pillow on the couch I’m likely to choose thicker cord filler and piping fabric, like canvas. For a pillowcase for a bed I’d likely choose a thinner cord and quilting cotton.
How To Sew Piping
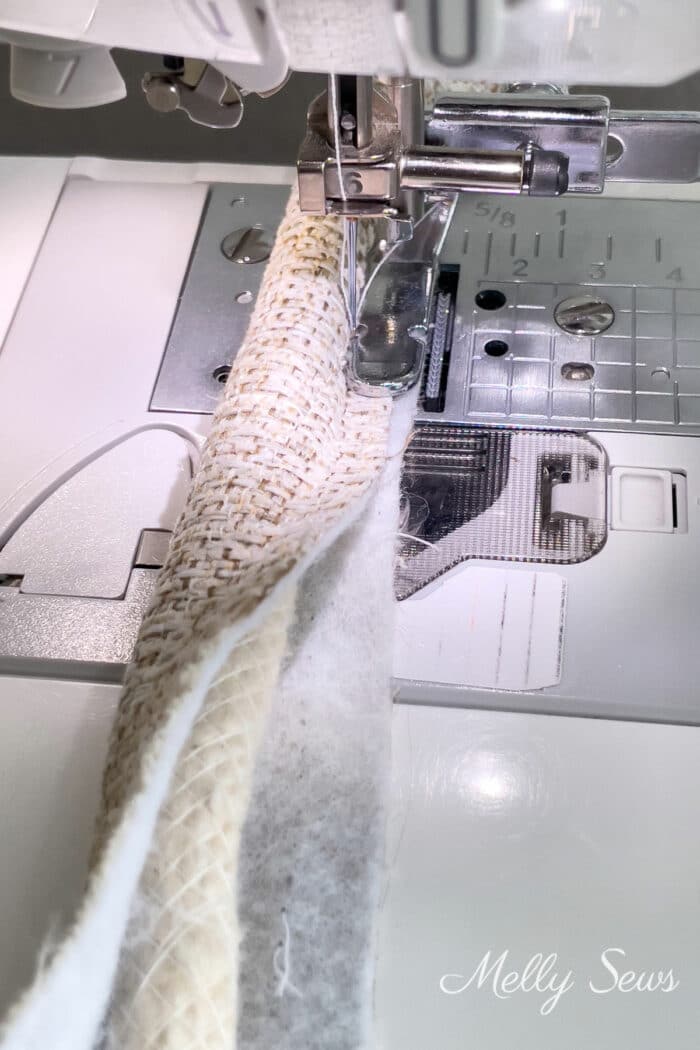
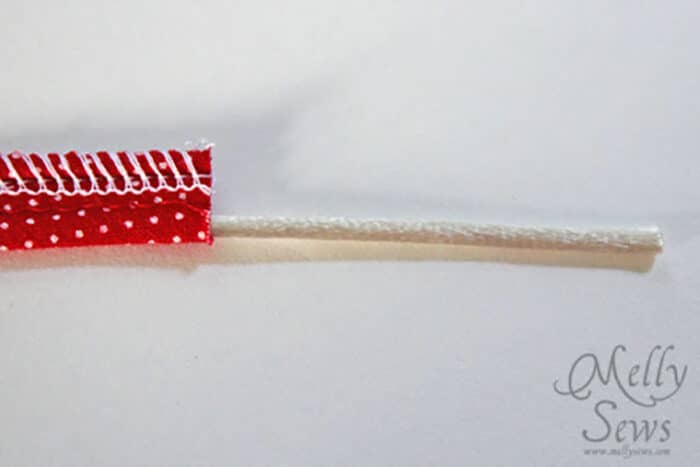
First, wrap your piece of fabric around the cording tightly. You might want to use pins or clips to hold the fabric in place.
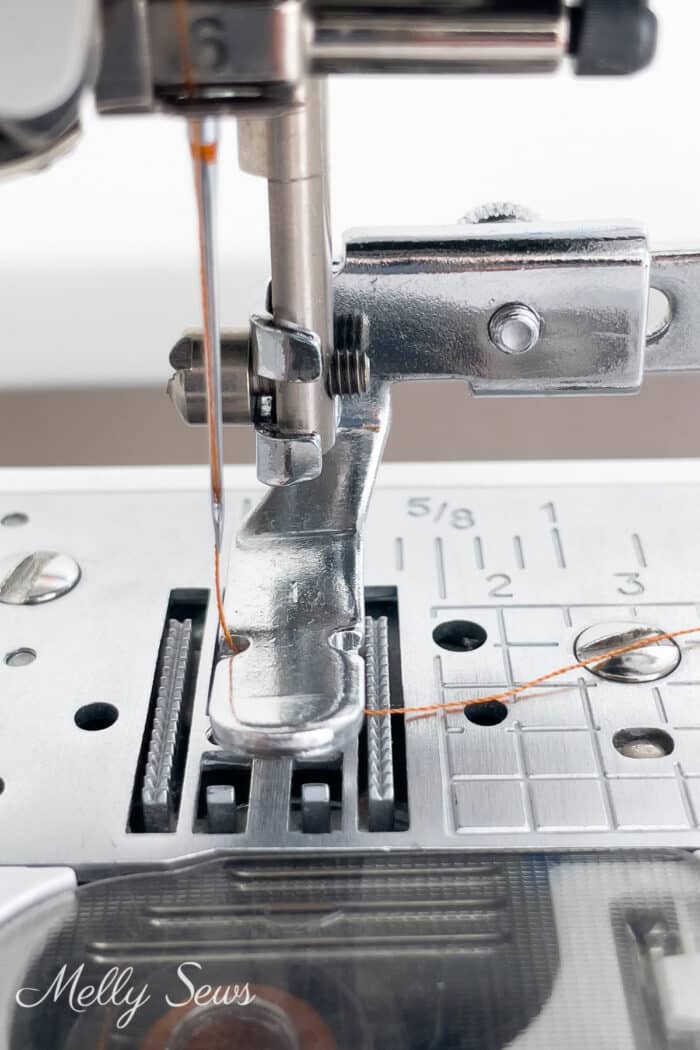
Next, using your zipper foot, stitch right next to the cording, like this:
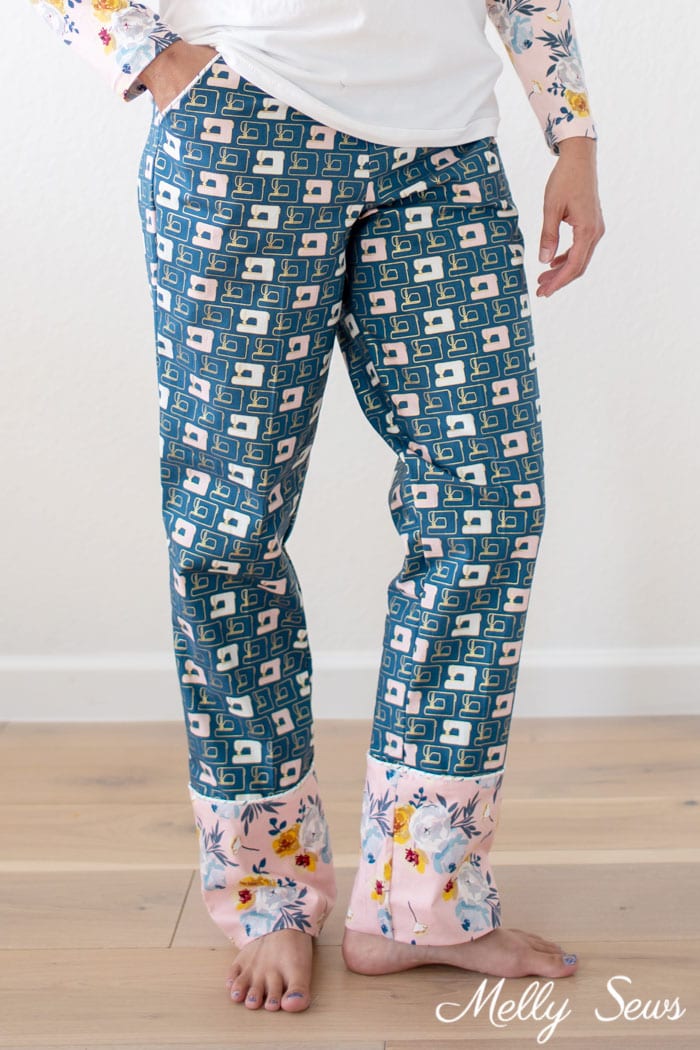
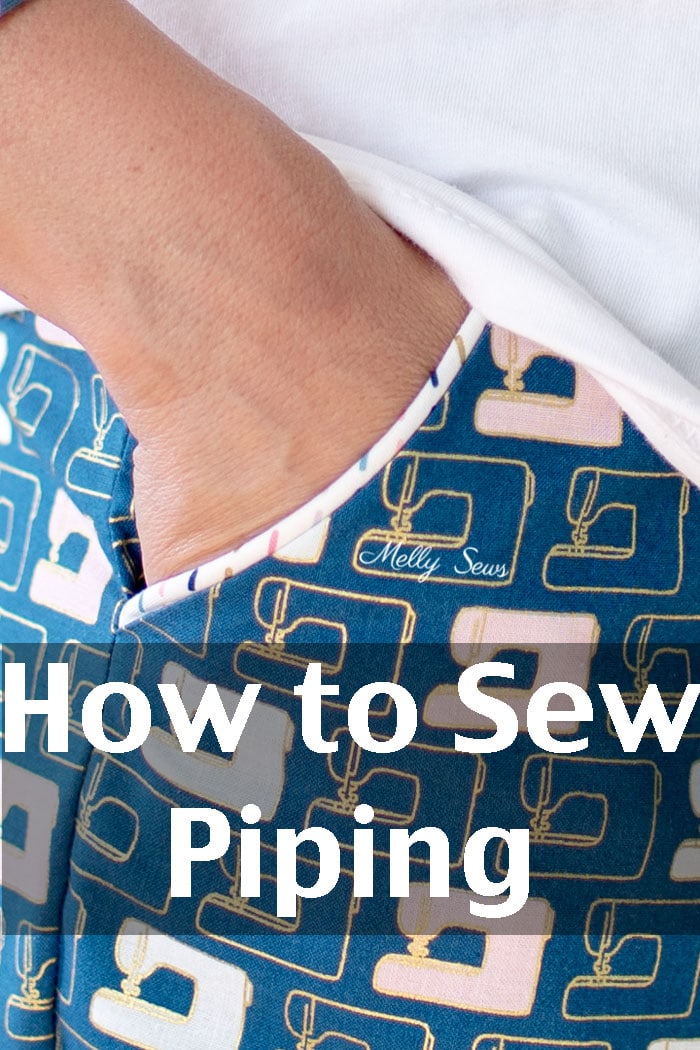
How to Add Piped Trim to Clothes
Piping is great for making details pop. Below I used it on pajama pant cuffs and pockets when I sewed up my Peppermint PJs pattern in my Blooms and Bobbins fabrics.
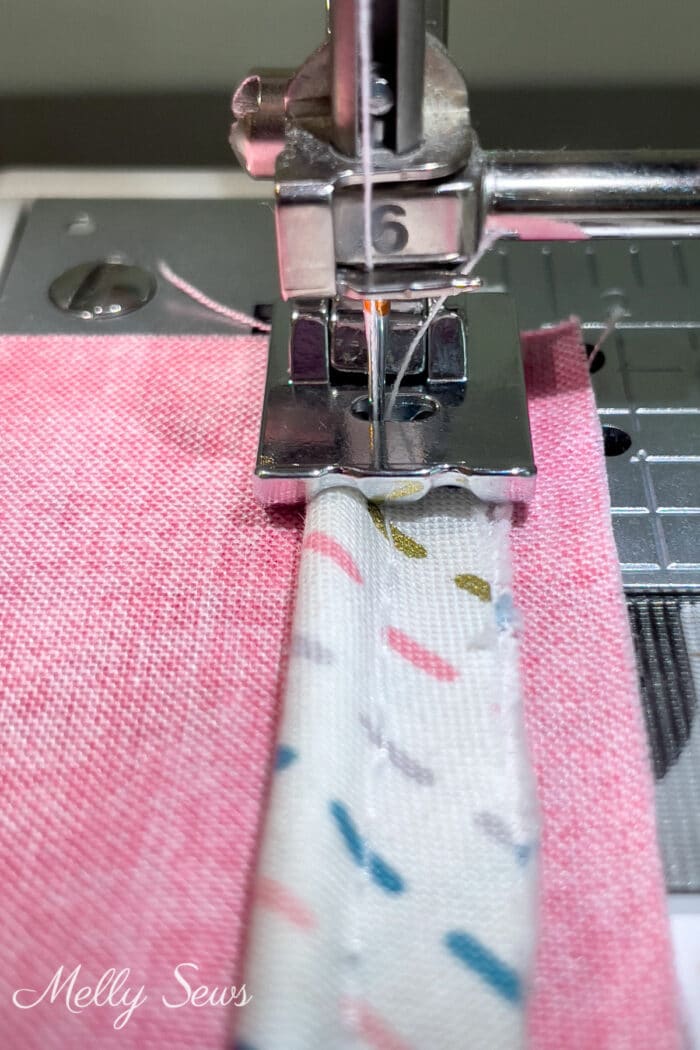
The trick to sewing piping into clothing is to baste it to your fabric first. Just pinning won’t give you good results. So take your piping and place on your fabric so that the stitching on the piping lays right on top of where you want your seam to be. Use a zipper foot on one side of the cording to baste it in place.
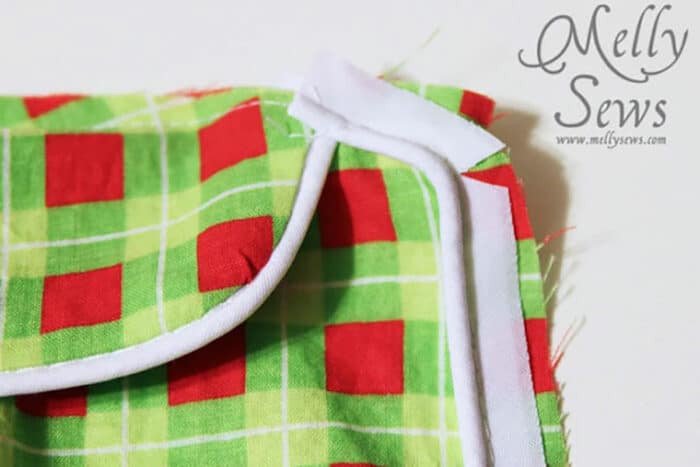
I find the easiest way to baste this is to line the edge of my fabric up with the seam guide on my sewing machine, then line the stitching on the piping up with my needle. After basting your piping, you sandwich it into the seam when you sew. Depending on your piping’s thickness, you may or may not need to use your zipper foot at this point. To sew piping around a curve or corner, sew to the corner or as far as you can on the curve, then clip the tape part of the piping, bend, and continue stitching.
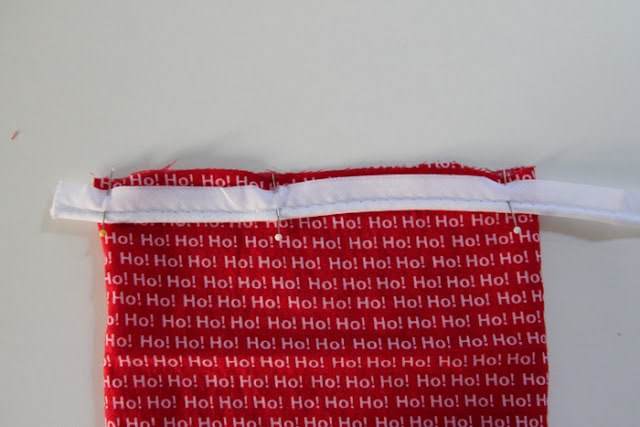
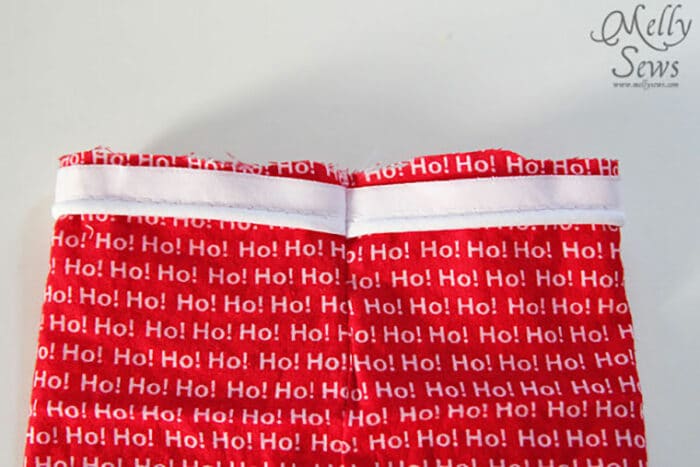
If you get to a place where you need to sew piping together (like when I sewed the cuffs together) , the best way to do this is to pull out the end of the cord, then cut off a little more than the length of your seam allowance.
This will allow you to flatten the piping into the seam, reducing the bulk and allowing you to match the piping without offsetting. You can see how the ends of the piping meet in the seam below.
Finally, topstitching once your piping is in place helps keep in laying correctly. Again, use your zipper foot to get the stitching really close to the piping.

How to Use a Piping Presser Foot
If you want to try a specialty presser foot, you can get a piping foot. You can see one in the image below. It has grooves on bottom for the piping to feed under the foot.
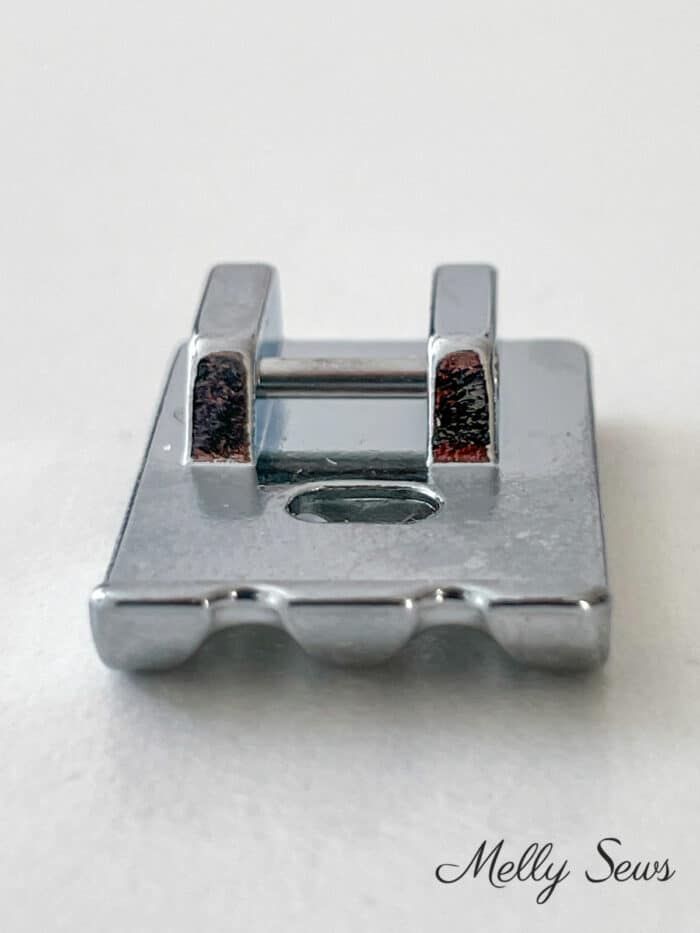
I’ve found this type of foot works best with thinner piping, like 3/8 inch diameter or less. Larger piping doesn’t fit in the groove as well, so for upholstery piping I go back to my zipper foot.
So if you haven’t tried it, piping is a really easy way to add some pop to your projects.

Like the Lazy Day Pajamas or the women’s Peppermint PJs shown below.
Robyn Vaughan
Terrific post. I’m not a ruffles or lace girl but I think I’d give this a try as a decoration.
Vicki Walsh
Thank you. I’m making my niece a bag for Christmas and this will be very helpful.
Vicki Walsh
Also, I like the contrasting trims on the bottom of the pyjama pants. Very creative idea.
Sarah
It looks so much easier than I thought it’d be, after this! Thanks!
Brenda
This is very informative for a beginner sewing person, which I am. Thank you