
Sew a casual mens button up shirt with this DIY tutorial, sewing pattern and video instructions
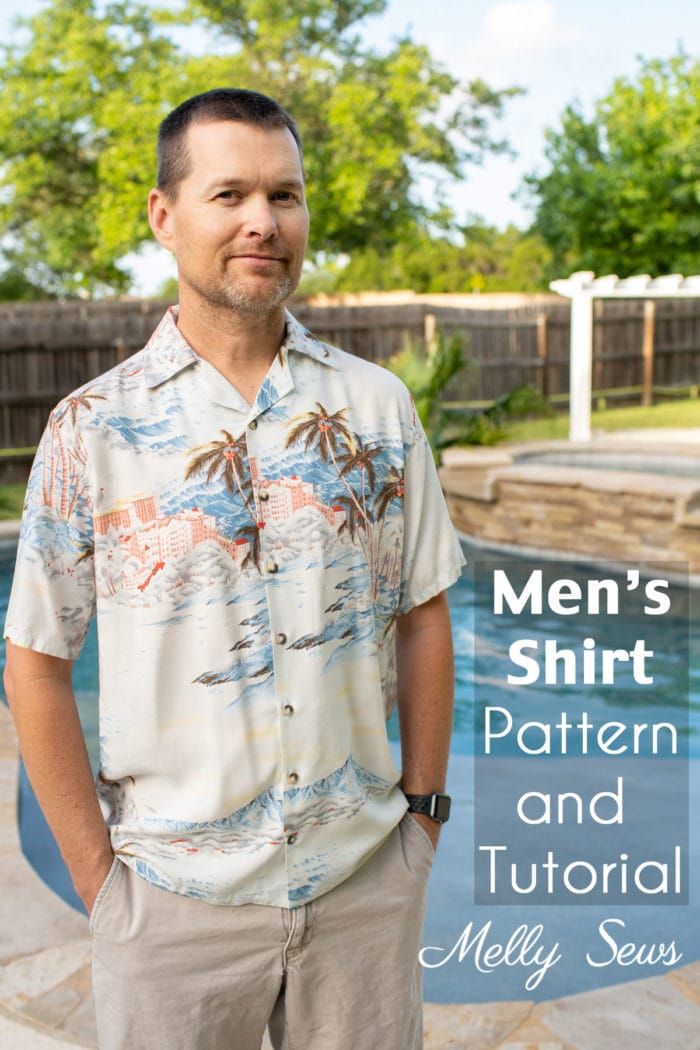
Hey y’all, today I’m updating a very popular old post and adding video to show how to sew a men’s shirt with this DIY tutorial and pdf pattern. This post is originally from 2013, and I’m happy to say that the Coach still wears the original shirt, it’s been a staple in his wardrobe for that long. This pattern is for chest size 36-38. If you need to make the pattern bigger or smaller, see this post.
To get this pattern, you must either be a free newsletter subscriber or have purchased a gallery access pass. Then click your preferred option from the buttons below. Existing newsletter subscribers should look at the bottom of the most recent Friday newsletter for the current free pattern gallery password. If you purchased the all access pass you’ll log in to your shop account to download the pattern. Note that the free version of the pattern does not have printable instructions so you’ll need to refer to this post for instructions.
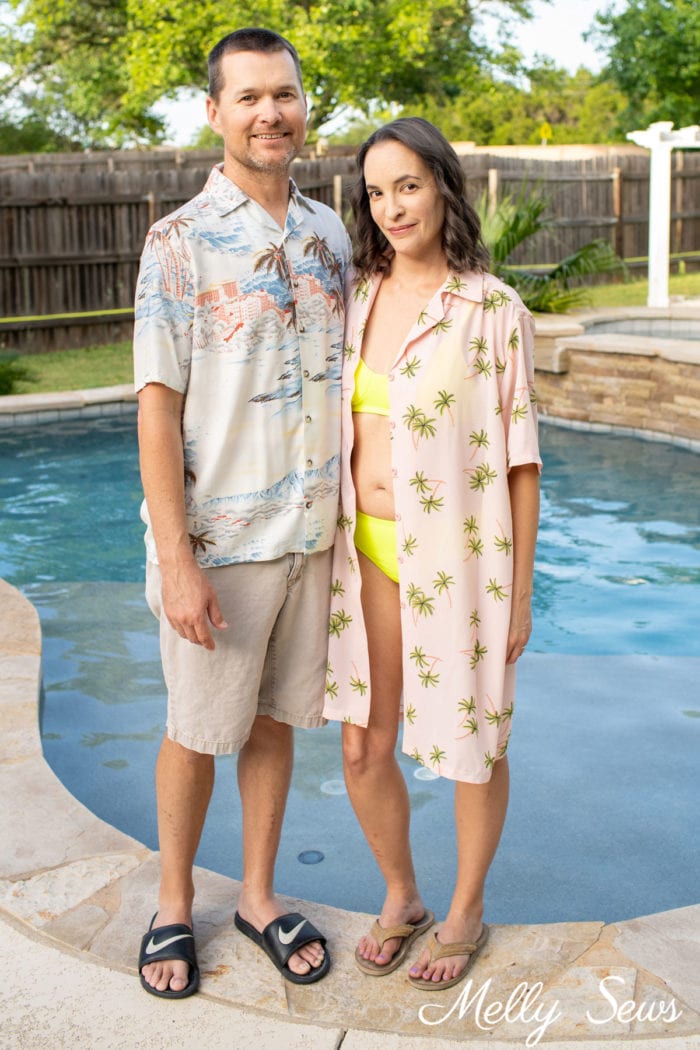
Both the original shirt and the new one I sew in the video were made from rayon challis, and I even decided to make one of these short sleeve shirts for myself to use as a swimsuit cover. I’ll share the hack details for my version after the original instructions.
A Comparison of Two Shirts
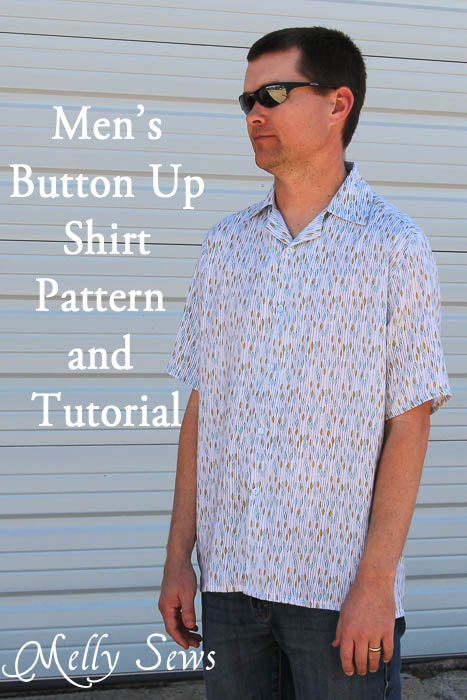
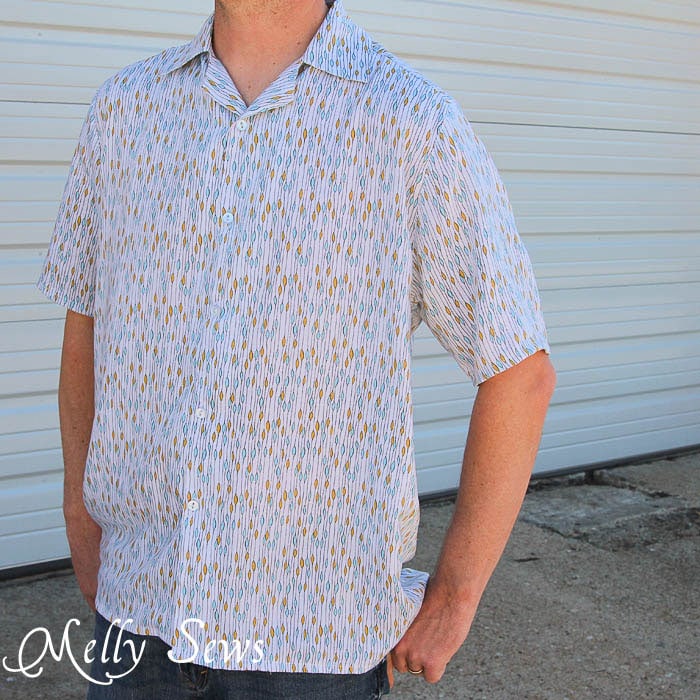
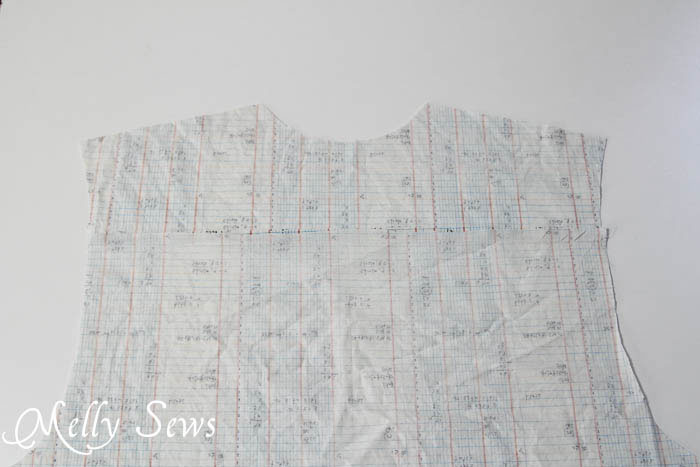
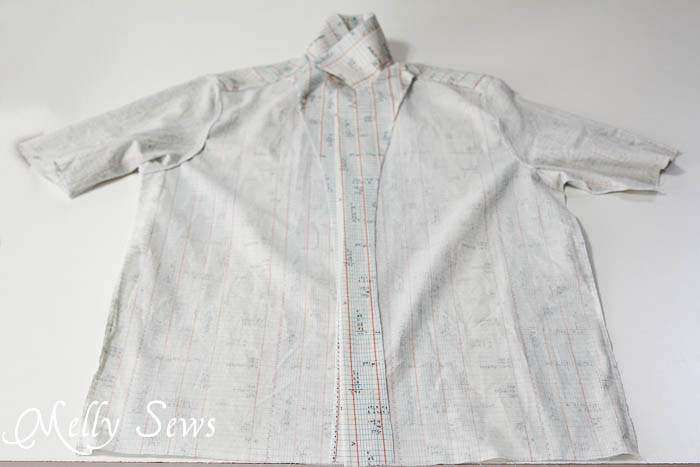
A while back (in 2013) I sewed a shirt for my husband the Coach, and then people wanted me to share the pattern because sewing patterns for men’s clothing were few and far between. Especially for patterns that weren’t a t-shirt. I got my brother to model a shirt made from the same pattern in Robert Kaufmen Architextures fabric that I fell in love with, and this post came together originally. So, before we get to the men’s shirt pattern and tutorial I give you the Math gEEk shirt.

The capital EE is because li’l bro is finishing his degree in Electrical Engineering (aka EE or double E) and all the math on this fabric made me think of him (and my dad, who is also a double E). (Also, as of this post update li’l bro has graduated and been working as an EE for a few years). This shirt is made from the same pattern I originally used to make Hubby’s shirt, which you’ll be able to download below. I got li’l bro to help me recreate the formulas on glass from A Beautiful Mind, as well as capturing him where he actually works/studies right now – on the computer.


As you can see, the quilting cotton shirt drapes a little differently than the rayon shirt, but it’s still cool. Other fabrics that could work well include linen and cotton shirting.
I do a lot of boy sewing. But I haven’t made as many men’s garments. Before this shirt, I had made the Coach a grand total of two items – some gym shorts and a bathrobe. He wears them both, but never outside the house. And I hadn’t made anything for li’l bro since…never, I think.
One of the first challenges in sewing for men is patterns. There aren’t a whole lot of them (or at least there weren’t at the time I originally wrote this post. There are more now). Since the Coach is so picky, I just had him try on a few non-sporting apparel shirts he owns and tell me what he did or didn’t like about the fit. Then I took two that were closest to being his favorite and made a pattern.
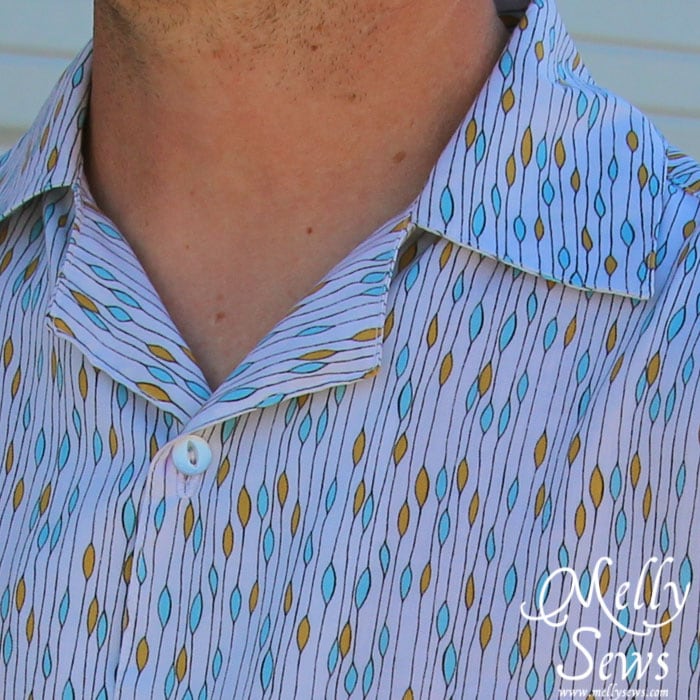
The next challenge in sewing for men is fabric. I bought this Free Spirit Novella Rayon in Rain Aqua at my local quilting shop intending to make something for a boy with it. To my surprise, when I showed it to the Coach, he said he’d wear it. After another trip to the store (men’s clothing needs more fabric than boys’, after all) and muslining my pattern with an old bedsheet, I whipped up this shirt.
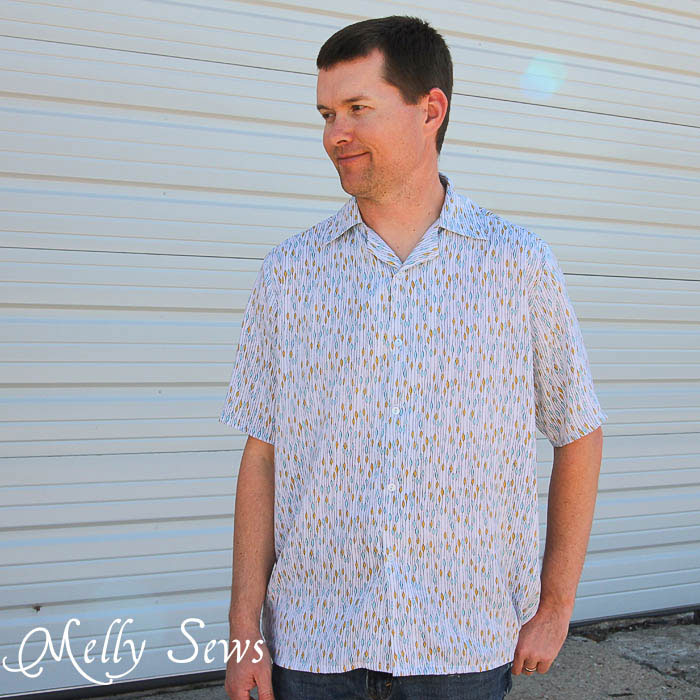
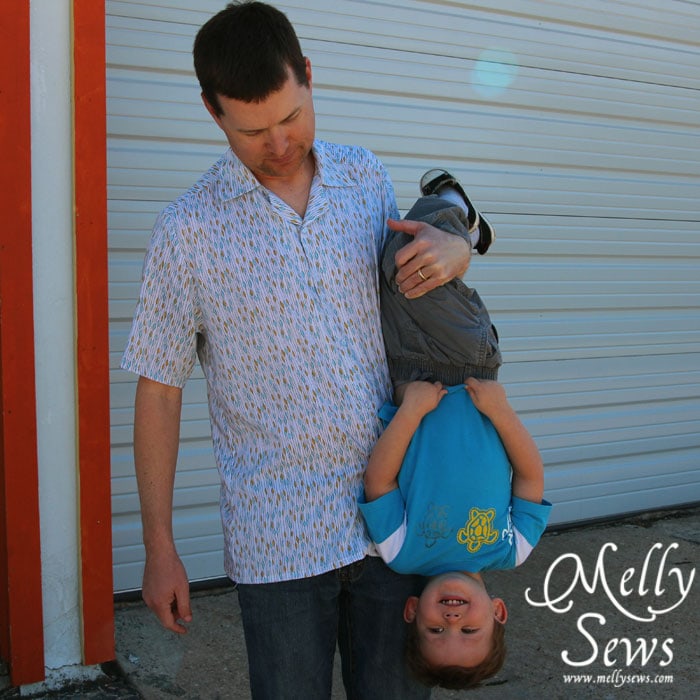
The fabric is just the right lightweight drape for this, and despite the bright colors, has a kind of hipster feel that works well in Austin. I left the hem straight because Hubby prefers it that way (no tucking required). I also resisted the urge to put on pearl snaps instead of buttons (too far over the hipster line). And the final challenge? Getting a good picture. He’s not used to being in front of the camera for my blog like the boys and I am.
Materials
To sew a men’s shirt for yourself, you’ll need:
- 2 yards of fabric
- 1 yard of lightweight fusible interfacing
- Buttons or snaps
- Thread, sewing machine, scissors, other basic sewing notions
- The pattern, see below
How to Get the Free Men’s Shirt Pattern
To get this pattern, you must either be a free newsletter subscriber or have purchased a gallery access pass. Then click your preferred option from the buttons below. Existing newsletter subscribers should look at the bottom of the most recent Friday newsletter for the current free pattern gallery password. If you purchased the all access pass you’ll log in to your shop account to download the pattern. Note that the free version of the pattern does not have printable instructions so you’ll need to refer to this post for instructions.
 |  |  |
Please note that all my free patterns are licensed for personal use only (no selling items made from this unless you purchase it) and by downloading you are agreeing to this license.
How to Sew a Men’s Shirt
To sew a men’s shirt, follow the instructions in the video below, which you can also watch on YouTube here. Or scroll below the video for photos and written instructions. Note that I do a little bit different construction in the video than in the photo tutorial. Both ways work, choose whichever makes the most sense to you.
After you’ve downloaded the pdf file, start by printing out the pattern, on US Letter or A4 sized paper, using Adobe Reader with scaling set to “Actual Size”. Trim around the outside of the gray boxes and tape together at the circles. Cut your fabric according to the cutting instructions on the pattern. Fuse interfacing to the wrong side of one collar piece, and the shirt facings. 1/2″ seams are allowed on this pattern. I’ve used pictures from both shirts in this tutorial, don’t let the changing fabric throw you.
Shirt Sewing Instructions
Start by pinning one of the yokes to the shirt back, right sides together. Stitch across, and the press the seam up towards the neckline.

Next pin the shirt fronts to the shirt back right sides together at the shoulders and stitch.
On the other yoke, which we will refer to as the yoke lining, press the straight edge 3/8″ to the wrong side.

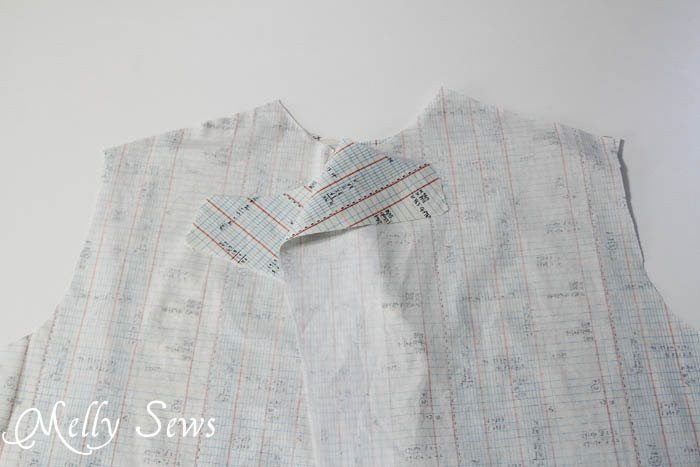
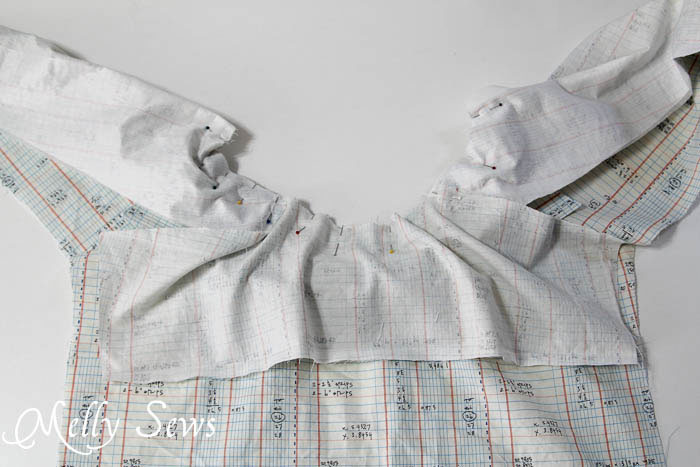
Place the shirt face down and the yoke lining face up. Pin the shirt facings to the yoke shoulders on the side closest to the neck as shown below and stitch facings to yoke lining.
Place the two collar pieces right sides together and stitch around the 3 straight sides. Trim the seam allowance down to 1/4″ .
Turn the collar right side out and press. Topstitch if desired.
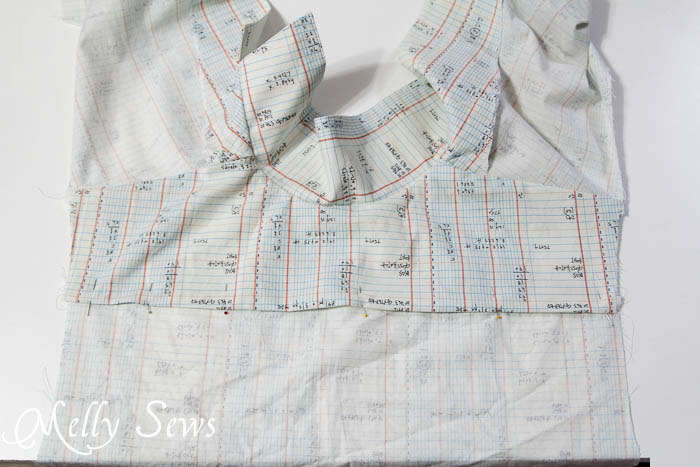
Pin the collar in place along the neckline, with shirt right side up and collar right side up. Start by matching the center collar to the center back neck, then continue to pin towards the shirt front edge. Your collar should end up about 1.25″ from the fold line of the facings. Check to make sure this is even on both sides, then baste the collar in place.

Now fold the facing and yoke over so that they are right sides together with the shirt with the collar sandwiched in the middle. Pin along the neckline, matching center back and shoulder seams. Stitch. Check for puckers, etc, then trim the collar seam down to 1/4″.
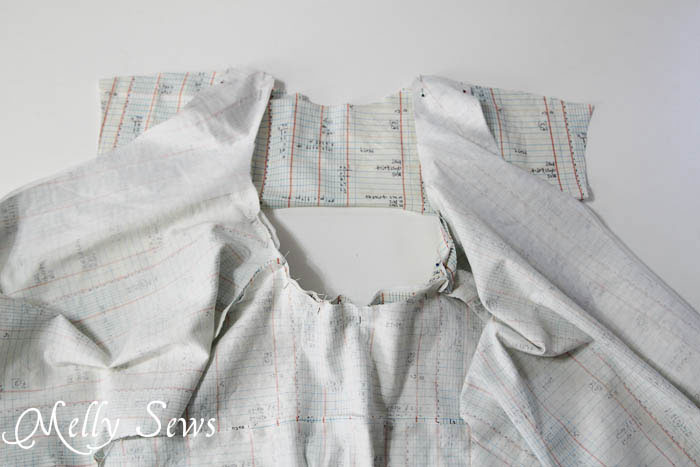
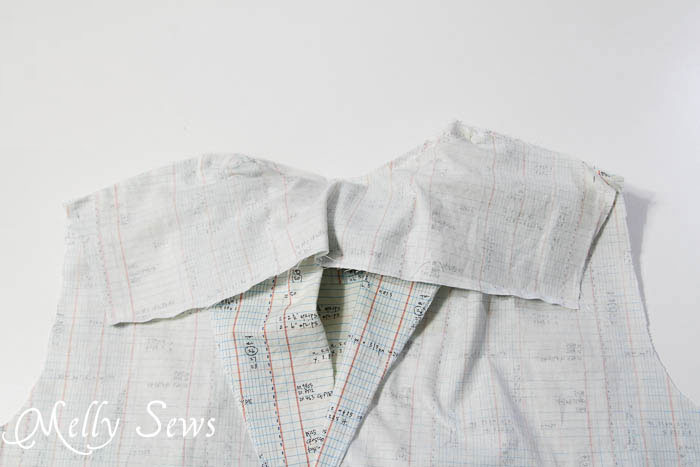
Match the yoke lining to the shoulder seams of the shirt. Stitch the outside shoulder edges together, stopping where the yoke is sewn to the front facings. In the picture below, the shirt is inside out and the yoke lining is flipped so that the right side of the yoke lining is against the wrong side of the shirt fronts.
Turn the yoke lining so that the wrong side of the lining is against the wrong side of the shirt back. This encloses the raw edges of the shoulder seams. Pin the pressed edge of the yoke lining over the seam joining the yoke to the shirt back. Turn the shirt right side up and stitch in the ditch of the yoke/shirt back seam or topstitch just above that seam (whichever you prefer) to secure the yoke lining and enclose the raw edges.
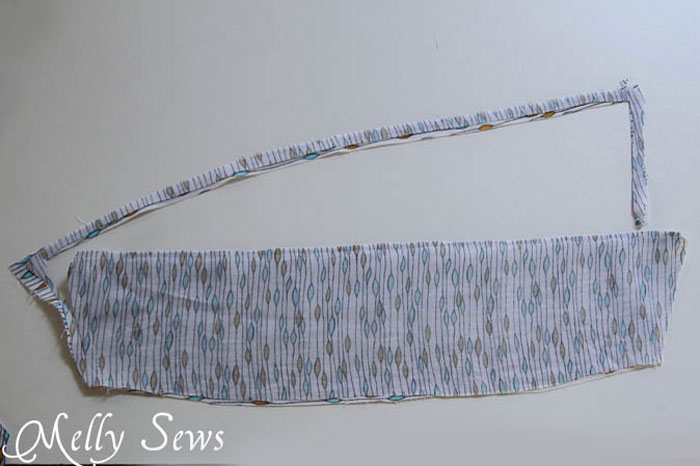
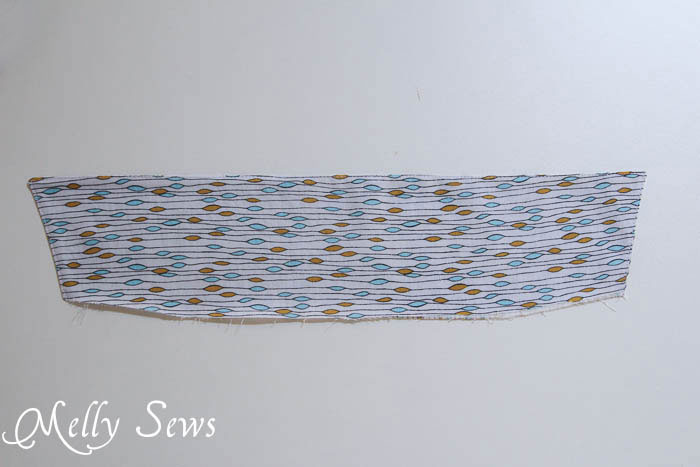
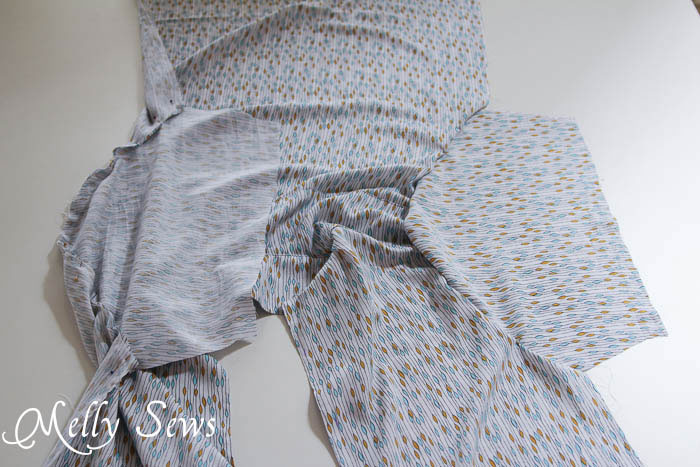
Lay the shirt out flat, right side up, and pin the sleeves in. First line up the front and back edges of the sleeve to the edges of the armholes. Pin from the edge toward center, stretching either the sleeve or shirt body as needed to ease the curve. Stitch. The picture below shows the pinned sleeve on the left and the sewn in sleeve on the right. You need to finish this seam using your favorite finishing technique (tips here).
Sew the underarm and side seams all in one seam, matching the underarm seams. Finish this seam as well.
To finish your shirt, iron the facings on the fold line, then topstitch close to the edge to keep them from rolling out. Hem the bottom and sleeves. 1″ is allowed for hemming on both, so turn under 1/2″ twice. Sew the buttonholes or apply the snaps and you’re done – you’ve sewn a men’s shirt!
Shirt Pattern Hacks
If you’d like to add pockets to the shirt, then check out this post on sewing patch pockets. I’ve also been asked about hacks for different sleeve lengths. I don’t think I’d personally sew an open collar shirt like this with long sleeves, but if you want to, you can lengthen the sleeves just by extending the side seams down to wrist length.
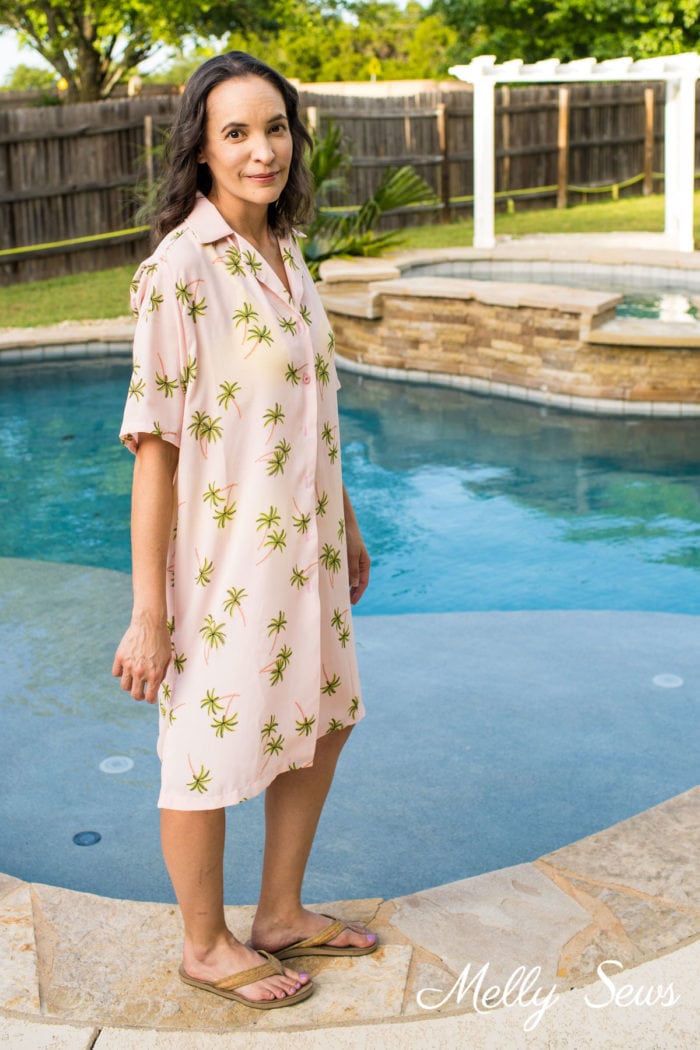
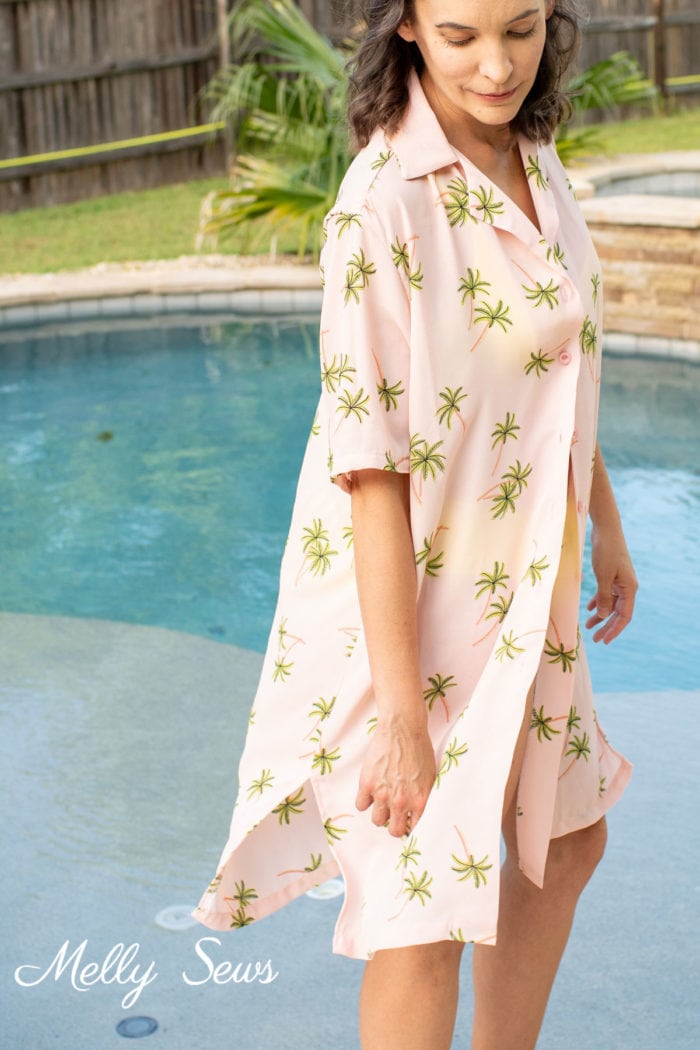
To sew a men’s shirt modified for myself, I decided I wanted to channel grandma chic and make myself something like a house dress. I used a palm print polyester crepe that I bought at a fabric warehouse. I lengthened the pattern 6 inches, straight down. Remember that I’m short, so you may want to lengthen more than I did. Also remember that you’re going to want at least 2-3 inches of ease over your bust size and hip measurement for this to fit; the hip measurement on this pattern is the same as the chest measurement. If the 36-38 inch chest size is too small for you, then you’ll need to do a full bust adjustment, add a dart, or make the pattern bigger.
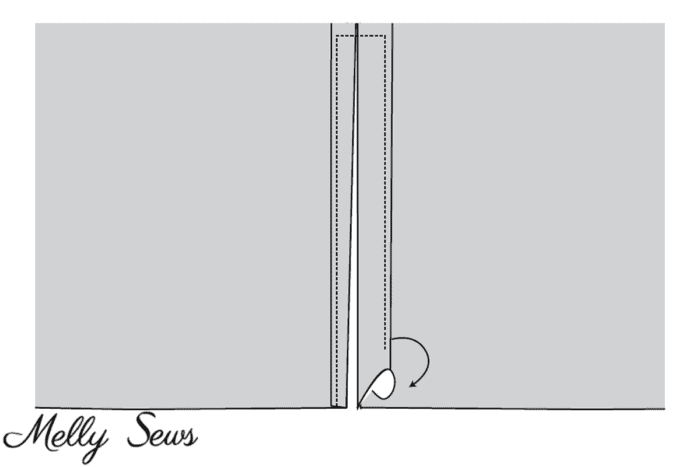
The other hack I made was to the hem – I added side vents. To sew a men’s shirt with side vents, you do not serge the seam allowances together if using a serger. Mark where you want the split to start, then backstitch there when sewing the side seam. Fold the raw edges of the seam allowances under and toward the seam, then press and stitch them down as illustrated below.
Kim
How would I go about resizing this to fit a larger man? Thanks for the pattern!!
Melissa Mora
This article is a good place to start. http://www.threadsmagazine.com/item/4368/making-sense-of-pattern-grading/page/all
Jessica
This is really awesome Melissa! I totally want to try. I’ll be measuring my man tonight…
Shannon
Thank you for the free pattern, Melissa. I’m signing up for your newsletter now.
Donna
Thanks so much! It’s about time someone dedicated some thought and time to the men in our lives. Something other then pajama pants or I Pad cases. LOL……. Really I am so going to give this a go. I have wanted to make a shirt for my DH for a long time now. Thanks Again!
Asha
So my husband decided today that he wanted a button down shirt to match the kid’s 4th of July outfits. I am sooo glad that I found this. Thanks!!!
rebecca sinclair
First of all, I want to say thank you for a free pattern for a men’s shirt! Yours is the only one I’ve been able to find on the web. Initially the cutting and taping together was confusing to me…I can see now what I did wrong. I have used printed pdf patterns before, but it was set up differently so I just jumped in without reading or thinking. Now, I’m confused and can’t tell if I’ve done it all correctly. One suggestion I have is to show a photo of what the final pattern pieces look like, all taped together and cut out. Just having a photo to look at and compare the size and shape of the pieces would make a big difference. Thanks again for a wonderful pattern!
rebecca Sinclair
I finally finished the shirt using your pattern. I am not an experienced seamstress at all, but I followed your instructions and it came out beautifully! The only instruction I never seemed to find was when to sew in the shirt facings…but I just did it before adding the yoke lining and it worked. Thank you again!!
marx
i love to know how to sew a mans shirt
tallowah
hello Melissa Thnk you Soo much for the quick reply. but pls can I have a free tutorial on how to make an off shoulder maxi dress.thank you am Soo grateful.I love your teachings.Soo calmin and easy to learn
Carole
WOW so quick to respond sending soooo many thanks
Have a truely blessed 2014
Carole
glo
i love this, it’s helpful, but not reall;y sure how you cut the front of the shirt to get those little flaps. pls help put a pix of the front before it’s folded. thanks
Melissa Mora
All you do is fold the facing pieces back on the fold line of the pattern. This is shown in the last picture.
Khemara
I Love It So Much, This is very well Explanation. I can Make this shirt for my self It look nice . Thanks you so much.
navnit
this is really help full for new ((lern swing))my wife is top blouse mekker but I want to swing my shirt self I am in learning proses
Caz Briggs
I am so pleased I found this site, I made this over the weekend for my daughter. She absolutely loved it,especially as I found sloth fabric. My partner loved it as well and has fabric arriving for his shirt. Thank you for the video as well.
Lisa
So this is imprinted on my brain now. I’ve made five and have a sixth ready to cut out! Great pattern. Well done, great pics. BIG huge thank you! My two teenage sons now want custom shirts:)
sarah walther
wow!! i just made this shirt tonight 🙂 being a novice, this tutorial was really helpful and i cant wait to make another one!
Janet
Thank you so much just what I have been looking for.
Little early but Merry Christmas and all the best for 2016
Melly Sews
Nicole
Hi Melly,
Just wanted to say thank you and beautifully done! I’m a designer/pattern maker of women’s clothing and am making some presents for the men in my life. Your explanation and pattern presentation is fantastic and I am very impressed.
Thank you for making my life easier and my man very happy!
Theresa
Thank you for this. I was able to make my son a shirt for his birthday.
andrea
THANK YOUUUU! Im making this for my boyfriend’s birthday, you saved my life! <3 followed you on pinterest and youtube!
Rodney
this is a great place to start! …have sewed other things but never a shirt….the photos help to make sense of it all ….Thank you for a great article! will be ready to try this:)
Sharon
Thank you for this great tutorial!! I have a shirt pattern that is pretty much like this shirt, except it has a single yoke and a back facing. I wanted to change it to a double yoke and skip the back facing but couldn’t quite picture how it would all go together. Now I get it! Hooray!
Lillian Pahina
He-eeyyy!
Thanks ever so much for the free men’s shirt pattern. I can picture it all coming together nicely. Now that I have the pattern, can’t wait to try to make matching shirts for my two boys.
Much love… 🙂
Maria
I’m late to this party, but just wanted to say that I’m a beginner sewist and made your shirt for my husband today, and it came out great! Thank you so much for the pattern and instructions!
Natalie
Just wanted to let you know that my son loves this shirt. I’ve made him several over the last few years and he just requested another out of some Mickey Mouse fabric he found when I drug him into Joann’s against his will this weekend. (He’s 21 and still loves all things Mickey!) Thanks so much for sharing this awesome pattern I’ve literally gotten years of use out of!
Carol Scrimshaw
I have made several of these shirts as they are a perfect fit for my husband. I recently saw your video and it looks way better burrito style and should give a neater finish. Thank you x
Toony L.
I followed your instructions carefully. The shirt came out perfect! I learned so much from making this, including my first time sewing buttonholes on my machine! It is a great project for beginners. You’re so kind for taking the time to make this tutorial video. Thank you!
Danielle
I just made this lovely top for my boyfriend’s birthday and he absolutely loved it!!!
Thank you so much for such and easy to follow pattern and video!!
Skylar
Thank you so much for the pattern and tutorial! I also love the photo of you both by the pool! So sweet 🥰
Sharon
Great pattern and video tutorial, thanks 😊
Jenny
Melly, I’ve just made the men’s shirt. Your instructions were so clear, it was a pleasure to make. I plan to make many more.
Michelle Hill
I just used your pattern as the basis for a guaybera shirt for my husband. I just added pockets, pintucks, and embroidery and it turned out great. Thank you!
Robin
Looks great! I love the one for you. I would use a natural fabric for environmental reasons.Thank you!
Rose
Beautiful job and loved the fabric.