
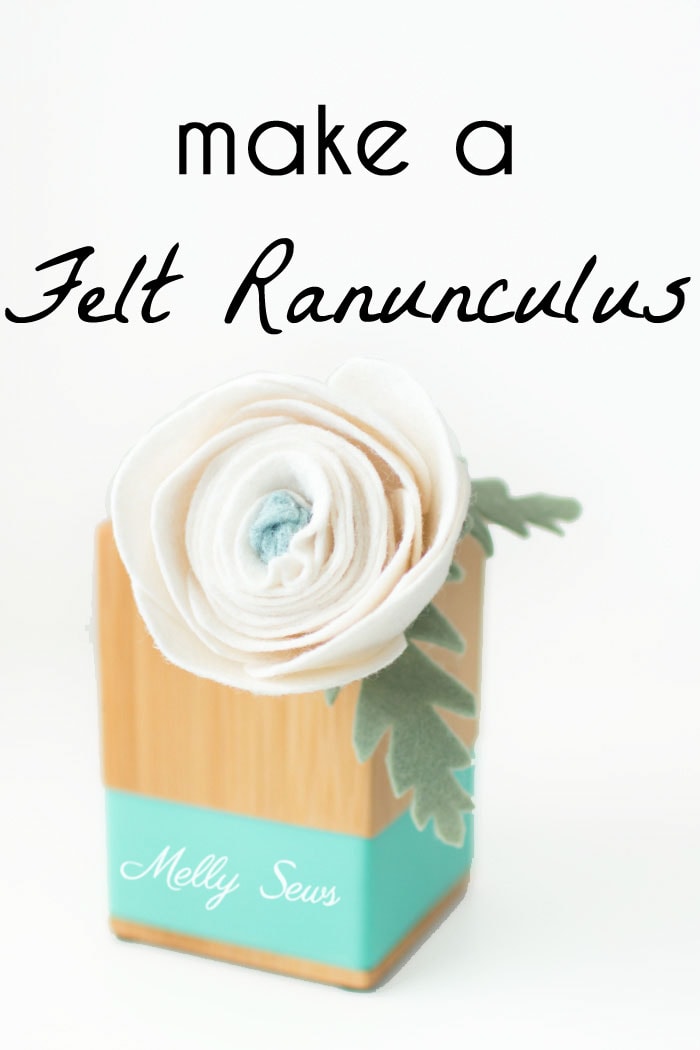
Hey y’all, today I’m sharing what is probably my favorite felt flower tutorial. I’m going to show you how I make a felt ranunculus. These are so fun because they are actually pretty fast to make for the payoff you get; I want to make an entire bouquet of just these.
And in case you’d rather download the petal shapes instead of eyeballing them from my images, I have the entire file for all these flowers available for purchase here.
Here’s how I did the ranunculus.
You’ll need:
- 1 sheet of 9×12 felt in the color you want your ranunculus, and some scraps of green. For this one I used Fresh Linen, Mediterranean Mist and Loden from this shop. I prefer the wool blend felt (which is hard to find in stores) because it cuts cleaner and is softer and easier to shape.
- Floral wire. I prefer the cloth covered kind for these
- Hot glue gun. Do your fingers a favor and get the low temp kind.
Note – if you wanted to, you could hand sew these. That’s the method I would recommend if you want to make them to embellish clothing. And then either use fabric that won’t fray, like fleece or knit, or add fray check to the edges after you make the flower if you use other fabric.
One more note – flowers in nature aren’t perfect. Allow yourself some imperfections while making these, and you’ll get a more realistic looking flower. Remember to have fun!
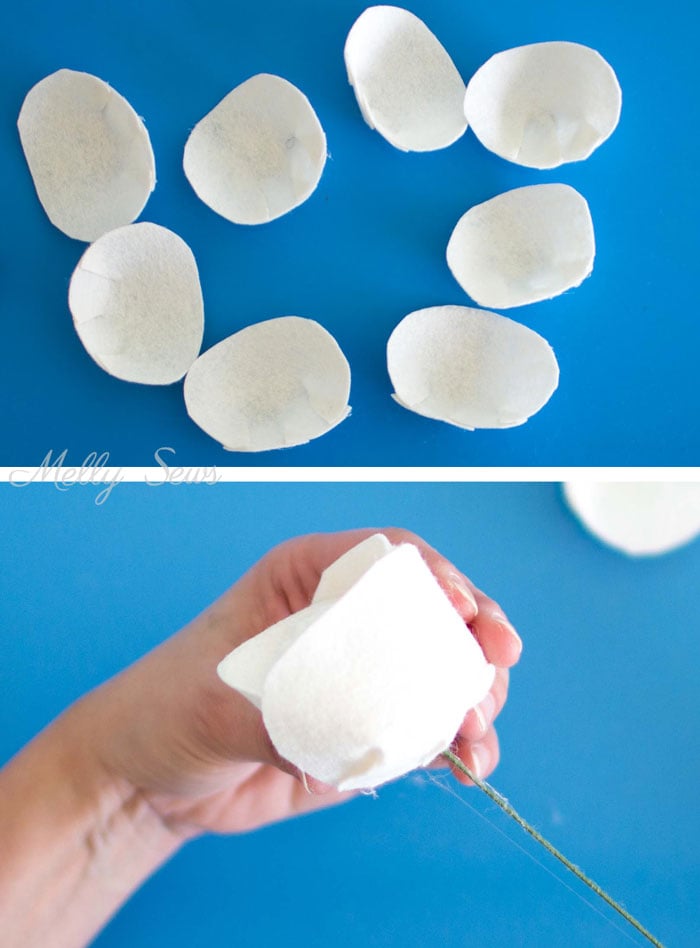
You’ll need to cut a circle about 4 1/2 inches in diameter and then cut it in a spiral.Cut this in a corner, then squeeze out as many oval petals as you can out of the rest of the felt; make sure you can get at least 6. These should be about 2 1/2 inches by 2 inches. You’ll also need a calyx; I start with a 5 point star and then cut a circle kind of shape around it. Finally, you’ll need a strip about 3 inches long by 1/2 inch wide for the center and couple leaves. I kind of sketch a line and the lines angled out from it, almost like a Christmas tree shape, the round around that frame. It helps to sketch these on paper to make templates.
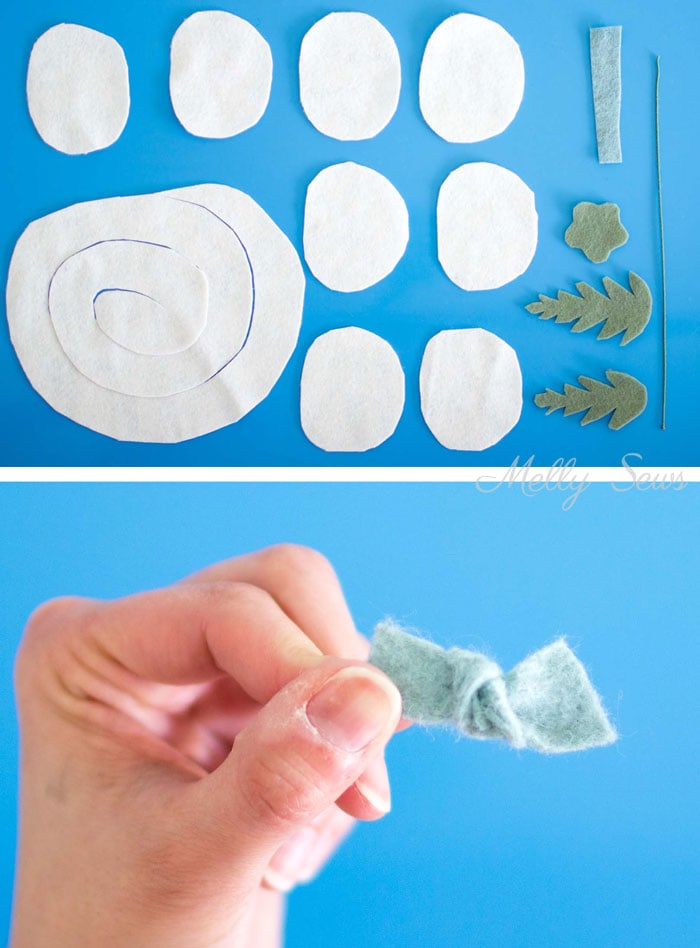
Tie a knot in the center of the strip. You don’t want this to be too tight.
Glue the flat ends of the strip together around the floral stem.
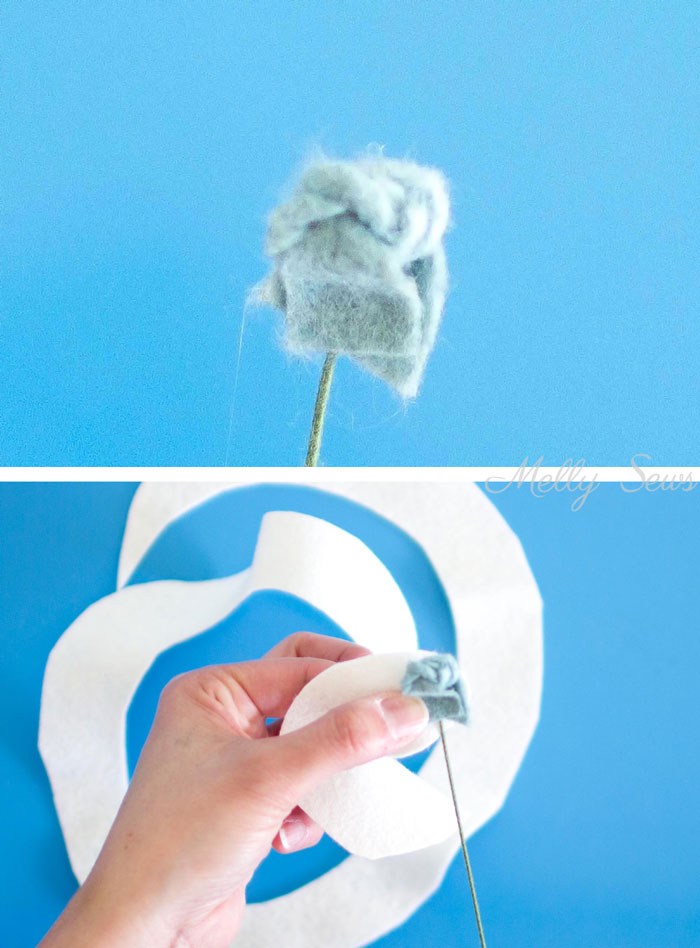
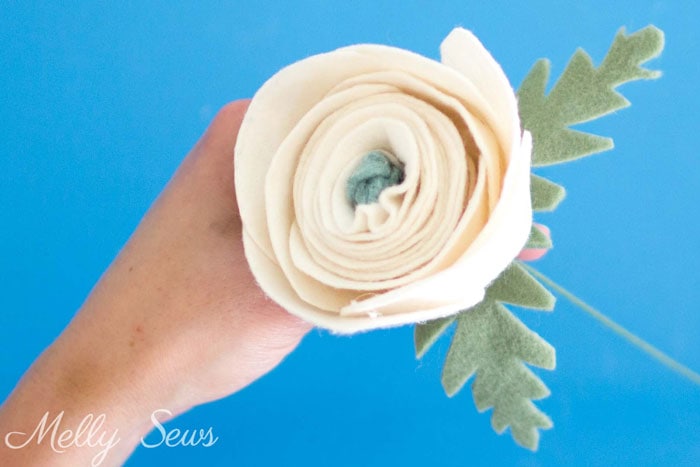
Next, start with the spiral, holding the innermost oval. Wrap this around your floral wire and knot, adding hot glue. Then continue to wrap your spiral around the wire, adding glue to the inner spiral edge a couple inches at a time, then rolling it onto the flower. How loosely or tightly you roll this part will partially determine the final size of this flower.
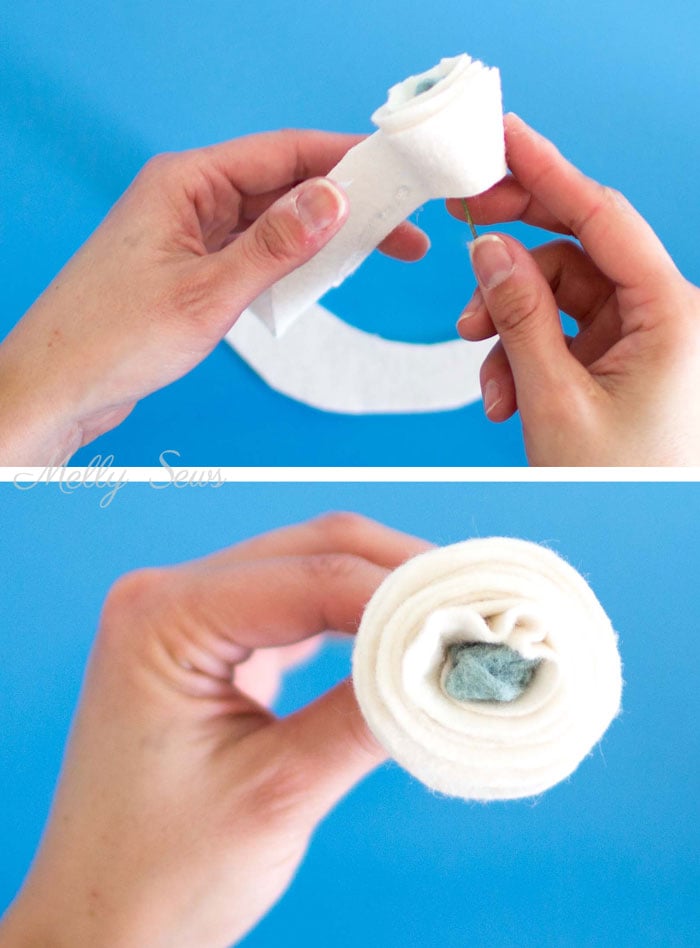
When you’re done, the ranunculus will look about like the image above.
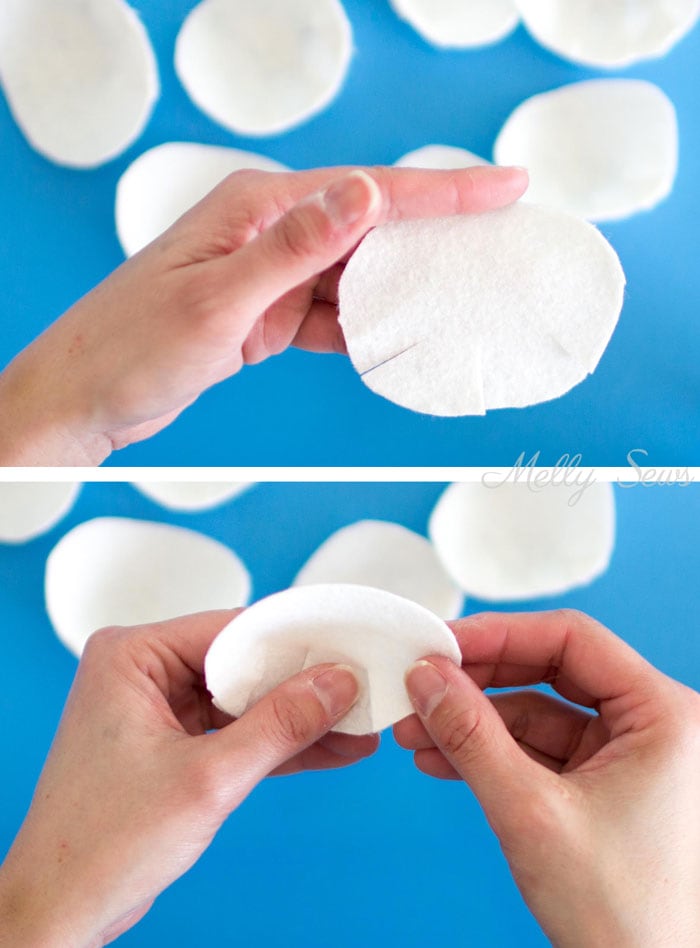
On the petals, cut three slits. If you imagine the petal as a clock, the slits are cut at about 6:00, 4:30 and 7:30.
Overlap the edges of each slit and add a dot of glue so that the petals cup.
Glue on the first layer of 3 cupped petals.
You may want to trim down the edges of the petals on this row so there’s a gradual transition from the center flower toward the petals.
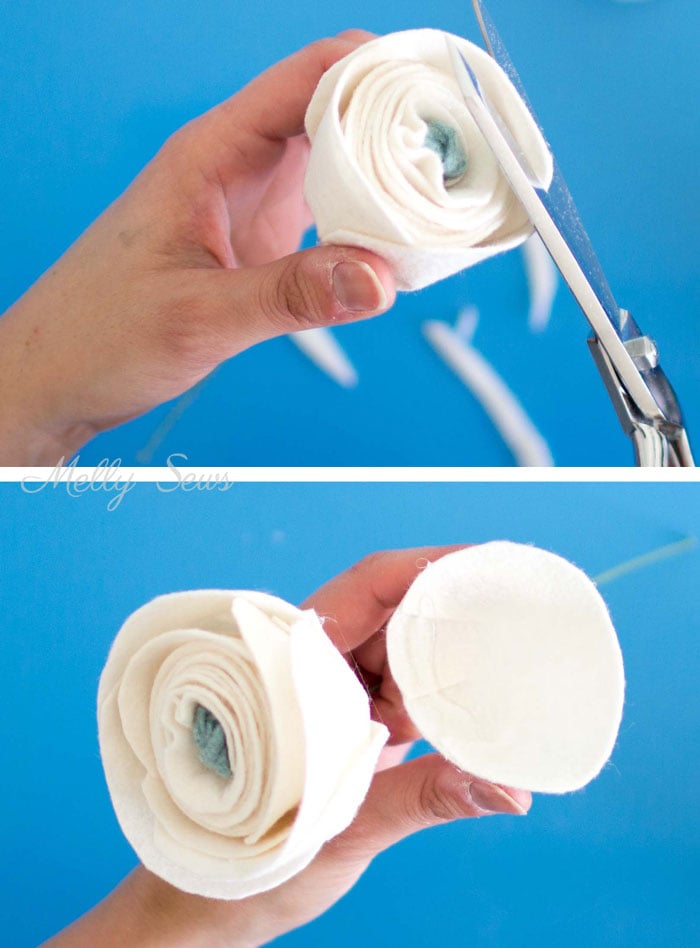
Continue glueing the cupped petals to the flower, rotating it and overlapping the edges of each petal slightly with the next petal.
When you’re done it will look like the picture below.
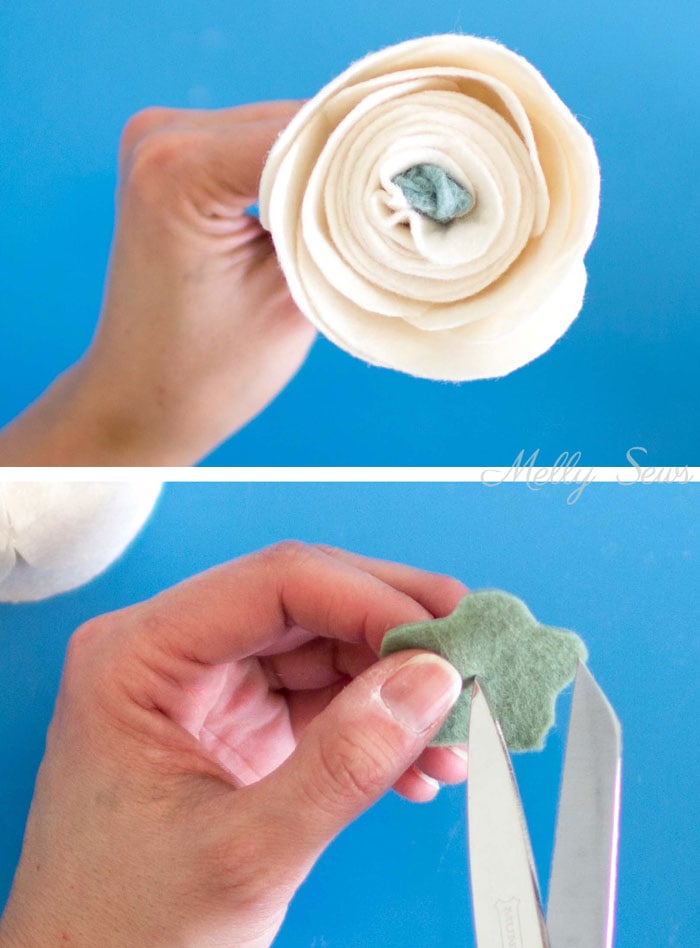
Poke a hole in the calyx and slip it onto the wire stem, then glue.
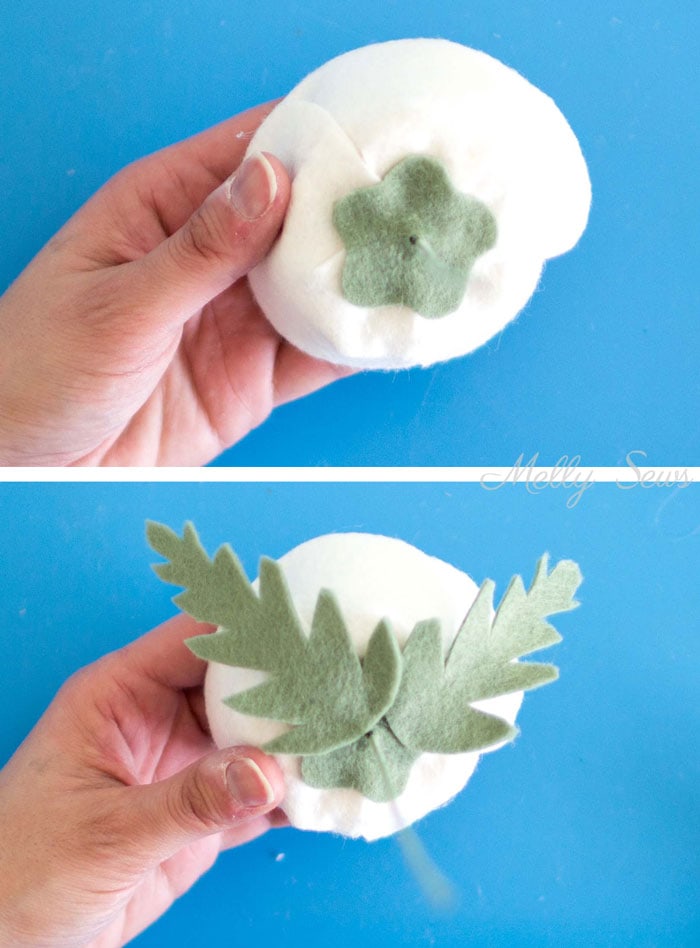
Glue the leaves to either the stem or the flower.
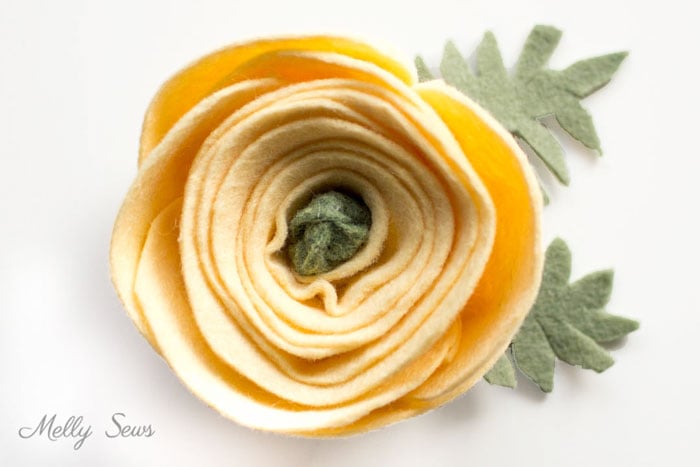
The ranunculus below is made with Custard for the petals, Enchanted Forest for the center and Loden for the leaves.
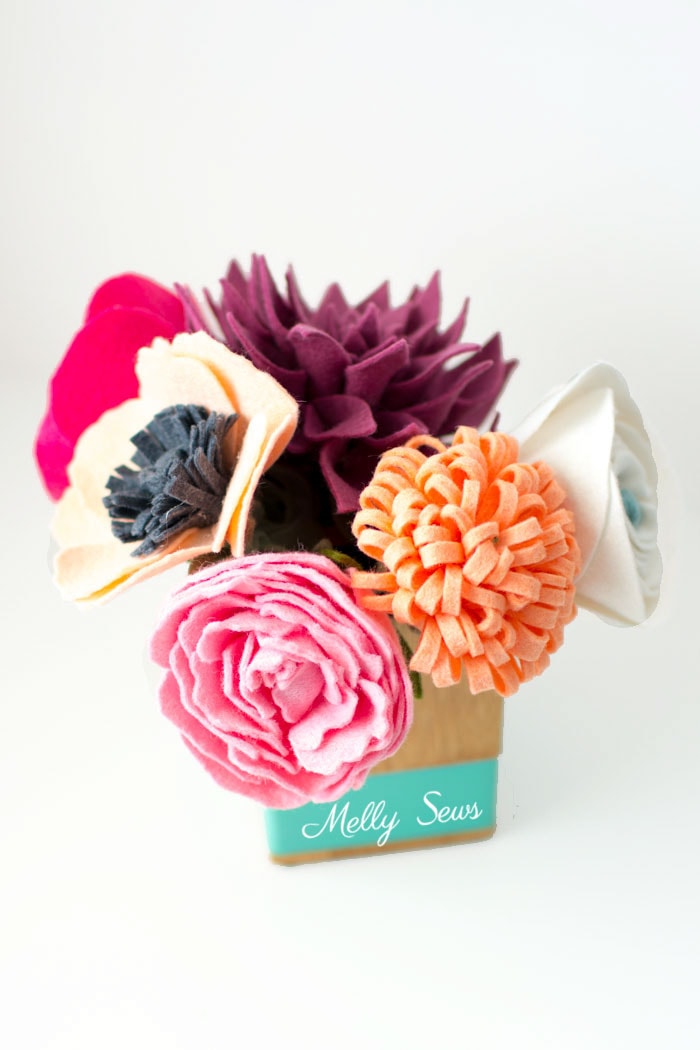
Look out for more flower tutorials to come – I made all of the ones in the vase below.
Di Ross
Love these. Thank you.
Anne
I’m loving your flower kick! Can’t wait to see all of them! I’ve got a Craft Gossip post scheduled for tomorrow morning that features your tutorial: http://sewing.craftgossip.com/?p=91642 –Anne
Liz
I love all of these flowers and look forward to having your templates when you release them..Very pretty. Very good work.
Victoria
Love these! Thanks for the free instructions. Ive made blue felt with green velvet ribbon centres for a Christmas wreath.
Sarah
Beautiful! Thank you for sharing x