
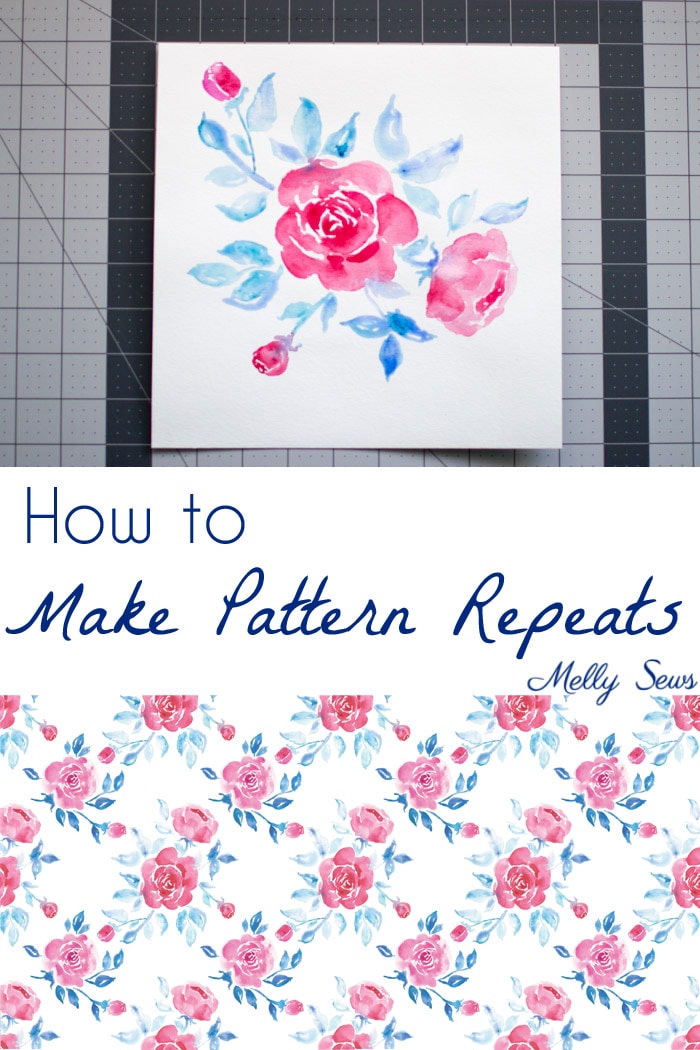
Hey y’all – we’re wrapping up Prints Month today and I wanted to leave you with the fleshed out tutorial of something I did in my Instagram Stories a while back that got a lot of interest – how to make fabric prints and how to make a print repeat, aka pattern repeat.
It’s pretty easy to draw one thing and just make it a block that repeats across fabric, but what if you want to get just a little fancier and have less space between your elements or do something like an all over floral? Many people think that you have to have expensive software like Adobe Illustrator (which I do use) but the truth is there’s a lower tech way, and all you need is access to a scanner (if your printer doesn’t scan, most copy machines at public libraries and other places do), sewing tools that you might already have (a rotary cutter and mat) and photo editing software (the free Snapseed app you can get on your smartphone works).
To start, draw or paint something on a piece of paper that has square (as in 90 degree) corners. Make sure this paper is also small enough to fit in your scanner – typically no more than 8.5 inches wide. Paint or draw something, making sure the image does not touch the edges of your paper.
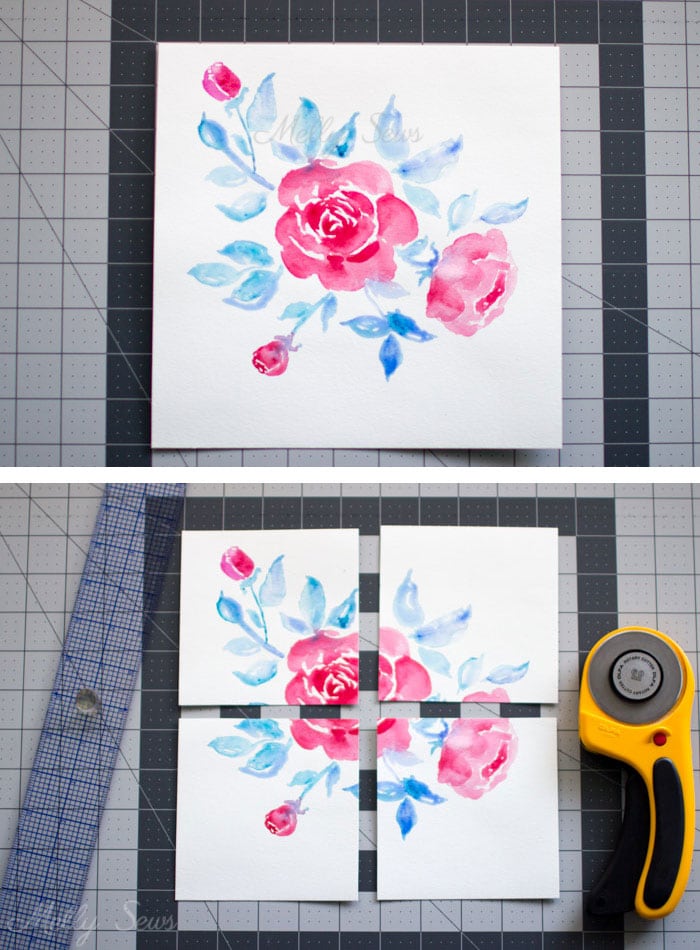
Using your rotary cutter and being very precise, cut your image into quarters, cutting right through the center of the image.
Next, swap your quarters as shown below; this means that the center corners of the image now become the outer corners of your paper.
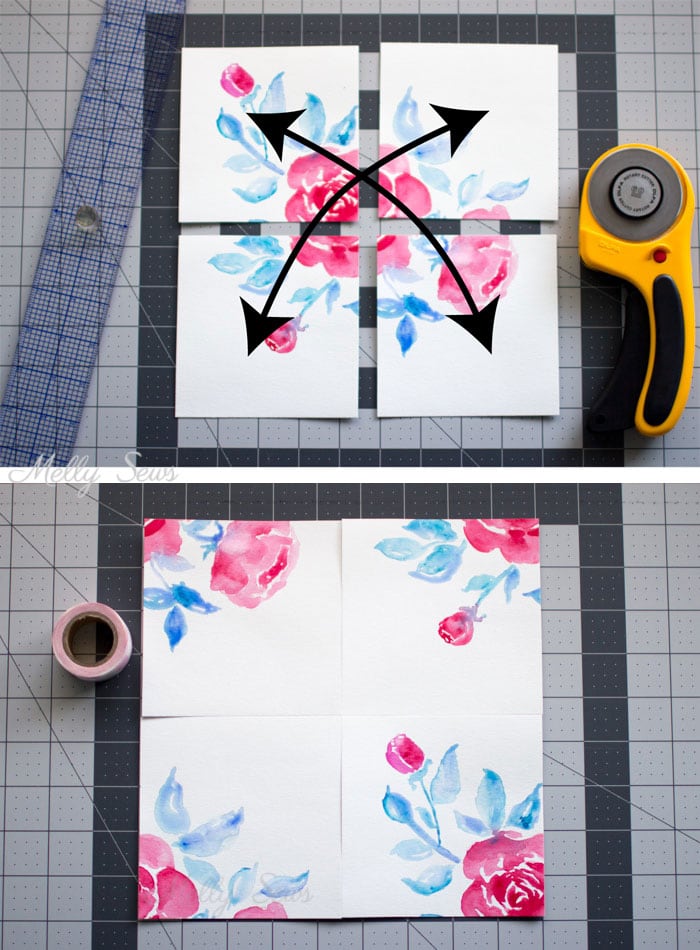
Tape this together on the back side, and then use the white space in the center to add to your design, again being careful not to paint or draw to the edges of the paper.
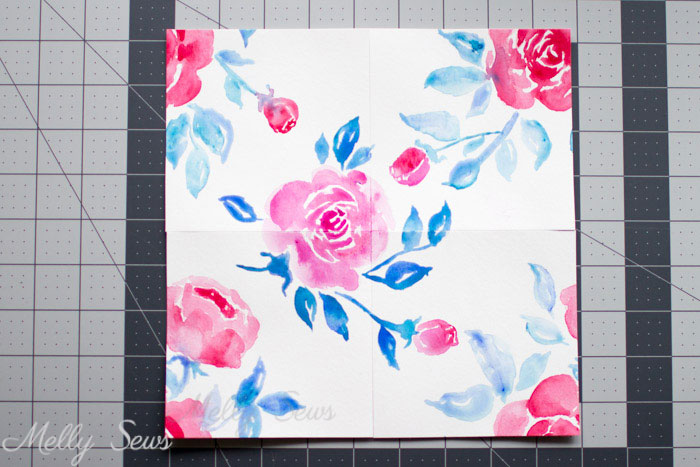
I stopped here, but if you really wanted to fill the white space in the design, the next step would be to carefully cut your tape along the vertical line, and then swap the right and left halves of your paper so that you again have white space in the center to draw on. Then you’d cut the horizontal tape, swap the top and bottom halves so the last bit of white meets up in the center, and draw or paint on that.
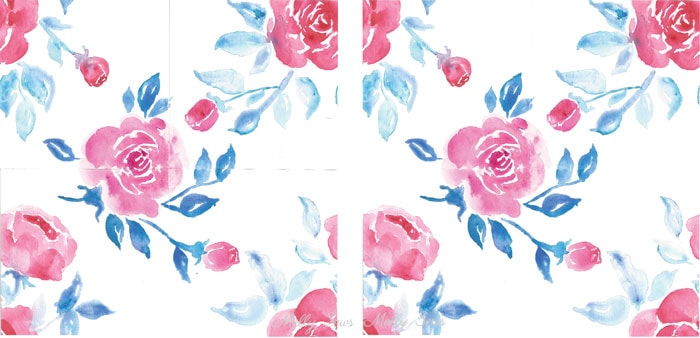
Next, scan your taped together block. You can see my scan on the left below. Be careful to line your paper up precisely to the edges of the scanner so that you don’t end up with a crooked design file.
Use photo editing software that has a healing brush tool (like Snapseed, which is a free phone app, or PhotoShop, which is paid desktop software) to smooth out any lines where you taped the paper – you can see my results below right. Then carefully crop your image so that your design goes right to the edge of the file, without any white beyond – if your crop isn’t right, there will be jogs or white lines when you put the blocks together digitally.
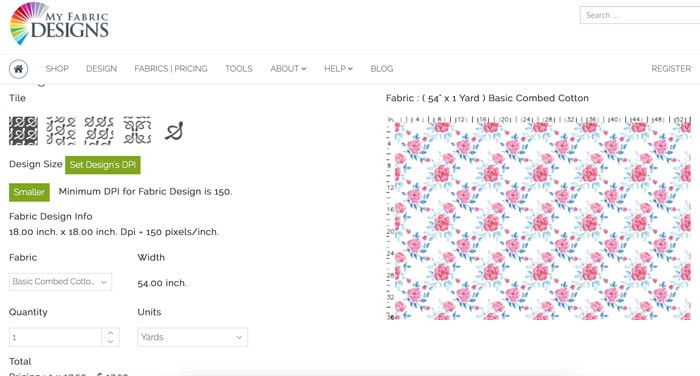
Finally, upload your image to a printing company to create your fabric! I like My Fabric Designs, but I have also used Spoonflower in the past. Use their tools to preview and zoom in on your design to check it before printing. And then sew up something fabulous with your original design!
Sharron
Wow. This is awesome! Thanks!
Stephany
This is a great tutorial!! Thank you for taking the time to show us how to get it done….low tech style.
Maia
Hello, I am a graphic designer from Argentina and I realized that I would love to work making patterns. Thank you for sharing your knowledge. You are a genius, greetings and successes!
Rabeea
This was really helpful, thank u for sharing the technique
Shalini
Thank you for the video tutorial and this blog post. I’ve been searching for a way to design without tech, and this was very helpful.