
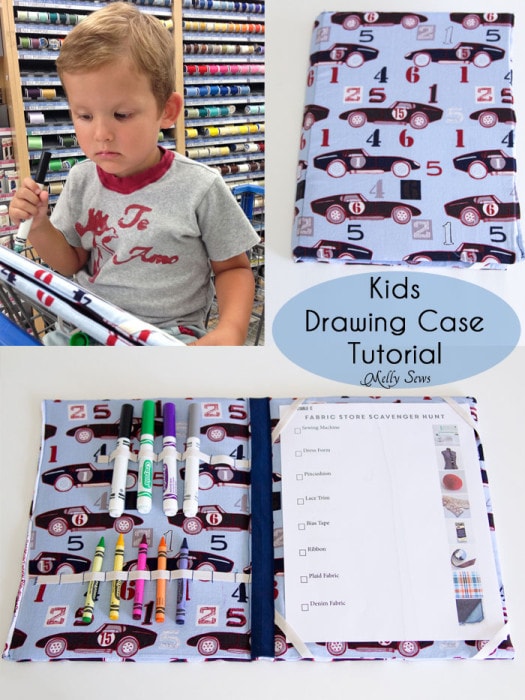
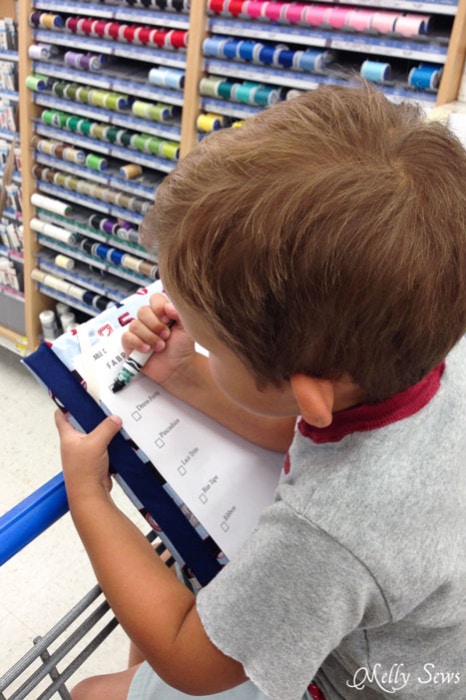
Hey y’all. I just realized I never really announced the theme for July – it’s Travel. So today I have a tutorial for this drawing case that can be handy in cars, on airplanes, or even on a trip to the fabric store. It’s made basically the same way as my iPad case, but without using leather. I love that you can switch out the pages – print new ones for each trip. It’s perfect for holding the scavenger hunt from the Make Believe: Activities to Encourage Creative Play eBook. It will even hold a coloring book.
So, let’s make one. Gather your supplies. You’ll need
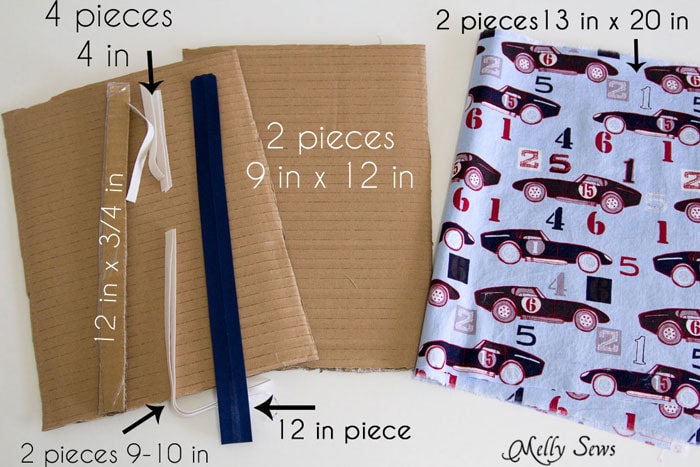
- 3 Pieces of Cardboard – 2 that are 9in x 12 in and 1 that is 12 in x 3/4 in
- 4 pieces of 4 in long 1/2 in wide elastic
- 2 pieces of 9-10 in 1/2 wide elastic
- 1 piece of 1/2 in wide double fold bias tape. *Note: if you want to make your own piece here, it does not need to be cut on the bias.
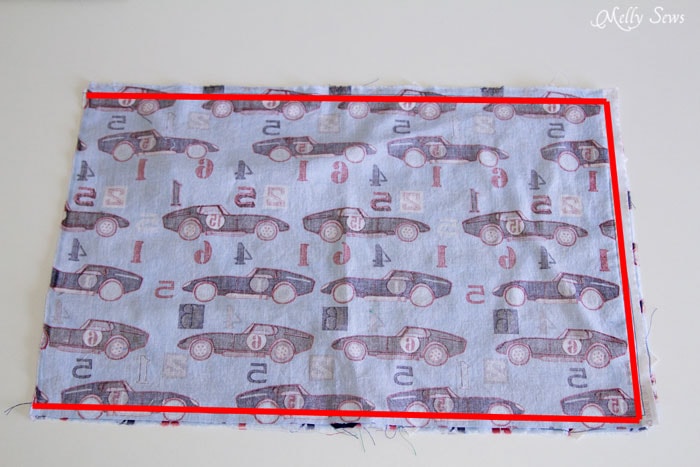
- 2 pieces of fabric that are 13 in tall by 20 in long
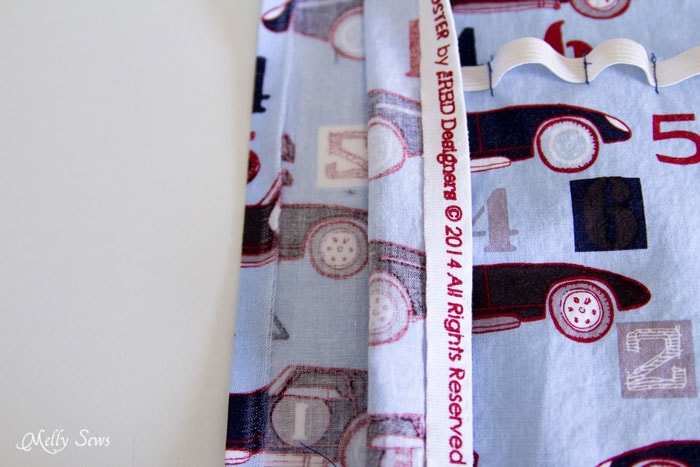
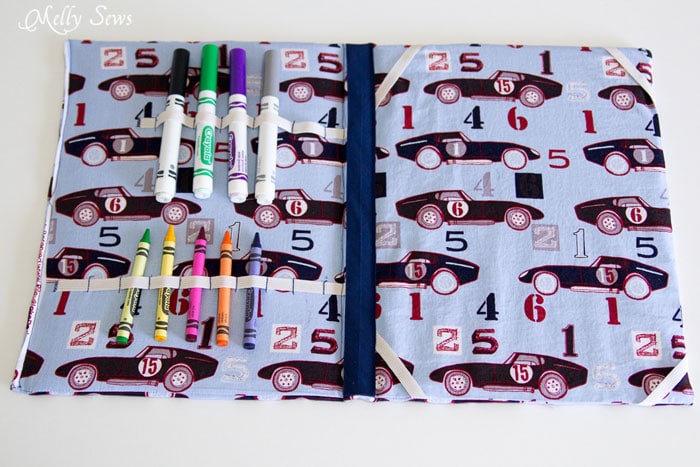
Fold one of your fabric pieces in half, matching the short edge. Mark the center (I just iron the fabric to do this). Pin your 4 in elastic pieces over each corner of the right side as shown. Pin the longer elastic pieces on the left side as shown.
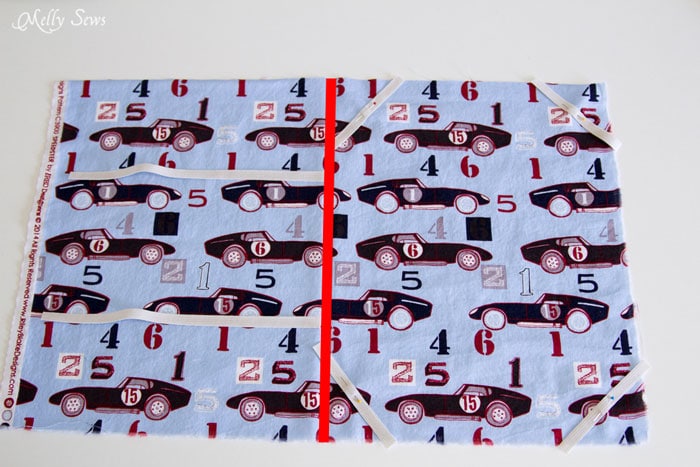
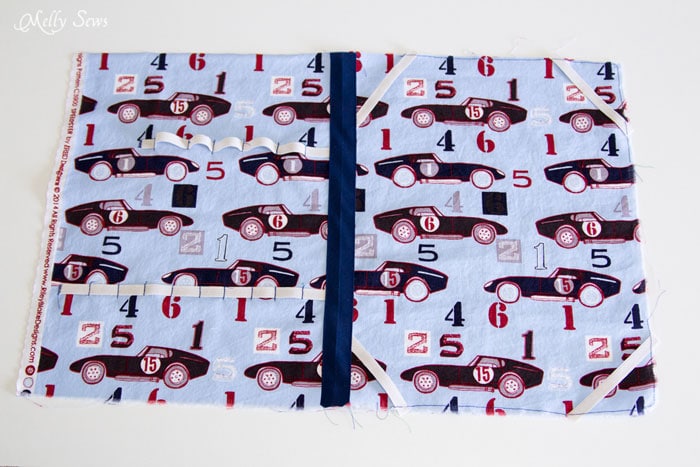
Unfold the bias tape once, so it is flat with two folded edges. Press. Pin over the center fold. Stitch down each long edge of the bias tape. Baste the other edges of the elastic in place. On the long elastic pieces, stitch across every 1/2 inch for crayons, leaving the elastic flat. For markers, bow the elastic up slightly and stitch across about every 3/4 inch. If your long elastic pieces don’t reach the edge of the fabric, use a narrow zig-zag and short stitch length to stitch over them.
Place the two fabric pieces right sides together and sew around 3 edges as shown, using a 1/2″ seam.
Turn the raw edge of the fabric 1/2″ to the wrong side and press, then turn the cover right side out.
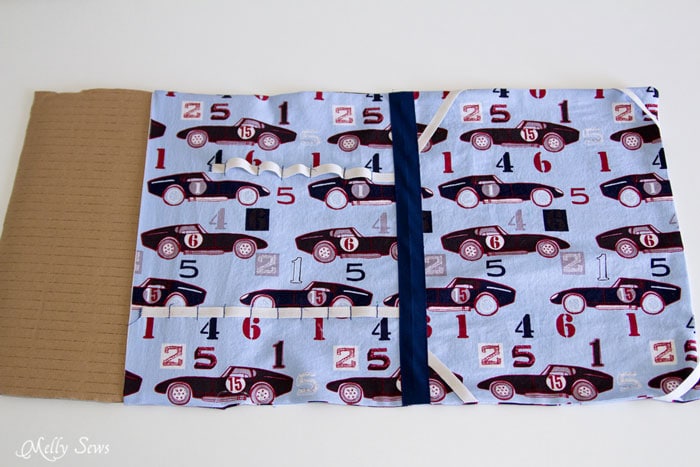
Slip the first piece of 9 x 12 cardboard and pus it all the way to the end of the cover. Put your zipper foot on your machine and sew with the needle right against the cardboard – this will be along the edge of the bias tape. Slide in the 3/4″ piece of cardboard until it hits the stitching, then stitch again, right along the other edge of the bias tape. Slide in the last piece of cardboard.
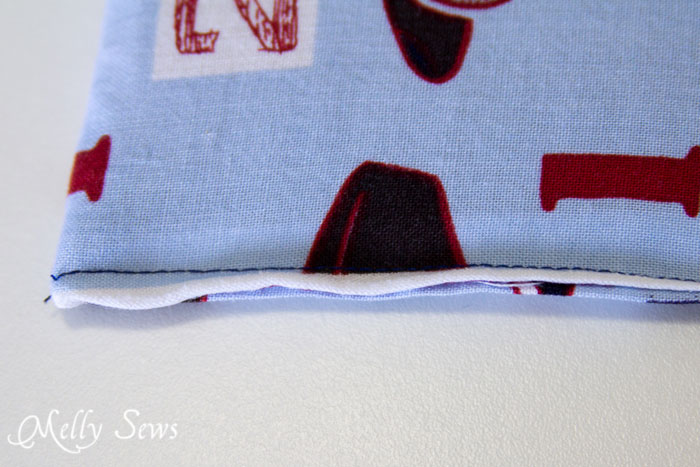
Topstitch the folded edges of the cover together, right against the cardboard.
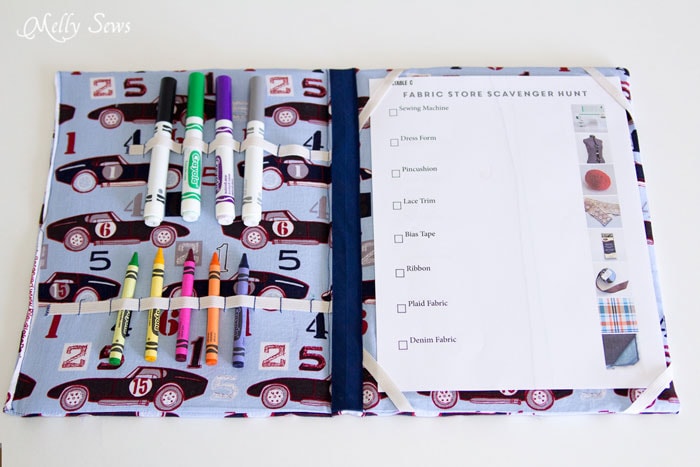
Load your case up with markers and crayons.
And add a coloring book, printed coloring pages, or a scavenger hunt.
Which is a great way to keep your kid busy while you’re fabric shopping.
Leave a Reply