
Sew Adjustable Straps – How to Install Lingerie Sliders
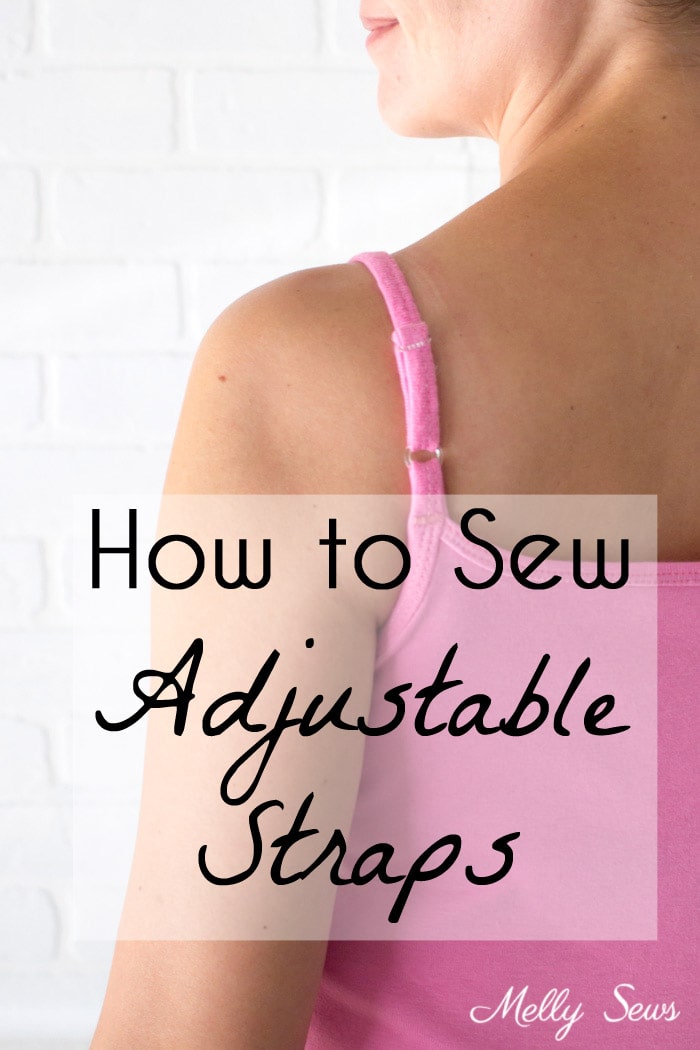
Hey y’all – how many of you go through sewing phases? I know I do, and right now I feel like I’m going through a lingerie and workout wear phase. And this particular make hits both! This is my newest pattern, the Kirei Camisole, and today I’m sharing this simple pattern hack to make the straps adjustable!
In the hot, hot summers here, I like to wear this type of tank over my sports bra for a workout. Truth be told I wish I could wear just my bra and shorts, but I’m not comfortable doing that outside my own home. So the Kirei Cami is perfect because it’s just enough fabric to make me comfortable and not a bit more.
However – sometimes knit fabric grows. So having adjustable straps to take up the slack is an extra little detail I like to add for myself.
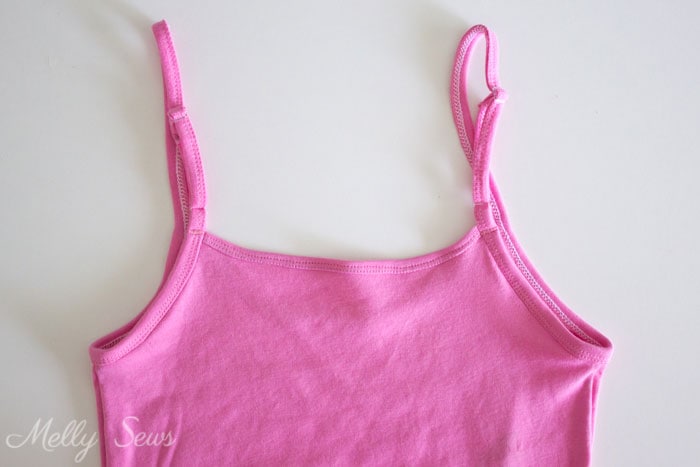
Want to add these type of straps to your Kirei Cami or even a dress version? First, you’ll need a pair of lingerie sliders and rings, like these (affiliate link). Since those are 3/8″ wide and the pattern calls for 1/2″ wide straps, you’ll need to modify the pattern slightly. Cut your straps at only 1 1/2″ wide and add 1 inch to the length called for on the pattern. And cut your interfacing strips to 3/8″ wide. Then follow the pattern instructions to press and prepare the straps, but DON’T sew them into a loop.
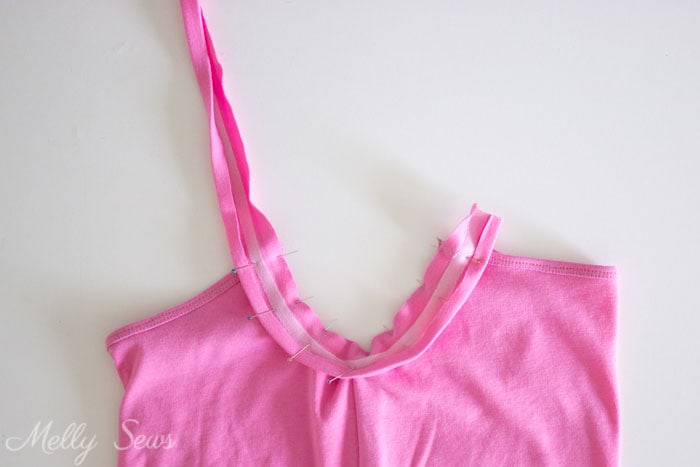
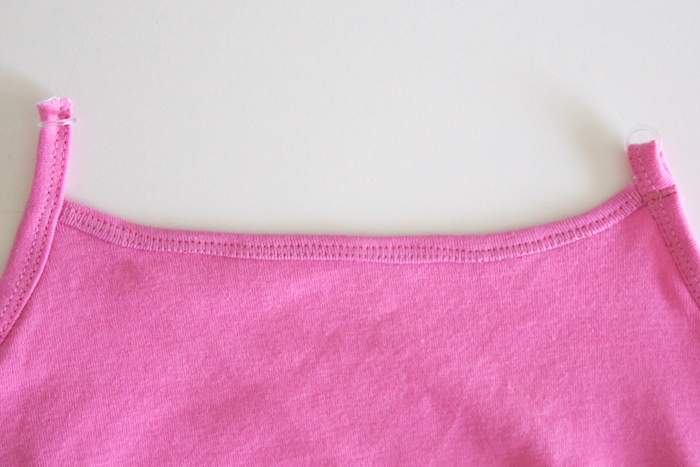
Pin the straps to the armscyes as shown below, with the long part of the strap matching the front of the cami, and the back extending 1 inch beyond the back edge of the tank. Sew the straps on in the crease line next to the raw edge, then fold straps closed and stitch them closed for the whole length.
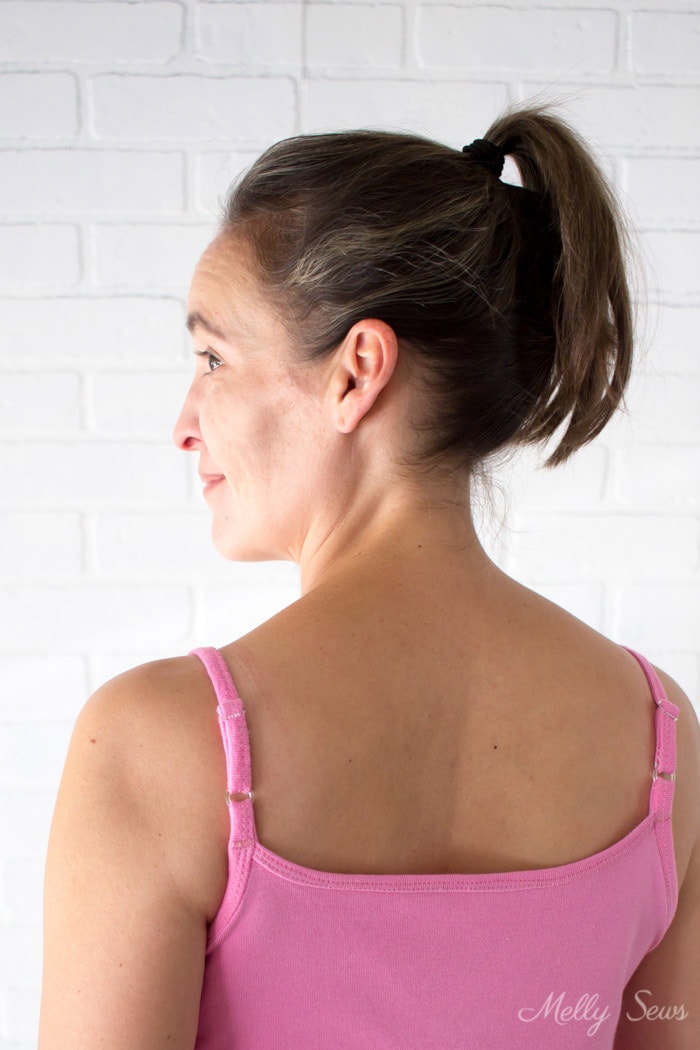
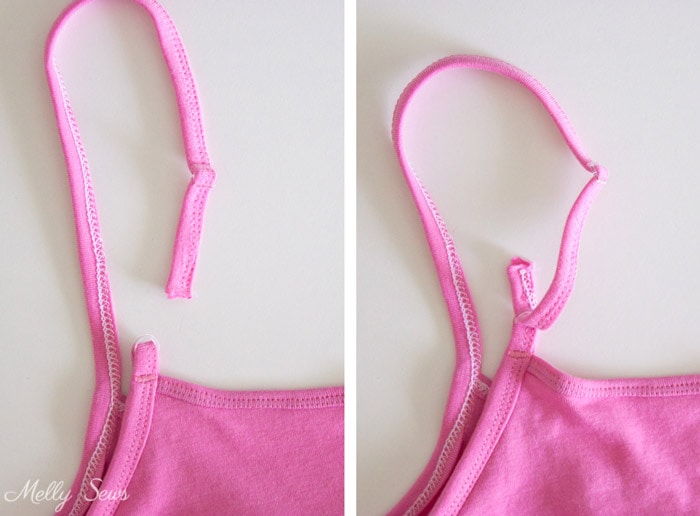
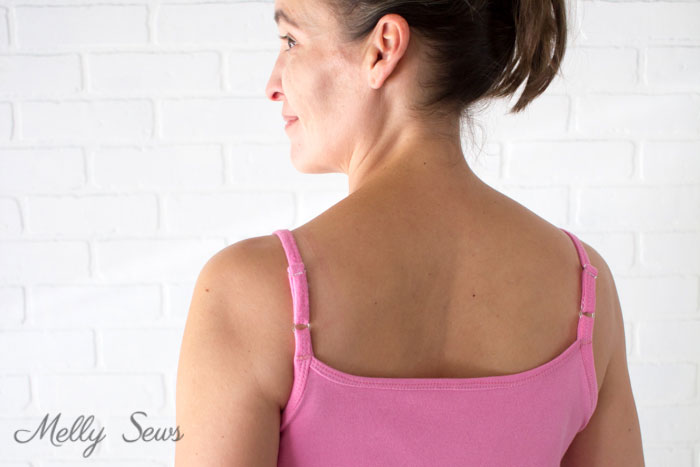
Slide the back strap stubs through the lingerie rings, then fold the straps down and secure with a medium width, short length zig-zag stitch as shown below right.
To see how to finish threading the straps, I made a video. I’ve got pictures below for those that prefer still shots, but this makes more sense watching on video.
So to recap what the video shows – first, thread the slider on the front strap so that the middle bar is on the wrong side of the strap. Then thread the front strap through the ring on the same side, going from right side to wrong side of the tank.
Thread a needle with a short amount of thread and take a stitch or two through the thinner corner of the strap end. Then loosen the strap on the slider.
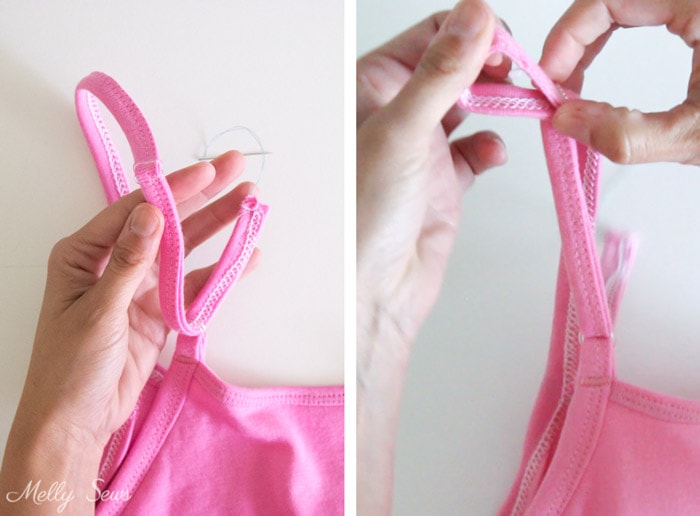
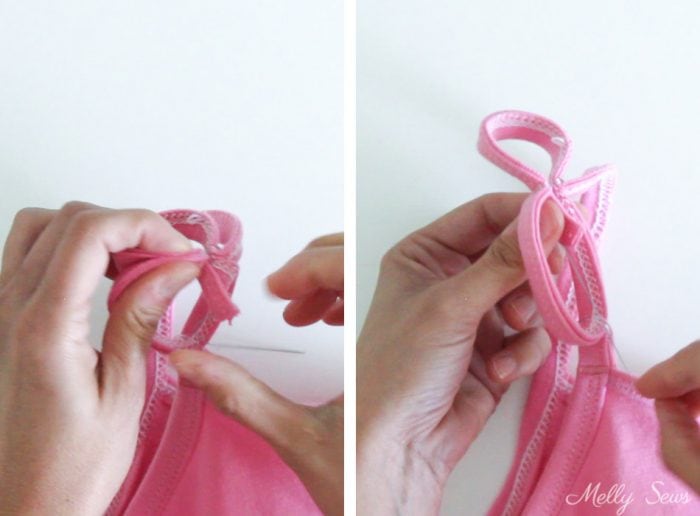
Use your needle to help pull the raw end of the strap up and down over the slider bar behind the rest of the strap. Then stitch that raw end to the strap – the part that my hand is pinching at right below. After it’s stitched, you can pull the slack out of the rest of the strap.
And that’s it! It’s more complicated to write about how to do this than to actually do it, so give it a try!
Joy Cranfield
Wonderful idea! You just answered my question about how to make adjustable straps for my great-granddaughter’s new romper style jump suit! I will make back adjustable straps! So glad I follow your blog & youTube & get your emails.
Lourdes
Learning how to sew. Thank you for the information. Kind of finding my way. Thank you for your knowledge.