
Learn how to sew zippers with this free sewing tutorial including video for visual learners
Hey y’all – today we’re going to talk zippers- specifically how to sew a zipper in a project. I know many new to sewing are scared of zippers and buttons, but there’s really nothing to be scared of, and being able to sew closures vastly expands the kinds of sewing projects you can tackle. From zipper pouches to floor pillows to dresses to zip flys, sew a zipper and you’re on your way. A zipper is often the first type of fastener sewing beginners attempt, with good reason! If you can sew a straight line, you’re already most of the way there to sewing zippers.
This video is the short version of a basic zipper application and shows how to sew a zipper centered on a seam. You can also watch on YouTube here. I’ll also break down these steps to sew a zipper in the pictures in this post, as well as instructions for a lapped zippers and invisible zippers.
Types of Zippers
Before we get too far into the process to sew a zipper, let’s talk a little about different kinds of zippers and zipper anatomy. Zippers fall into two general categories – separating and non-separating zippers. A separating zipper is the type you find on jackets, where the two halves come apart.
Below is an image showing the parts of a zipper. The one pictured is a separating zipper. A non-separating zipper doesn’t have the pin and box part at the bottom end of the zipper, instead it has a zipper stop so that the two sides of the zipper remain attached to each other.
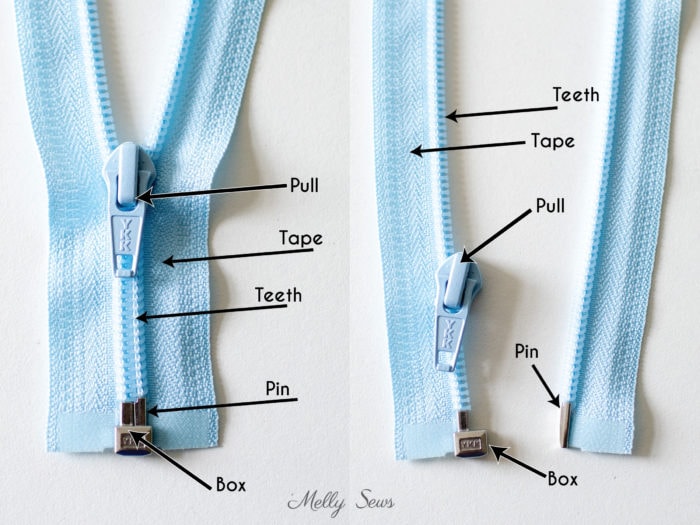
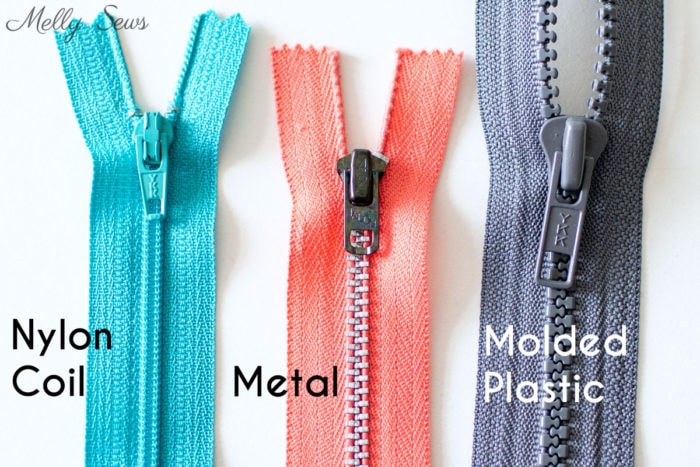
Non-separating zippers are the types seen in the fly of pants, in skirts, on purses, etc. In addition to these two general use categories, zippers can also be classified by the materials that make them. The pull at the top of the zipper is generally metal, but can also commonly be plastic. The teeth can be metal, nylon coil, and molded plastic. The zipper tape can be polyester (most common) or sometimes cotton.
Tools:
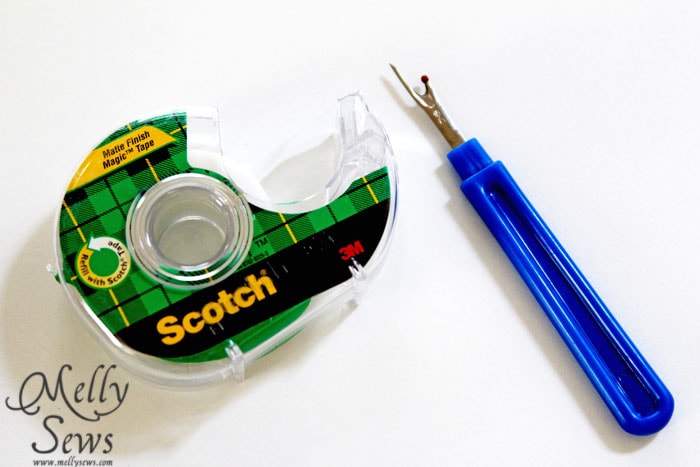
You probably assume that you’re going to need a sewing machine and thread to sew a zipper. But you may not expect these two tools I find indispensable for zipper installation. I always use my seam ripper and Scotch tape. Surprised? Keep reading.
You’ll also need a different presser foot for your machine. Most new machines come with a zipper foot – the one on the right in the picture below, and the regular foot is on the left. You’ll notice that instead of two “toes” the zipper foot only has one. This particular foot belongs to my vintage machine and it has a slider so that you can position the needle on either side of the foot. My newer machine has a snap on foot that you can snap to either side of the needle instead of the slider plate. Zipper feet are built this wayso that you can have the needle stitching right next to the zipper teeth without the presser foot getting in the way.

How to Sew an On Seam Zipper
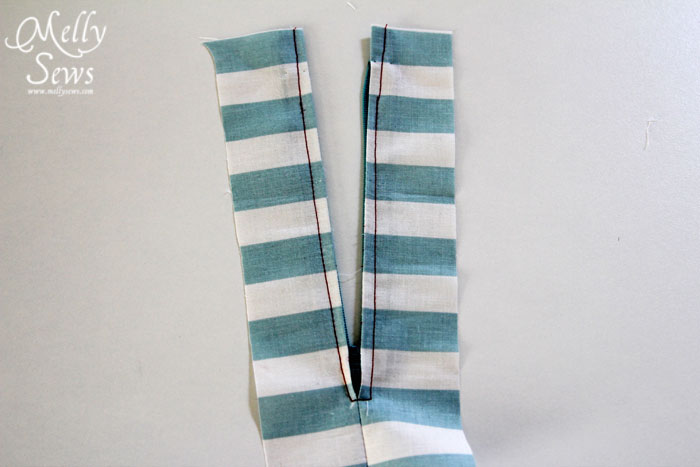
This is how I install my zippers 90% of the time. Start by placing your fabric right sides together. Next, sew the seam you’re going to put the zipper in with a basting stitch. Backstitch at the bottom of the zipper length, and then continue stitching the seam with a regular stitch length.
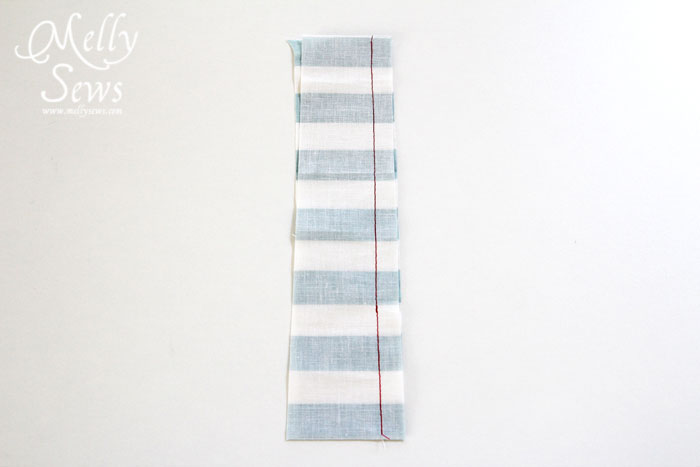
Press your seam open flat.
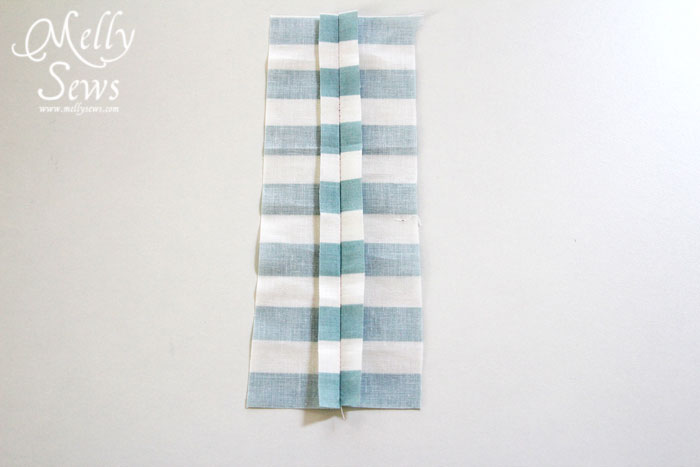
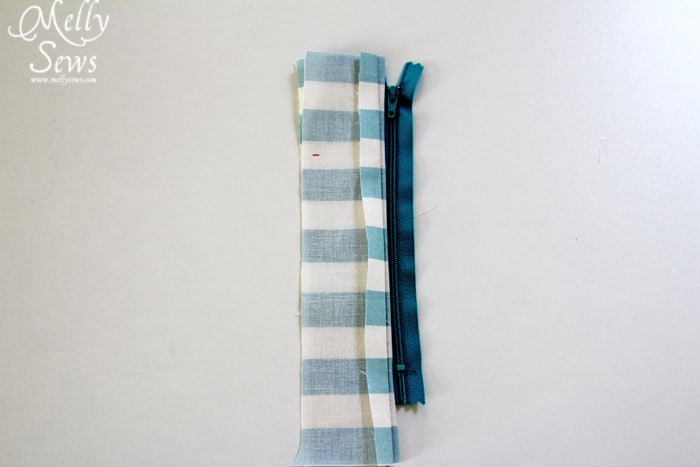
Lay the right side of the zipper face down over the seam, lining the teeth up with the seamline. The side of the zipper tape will be close the the raw edges of the seam allowance.
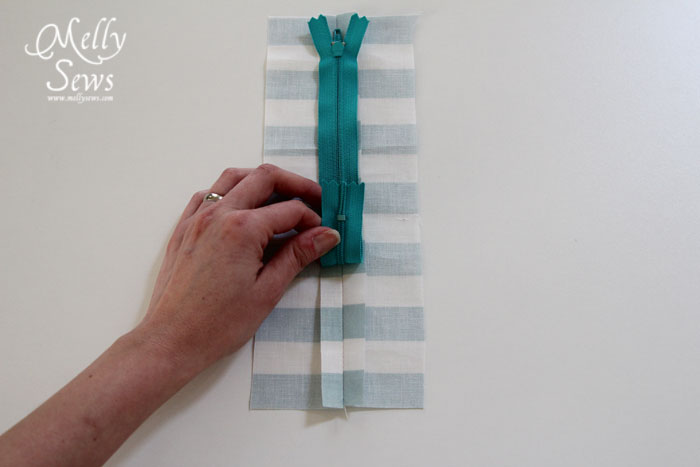
Use a few pieces of scotch tape (no more than 1 every 4 inches or so) to hold the zipper in place.
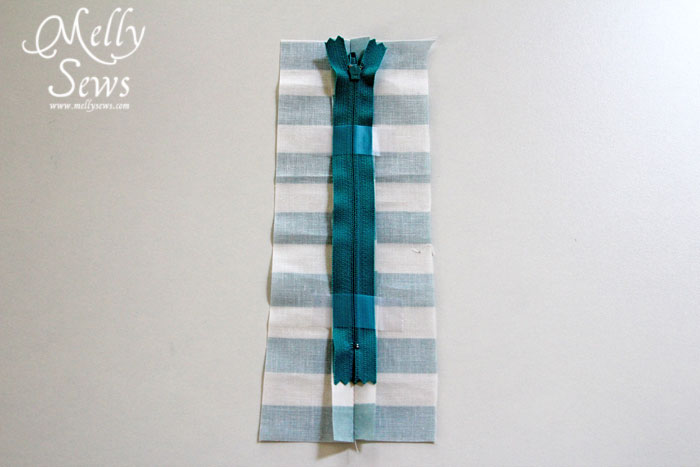
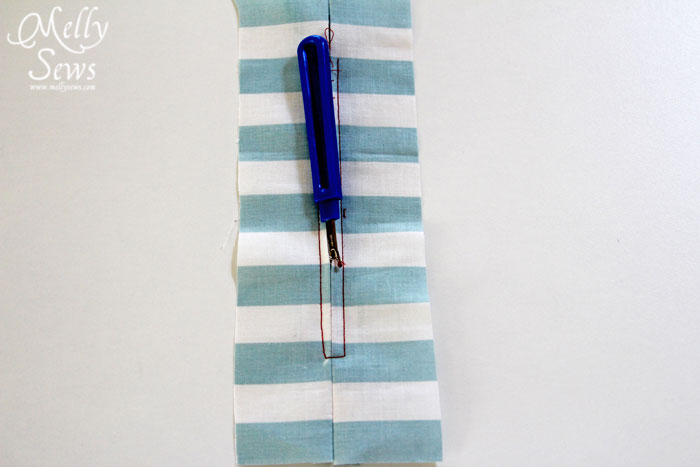
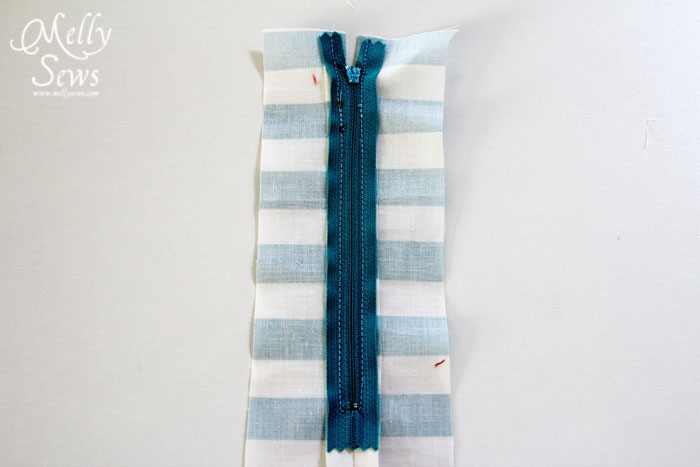
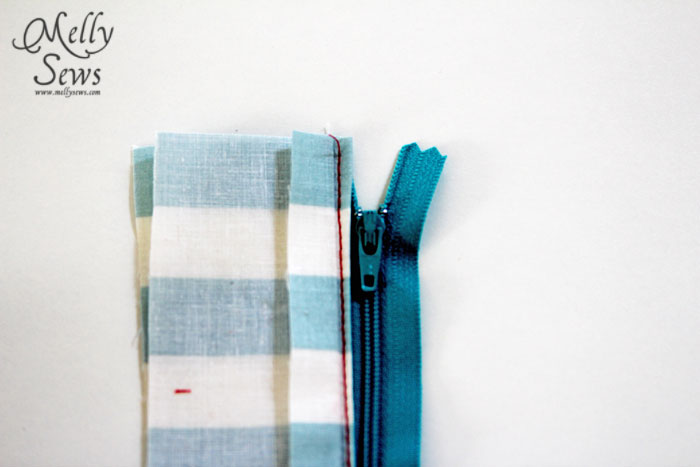
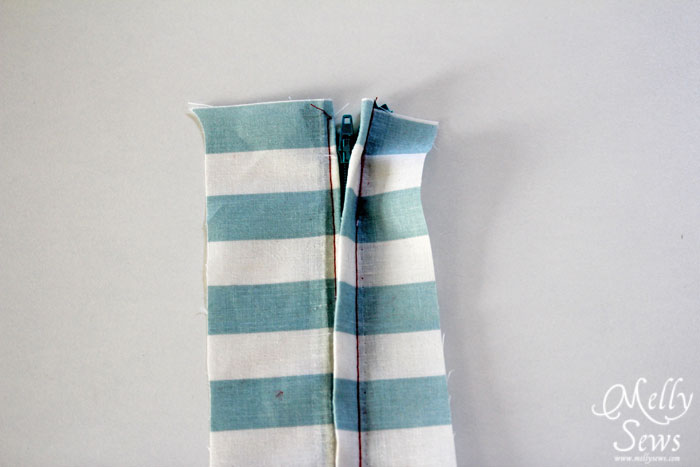
Carefully turn your fabric right side up and stitch 1/4″ away from the seam on the right side of the fabric. Stitch down one side, stop with the needle in, turn, stitch across the bottom of the zipper just above the zipper stop (you may want to mark this with a pin) and then stop and pivot again, then sew up the second side. Don’t worry about the top part of the zipper where the pull makes it hard to keep your stitching straight – we’ll get to that in a minute.
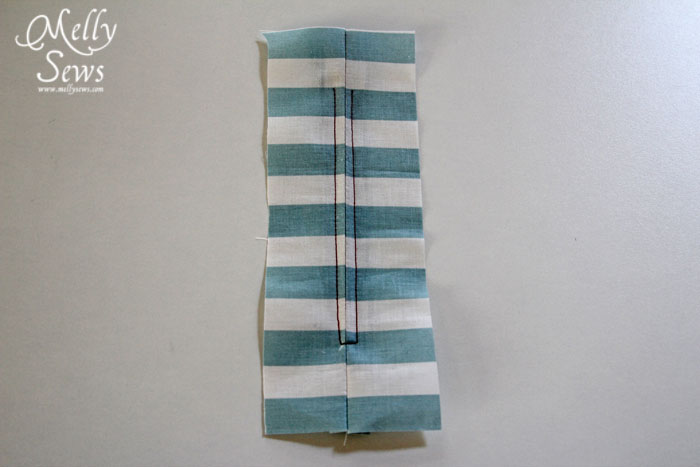
Remove your tape.
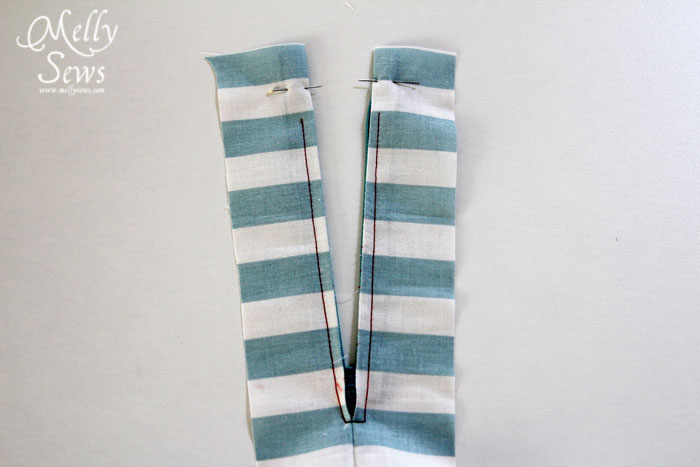
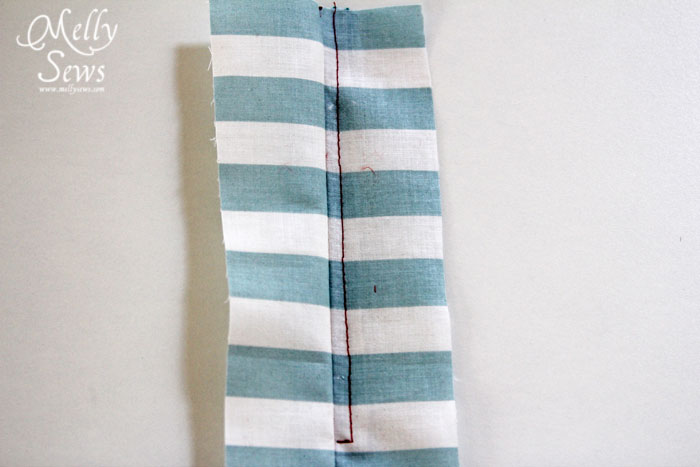
Use your seam ripper to remove the basting stitches from the zipper opening.
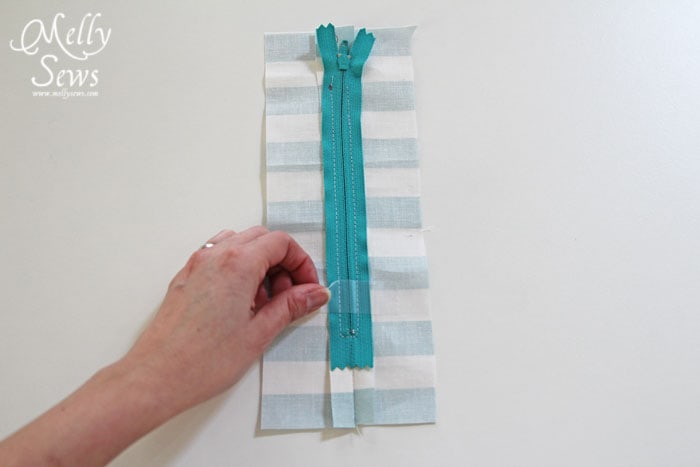
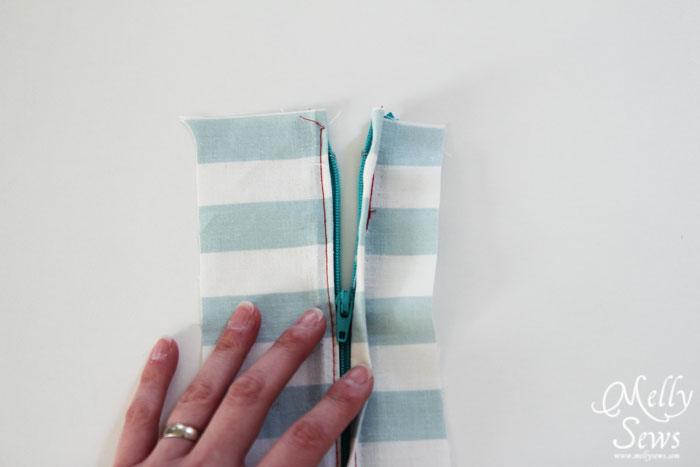
Unzip your zipper and pin the top part of the zipper tape to the fabric, keeping the seams folded under.
Stitch the top part of the zipper to the fabric close to the fold.
You’re done! That wasn’t so hard, was it? Front side:

Back side:
How to Sew a Lapped Zipper
If you want to get all fancy, then you can do a lapped application. Warning – this won’t work with less than a 5/8″ seam allowance.
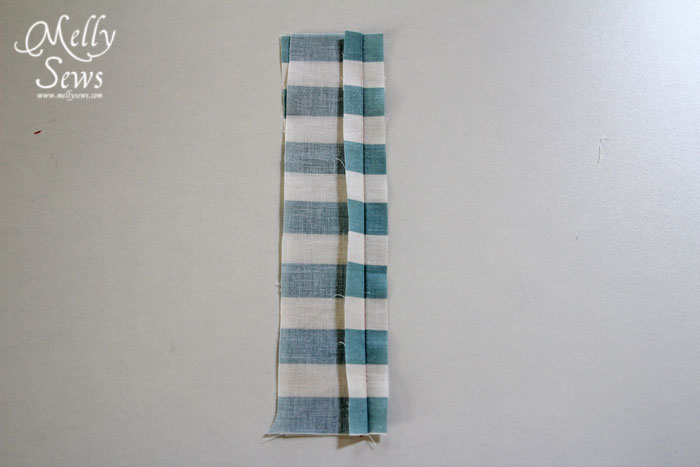
Sew your seam as you did for the on seam application, basting, backstitching, then regular stitch length below the zipper. Then press one seam allowance out and the other flat, as shown below.
Lay your zipper face down, with the teeth just to the right of the seam line. Stitch the zipper tape to the seam allowance that’s sticking out – on the right in the picture below. This is just a basting stitch and won’t be seen later, so it’s OK to curve your stitching around the zipper pull.
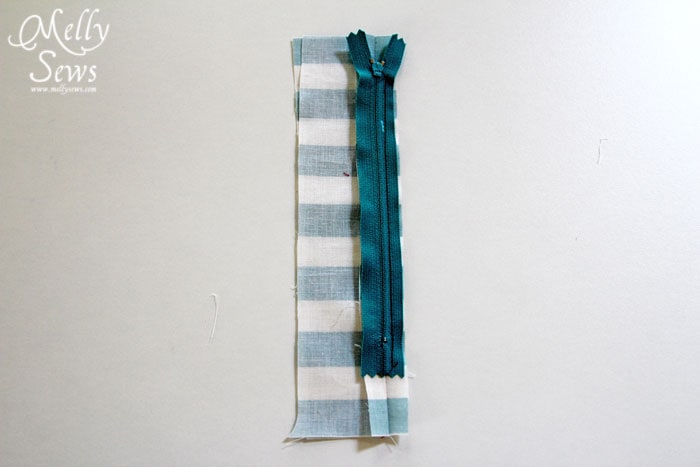
Tuck the zipper under, so it is face up and the seam allowance folds right next to the teeth. Stitch the seam allowance and zipper tape together right next to the teeth. If you need to, you can unzip the zipper to sew the part next to the pull, then stop with your needle down and zip up the zipper (you may have to raise the foot to do this) then continue stitching.
Press the seam flat. With right side up, sew down the unsewn edge of the zipper, securing it to the fabric and other seam allowance, then pivot and stitch to the seamline. Backstitch here.
Remove basting stitches and reveal your lapped zipper!
Invisible Zipper
Here’s a video of how to sew an invisible zipper.
If you prefer written instructions, I have an invisible zipper tutorial with pictures in this post.
tara
thanks for this! very clear and helpful.
maria
The first application seems the easiest. I will try that for the cushion covers. Thank you so much for sharing. Greetings from Victorville, CA.
Theresa
I have tried following other zipper tutorials, and ended up annoyed at my finished project. I have since avoided zippers. This tutorial looks much easier than some of the other ones I have seen. I am pinning for eternal reference, then I am going to find something to put a zipper on. Thank you!
Jenny
THANKS for the tutorial. I sew dolls, and have never done zippers. Last week i got a request for a doll with a zipper in the front. Her daughter had open heart surgery and she wanted a “mended heart” inside…anyways so now i get to attempt it 🙂
Laura
What a great idea to make your zipper stable on the backside with tape! I use tape on the front side, laying right down the middle of the basted seam, to use as a guide for my permanent stitching – for me, this trick helps me keep my zipper seam even straighter! 🙂
Erin
Thank you so much for including so many pictures! I just finished a lovely skirt for my 14-year old daughter which called for a lapped zipper and I had to modify it because I just couldn’t figure it out. I was so discouraged, but now I’m ready to head to my sewing room to try again.
vikki
You are an amazing genius!!!!! Thank you soo much!
sarah
Thank you soooo much Melly ! This tutorial is very clear and all the pictures sure help, especially when you are a beginner like me 😉
Best wishes from Britany, France.
Stephanie
So I have used this two times!! I have been sewing for years and this is the best and fastest way to sew a zip!
Sofie
Thanks for thuis tutoriol! Tried it this afternoon and I will be planning a lot of zippers to sew this way! Works terrific!
Sanna
Thanks you for this amazing tip. This saves my future zipper sewings.
Regards from Finland!
janelle
Thank you so much for this tutorial! I am new at sewing and successfully sewed a lapped zipper because of your clear directions. My boppy cover now looks store bought!
Linda
You have no idea how much you just helped me! I’ve been avoiding zippers out of pure fear!!!
Virginia
Thanks you very much you made it easy for me to understand how to add a zip sure I’ll do one tomorrow. God bless you.
Virginia
Thank you very much you made it quite easy for me to understand sewing in a zip. God bless you.
Sarah Williams
THANK YOU! I have been terrified of zippers for forever. With your help, I completed my first one tonight! Looking forward to mastering the skill.
Penny Howard
Thanks for a great easy to follow tutorial- great pictures. I have always wondered how to correctly manage to sew a zip in the “lapped” way & get neat,consistent results- well now I do!! To the sewing room!!
Olga Guerrero
I have been sewing for years. Certainly this is the fastest way to sew a zip
Thank you,
Olga Guerrero
Chile
Toni
so, when i used the great tape idea — i couldn’t get the tape off what is the secret there?
CrankyBeach
Scotch tape!! Miss Nettleship would be horrified! Back in 1969 8th grade girls’ home ec she made us pin them in, then baste them, THEN sew them. At home, my mother discovered double-sided zipper tape, which I used for a long time. I probably haven’t done a zipper in over 20 years, and now I need to do one. I was THIS CLOSE to going over to the fabric store to see if I could find some zipper tape, but I Googled first, and I am so glad I did!
(Yes, there really was a Miss Nettleship. I am not making that up.)
Debbie
Thank you! I am new to selling and this is the first tutorial that I was able to follow. I plan to bookmark this website for future reference. As for the type of tape, (someone mentioned having difficulty getting the tape off), I used masking tape, basically because it was the only tape I had on hand. It was very easy to take off and left no sticky residue. Hope that helps!
Kalyla
Wow, this looks like it would work “sew” much better than the method I’m used to! I’ll have to try that next time. I have sewn “sew” many zippers (am I overdoing that pun?) but they almost never turn out perfect; especially the lapped zippers. I actually think invisible zippers are the easiest.
Kristen Howard
2 things that I loved about your tutorial. 1) the use of tape. I have usually basted the zipper in place. Tape would be quicker. 2) leaving out the top part near the pull and coming back to it. I will be using those ideas very soon. Thanks!
Al
Brilliant advice – thanks so much.
Am about to sew a whole bunch of cushion =covers for a friend and will definitely give this method a bash as I generally suck at doing zips.