
Learn to sew fabric pumpkins for decoration with this step-by-step tutorial and video
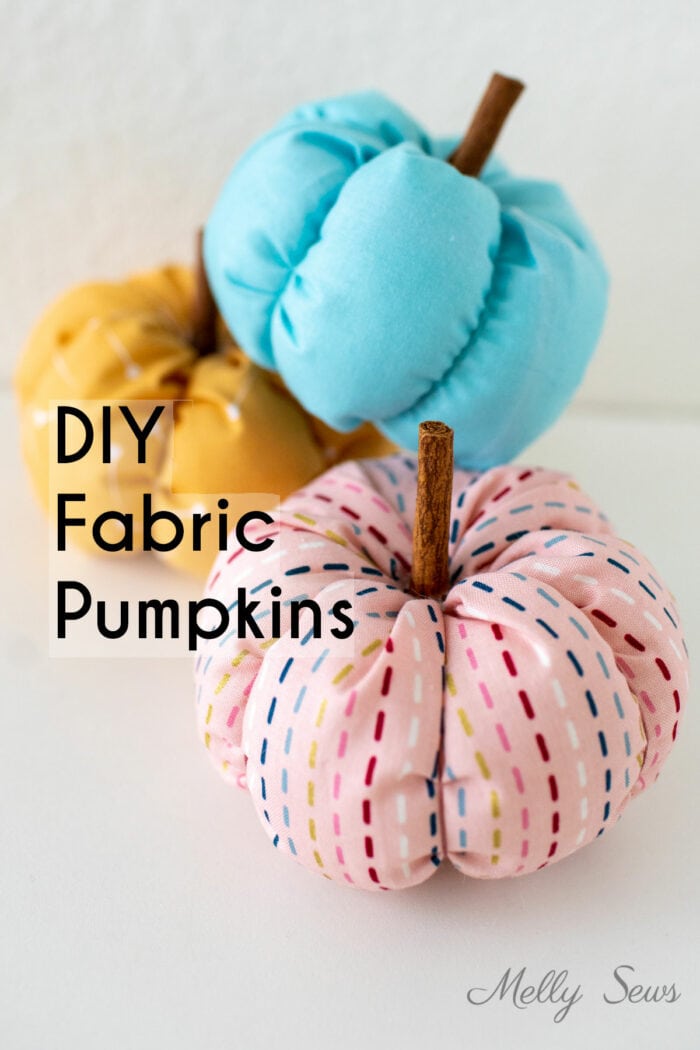
Hey y’all, today I’m sharing a tutorial for a fabric pumpkin. These fabric pumpkins are cute touch for fall decor, from Halloween to Thanksgiving. And if you’ve seen how I decorate for Christmas, it shouldn’t surprise you that I chose non traditional colors for my pumpkins to better match my normal home decor. But the great news is that you can make these in any colors you want. So if you enjoy traditional fall colors in your home, go for it!
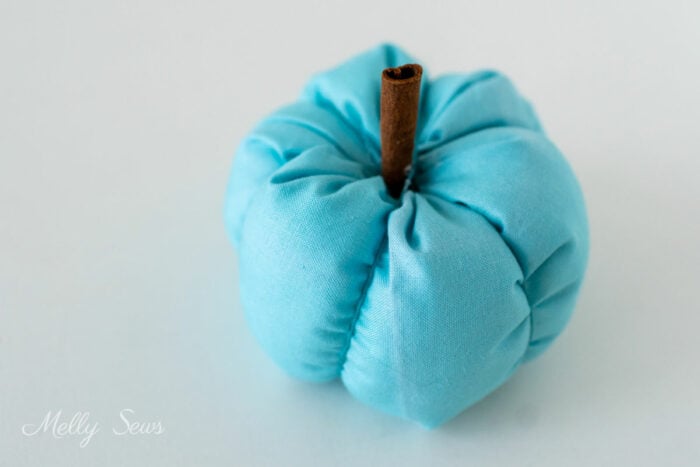
The prints I used for each fabric pumpkin are all from Riley Blake Designs. The pink is my design from the Blooms and Bobbins collection, the gold is Pin Drop Daisy, and the aqua is Confetti Cottons Riley Aqua. I chose to make each pumpkin all out of one fabric, but you can also sew several scraps together into a strip to use different fabrics in the same pumpkin.
I thought for a while about what to use for the pumpkin stems and ultimately decided on cinnamon sticks. That gives these DIY fabric pumpkins a subtle fragrance that also feels like fall to me. And since these are pretty small, I think they’ll work great in a holiday table centerpiece that won’t block conversations across the table. So let’s see how to make them!
This post contains affiliate links. As an Amazon Associate I earn from qualifying purchases. All affiliate links are identified with (affiliate link) after the link or a commissions earned statement above the link(s).
Supplies for a Fabric Pumpkin
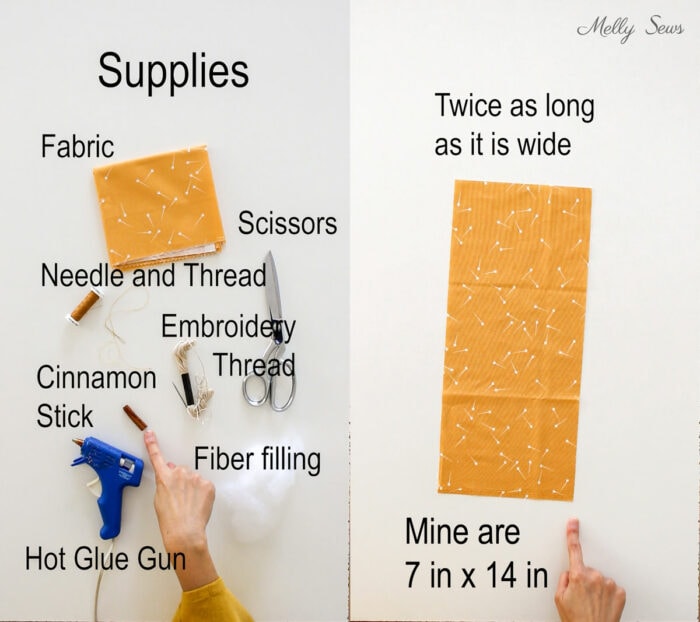
Here are the supplies you’ll need to make these pumpkins. And while I used a sewing machine, you definitely don’t need one. There’s only one seam and you can hand sew it.
- Fabric. I used quilting cotton for these, but I almost used velvet and I still might make some velvet ones. You could also use burlap, canvas, linen, silk, etc. I think even old sweaters would work to give these a fun texture.
- Scissors (affiliate link)
- Needle and all purpose thread (affiliate link)
- Embroidery floss and needle (affiliate links) For a rustic look, you could also use twine, and for a glam look thin satin ribbon would be fun.
- Cinnamon stick (affiliate link) You could also use wine corks, twigs, large wooden beads or even small sewing thread spools.
- Fiber filling (affiliate link)
- Hot glue gun and glue (affiliate links)
You can make these in any size, just use the rule of thumb that your fabric should be about twice as long as it is wide. I cut my fabric 7 inches wide and 14 inches long. You can go a little longer than twice the width too. For example, if I was sewing fabric scraps together I might cut eight pieces 7 inches by 2 1/2 inches and sew them with 1/4 inch seams. That would give me a strip 16 inches by 7 inches, which would also work for these.
Putting the Pumpkin Together
To make fabric pumpkins, check out the short video tutorial below or on YouTube here. Or if you prefer written instructions, check for those below the video.
Time needed: 10 minutes
How to Make Easy Fabric Pumpkins
- Gather your supplies
You’ll need fabric, all purpose and embroidery thread, hand sewing and embroidery needles, polyester or cotton stuffing, something for the pumpkin stem like a cinnamon stick, and a hot glue gun and glue.
- Cut your fabric
Cut your fabric twice as long as it is wide. For a small pumpkin like mine, cut 7 inches wid by 14 inches long.
- Fold and stitch fabric
Fold your fabric right sides facing and match the short ends. Stitch across the short end so your fabric is a loop. You can hand stitch this seam with a whip stitch, running stitch, or back stitch.
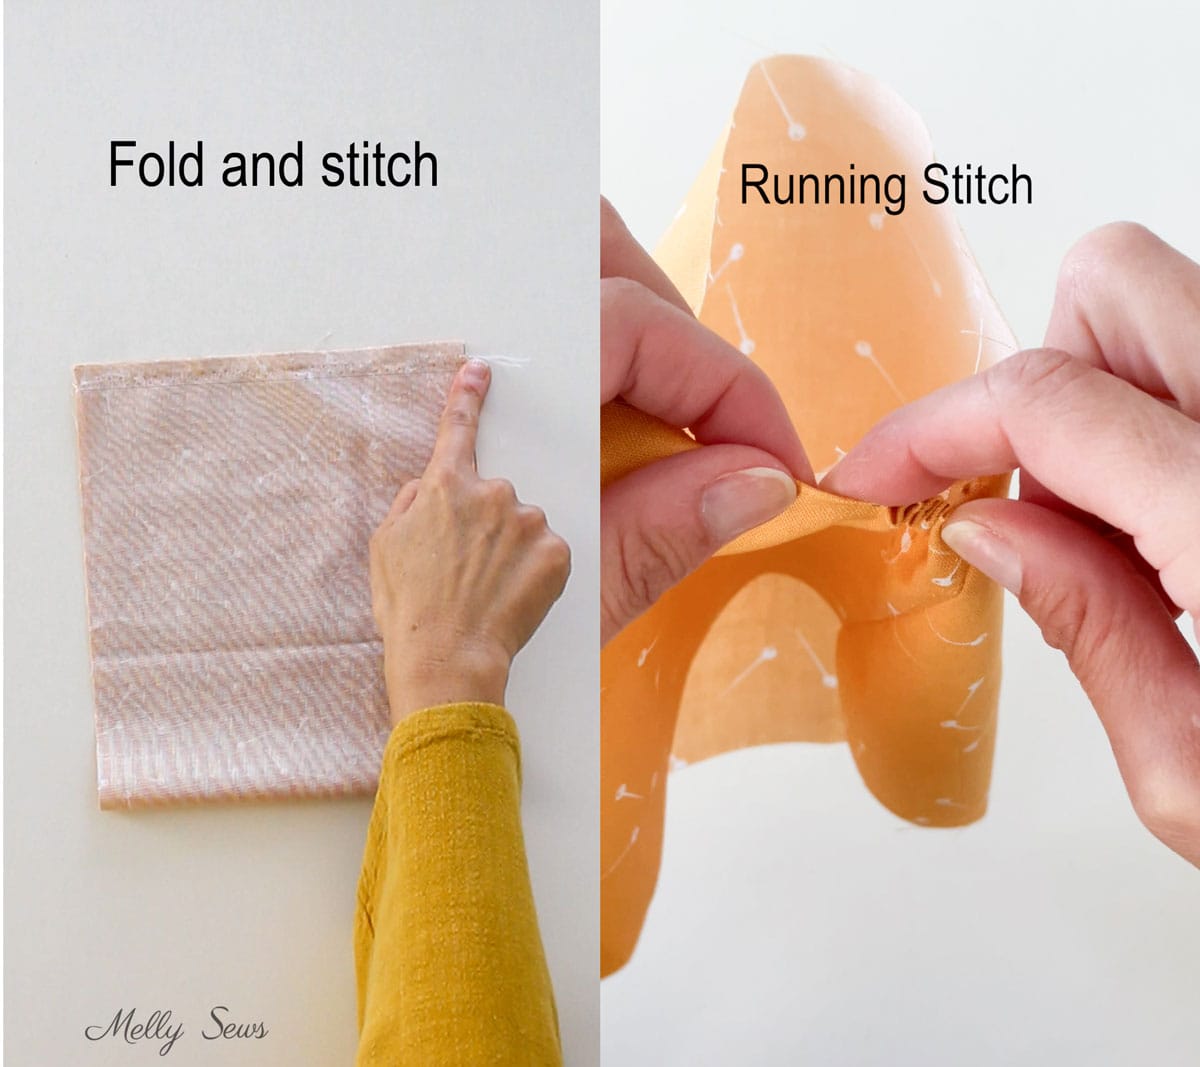
- Gather the ends of the fabric.
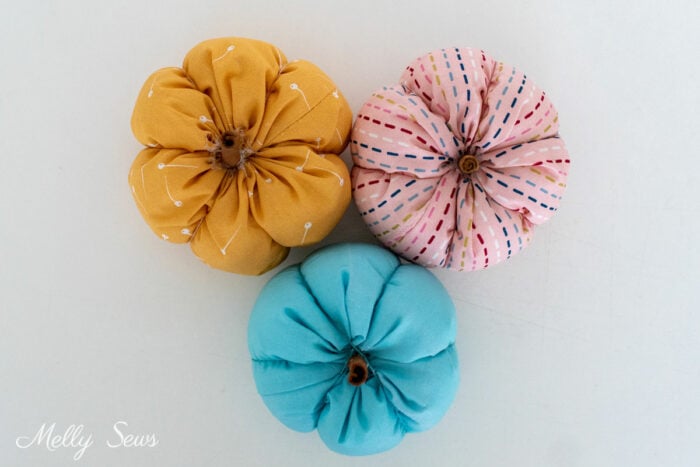
Hand sew a running stitch along the edge of the fabric. I like to fold the raw edge down and stitch through both layers. Pull the thread tight to gather the fabric on one end, and add a few extra stitches across if there is a hole to close. Knot and cut thread. Sew the same type of running stitch along the other edge, but don’t gather or cut the thread yet.
- Stuff the pumpkin
Fill your pumpkin with poly-fill or other stuffing material. Don’t stuff too firmly. Gather the thread, sew the hole closed, and knot and cut the thread.
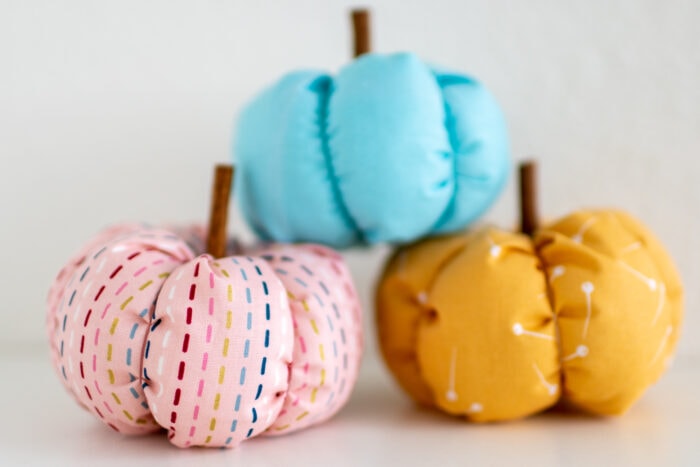
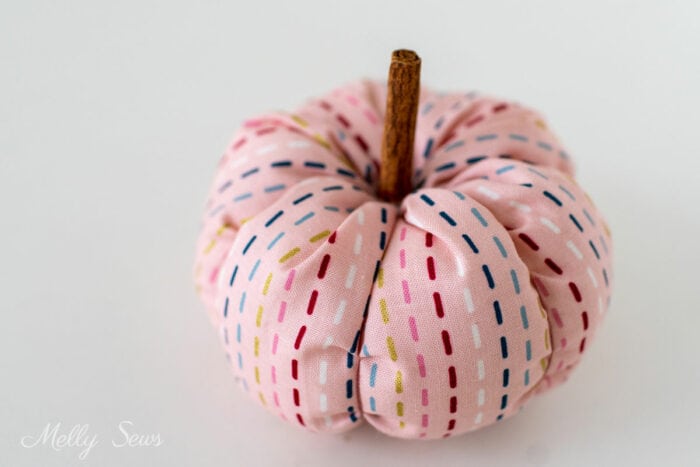
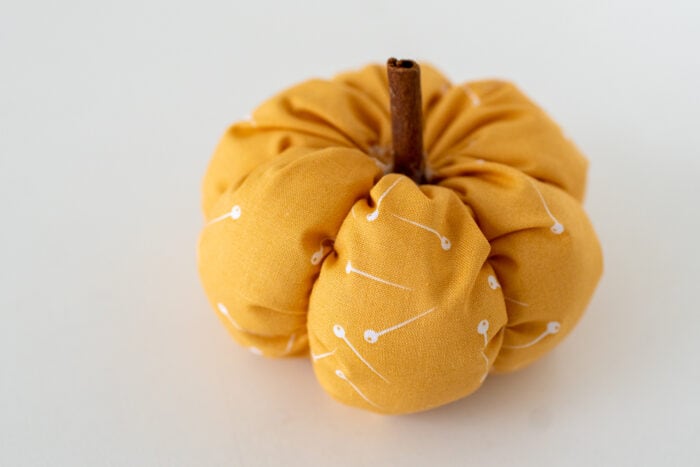
- Add the pumpkin ridges.
Decide which side is the top of the pumpkin and which is the bottom. Using embroidery thread, stitch a small stitch at the bottom of the pumpkin, wrap the thread around the pumpkin, and sew another stitch at the bottom to hold this wrap in place. Repeat, moving your wraps around the pumpkin until you have 6-8 equal sized bumps around the pumpkin. Alternatively, you could cut 3-4 pieces of thread, ribbon or twine and wrap them around the pumpkin then tie the ends of the thread together in knots instead of stitching.

- Add the stem
Use hot glue to glue the stem down onto the top. You could also use ribbon to add a bow at the base of the stem if desired.
Finishing Touches
If you’d like to keep these pumpkins on your table and help prevent them from being used as projectiles (I do have boys and nephews that I could see doing that), you can also take a long length of ribbon and hot glue or stitch the pumpkins along it to make a table runner. That way they can’t be picked up individually.
Laurie Brown
I’ve wondered for a while how to make those fabric pumpkins; thank you for providing the tutorial! And, while I don’t have small boys, I DO have cats, so the hint to attach them to the surface is brilliant!