
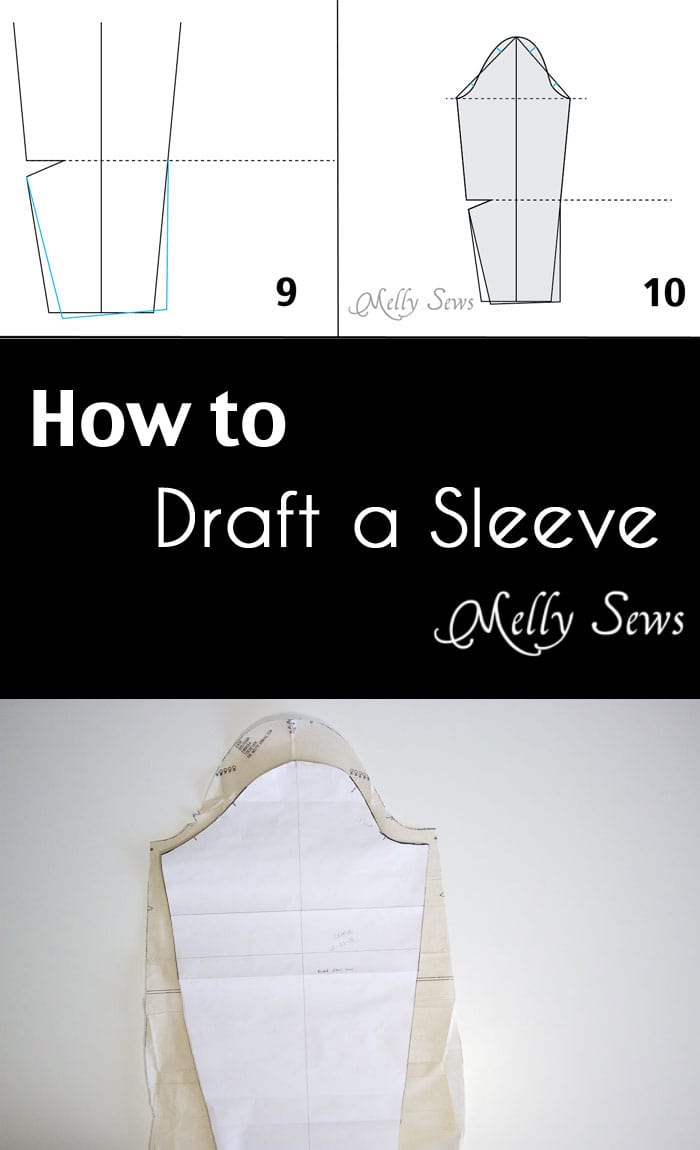
Draft a sleeve sloper – make and fit a sleeve pattern block to use for all kinds of sleeve variations
Hey y’all – today we’re building on last week’s post about how to draft a bodice by showing how to make a sleeve pattern. So let’s get to drafting a sleeve! Note that like the bodice sloper we drafted, this isn’t meant to be a wearable sleeve but an exact flat pattern copy of your body that you can then use to see how much design ease a pattern has and where you might need alterations.
You’ll need some measurements from your bodice – specifically your armscye lengths and armscye depth, which in this post we will refer to as your cap height. From your body you’ll need measurements for your sleeve length, your bicep measurement. If you need help with these measurements, see my post on measuring. To measure the armscye length, you need to mark the seam lines on your bodice sewing pattern, then measure the full curve of both the front armhole and back armhole. The armscye depth is the vertical measurement from the shoulder point to the armscye point at the top of the side seam.
You’ll also need a large piece of paper, pencil, and ruler. A flexible ruler like this one or French curve ruler (affiliate links) is also helpful.
Important notes before we begin to draft a sleeve:
This tutorial only works for bodices intended to have set in sleeves. It won’t work for a kimono sleeve or a raglan sleeve. And if you’re trying to add a sleeve to a sleeveless dress, this won’t always work. The problem is that the armscye of a sleeveless dress is likely not drafted to have a sleeve, and therefore will not reach the shoulder point. So in order to add a sleeve, you need more fabric to cover the parts of the shoulder that the armscye on a bodice usually would have covered. You might be able to add a flowy type sleeve or a knit sleeve, but you can’t add a fitted or tailored woven fabric sleeve unless you first re-draft the armscye. Just so you know.
Also, just like the bodice post, this tutorial will result in a sloper. That is, a tight sleeve that mimics the shape of your arm pretty closely. It is useful to be able to compare the shape of your arm to a flat pattern. You’ll need to add design and wearing ease yourself. See this post for ideas on sleeve variations after you draft this sleeve block.
Make a Pattern for Sleeves
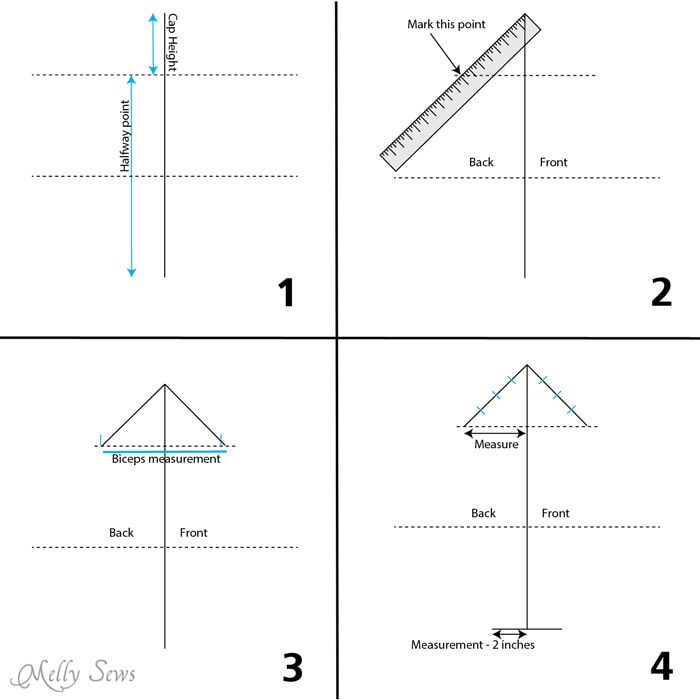
- To start, draw a vertical line the same length as your sleeve measurement. Measure from the top down the cap height (also known as the armscye depth) and draw a horizontal guideline – this is your biceps line. Then measure from that line to the bottom of the vertical line and make a mark and horizontal guideline at the halfway point. This is your elbow guideline.
- Take your ruler and line the 0 mark up at the top of the vertical line. Holding this point in place, rotate the ruler until the armscye length point hits your cap height guideline. Mark this point. Repeat with the other armscye (since your back and front armscye lengths are probably not the same).
- Next, measure your bicep length centered over the vertical line. This may or may not match up with the marks you made from the armscyes. If it doesn’t, make a mark in between the end of the bicep line and the armscye mark. Draw lines from these new marks to the top of your sleeve length line.
- Divide each of the lines you made in the previous step into quarters and mark them. Then measure the biceps line as indicated. Subtract two inches from that measurement and mark that measurement on the bottom of the vertical line to create the wrist measurement for your sleeve.
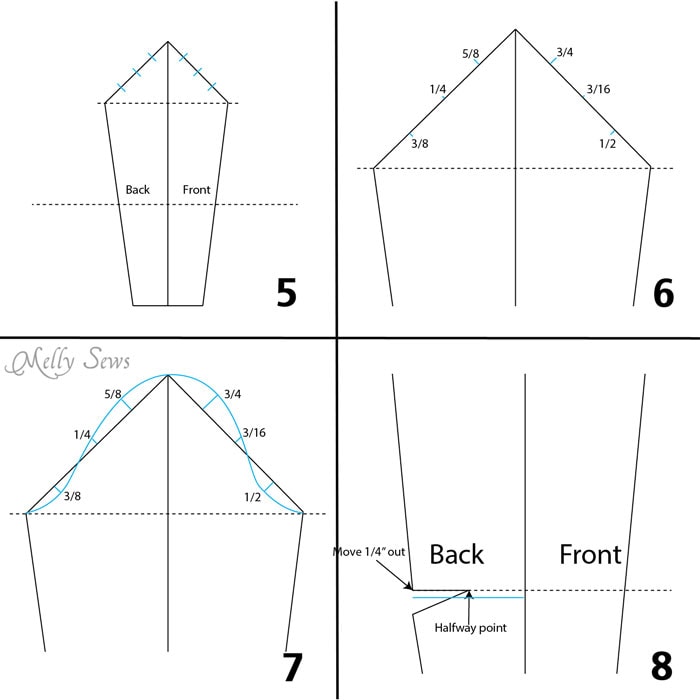
5. Connect your wrist line with the roughed in sleeve cap to show the basic shape of your sleeve.
6. On your dividing marks on your sleeve cap, measure the amounts shown perpendicular to your line.
7. Draw in the sleeve cap, hitting the marked points.
8. Now go down to the elbow guideline. Measure out 1/4 inch from where the side seam line hits your elbow guideline on the sleeve back and redraw the upper part of the sleeve side seam. Then measure from there to the vertical center line and mark the halfway point. Measure down 1 inch from the corner and make another mark. This is going to be the elbow dart. Make sure the two dart legs are the same length.
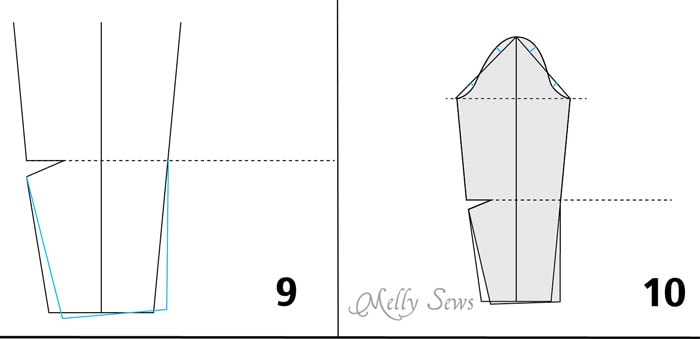
9. Since you added 1 inch (the dart gap) to the sleeve, you now have to shift the lower part of the sleeve. First, measure the length of the lower sleeve from BEFORE you added the dart (from the wrist corner to the elbow line). Next, on the wrist line measure in 3/4 inch. From the dart point, draw a straight line equal to the original lower sleeve that crosses the wrist line at the 3/4 inch mark you made. Measure over the same amount as the original wrist line. Then make a new front side seam the same length as the original lower front sleeve.
10. Your final sleeve piece, without seam allowances will look like this diagram.
Now let’s take a look at a couple sleeves and I’ll show you how you can and can’t use your drafted sleeve to fit sleeves. We’ll start again with New Look 6677
This pattern has a fairly fitted sleeve cap that flares slightly at the wrist. Remember how the armscye was too long for my bodice?
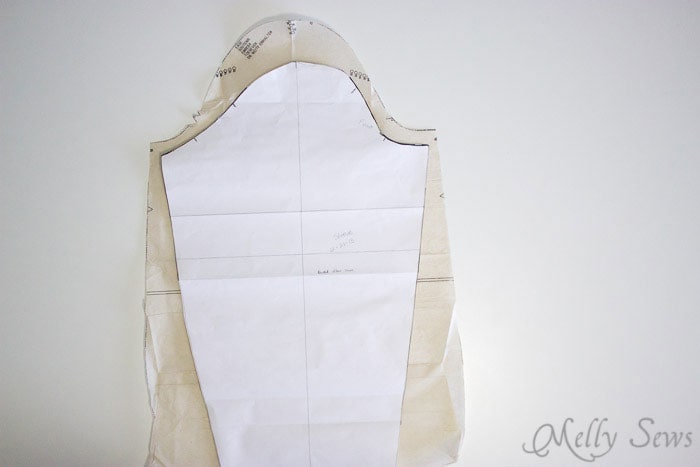
Well, then it should come as no surprise that the sleeve cap on this pattern is also too high. When you alter an armscye, you also have to alter the sleeve cap. To do this you’d cut the sleeve cap straight across and lower it by the same amount you shortened the armscye. Then measure the seamline and make sure the length is at least as long as the seamline on your armscye.
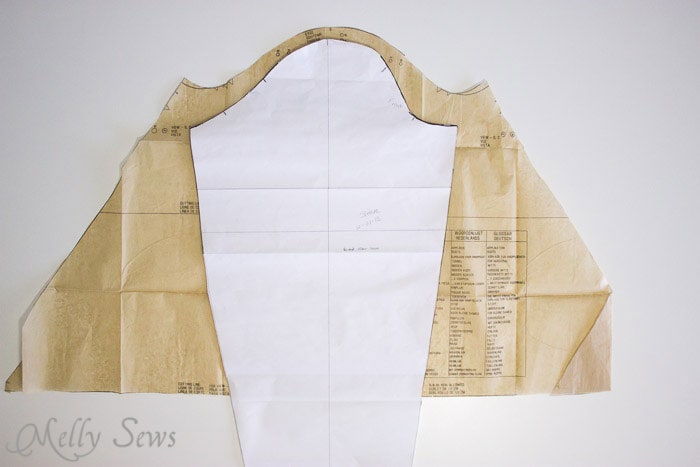
However, let’s look at Simplicity 4958. Remember this one had a mostly OK armscye for me.

However it has a bell shaped sleeve. As you can see below, this results in a lower sleeve cap and a wider sleeve. Though the pattern looks much different than mine, if I compare lengths at the seamline (not the edge of the sleeve) they’re actually very close to the same length. This means I don’t need to alter the pattern.
And that gets me to one of the best posts I’ve ever read about sleeve drafting. If you’d like to see really great examples of cap height and how it changes based on how the sleeve style changes, read this post on Ikat Bag. It’s a long post, but very worthwhile if you’re working on fit.
Miss the post on drafting a bodice? It’s here.
ooobop!
Thank you so much for this great post. I’ve adjusted patterns by removing sleeves (and creating facing) but havent attempted to draft a sleeve as yet. This will be so useful when I do! 🙂
Nicole
Awesome! Thanks for this! I have been wanting a post about making sleeves for a long time. I often have sleeveless dress patterns where I want to add a sleeve, and this will be very helpful.
Diya
Hi Melissa wonderful darling series.. do you have a pic of your sleeve you attached to the bodice muslin too made.. I am doing a lot of fit analysis and would like to see if you have one please
Gabriel
I FINALLY GET IT. I’ve battled with sleeves for so many years but this guide really made everything so clear. Thank you!!