Everything you ever wanted to know about how to draft your own skirt pattern and sew a skirt, as well as make many skirt variations
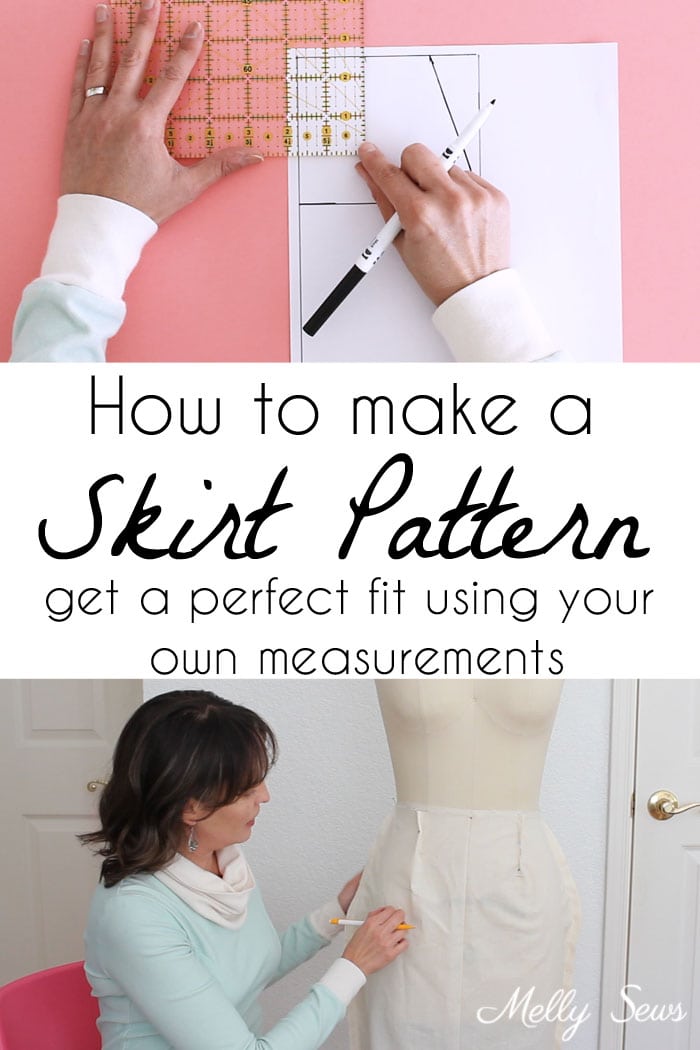
Hey y’all, today I’m going to show you how to make a skirt pattern. If you’ve been a reader of this site for a long time, this is an update to a an old post that now contains VIDEO – yes! If you’ve never seen this post before, welcome. I hope you learn a lot about skirts and flat patterns from this.
So, we’re going to be drafting our own patterns based on our measurements! That’s right – starting from scratch.
Materials For Your Customized Skirt
This post contains affiliate links. As an Amazon Associate I earn from qualifying purchases. All affiliate links are identified with (affiliate link) after the link or a commissions earned statement above the link(s).
Never fear, skirts are the easiest thing to start patternmaking with, so even if you’re a pattern drafting beginner you can do this. So grab these tools:
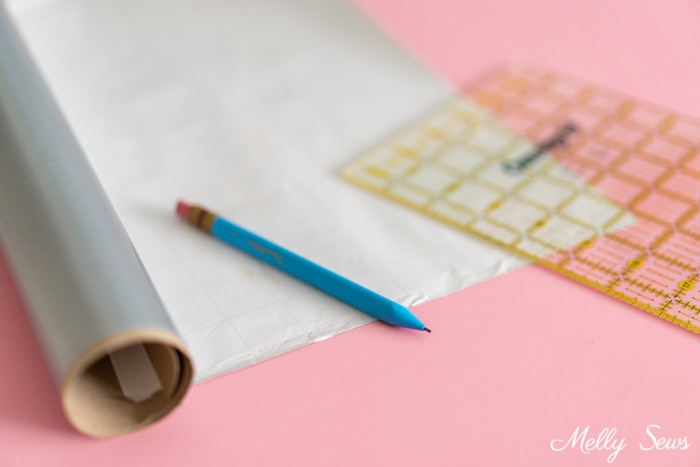
- kraft paper or wrapping paper (use the back side)
- pencil
- ruler, preferably a clear one (here’s an affiliate link to the one I use in the video)
- Optional but useful – a French curve or bendy ruler. You can also hand draw your curves, but these tools make it easier.
- Muslin fabric, about 1 1/2 yards (depending on your size). Note that you don’t have to sew your skirt from muslin fabric, any firmly woven fabric will work. I’ve seen these made with old bedsheets and quilting cotton
- Sewing machine and basic sewing notions – scissors, thread, needles, pins, etc
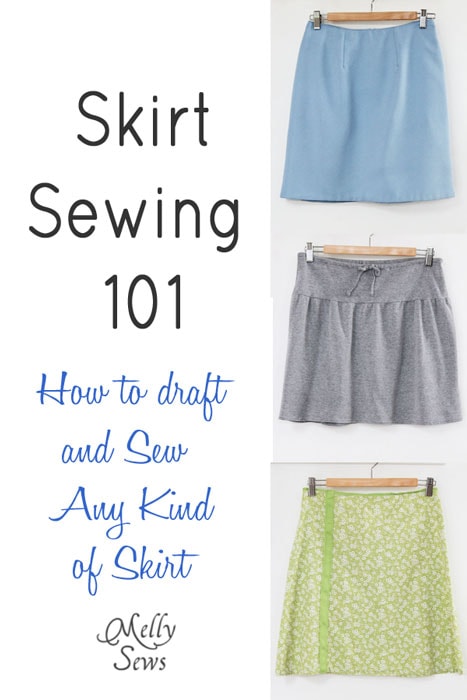
Then I’ll show you how to take that basic skirt pattern and turn it into all of these skirts:
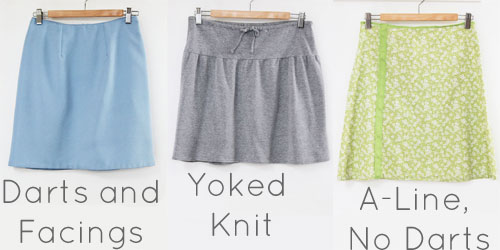
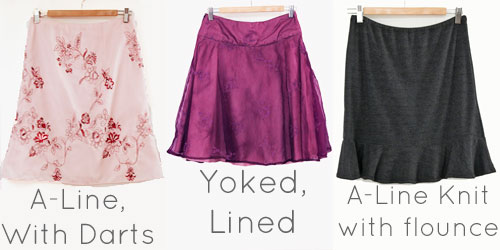
So hike up your skirts (sorry, couldn’t resist) and get ready to draft and sew!
Measurements You’ll Need
To start with, you need four measurements: your waist, your hips, your waist to hip length and your skirt length (for this we’ll be using a waist to knee measurement). Let’s discuss more.
Waist: This can be your actual waist, or where you want your skirt to sit.I prefer to do actual waist and then change up my pattern from there.
Waist-to-Hip: You may want to put a sticker on yourself level with the tape while holding the measuring tape for the waist and hip measurements, so that you can easily measure the distance between your waist and hip. Alternately, you can tie yarn around yourself at both levels and measure that way. This is a vertical measurement.
Length of the Skirt: Measure vertically from your waist to your knee. You can use a waist to floor measurement if you’d like a maxi length skirt.
For more help with correct measurements, you can check out the video in this post.
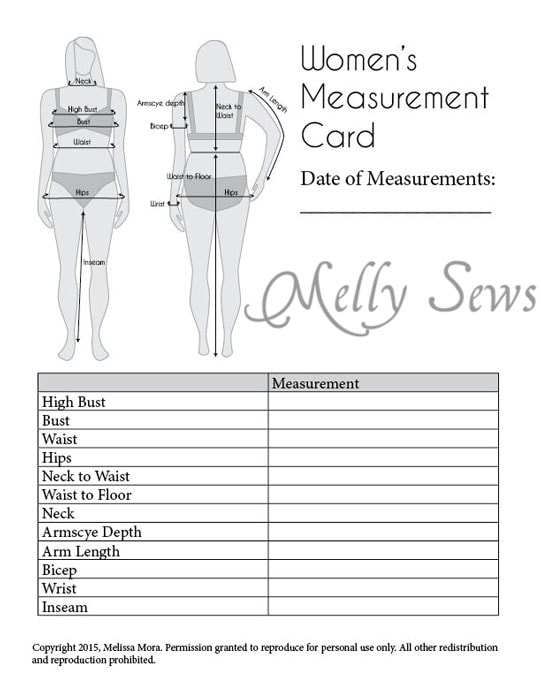
If you’d like a handy measurement card to record these and other measurements, you can click on the image below to get a PDF. Just make sure to add the Waist-to-Hip and Waist-to-Knee measurements to it for yourself.
Video Tutorial to Make a Skirt Pattern
In the video below, I show how to draft the basic block. You can also watch that on YouTube here. Or if you prefer written instructions, check below the video.
Drafting a Skirt Sloper
OK, we’re ready to draft. Get out some kraft paper, use the back side of a roll of wrapping paper (the kind with grid lines is especially handy) or tape a bunch of printer paper together. Grab your ruler. Also make sure you have a pencil, and some muslin (or scrap fabric – enough to cut out your skirt) and pins. When it comes time to fit the muslin, you’re also going to need a friend or a spouse, and a fabric marker or chalk.
We’re going to draw 1/4 of the skirt for the pattern, so you’ll need to do a tiny bit of math. Calculator (or more likely, phone) at the ready! Start by dividing your hip measurement by 4. Add 1/2 inch to that number, then draw a rectangle that is that wide and your desired length (suggested: waist to knee measurement) tall.
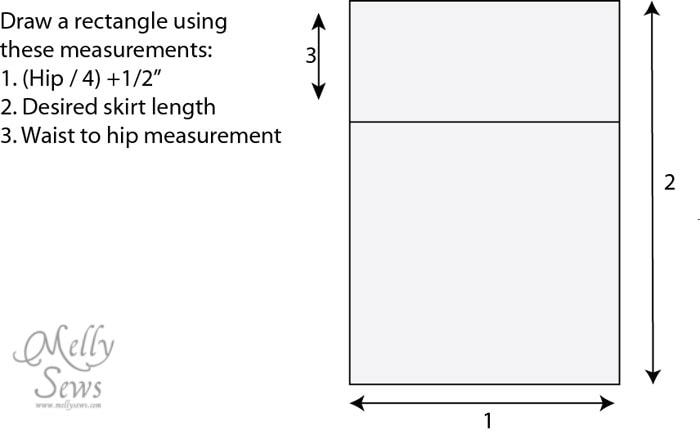
But wait Melissa, I’m not a rectangle! Of course you’re not. This is just our starting place. Now we’ll work on the waist.
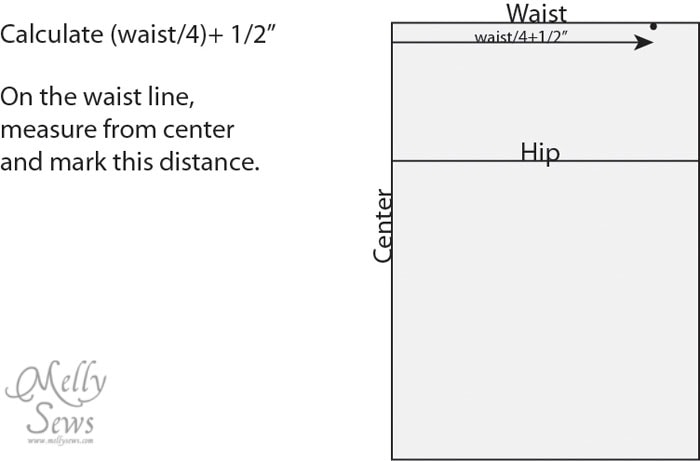
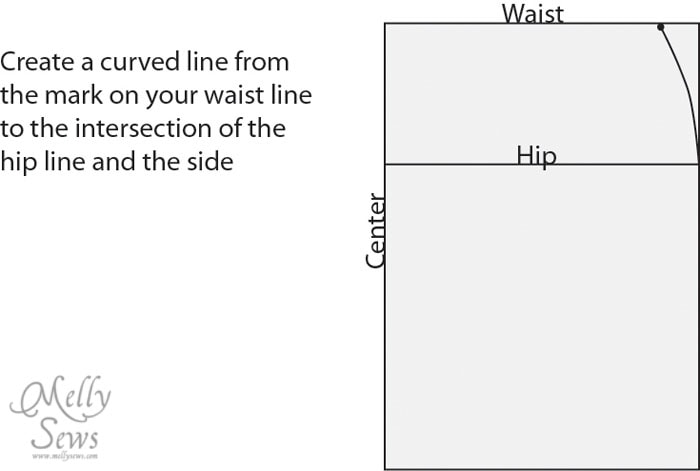
A bendy ruler works well to draw this curve, as does a French curve. Or a dinner plate. Just make sure the majority of the curve is in the top 3″ or so, because that’s where the body curves the most.
Testing the Fit
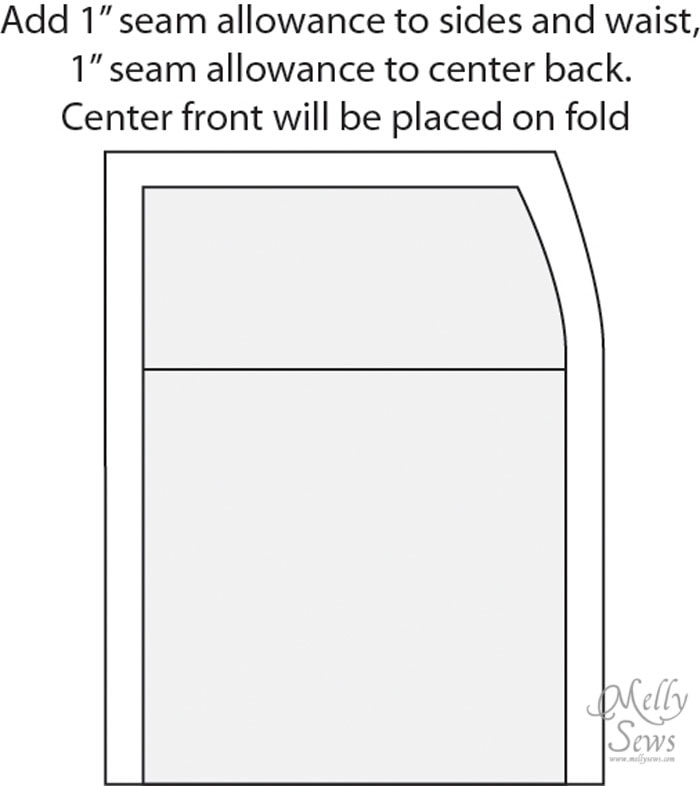
Add seam allowances to the side and waist, then retrace the pattern and add the center back seam allowance, and you have your muslin patterns. Cut out the front piece on the fold, and two back pieces mirrored. IMPORTANT: you’re going to want to mark the hip line on the muslins.
Pin up your center back seam, and one side seam. Then put the skirt on yourself, inside out. Pin up the remaining side seam. You may need assistance from your spouse or friend (frouse? spiend?).
Starting in the front, smooth your hands together from the center and side seam to pin the front darts. Pin the excess fabric at the waist. Repeat on the other side. This isn’t too hard to do yourself.
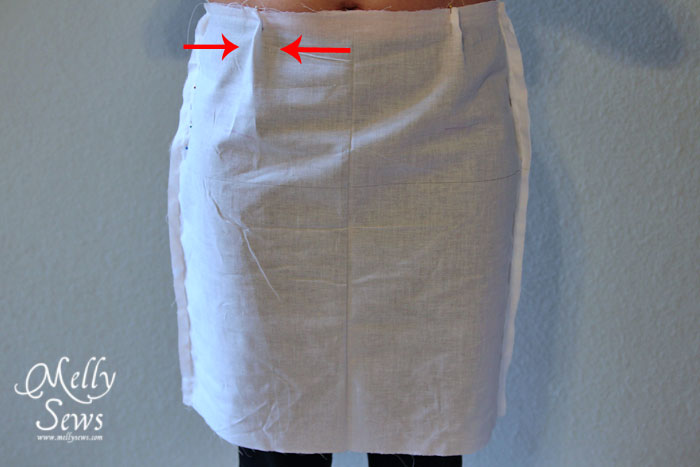
But then you’re going to need your spouse/friend/spiend/frouse or whatever to help you in the back. Because trying to pin back darts on yourself results in getting stuck with pins. And other bad stuff. So as you did on the front, have your friend smooth the fabric in the back and pin the darts in the waist.
If the muslin is tight around your rear, let out the pins in center back seam first, not the side seams.
Next we need to determine where those darts will be positioned. It’s easier to start in back with this, and it involves some looking at your rear (Omigod Becky, look at her…just try not singing “I Like Big Butts” while you do this). With the fabric marker or chalk, you’ll want your friend to mark the point where your buttocks start to curve toward your back (mark 1) and where they start to curve out toward the hip (mark 2).
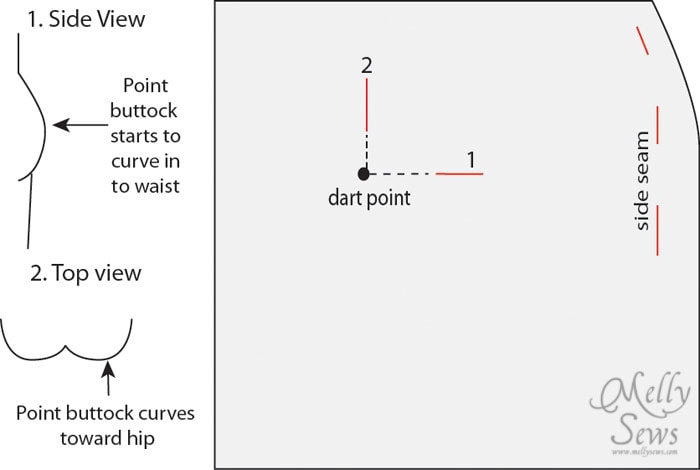
In the front, you’ll need to do the same thing, except the curve will be your tummy instead of your butt. Of if you’re a flat ab workout queen, you may not need front darts. And many women might secretly hate you. Kidding. Sort of.
Now, check out your side seams. Make sure they’re going straight down your sides. If they’re not, unpin and adjust until they are.
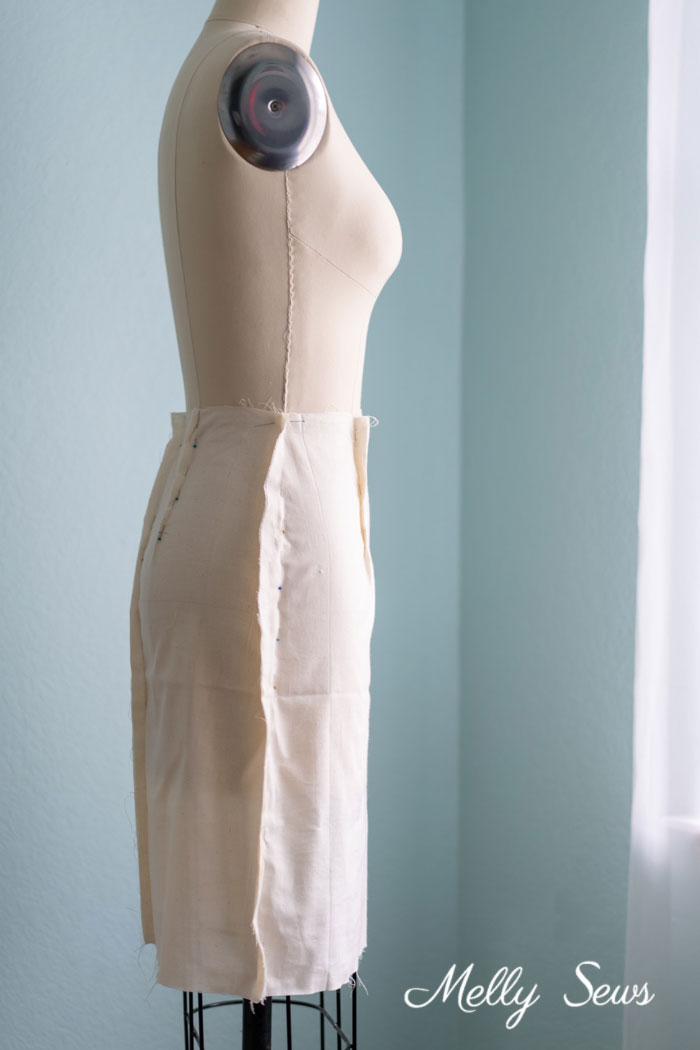
Now use your marker or chalk to mark where the pins are on the side seams and back seam. Then unpin yourself down one side and take off your muslin. Excuse your friend/spouse and thank them for their help, you’re on your own from here on out.
Mark the pins that are holding the darts, on each side of the dart. Then you can remove those pins.
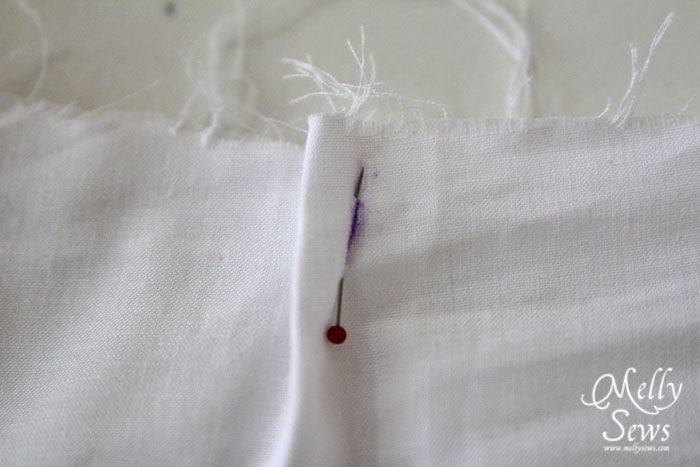
We’re going to figure out where the darts go. Measure over on your lines that marked the curve breaks on your body; where they intersect is the bottom of your dart. Transfer these measurements to your paper pattern, and mark the bottom of the dart. Repeat with the front dart on the front pattern piece.
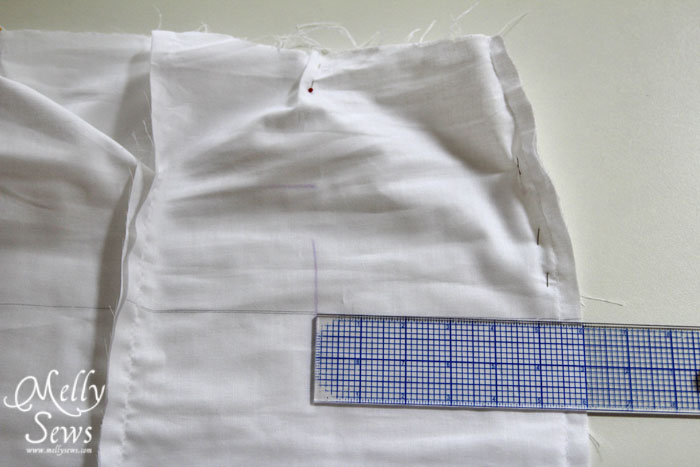

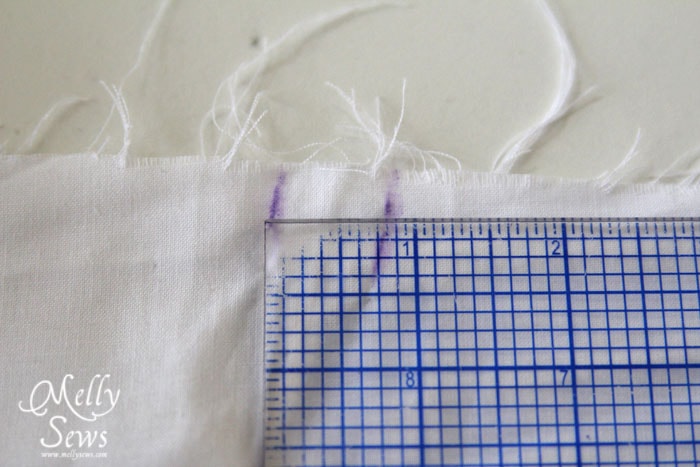
Now measure the width of your darts on your muslin.
Make a straight line up through your dart point, perpendicular to the hip line on your pattern.
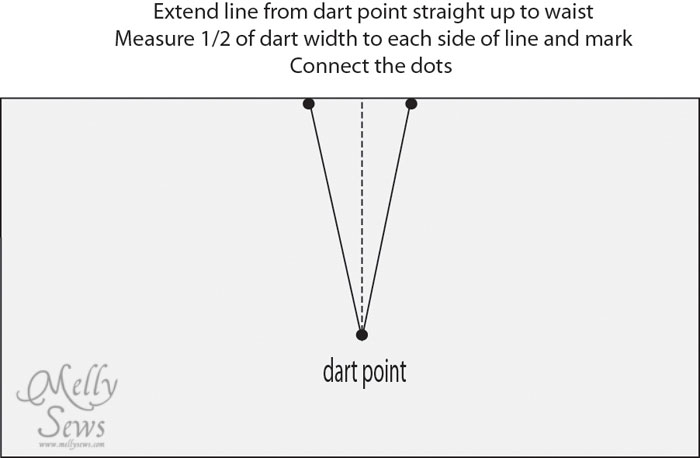
Repeat this dart creation for the front piece. Finally mark off your side seams and adjust the seam allowances. You now have a skirt pattern!
Now, it’s a good idea to make another muslin and test this pattern before you cut into the good fabric, but any adjustments should be minor.
Variations on the Basic Skirt Pattern
Ok, time to show you how to take the pattern we drafted and turn it into other variations.
Basic Skirt with Facings
Let’s start with adding facings – the facings and sewing a zipper into the center back seam are the only things I added to make this fitted skirt.
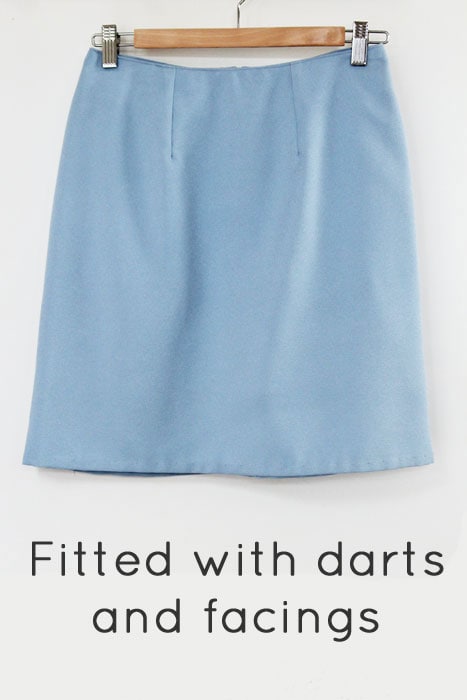
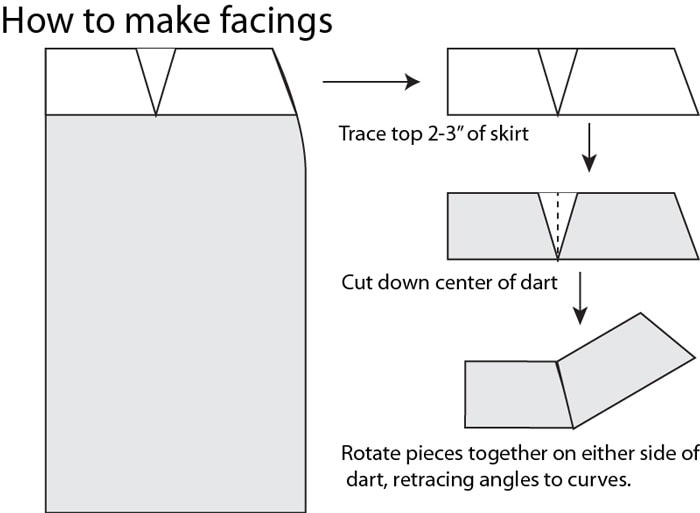
You’ll cut your facings on the fold, just like your skirt. Since your skirt already has seam allowances, so will your facings – no need to add them.
Steps to sew this skirt:
- Sew back darts
- Sew back center seam and put in on seam zipper (see this tutorial)
- Sew front darts
- Sew side seams on both skirt and facings
- Sew facings on to skirt (pin facing to waistline, right sides of fabric together, stitch around, then turn facing to inside of skirt and press. Topstitch if desired)
- Hem
How to Make an A-Line Skirt with Darts
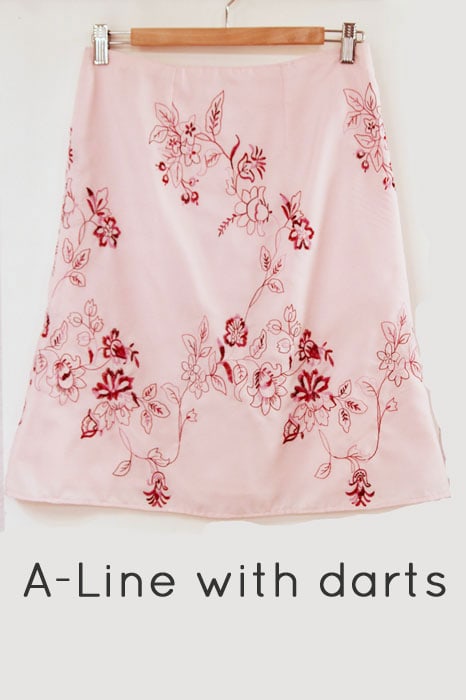
This A-Line skirt I made is fully lined, so no facings. This is a super simple skirt variation.
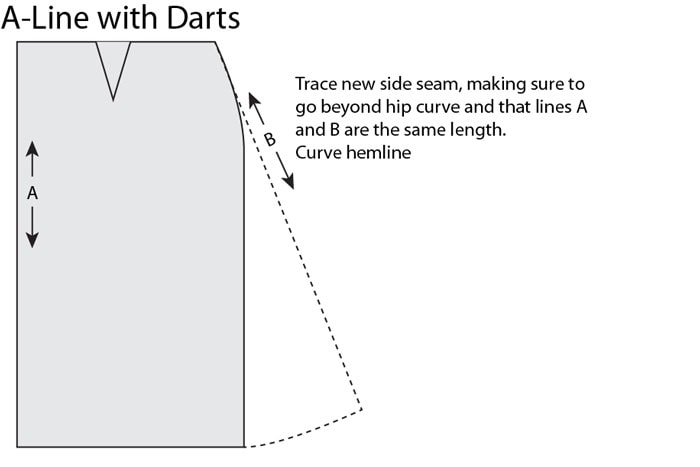
Steps to sew this skirt:
- Sew back darts
- Sew back center seam and put in on seam zipper (see this tutorial)
- Sew front darts
- Sew side seams on skirt
- Repeat steps 1-4 with lining
- Sew lining to skirt (pin lining to waistline, right sides of fabric together, stitch around, then turn lining to inside of skirt and press. Topstitch if desired)
- Hem both lining and skirt
How to Sew an A-Line Skirt With No Darts
If you think about how you make facings and how you make an A-Line skirt, the next variation is really easy to grasp too.
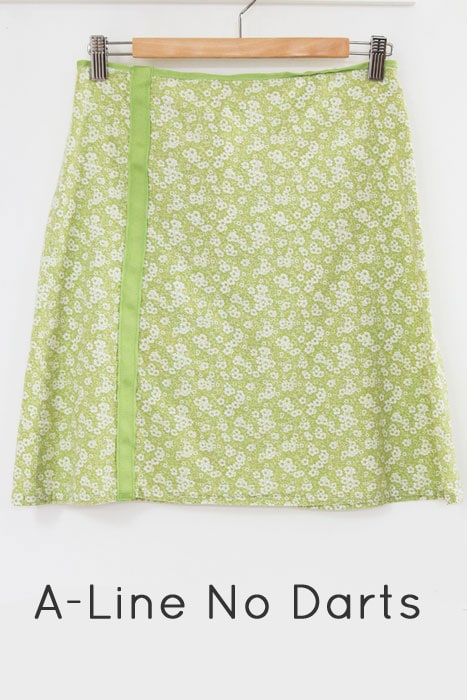
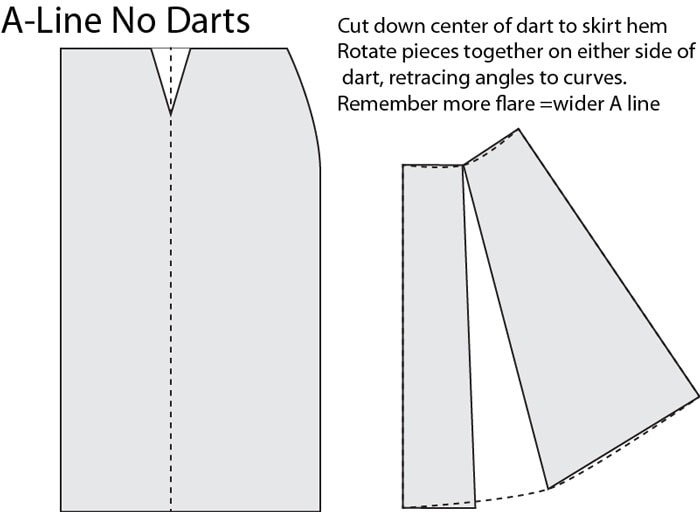
For the A-Line above I also off-centered some ribbon trim, and I finished the waist with the same ribbon. Steps to sew this skirt:
- Sew decoration onto front.
- Sew back center seam and put in on seam zipper (see this tutorial)
- Sew side seams
- Bind waistband with bias tape or grosgrain ribbon (see this tutorial)
- Hem
How to Sew a Skirt with a Yoke
What if you want to add a yoke?
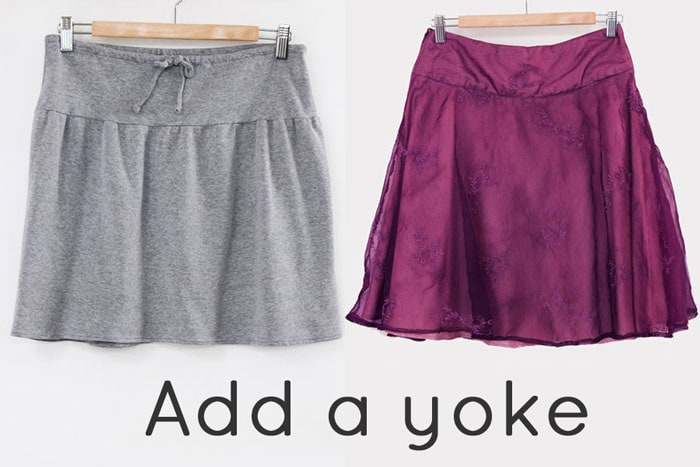
First you’ll create an A-line shape with no darts, then you’ll just cut the pattern where you want the yoke to be, and add seam allowances.
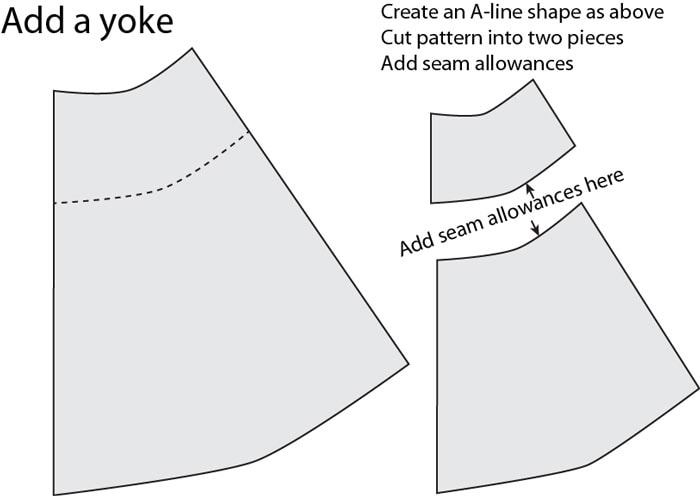
Steps to sew this skirt:
- Sew yoke together at side seams.
- Sew skirt side seams
- Sew back center seam and put in on seam zipper (see this tutorial)
- Sew facing or lining to waistband, turn to inside
- Hem
How to Add a Flounce to a Skirt
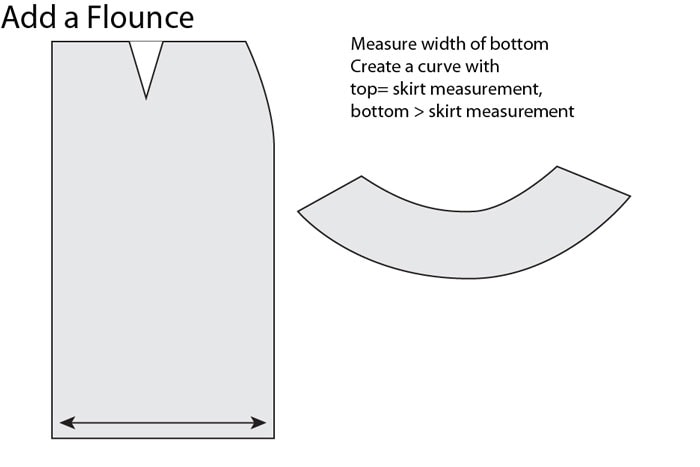
And finally, how to add a flounce. Remember when doing this type of skirt that you may want to remove length equal to the vertical length of your flounce so that the entire skirt length stays the same.
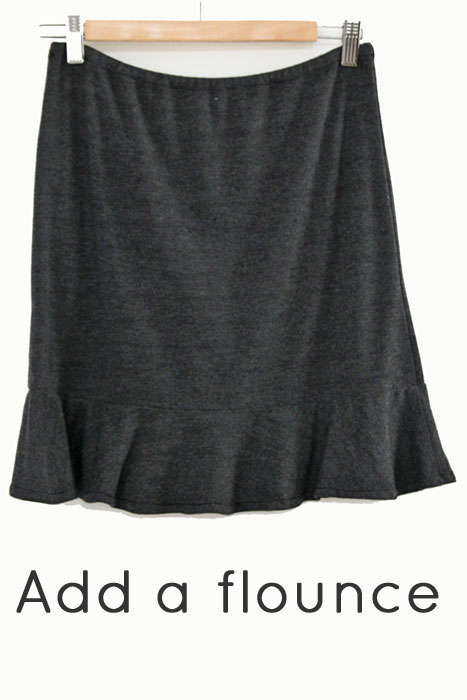
Steps to sew this skirt:
- Sew side seams of flounce.
- Sew skirt side seams
- Sew back center seam and put in on seam zipper (see this tutorial)
- Sew flounce to bottom of skirt
- Sew facing or lining to waistband, turn to inside
- Hem
This concept also works if you want the bottom part of a yoked skirt to be fuller than the top part, but without having gathers. In that case, you’d measure the bottom of the yoke, and that would be the top of your curve, and then you’d curve out the bottom – more curve=more fullness.
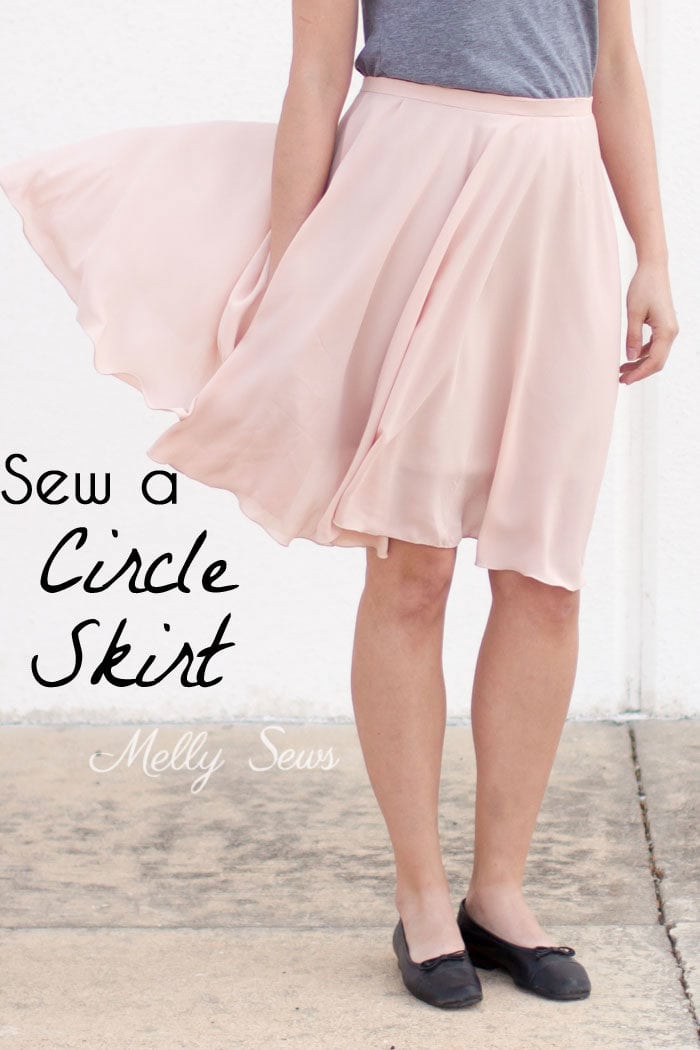
How to Sew a Circle Skirt
Since a circle skirt doesn’t have any shaping for the hips, it’s easier to draft just a waistband and then cut out the skirt as shown in this tutorial for a circle skirt.

Lou Ann Rice
GREAT job, Melly. Thank you.
Renee
This is so nice of you to do! Thanks, I’ll be referring to this!
Jody
Thanks for the clearly written and thorough tutorial!
Emily
Wow! A wealth of information! Thank you for sharing!
Bec Clarke
Super tutorial, thank you
Maria
wonderful tutorial!!!! thank you very much
Jess Abbott
This will help So many people, awesome tute Melissa! Will need to pin later 🙂
Ajaire
Thank you for this tutorial Melissa! I’ve made all these types in the past, but it’s great seeing how they all relate. I’m definitely pinning this for reference.
Anne
You didn’t mention that there would be no zipper on the knit one! I would like to use a strong knit for the yoke but a cotton on the bottom. Any suggestions?
Beth
AWESOME TUTORIAL! Thanks so much for this – will definitely bookmark to refer to again!
x
Janine
This is excellent.
adeyinka
THIS IS AN AWESOME TUTORIAL
defitria
Thank you Melly, so helpfull..
Melissa
This tutorial is incredible. Thank you. I’m trying to work up the courage to give it a try. You lost me on the facing though. “Rotate pieces togethere on either side of dart retracing angles to curves,” may as well be written in Greek. I just can’t wrap my mind around it.
Which sides of the pieces get adjoined? Retrace what angles? To which curves?
Cindi
Awesome! My daughter got a job that is business casual. She loves skirts. But has a hard time finding ones she likes that I don’t have to alter! So I will try making a couple for her and see how it goes!
Thank you!
Christa
Love this tutorial. I’ll be trying this out tomorrow for sure 🙂
http://cafeapois.blogspot.com
migdalia
amazing tutorial. thanks you
Md Filmet Hossain
thank you
virginia
Melly’s explanation is so clear, i will start making my own skirts henceforth
Sophie Haller
Thank you, thank you, thank you!!!
June
Hi Melly
I just found yr lovely blog. Thanks for the clearly written and thorough tutorial! Now I am brave enough to sew
one or two for myself with all the materials I brought yeara ago but never have the confident to
sew.
Merry Christmas to your lovely family.
Tammy
Very informative!
Tammy
Great tutorial!
Joanne
You are a super seamstress and a wonderful teacher. Thank you kindly Melly 😉
Lady Violet
Great stuff. I’ll be trying this shortly. Terribly fond of skirts but live in a place where they are no-go. Can’t buy anything to suit.
Thanks for sharing : )
Amy P
This is an incredibly clear and helpful tutorial! Thank you!
notorious
Hi Melly;) I appreciate your tutorials. Could you give more detail for the following:
“….This concept also works if you want the bottom part of a yoked skirt to be fuller than the top part, but without having gathers. In that case, you’d measure the bottom of the yoke, and that would be the top of your curve, and then you’d curve out the bottom – more curve=more fullness….”
Thank you.
mirapope
Yes….I’m trying to figure out how to curve the top of a basically-A-line skirt…and then make the bottom curve match the top 24″ inches down from it. But ending up with all parts of the bottom curve the same, no oopsy-daisies. And I find this part of your statement confusing.
isabel
Love your humor!! and all the images. This is very valuable for me!! Thank you very very much!!
Daphne
I am a bit lost. When cutting the front piece on the fold, do you include the 1″ seam allowance, or place the fold on the original line, ignoring the seam allowance?
Thank you!
ChristinaW
Thanks so much for this tutorial, so far I’ve made one skirt that fits great!
Sylvaine
Merci beaucoup pour ces excellents patrons ….
Je vais me coudre des milliers de jupes maintenant !!! 😉
mr4ma
What an amazing tutorial! Thanks for sharing 🙂
Florence N Ndubuisi
Am enlightened
vicky
soooo helpful. tnx a bunch
toyin orifunmishe
this is a good job! thanks
Margaret
thank you so much for that. Did pattern cutting in about 1969!!!!! Couldn’t remember how to do it. This is fantastic. For Summer going over to Oz to look after our grandkids and babies and had decided to just get some pretty T shirts to wear with skirts as it gets up to 44 deg on bad days so was wanting to make a few skirts to mix and match. Paid a huge amt. for one pattern with a yoke and don’t know if the size I chose will even fit. Yours look nice and easy. So here goes.
Cynthia
I love all the patterns, its really beautiful and nice.
DarleneMAM
Very much appreciated. I spent too much time yesterday creating facings for a purchased pattern that cost a ton but didn’t provide facings, thereby making the end product look cheap! Now I can do a custom skirt with variations!
Fergus Naugler
Fantastic job. Well described and illustrated, good variations, excellent templates for many combinations. Well done thanks
Sarie
Wow! This is abosolutly perfect! This has really opened up my understanding. Thanks so much ????????
Liz
Oh my gosh! I’ve trying to learn how and this helped SEW much! (sorry, couldn’t help myself) Its so much easier to understand than the other ones I’ve found. Thank you!
Brannie
Wow that was amazing! I never knew the names of the different types of skirts! Thank you so much (again) for the clear instructions with photos. It’s like having a sewing mentor anytime I need one! You are wonderful!
Ame
Melly, I have been making these skirts from the onset of your sharing them. I Love Love Them. You are meticulous and so generous with your sewing art. Thank you from the bottom of my heart for all your work.
BELLA CUCINA
Melly, your patterns and Chris Sartorial’s are the best blocks for A line skirts. Thank you for sharing your extensive talents.