
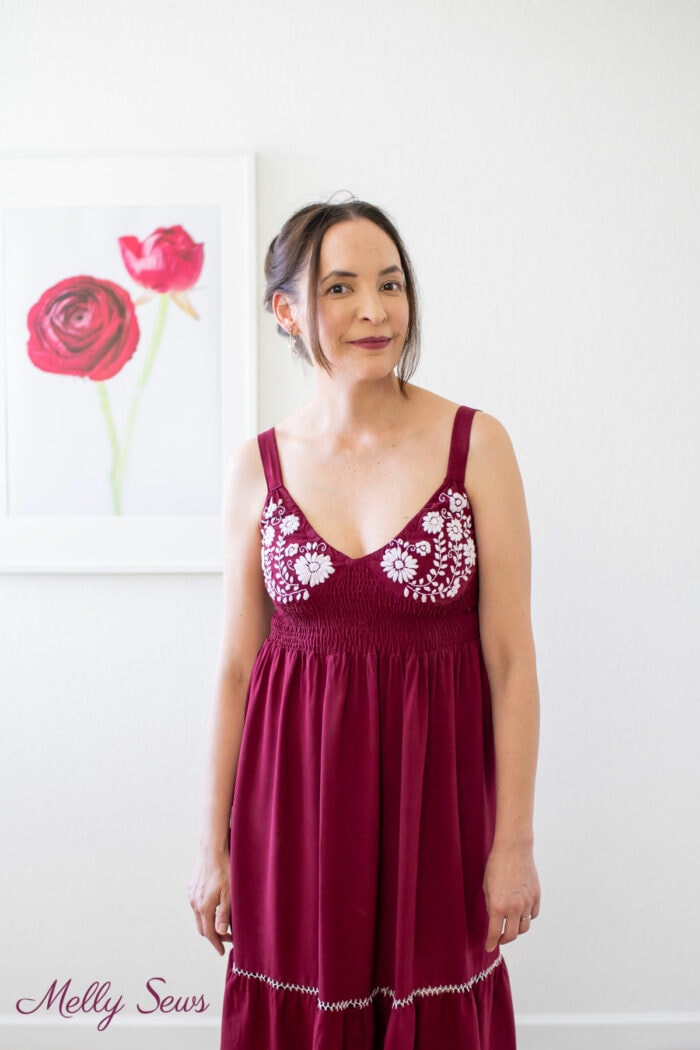
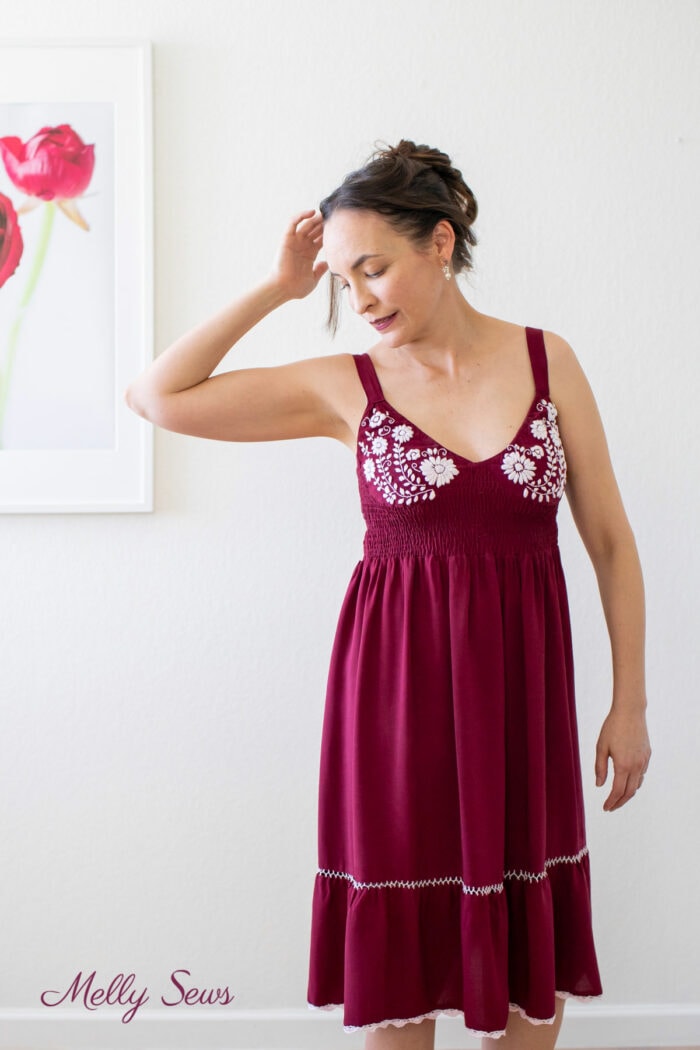
Embroidery on clothing can make an ordinary piece into a work of art. Learn how to personalize an embroidered dress.
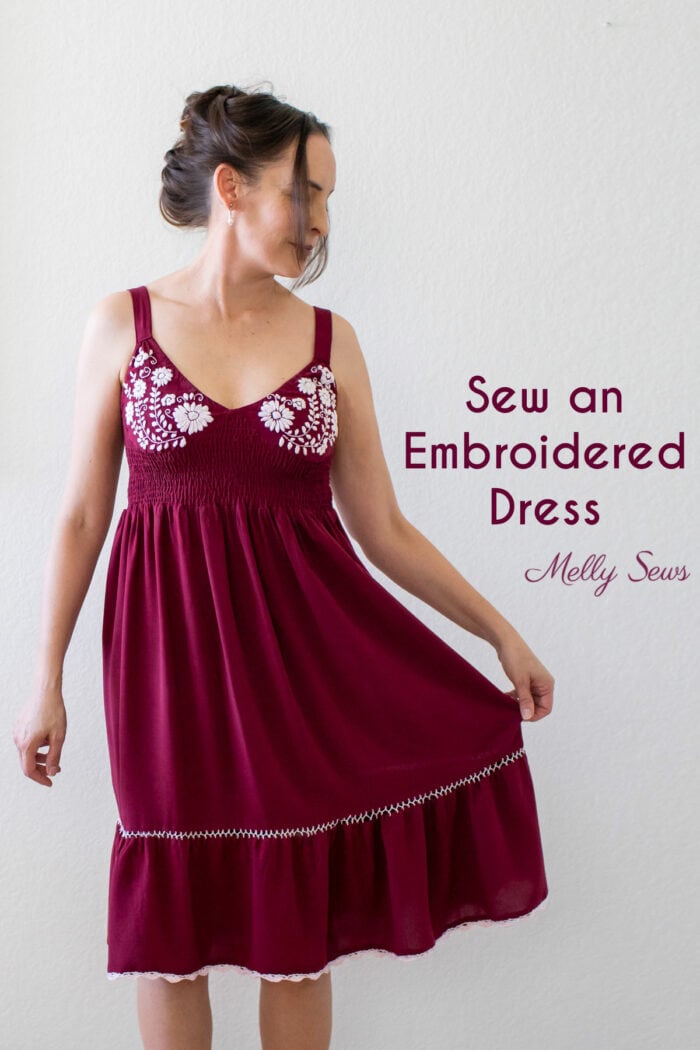
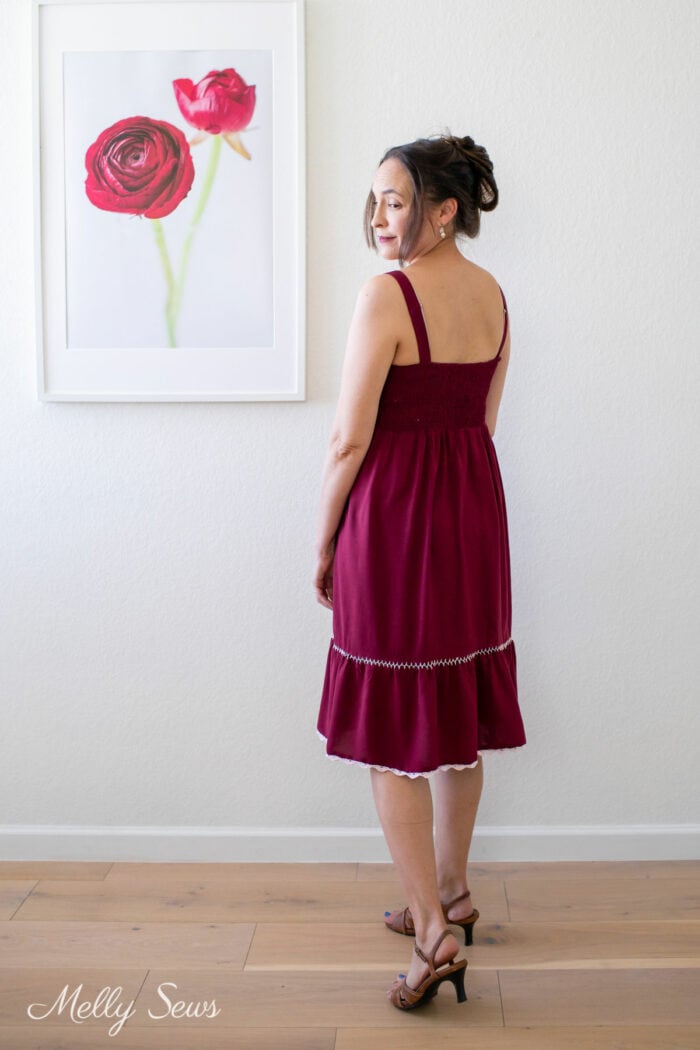
Hey y’all, today I’m sharing how I made this DIY embroidered dress. The hand work on this sewing project was perfect while I was recovering from hip surgery and couldn’t sit at my sewing machine. I’ve always found embroidery soothing, so it helped keep my sane while I was mostly immobile.

A note: this is not going to be a tutorial with step by step instructions to recreate the look. It’s more an overview of my process and how I got from an idea in my head to a finished dress. Hopefully that’s also interesting, though it will be different from my usual how to posts.
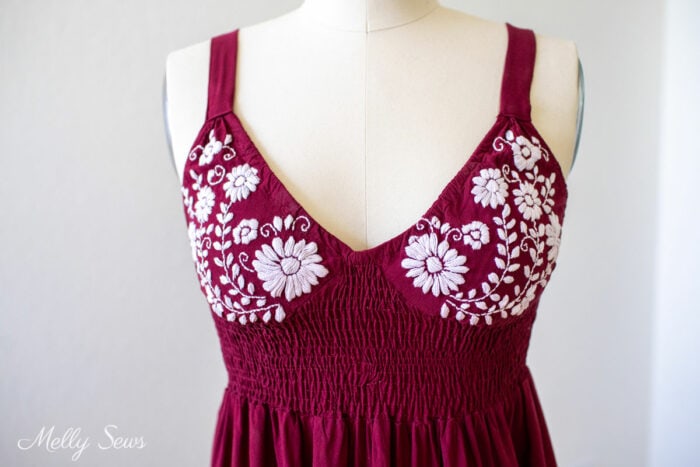
I planned from the beginning of this project to embroider the bodice, but then after I did I couldn’t resist adding more hand stitching to join the tiers of the skirt. And once I did that, then I wanted a hand worked bottom edge. It was a whole “If you give a mouse a cookie” situation. But I’m glad that I took the time to do all the hand stitching and the crochet edging.
Making the Pattern
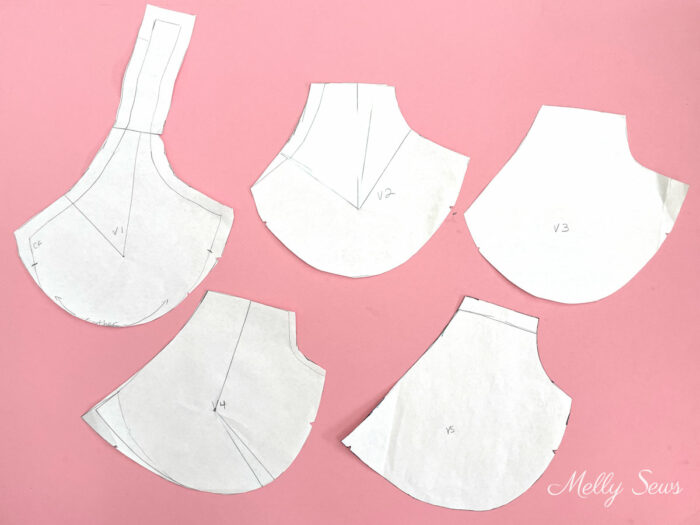
This started with the pattern I drafted for this navy blue stretch velvet dress. (I still need to post about that dress!) I wanted the underbust part of the bodice to be the same shape, but shirred, plus the deep neck cups with straps instead of sleeves. From that starting point I used the same underbust piece to muslin and added a strap to the original cup. Next I cut it out of woven muslin fabric. I knew it wouldn’t fit straight off because my original pattern was drafted for a stretchy fabric, but I wanted to see how much alteration it would need.
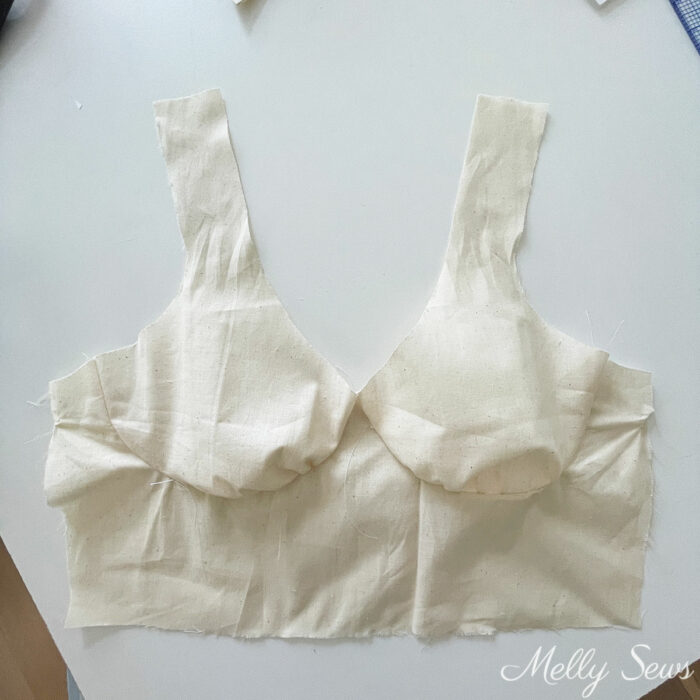
This muslin basically pancaked my bust. The image below shows my pattern progression. I started by adding some width to the top of the cup so it could be gathered top and bottom, then changed the bottom width, then the neckline edge length and angle, and then changed that area yet again. The thing about fitting something round like a boob is that 1/4 to 1/8 inch changes can make a big difference in proper fit. Which is why the end pattern looks very similar to the one I started with, but fits oh so much better.
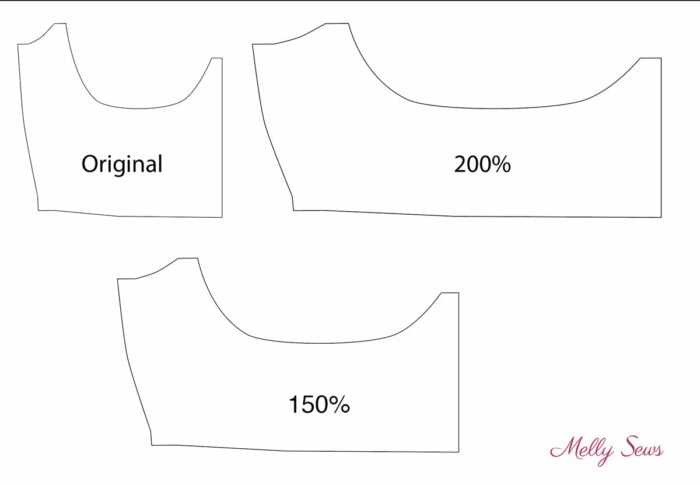
Next I had to determine how much to change the underbust and back pieces to account for the shirring. To do this, I grabbed this shirred dress I made last year. I measured the dress unstretched, then stretched and remeasured. I determined that the shirring had 100% stretch. It was 9 inches unstretched and I was able to stretch to 18 inches.
In Adobe Illustrator, I first scaled my piece 200% horizontally. But that would have meant that when I wore the dress it wouldn’t need to stretch at all. I wanted it to stretch some, so I increased the piece 150% in width and kept it the same height. I then sewed one side seam of the back piece (which was also stretched to 150% of the original width) and sewed my lines of shirring across both pieces before sewing the other side seam.
Supplies needed to sew a DIY embroidered dress
This post contains affiliate links. As an Amazon Associate I earn from qualifying purchases. All affiliate links are identified with (affiliate link) after the link or a commissions earned statement above the link(s).
Now we get into the actual fabric and dress. Here are the materials I used to make it:
- Rayon challis from L.A. Finch Fabrics. I think I used 2 1/2 yards
- DMC Pearl Cotton in Snow White embroidery thread(affiliate link). By the time I was done I had used 5 skeins of this thread. You could use regular embroidery floss for the bodice, but the pearl cotton is easier to work with for the bridged seam and the crocheted edging.
- Embroidery needle, scissors and embroidery hoop
- Dritz Elastic thread (affiliate link) – I only had white on hand, I wish I had had the black elastic thread for this fabric.
- 1/4 inch cotton swim elastic – I ended up using this to finish the sides of the cups and the top of the back. The large roll I bought back when we were making masks comes in handy for things besides masks and swimwear.
- Washable markers (affiliate link) to draw my embroidery design
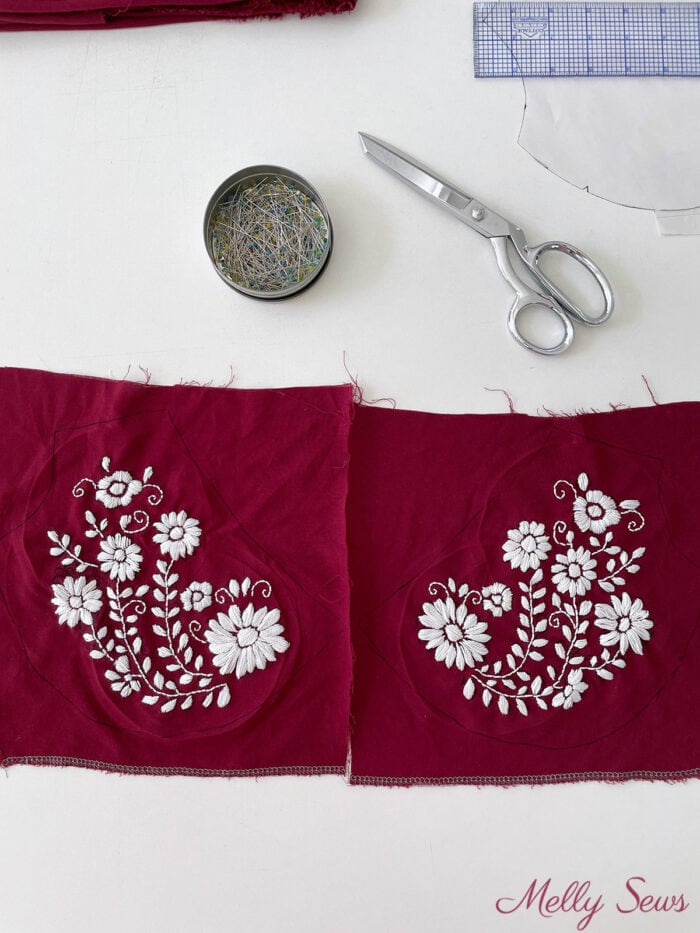
- I based my embroidering on this free design and just kind of altered the size and shape to fit my bodice.

Backstitch and Satin Stitch
I traced my bodice pieces onto the rayon and then cut outside of them. Then I drew on my embroidery design and hooped the piece. The tricky part was making the embroidery design a mirror image for the other side of the bodice.
Here’s a quick video that you can also watch on YouTube showing how to do the backstitch and satin stitches I used in the embroidery design. If you’d like a more detailed post on these stitches, check out this one.
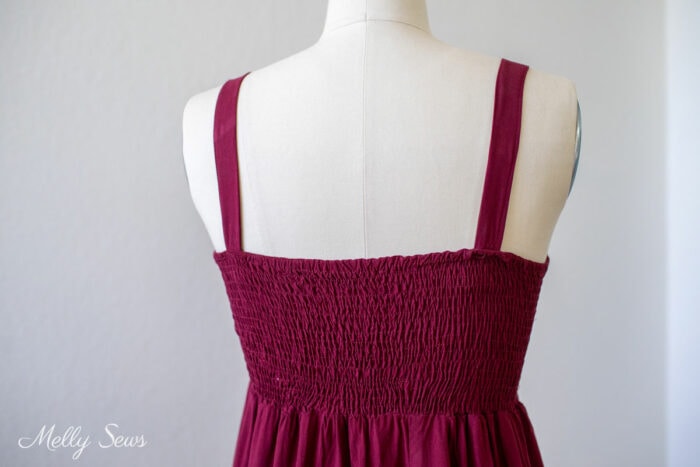
Once I sewed the cups to the bodice, then I needed to finish the edges. I used the same technique as I used in this bikini top – I sewed swim elastic to the edge of the cups and under the arms/around the back while stretching the elastic slightly just as I did in the video in that post. Then I flipped it to the wrong side and stitched it down again, stretching it flat as I stitched. This slightly gathers the neck, arm and back edges and makes sure they sit securely on me.

Finally, I gathered the tops of the cups into the straps and topstitched them closed. I made the straps 1 inch wide. I tried the dress on and had my mom pin the straps in the back over my bra straps so that the placement would be perfect.
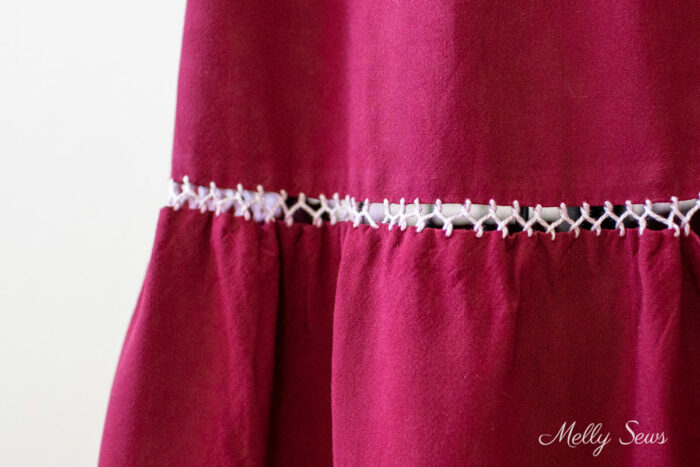
Decorative Bridge Stitch to Connect Tiers
And then here is a short video that you can also watch on YouTube showing how I did the decorative bridging seam between the tiers. For reference, my tiers measure 18 inches and 9 inches in length. Each tier is 1.5 times the circumference of the part it was being attached to. You can read more about how to calculate tiers for a dress here as well as see another way to connect them. And if you’d like to see more about how to sew a bridging or fagoting stitch, check out this post.
And here is a close up of the stitching connecting the tiers.
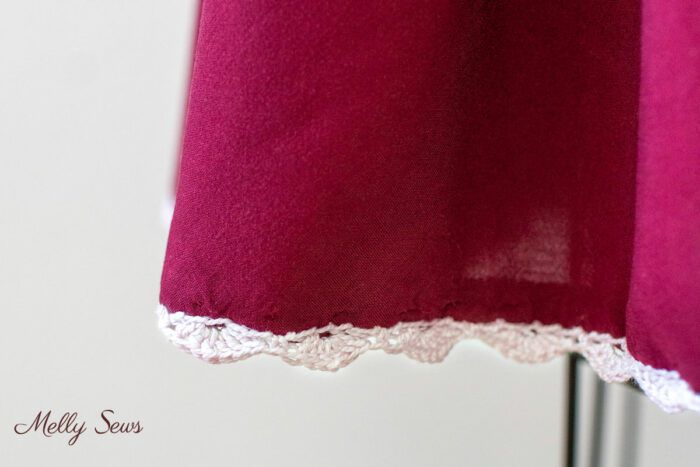
Chain Stitch and Crochet Shell Edging
Finally, here is how I did the chain stitch and then the crochet shells to finish the hem of the dress. You can also watch this video on YouTube. I don’t have anything slowed down on this because I didn’t set out to make a crochet tutorial. So if you need more help on the shells I’d suggest searching for a beginner crochet shell stitch tutorial. Though crocheting with a tiny crochet needle and pearl cotton is probably not a crochet beginner skill.
And here is a close up of the border when I finished it.
And that is how I made my DIY embroidered dress. I sewed this on deadline for some family pictures scheduled last weekend. But the pictures got rained out, and now we have to reschedule.
I love how the hand embroidery on this dress takes it from a basic sundress to something a little more fancy without being over the top. And I love knowing no one else has a dress quite like this one. The end result totally justifies the hours spent hand stitching in my opinion.

Julie
Beautiful! The colour really suits you and the embroidery is stunning ! How did you trace/transfer the embroidery pattern to the fabric?