
This step by step DIY tutorial will show you how to do a zipper to corset back alteration to make a dress bigger, and even how to make your own lace up zipper replacement panel.
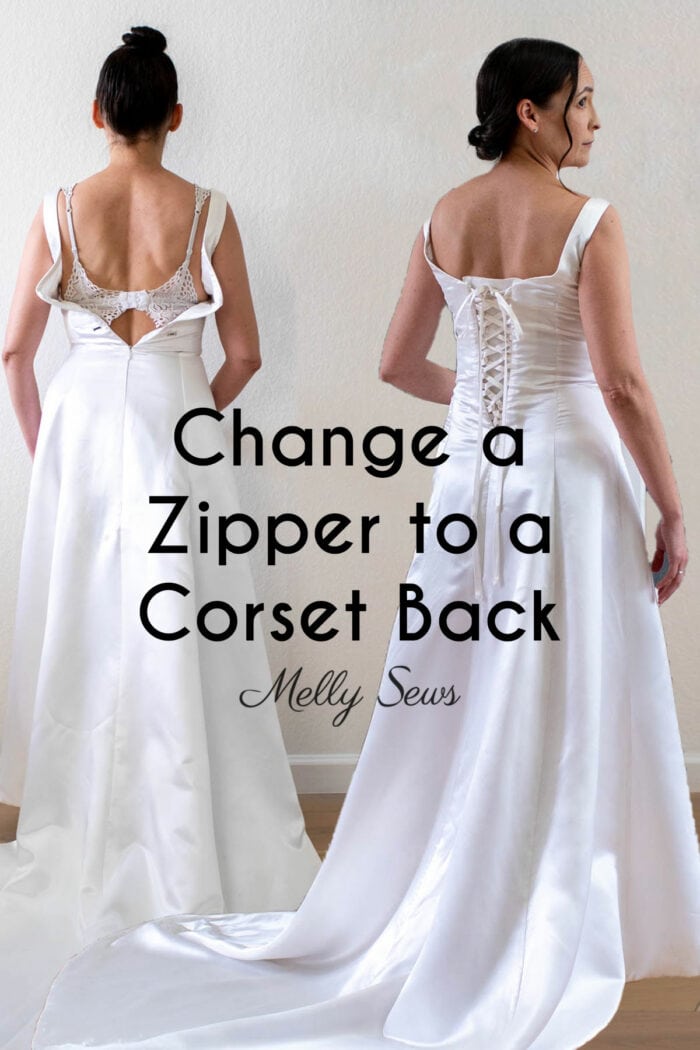
Hey y’all, to wrap up this month of formal sewing tutorials I did a project with my wedding dress and I’m going to show you how to change a zipper to a lace up back. This corset back alteration is a great way to fix a dress that just won’t quite zip up any more. By making it a lace-up closure, you’ll gain a few inches in the back of the dress.
This is a common alteration a professional tailor might do for formal dresses to get a custom dress fit. But you can do this yourself as well! I shared the final result on my Instagram and this post will have a step by step tutorial for making dress bigger. However, this won’t work if you need the dress to be bigger all around. It only adds width to the back and not the front or side seam. And if you don’t know how to sew, check out my free online sewing classes that start here.
Many years ago, when I got married, my mom sewed my wedding dress for me. Years later (ten years ago, to be precise) the Coach and I hit a milestone anniversary and I decided to take my dress back out for our Hawaiian vacation. We took trash the dress photos on the beach to commemorate that anniversary. And that was also the last time I was able to zip this dress all the way up.

Five years ago we decided to do photos again, and this time the back of the dress would.not.zip past my waist, which I discovered the morning we were meeting the photographer. So while I love those photos, a safety pin added at the last minute was what held my dress closed at the top. I guess my bust has increased more than my waistline over the years.

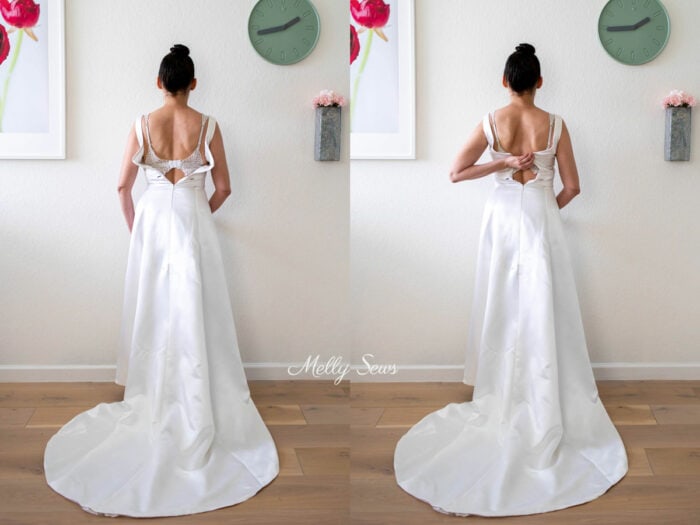
Now it’s five years later, another milestone anniversary, and I didn’t even try to take photos because I knew the dress wouldn’t zip. You can see pictures of me in my sewing studio below with the dress zipped to the waistline, which was far as it would go. But that left me with a perfect opportunity to alter the dress to hopefully fit for the next few years. I thought it would be a quick alteration by sewing in a purchased zipper replacement panel, but then it didn’t match my dress, so I ended up sewing my own.

Materials Needed To Replace a Zipper with a Corset Back
This post contains affiliate links. As an Amazon Associate I earn from qualifying purchases. All affiliate links are identified with (affiliate link) after the link or a commissions earned statement above the link(s).
To change the back of your dress to a lace up style and make it larger, you’ll need
- A zipper replacement lace up kit (affiliate link) Use a measuring tape to determine the amount of zipper length that won’t zip and add at least 1 inch to that amount to decide on your length if you’re buying a kit.
- Boning (affiliate link) if you’re not buying a kit. The one I linked looks the same as the kind I bought at a warehouse.
- Fabric that matches your dress if you’re not buying a kit. I used the streamers that were originally on the back of my dress as that was the only extra material on the dress. The streamers wouldn’t work with the laced up back fabric panel anyway so I borrowed that original fabric from them.
- If you’re using satin like I did, pinking shears (affiliate link) or a pinking blade (affiliate link) is helpful
- Matching ribbon for the lacing if you don’t want to make your own
- A tube turner for turning the tubes if you’re making your own lacing like I did. For mine I found that the third type of turner in that post worked best since I was making 3/8 inch wide tubes and they were difficult to turn.
- General sewing notions – home sewing machine, needles, thread, scissors, etc. It’s possible to hand sew all of this, but I would definitely grab a thimble if you’re planning to do that because you’ll need lots of tiny stitches to hold this in place securely.
How to Add Corset Lacing to a Garment
I made a video of the whole process for my old zipper replacement , which you can watch below or on YouTube here. I’ll also put written instructions below.
How to Make Your Own Lace Up Back Panels
Below is how I made my pattern and sewed the loop panels and the modesty panel for my gown.
Time needed: 2 hours
Make a Corset Back Kit
- Make your pattern pieces
For the side panels, measure the length you need that can’t zip. Then draw a line that length plus 1 inch. Make marks 3/4 inch to each side of the line at the bottom, and 1 inch to each side of the line at the top, then connect the points so that your panel is 1 1/2 inches wide at the bottom and 2 inches wide at the top. Add 1/2 inch seam allowances all the way around the piece. For the modesty panel I doubled the side panel widths and did 3 inches wide at the bottom and 4 inches wide at the top and the same length. Make sure that is going to be wide enough to cover the gap you need covered; if not, make the modesty panel wider. Add 1/2 inch seam allowances all the way around.

- Cut out the panels and strips for the lacing
Cut 4 side panel pieces, 2 modesty panel pieces, and lots of long strips to make into the lacing if you’re making it. I cut out 5 yards length of 1 1/4 inch wide strips.
- Make the cording (optional)
You can use ribbon for the lacing, but if you’re making it, you’ll fold your fabric strips right sides together, matching the long edges. I sewed mine with 1/4 inch seams so that when I turned my tubes right side out they were 3/8 inch wide. This was difficult to turn, but this was the amount I had fabric for. I turned the tubes right side out and then hand stitched the ends together until I had one long piece. Turn the raw edges at the ends to the inside and stitch closed.
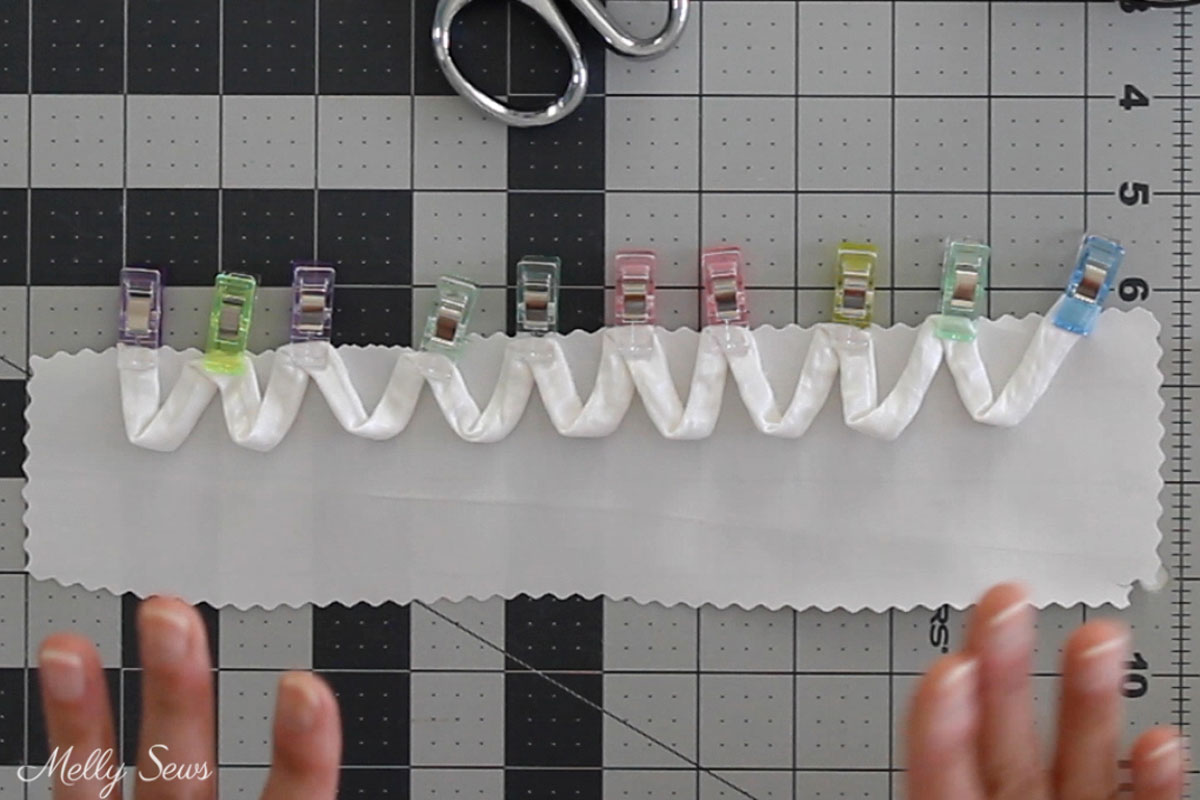
- Fold and baste the loops.
I made my loops 1 inch apart and 1 inch deep. Start 1 inch above the bottom edge and end 1/2 inch from the top edge. Fold the lacing in a series of V shapes and clip to the edge of the side panel fabric. Then baste with a 3/8 inch wide seam allowance. Repeat for the other side panel
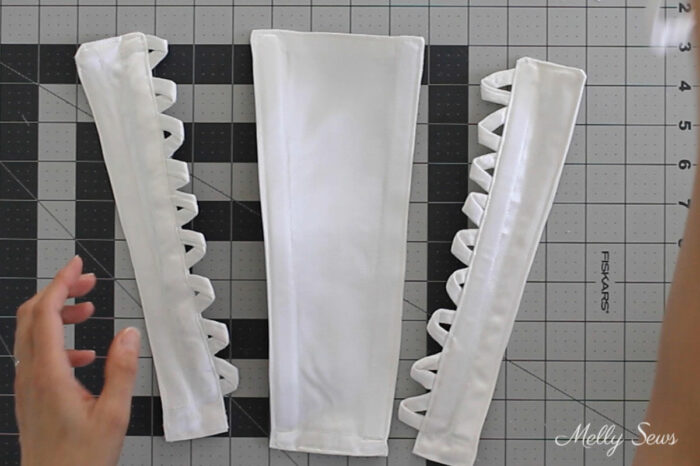
- Sew the side panels.
Place one of the non-looped side panel pieces right sides together with a looped piece. Stitch around the two long sides and the wider top edge. Clip corners and turn panel right side out. Press. Topstitch around the same 3 edges, starting 1/2 inch up from the bottom. Repeat with other side panel and modesty panel, though you won’t have loops to worry about on that.

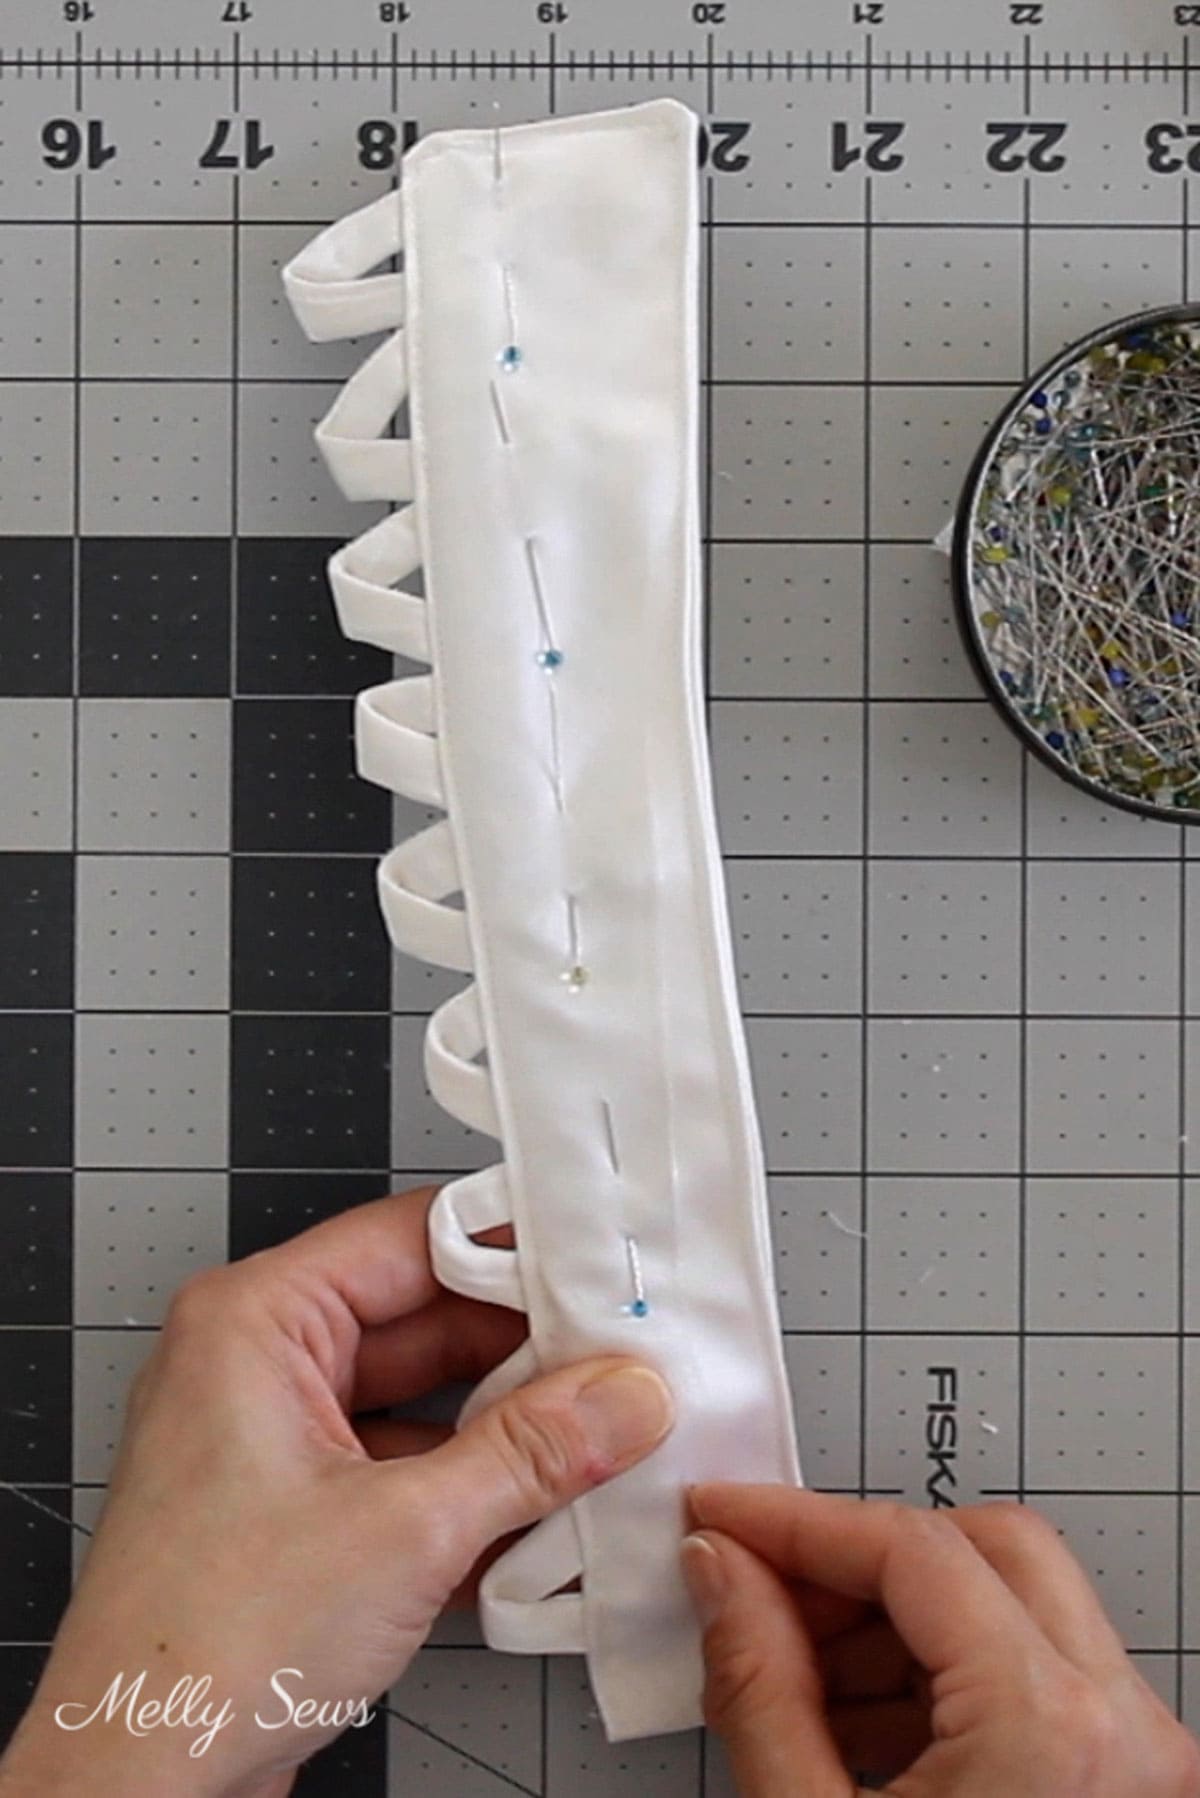
- Add the boning
Cut boning pieces to length so that it will hit the topstitching on top and end at the bottom of the last loop at the bottom. Feed boning into the panel, using pins to keep it against the topstitching. Stitch a channel to keep the boning in place. I find it’s easier to use a zipper foot so you can stitch with the needle right next to the boning. Repeat on the other side of the panel and with the other panel and the modesty panel.
How to Sew on a Corset Back to Replace a Zipper
Once you have your zipper replacement kit, sewing it on is easy. Here are the steps explaining how to change a zipper to a lace up back.
- Use a seam ripper to unpick the zipper to the new stopping point.
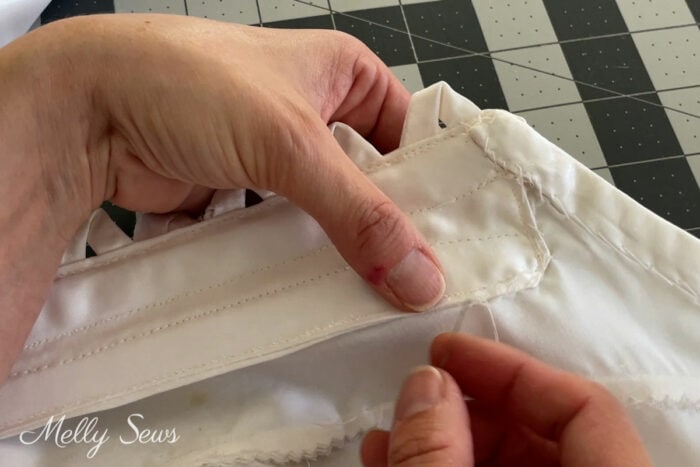
- Place one side panel under one side of the back opening. Either topstitch it in place or sew the panel to the seam allowance as I did in the video above.
- Hand stitch the other side of the panel to the lining of the dress using a whip stitch. This post will help you with hand stitches.
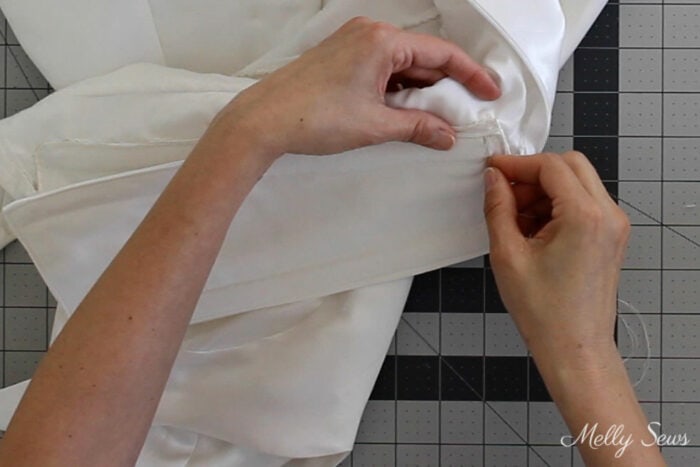
- Hand stitch the modesty panel to the back of one side panel.
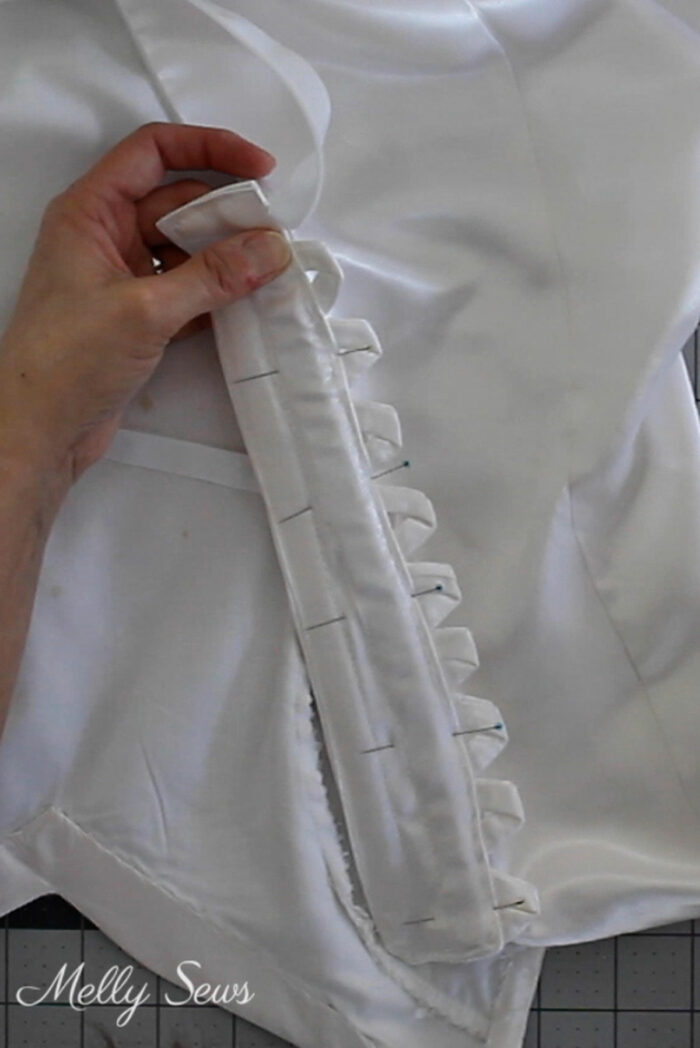
Here is how I pinned on the side panel.
This shows how I stitched the panel to the lining
And finally, below you can see how I stitched the modesty panel in place. You can also add a hook and eye or sew on a snap to one side of the modesty panel if desire, but usually the pressure of the lacing against the wearer’s back will hold the panel in place. And that’s how to change a zipper to a lace up back!
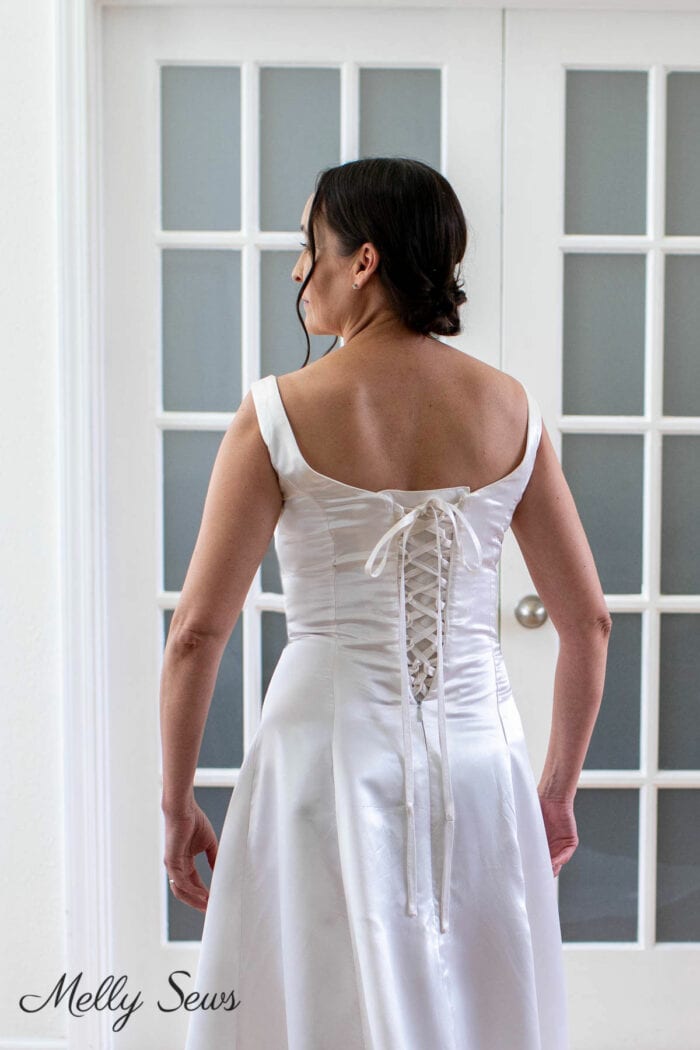
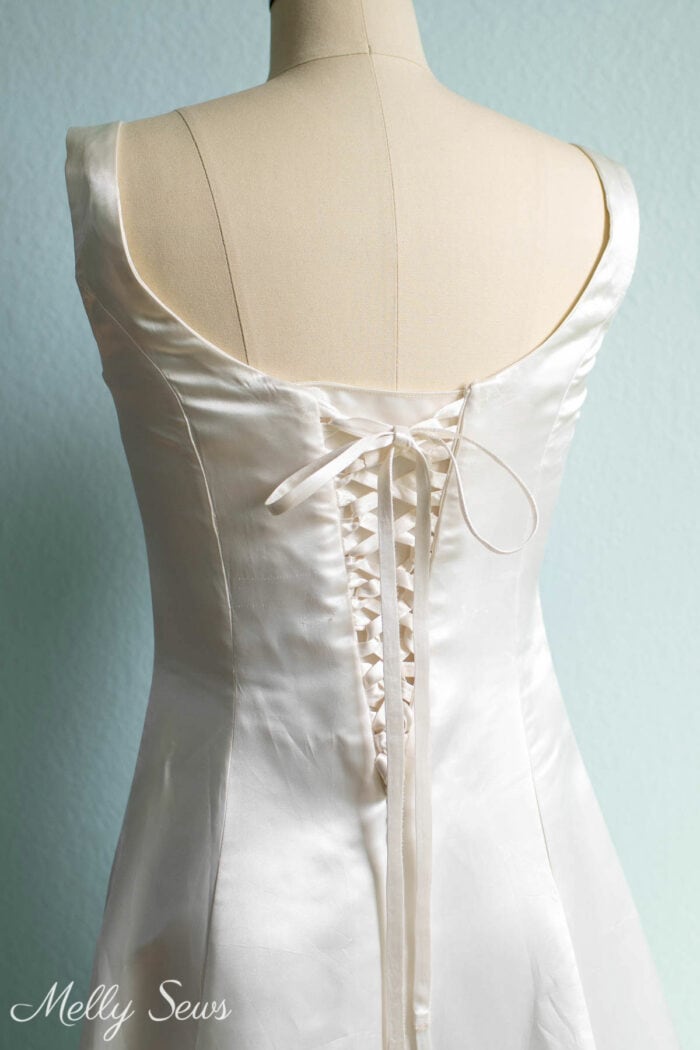
Lacing the Back
I like to lace my back from the bottom so there’s a bow at the top. However, you can do this the opposite way so the bow is at the bottom. Thread the lacing through the bottom two loops, then lace just like a shoelace – back and forth through every other loop.
Kristie
Wow. This might be the only way I could fit into my wedding dress! It has been way too many years since I tried. Thank you for sharing this how to. It is prom season, and this is going to be a useful tip!
Katie
That looks even more beautiful now 🙂
Cindy
Absolutely stunning! Thank you for sharing this gorgeous remastering.
All good, positive thoughts to you for your surgery and recovery.
Dara
My Goodness You Coach make a Beautiful couple! The Dress is Lovely also! May you have MANY MORE Happy Anniversaries to celebrate!!
Jean
When my younger daughter got married I tried my dress on and it stopped about where yours did. My daughter had the same issue – not that she wanted to wear it – “Mom, I don’t THINK so”…
I never would have thought to try a corset alteration but now would consider it after reading your post. Thank you!
Carol Burman
Fabulous story. I love the alteration idea. Thank you for sharing. Enjoy the warm weather, in preparation for next week. Best wishes from 🇨🇦
Carol
Yvette
Absolutely stunning! I wish I had known to this before giving away my prom gown. Thank you for sharing
Dianne
A great way to save your wedding dress for another future occasion – love that you want to alter to have the wonderful memories of your beautiful dress (created by you Mom) . Still have my wedding dress (from 53 years ago) that was lovingly sewn by my husband’s sister (she also sewed the bridesmaids’ gowns). She has passed on so you can imagine how very dear & precious that dress is to me. I also want to send along my best wishes for your upcoming surgery Melissa.