
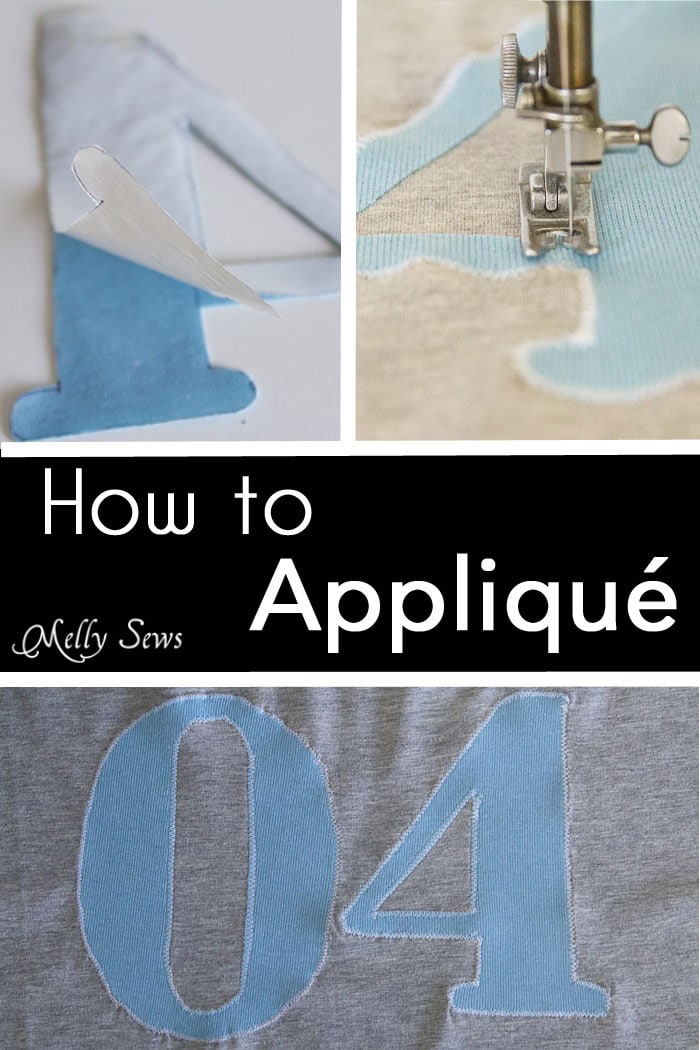
Hey y’all – I decided to start something new on the blog this year and make more of an effort to fill in technique gaps that I haven’t covered in their own posts by creating a sewing terms glossary. And of course, being the sucker for organization that I am, I’m going to try to do them alphabetically. You’ll see one pop up at least once a month. So today’s lesson is how to applique.
Appliqué – a technique in which smaller pieces of fabric are applied to larger pieces of fabric to create a design.
There are fascinating variations of appliqué – for example, Hawaiian quilting features appliqué prominently, and reverse appliqué incorporates cut outs to reveal the contrasting fabric, but today we’re going to focus on a straightforward modern appliqué method.
To do this, you’ll need
- The design you want to appliqué
- The fabric you want to use for the appliqué
- The fabric you’re going to place the appliqué on
- A sewable, fusible, double sided adhesive, such as Heat ‘n Bond Lite or Wonder Under (affiliate links) Important: whichever fusible you choose, make sure it’s safe to sew. Some are not and will gum up your needle and be awful to work with.
A note about choosing or making an appliqué design – if you are using something like text that needs to read a certain way, you’ll want to print the design mirrored, like the number 4 below.
Trace the design pieces onto your fusible adhesive on the paper side, as shown below.
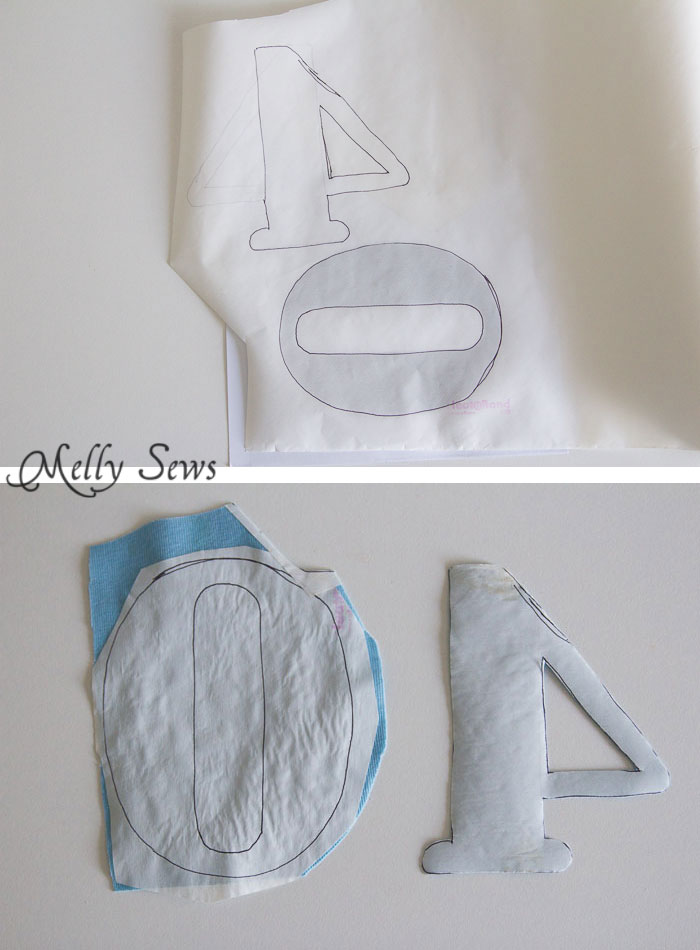
Fuse your designs to the WRONG SIDE of the appliqué fabric. Then cut the appliqués out of the fabric. I cut away as much of the excess with regular scissors as I can before switching to my fabric scissors to cut out the appliqués in detail.
After the appliqués are cut out, peel off the paper backing, then position them on the fabric you’re applying them to.
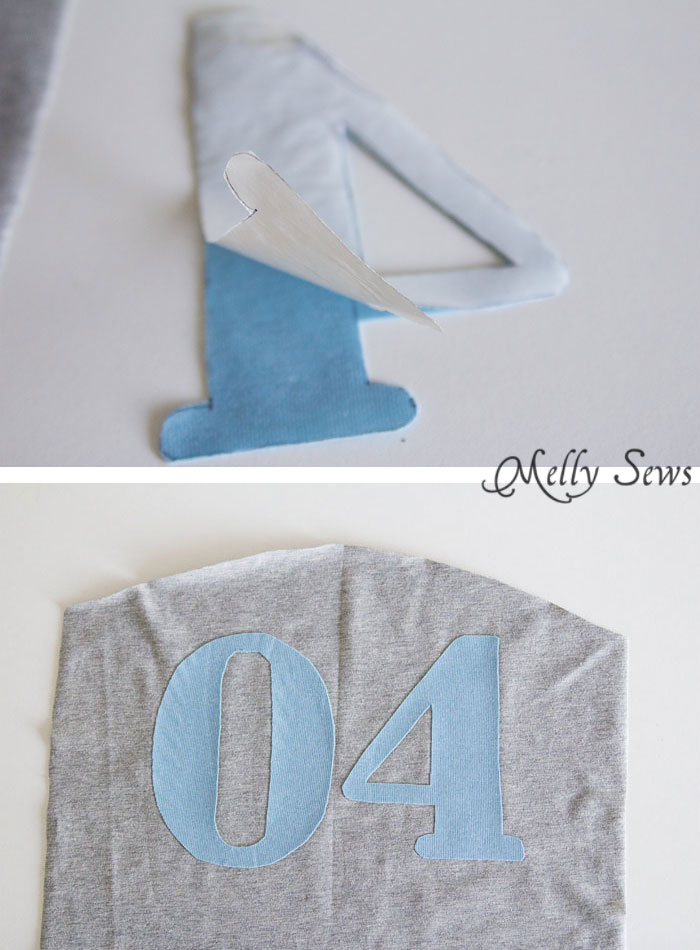
Press the appliqués to make them stick to the fabric. Next you’ll use either an appliqué stitch or zig zag stitch to stitch around the fabric edges and make sure the appliqués stay put! If you’re using a zig zag, you’ll want a wide stitch and short stitch length. Hand crank your machine to set the needle just off the edge of the appliqué, then begin to stitch. Keep the fabric lined up so that the needle stitches off the edge on one side.
When you need to turn an interior corner or curve, stop with the needle on the fabric, not the appliqué, then lift the presser foot and turn. For exterior corners, stop with the needle in the appliqué, not the fabric, then lift the presser foot and turn.
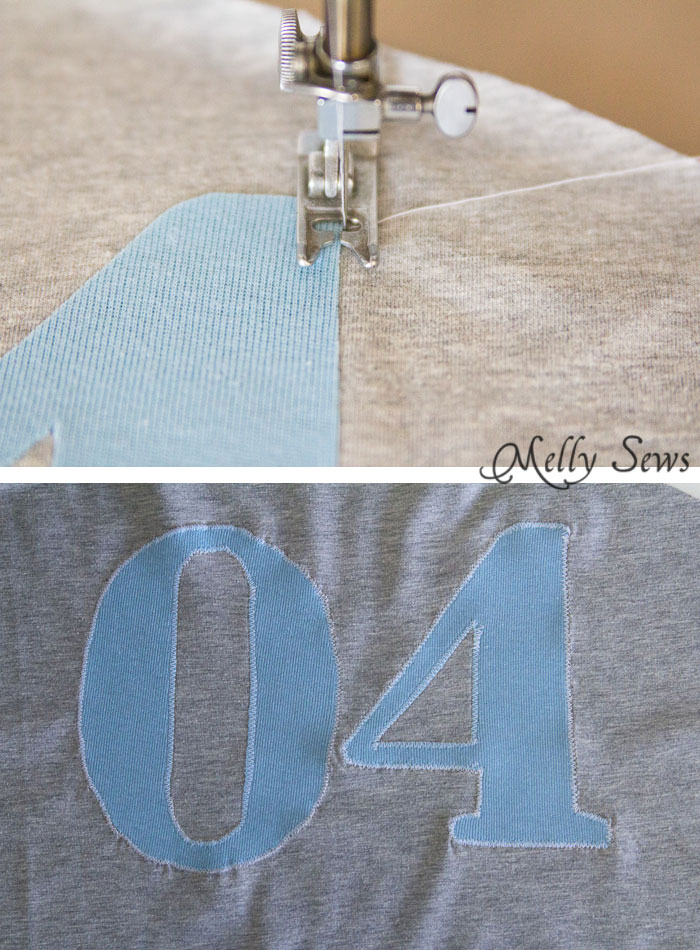
When you’re finished, the edges of your appliqué should be covered with enough stitching to make sure to hold the appliqué firmly to the other fabric and to prevent any fraying of the appliqué – this is why you should use a short stitch length to keep those stitches together.
For more great information about appliqué, see this post from Sew Like My Mom.
Tringa
This has inspired me! Thank you for sharing 🙂
April @ Wunderlabel
These variations of applique are fascinating.. I should try this with the tees of my ‘lil boy. 🙂 maybe he’ll like it. haha
Kevin
I love some of the techniques you used. They are absolutely adorable.
Helen E O'Driscoll
I use a fabric spray glue for sticking the applique peices works just as well,
Lizzy115
Excellent! Putting the needle down in the correct position is so important and was the part I couldn’t wrap my head around. Inside curve – needle out; outside curve – needle in. Got it!!! Thank you so much for this.