
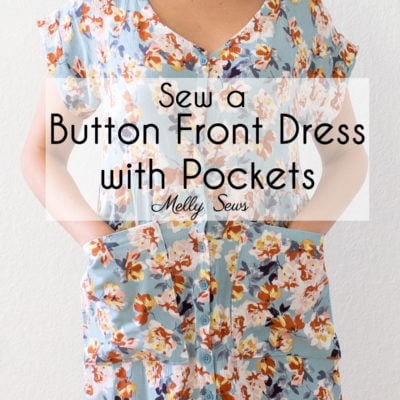
Change a pullover style top into a button up shirt with this pattern hack
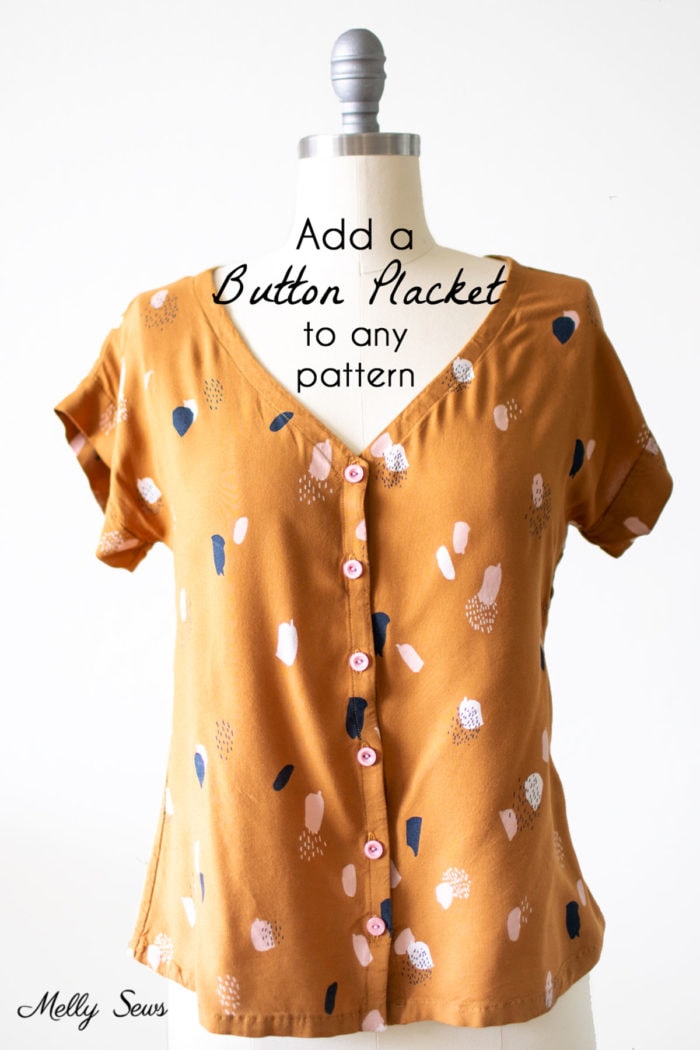
Hey y’all, today we continue Esma hacking month with this pattern hack for turning a pullover into a button up. In other words, this is how to add buttons and a placket to a shirt. I love how this keeps my favorite details of the Esma Top but adds just a little something.
I made a video showing this process, which you can watch below or on YouTube here.
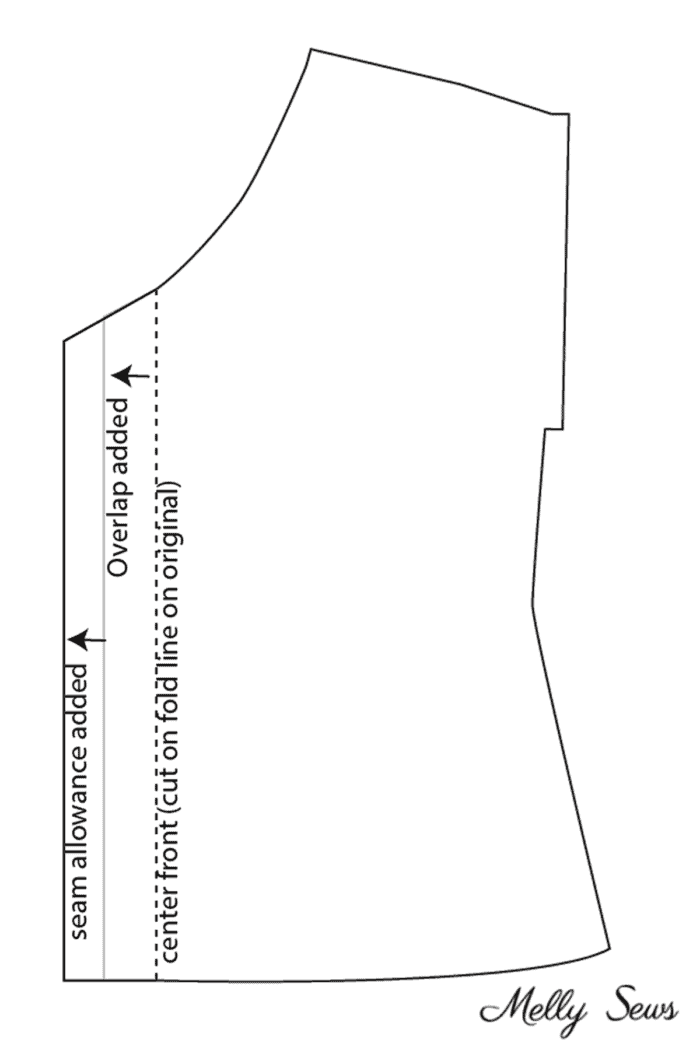
For the pattern alteration, you need to add the amount of overlap you want at the center front plus a seam allowance. Then cut two mirrored fronts instead of one front on the fold.
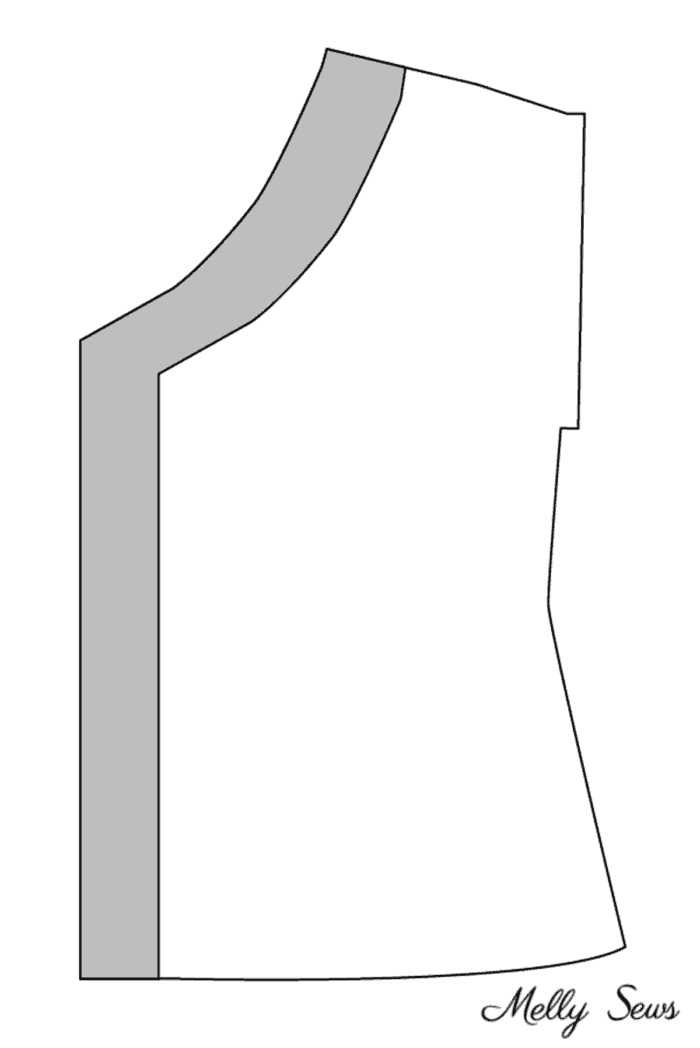
Next you need to draft a new front facing. Make sure it matches the existing back facing width at the shoulder. Cut two mirrored facing pieces.
This post contains affiliate links. As an Amazon Associate I earn from qualifying purchases. All affiliate links are identified with (affiliate link) after the link or a commissions earned statement above the link(s).
For more help sewing a neck facing, you can see this post. For more help with buttonholes, you can see this post. And to get a nice finish on the bottom front corners, be sure to watch the video above. Lastly, you’ll add buttons to the placket! I used 6 half inch wide buttons spaced with my Simflex gauge (affiliate link) to finish the front of the shirt. I machine stitched my buttons on so it was super fast!

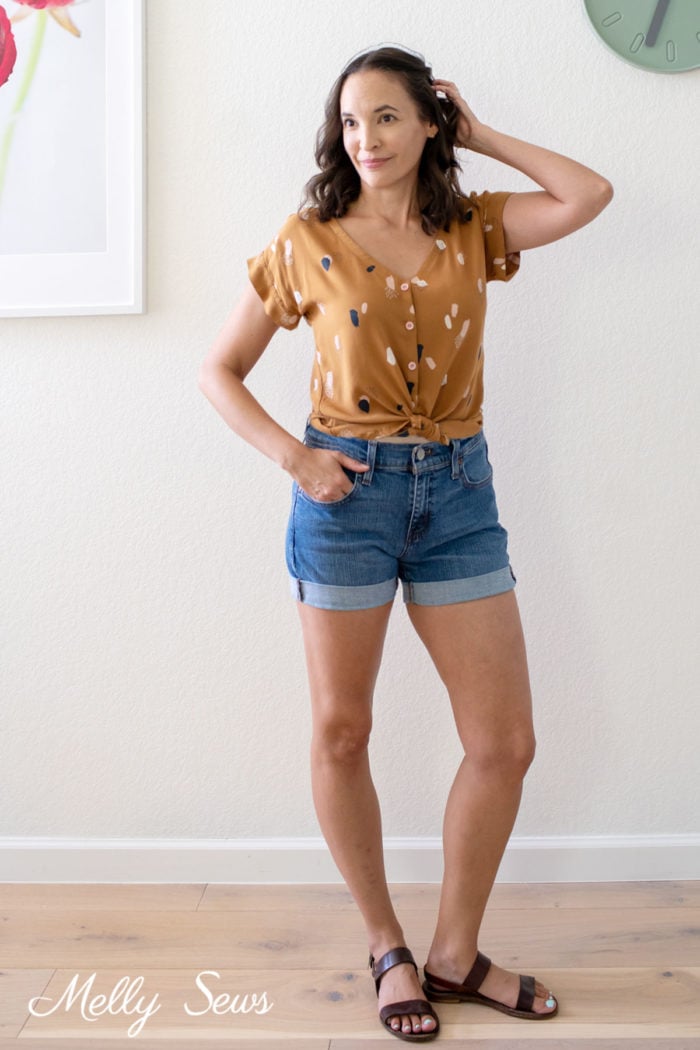
This fabric is a rayon challis from Atelier Brunette that I bought and hoarded especially for this project. I love the way it turned out and have already worn this top several times.
Check out all my other Esma hacks below
 |  |  |
Pat Adams
I love this idea – I’m going to try it! I love your Blog/Site and get so many ideas that show me how to improve my skills and give me COURAGE to step out of my comfort zone and try new things. Thank you so very, very much!
Nasrah
Very nice