

Hey y’all – today I’m going to show you how to sew a circle top with a hood. You could also call this a hooded poncho or hooded tunic – it could fit into any of those categories.
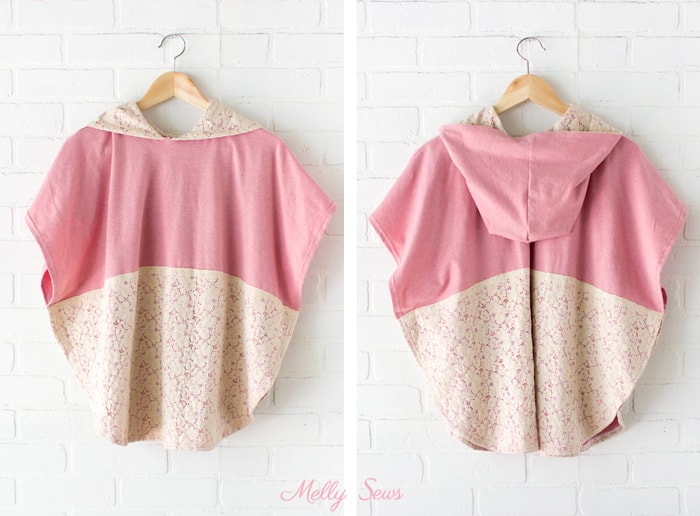

One of my biggest challenges with wearing things like leggings is what to wear on top. My personal style is a little more feminine than most athleisure, so something like this with pink and lace and a flowy shape is right up my alley. On the other hand, if you prefer less feminine detailing, you could skip the lace and use a different color and this would have a totally different look.


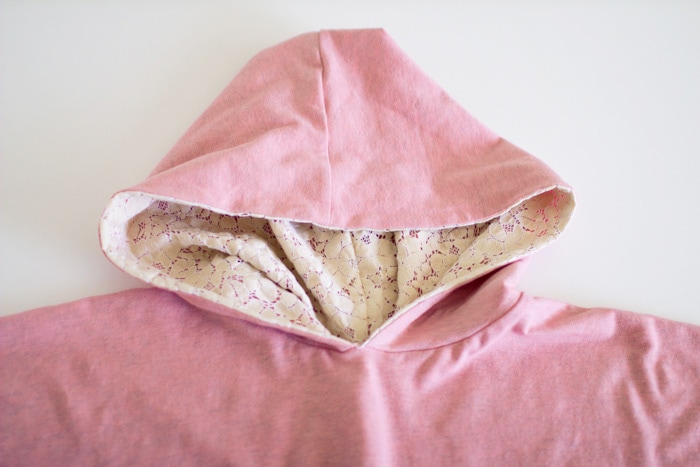
I custom dyed the fabrics for this tunic; the pink started out as a heathered oatmeal knit and the lace was bright white. I used Dharma Trading Co. Baby Pink to overdye the knit and a mix of Amber Waves and Charcoal to dye the lace.
The best part of this project? You don’t need a pattern for anything but the hood, and I’ve got a free hood option for you today!

Want to sew your own? You’ll need:
- Knit fabric, about 1 1/2 – 2 yards of 60″ wide fabric depending on your size
- Stretch lace fabric (optional) 1 – 1 1/2 yards, depending on your size and the fabric width. Note – I used the lace to line my hood; if you’re skipping the lace make sure to have another 1/2 yard of knit for the lining. A contrast color could be fun! Also, if you want to use non-stretch lace on the bottom you can, just use something else to line the hood.
- Measurements for your shoulder width and preferred top length, measuring from the bone at the base of your neck in the back down to whatever length you’d like.
- The hood pattern and neckline template.
Click your preferred option below to get the free pattern as a newsletter subscriber.
 |  |
Please note that all my free patterns are licensed for personal use only (no selling items made from this unless you purchase it) and by downloading you are agreeing to this license.

To sew these, watch the video tutorial below. If it won’t load below for some reason, you can also watch on YouTube here. Or if you prefer written instructions, keep scrolling.
To make your pattern, start with your shoulder width measurement. Add 12-14 inches to that measurement; this will be the width of your fabric. Cut two rectangles this width by your preferred length (don’t forget to add about 3/4″ for the hem to the length) and make sure your knit fabric is stretching widthwise with your pieces. Then fold your tunic pieces in half vertically.
For example, I wanted a 25 inch long tunic and my shoulders are 16 inches wide. So my pieces measured 28 inches wide by 26 inches long.
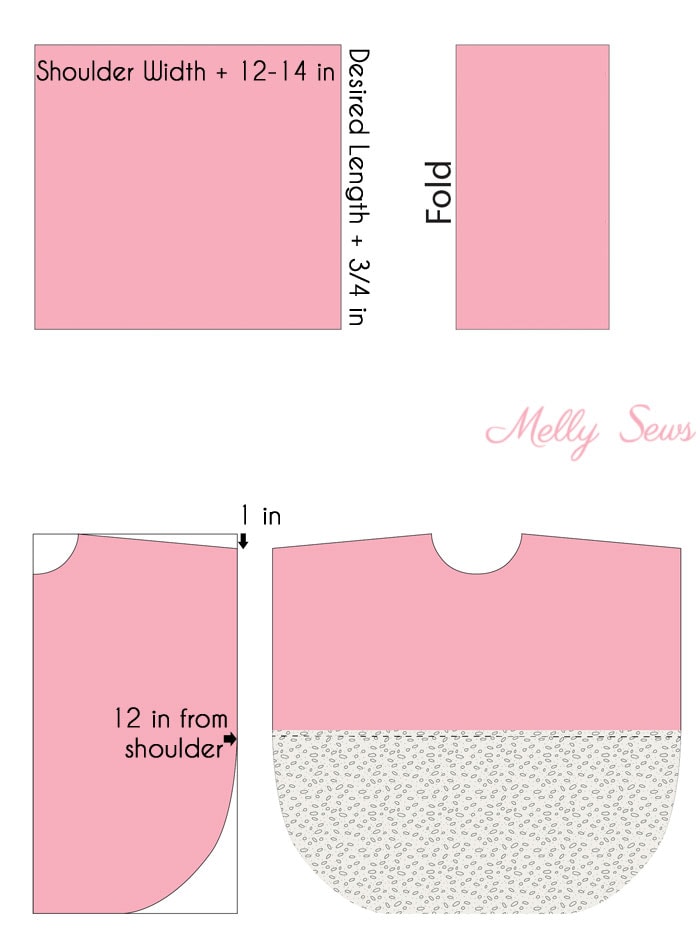
Use the neckline template to cutout the neckline at the fold. Then drop the outer shoulder edge 1 inch and mark a line from the shoulder to the neckline; cut that piece off.
Finally, measure about 12 inches down on the side and then round off the bottom from the side toward the center front/back. I like to use this flex ruler (affiliate link) to plan out my curves before cutting. Once you have your shape, cut out two lace pieces to match the bottom tunic edge.
Don’t forget to cut 2 mirrored hood pieces and 2 mirrored lining pieces for the hood.
Open the front and back tunic pieces flat. If you’re adding lace, turn the top edge of one of the lace pieces under to the wrong side and pin it across the front, then repeat with the other lace piece and the back. Stitch across folded edge.
Place the front and back right sides together and stitch across the shoulders.
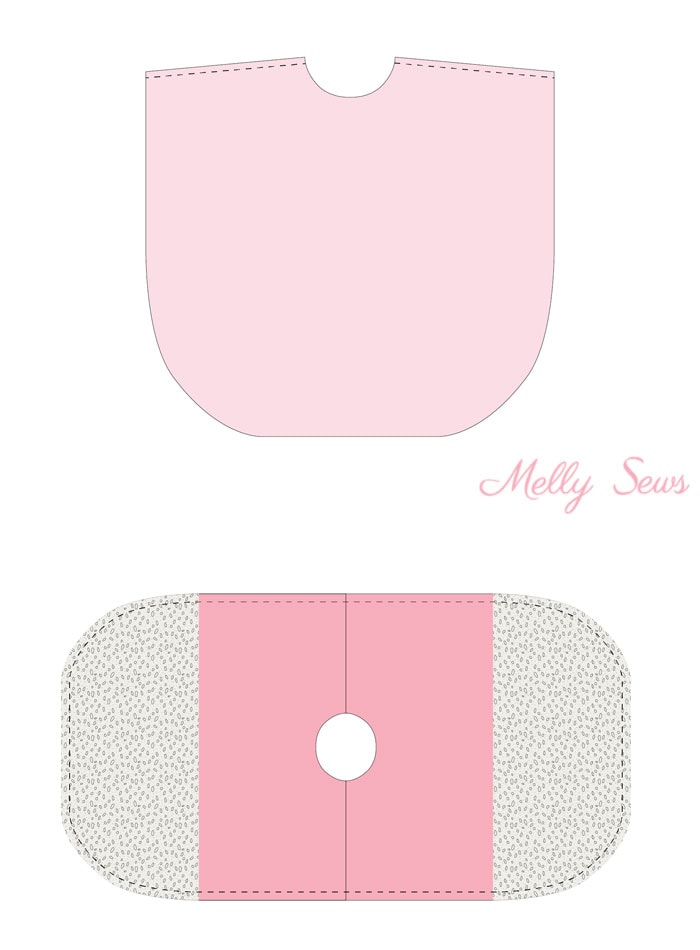
Open the tunic flat and baste 1/2″ in around the entire edge. This will hold the lace together and form a line for folding the hem.
Fold the hem all along the edge, folding on the basting line. Note that around the curves, the raw edges will have puckers inside but the folded edge and appearance from the outside will remain flat. Stitch the hem.
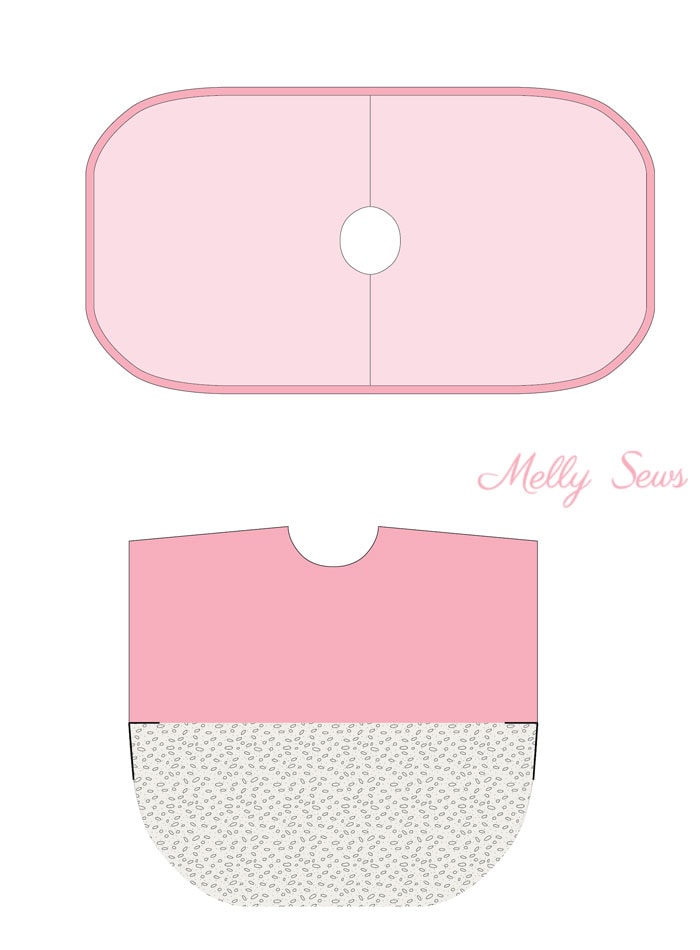
Fold the top wrong sides together, then stitch across at the top of the lace at the outer edges and down a couple inches to create the sleeve holes and to hold the sides together.
Construct the hood according to the directions in this post.
Mark center front and center back on the tunic. Butt the face ends of the hood together and match them to center front. Match the hood seam to center back. Pin around the neckline, then stitch. If this part is confusing, see the video. You can finish this seam with a serger, or if you don’t have one, cover it with knit bias tape.
And wear your top with pride!
Naomi
Perfect timing! I’ve been looking for an idea to make out of Terry Cloth for a swim cover for my daughter. This is great! Will be a nice challenge to scale the idea down to a size 4 🙂 Just what I needed for our upcoming beach trip to the Adriatic Coast. Thankyou <3
Janine
Thank you for sharing your talents! I’m a compulsive DIY vid watcher and have to say that your video is one of (no – probably the) best one I have seen in a long time – clear instructions, great video angle, and great pace of instruction.
Thanks again!