

This is part of my Signature Look for the Project Run and Play Sew Along. The full post is schedule for Thursday, but you’re getting a sneak peak with this post.
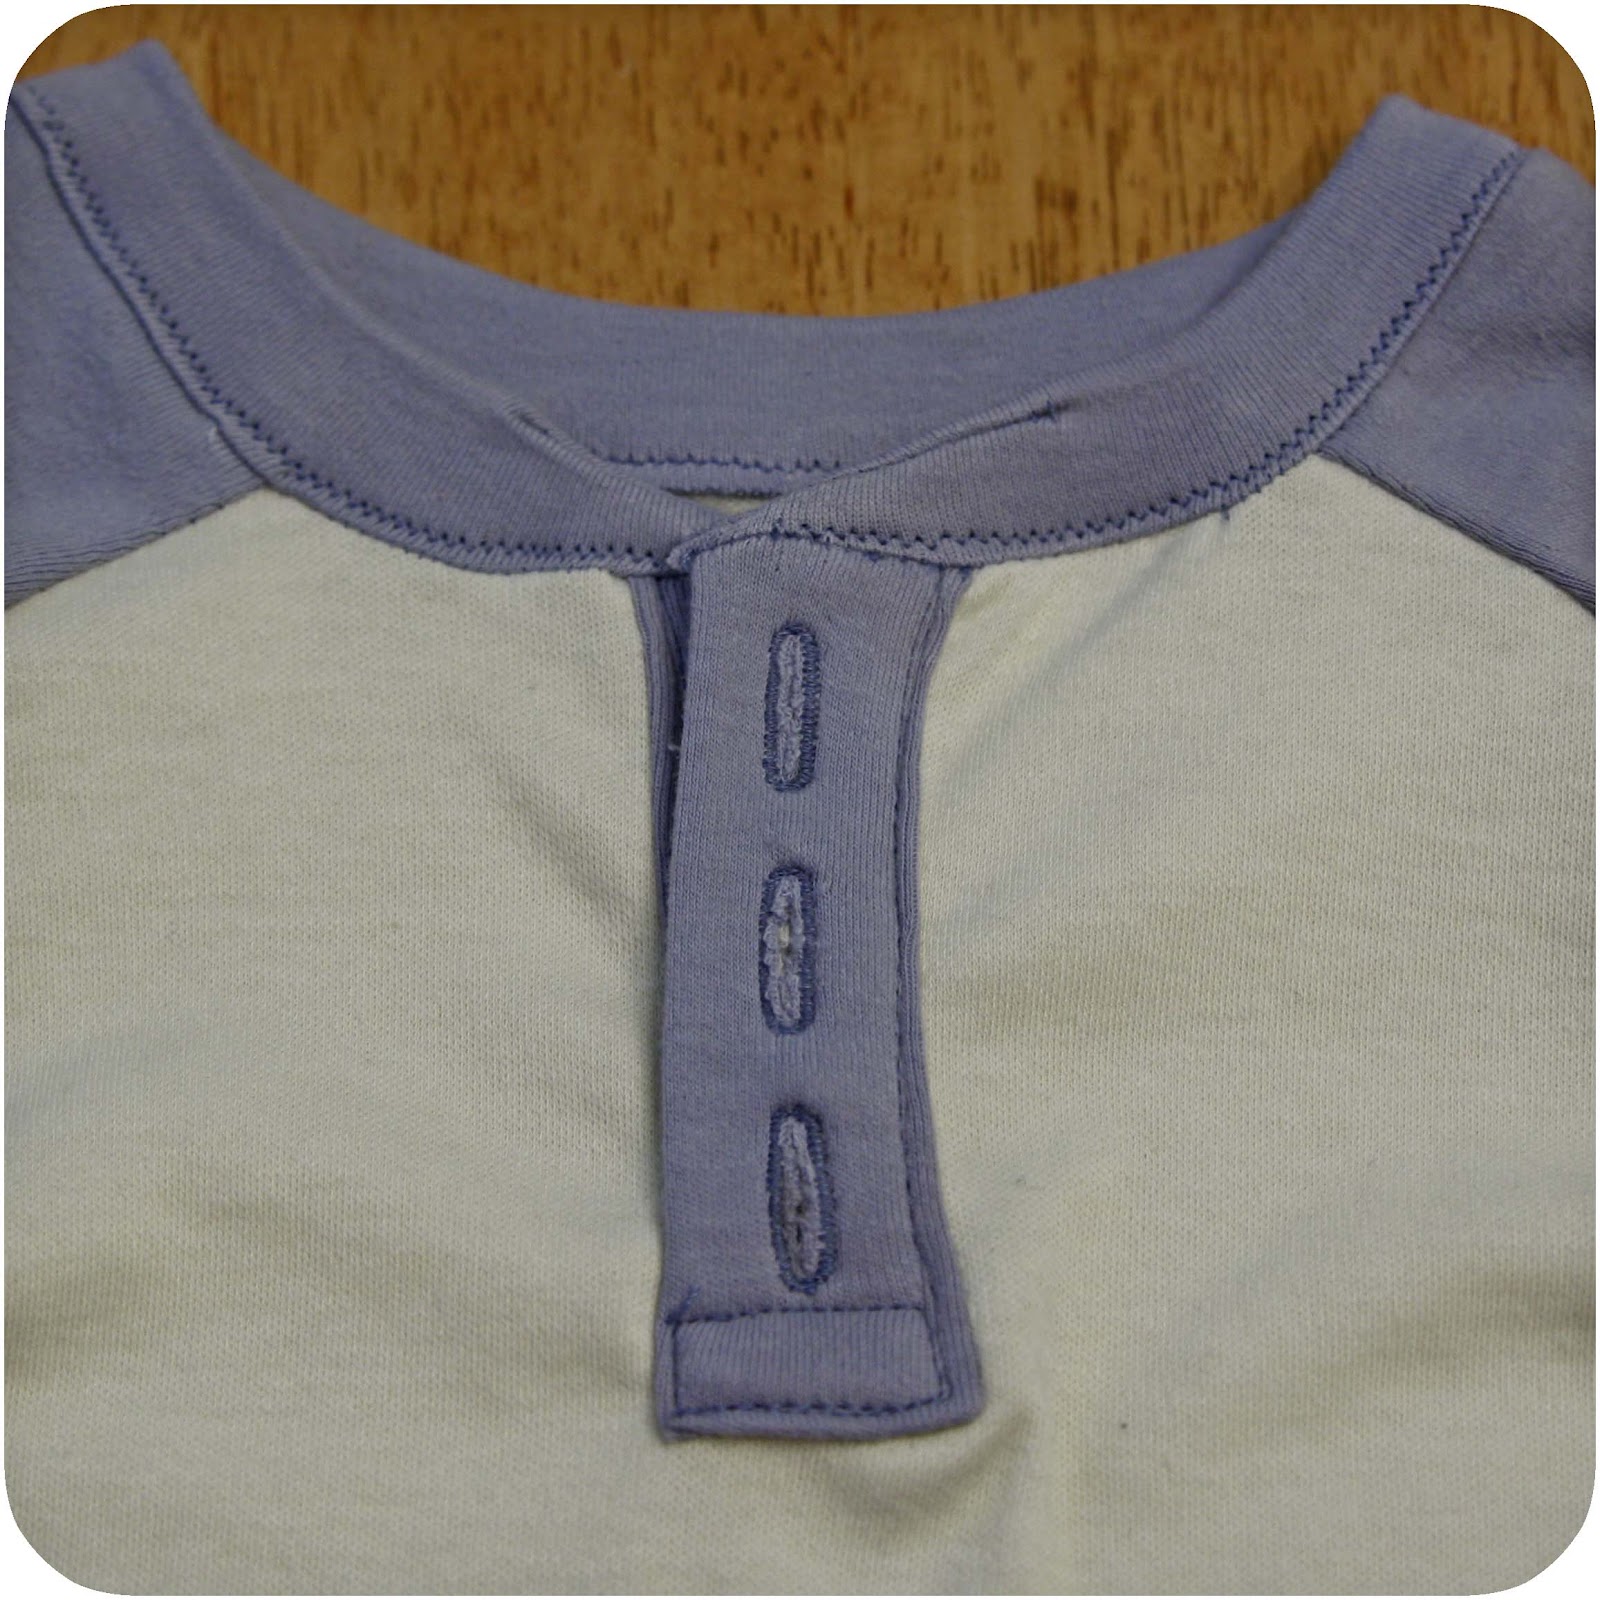
In this tutorial, I’m going to show you how to take any t-shirt and turn it into a henley (or a polo – if you add a collar instead of a neck band, the placket technique is the same) by adding a button placket.
If you’ve never sewn a placket before, I recommend you try this with woven fabric first (maybe even with scraps) because knit fabric adds two challenges – one, it stretches, which can make the placket end up wonky if you’re not careful. You can interface the placket area to combat that, but that leads to more of problem two, which is that knits are usually bulkier than wovens, which can make the bottom of a placket challenging. So, here we go.
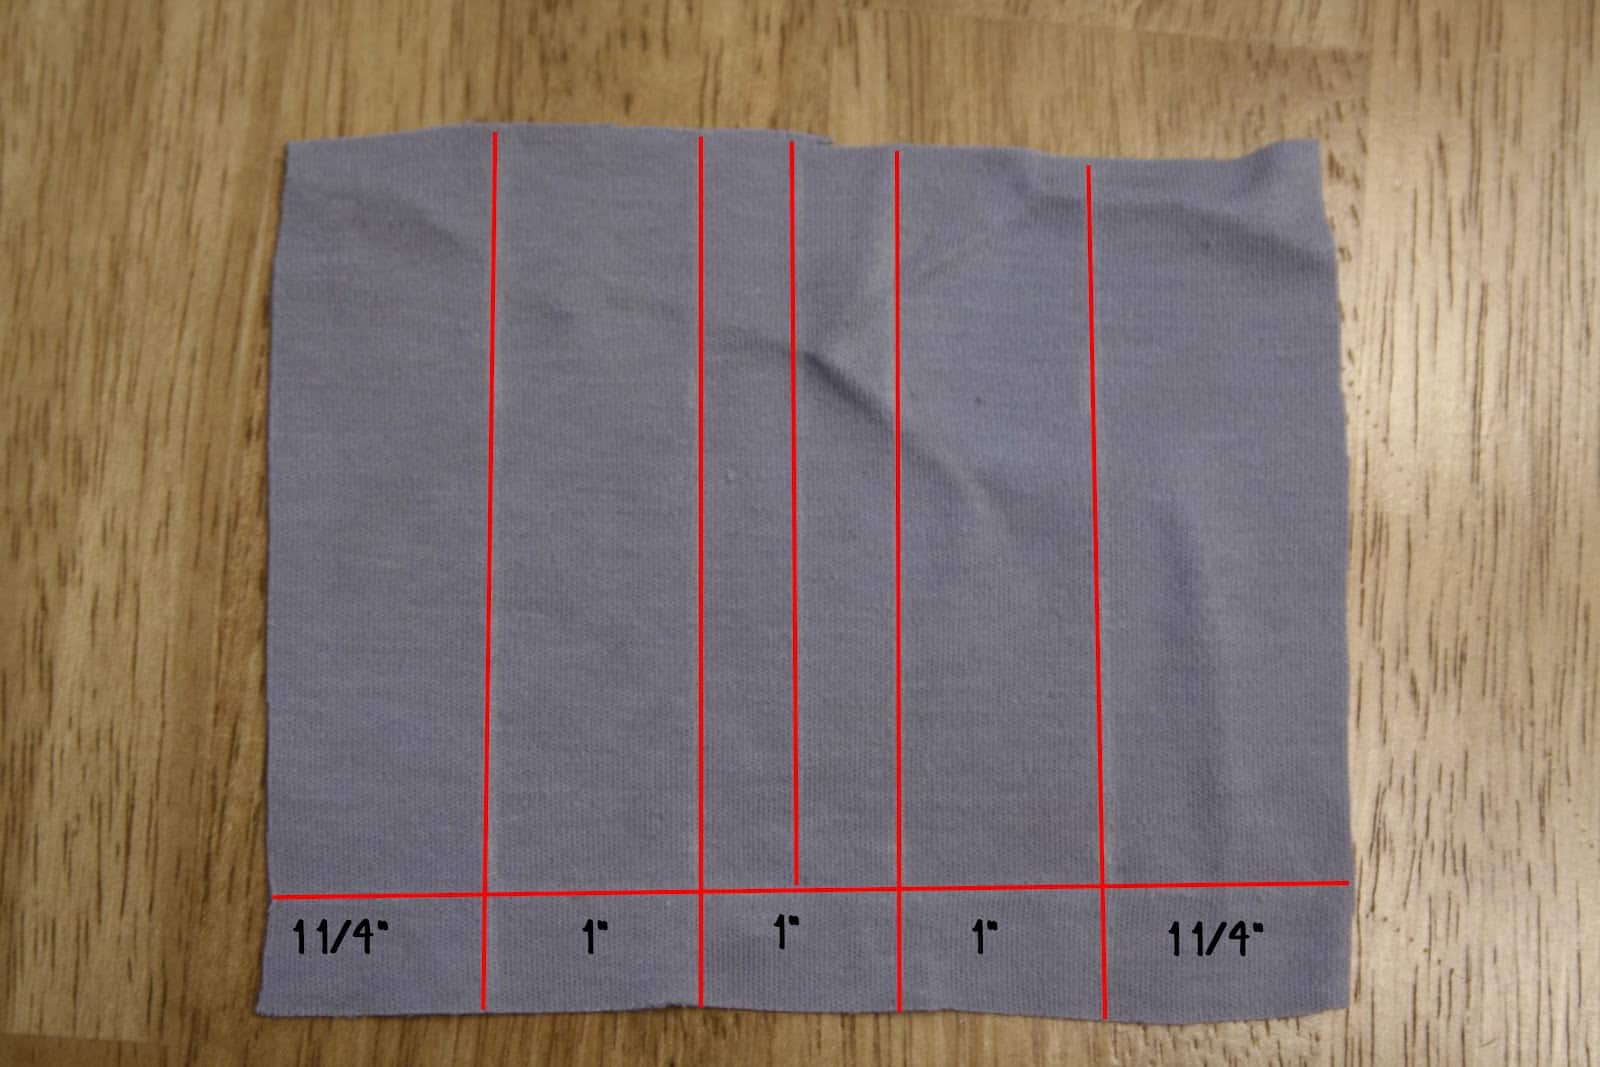
You need a rectangle that is 5x the width of your final placket, plus 1/2 inch
As tall as you want your final placket, plus 1 inch
So my rectangle below, for a final placket that was 3 1/2 inches long and 1 inch wide, is 4 1/2 inches tall by 5 1/2 inches wide. Then you divide your placket into sections as show below. The center three sections are as wide as your placket (though the very center one gets divided in 1/2), the two end sections each have 1/4 inch added to them. You should also mark a line 1/2 inch up from the bottom.
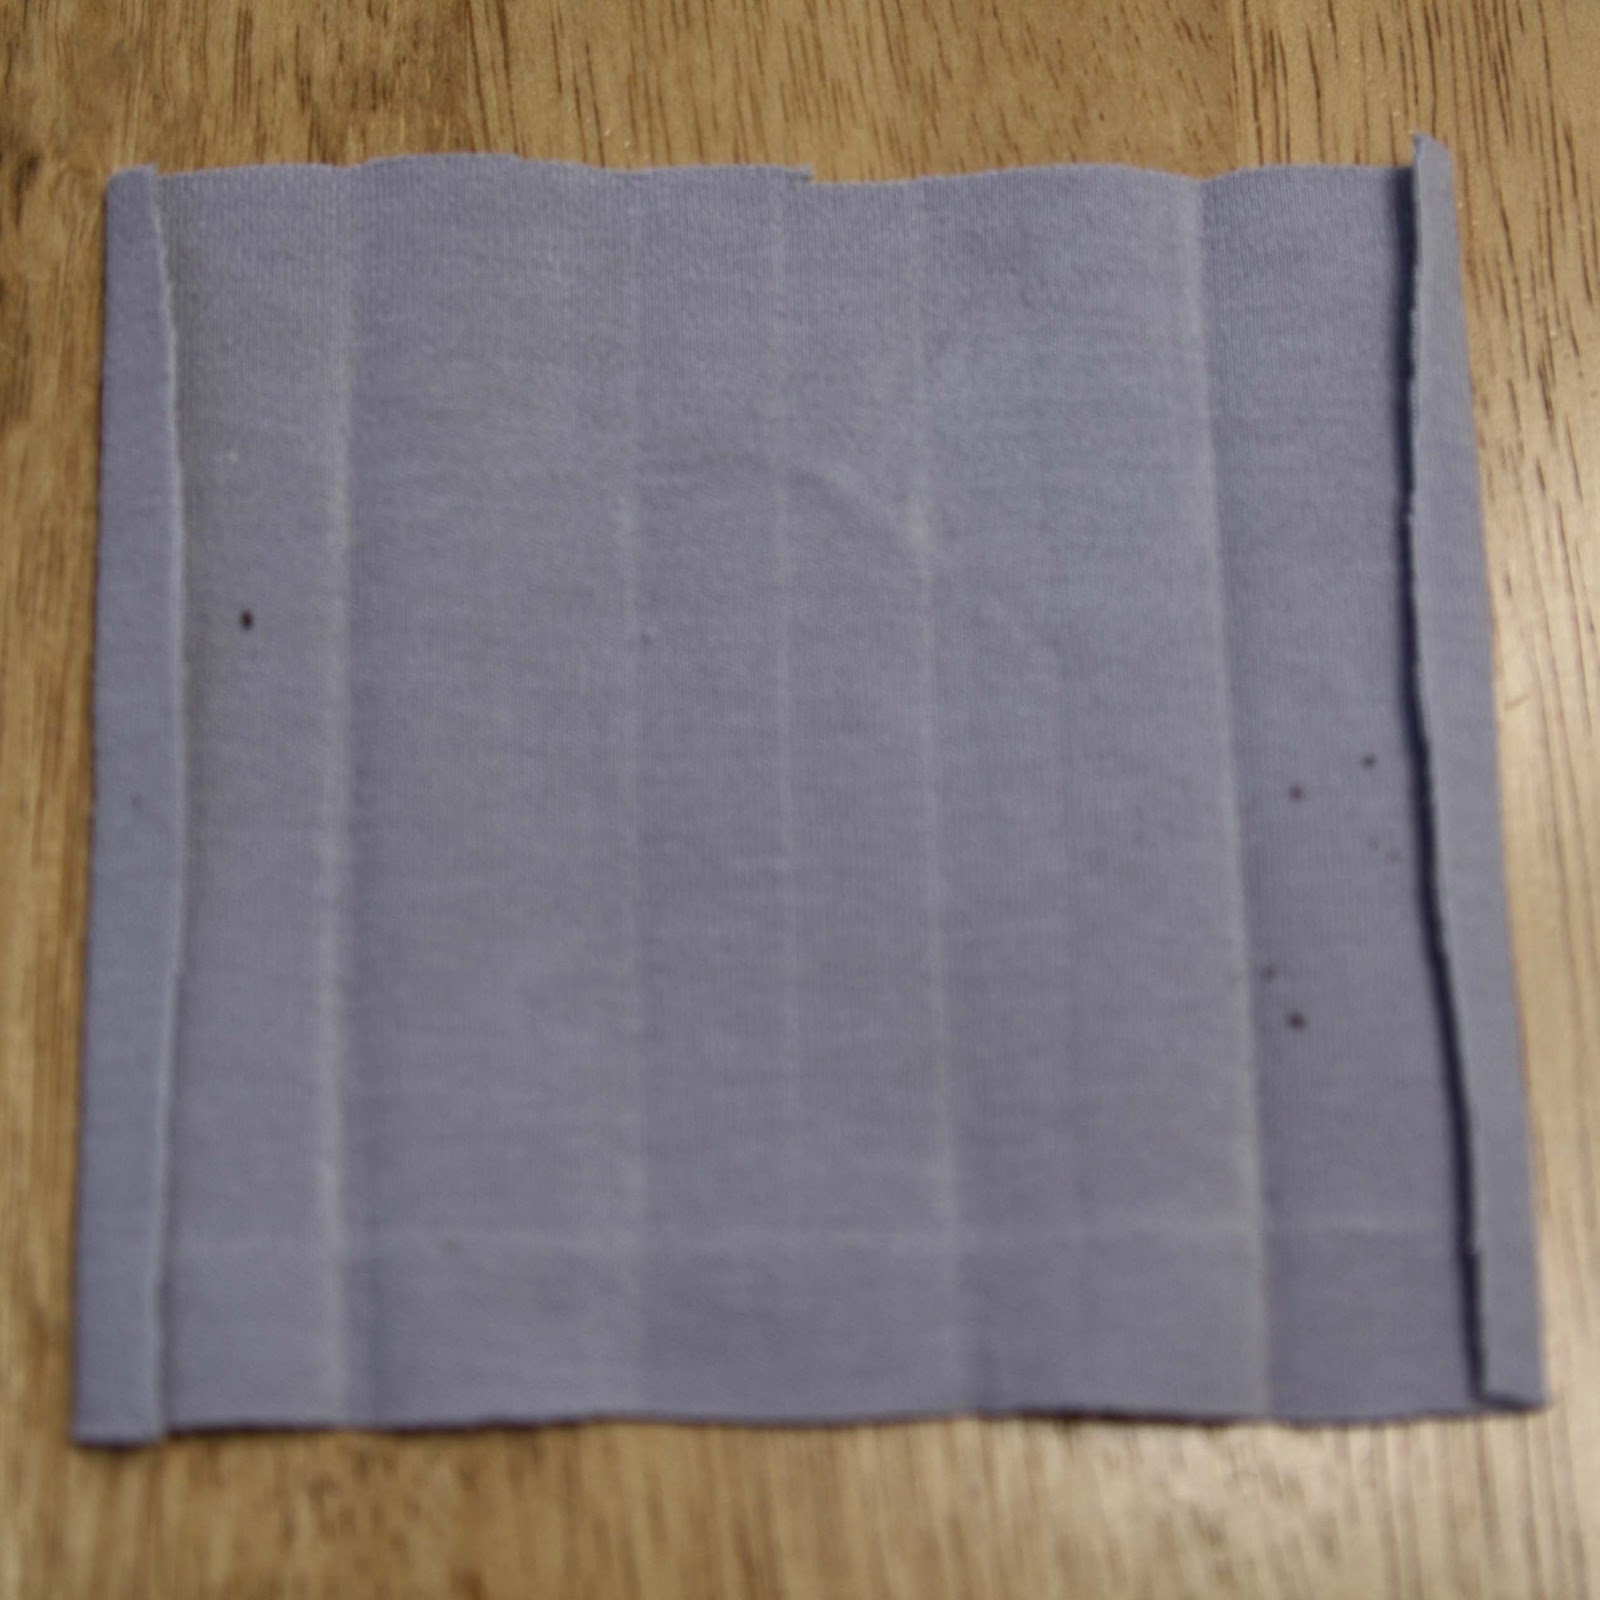
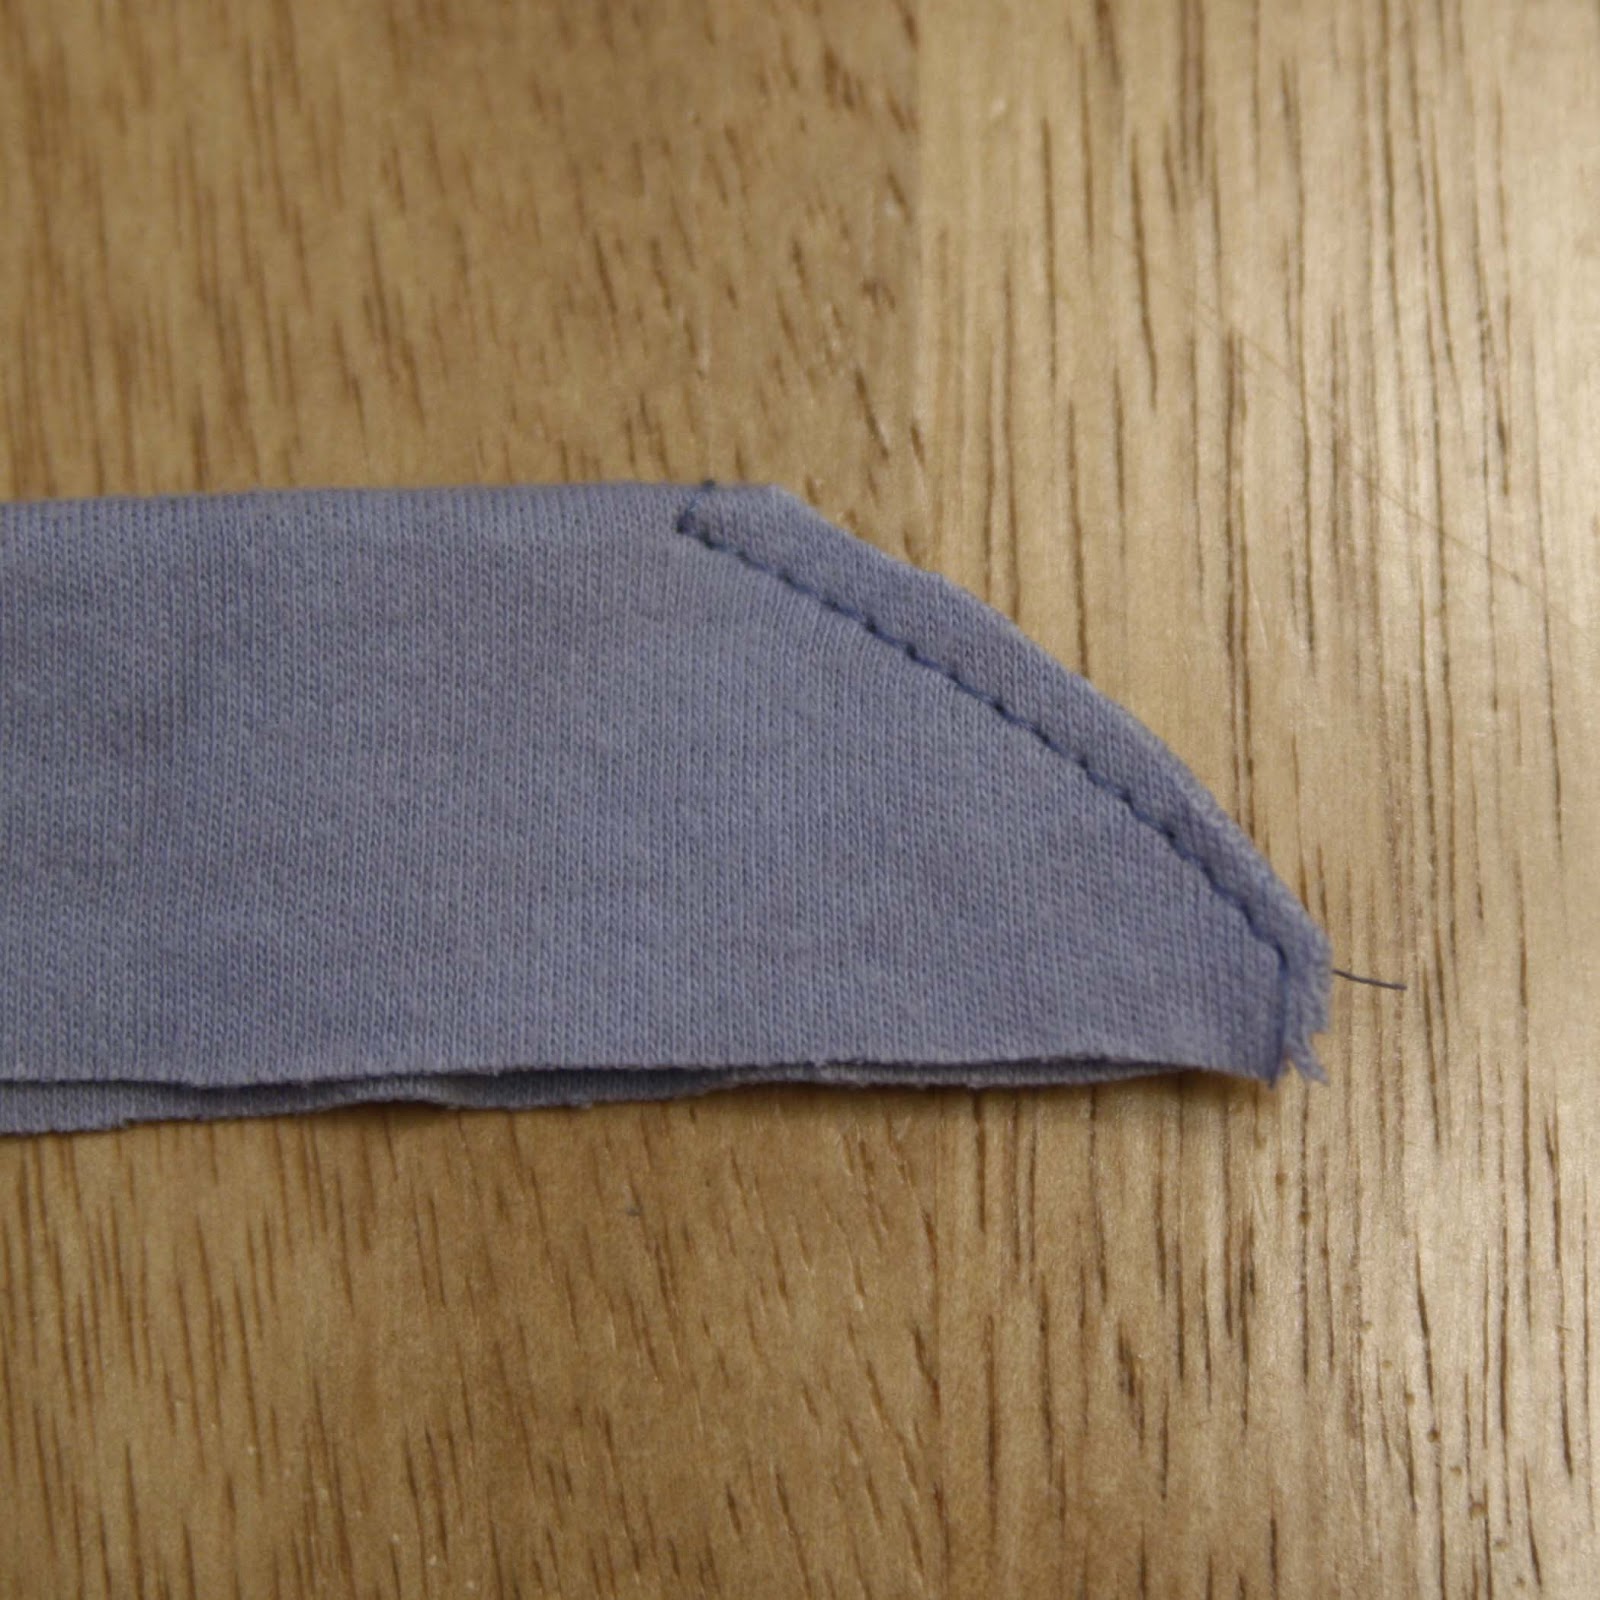
Next, get out your iron. Iron the edges in 1/4″
Now fold the ends in on the line so the edges now rest on the lines for the center section. Iron again.
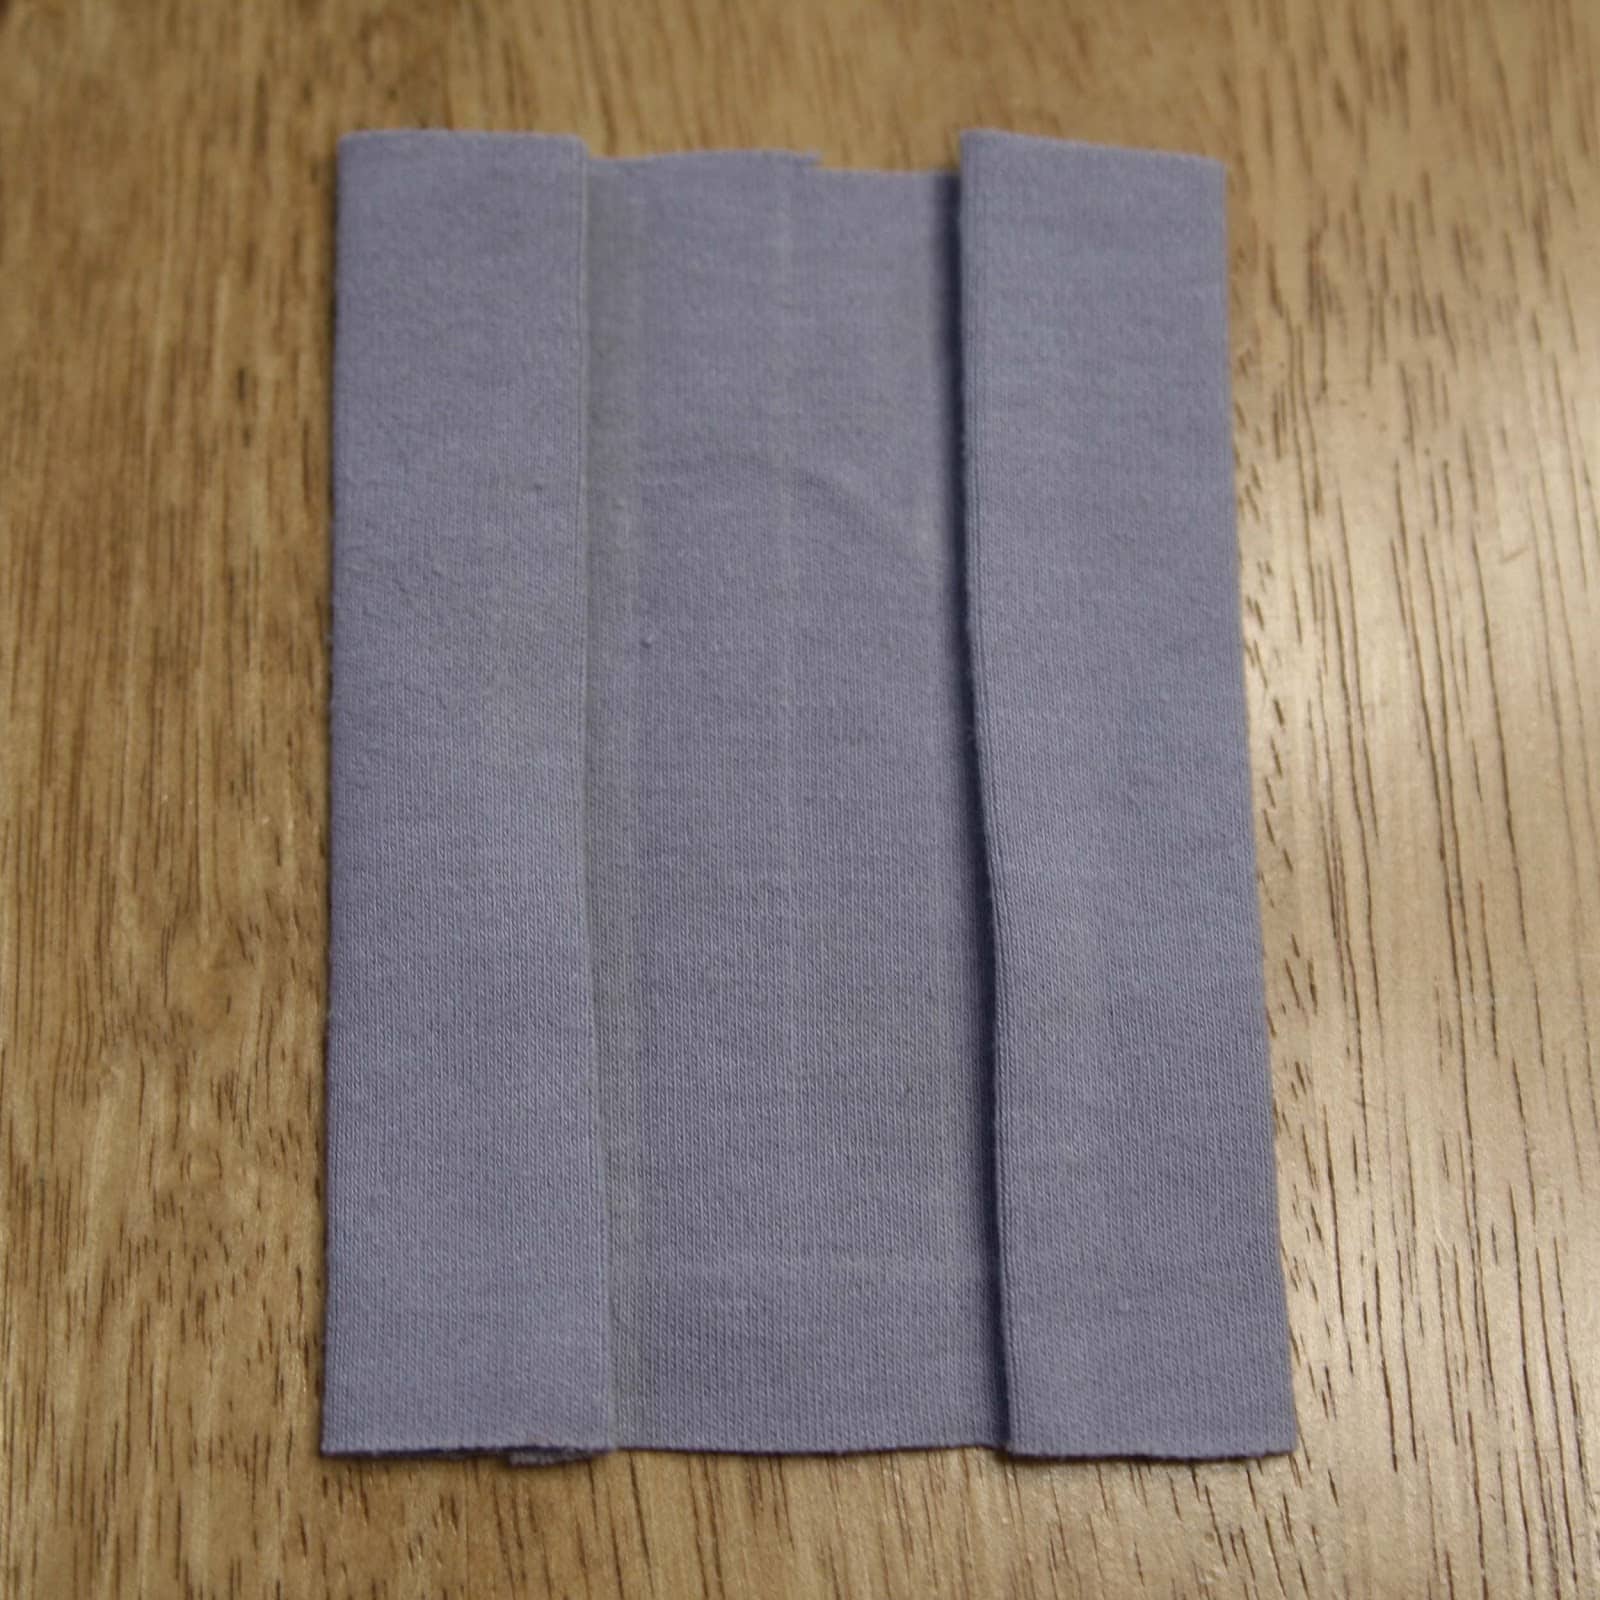
Fold those two ends in again, one over the other, and iron again. This is the width of your final placket.

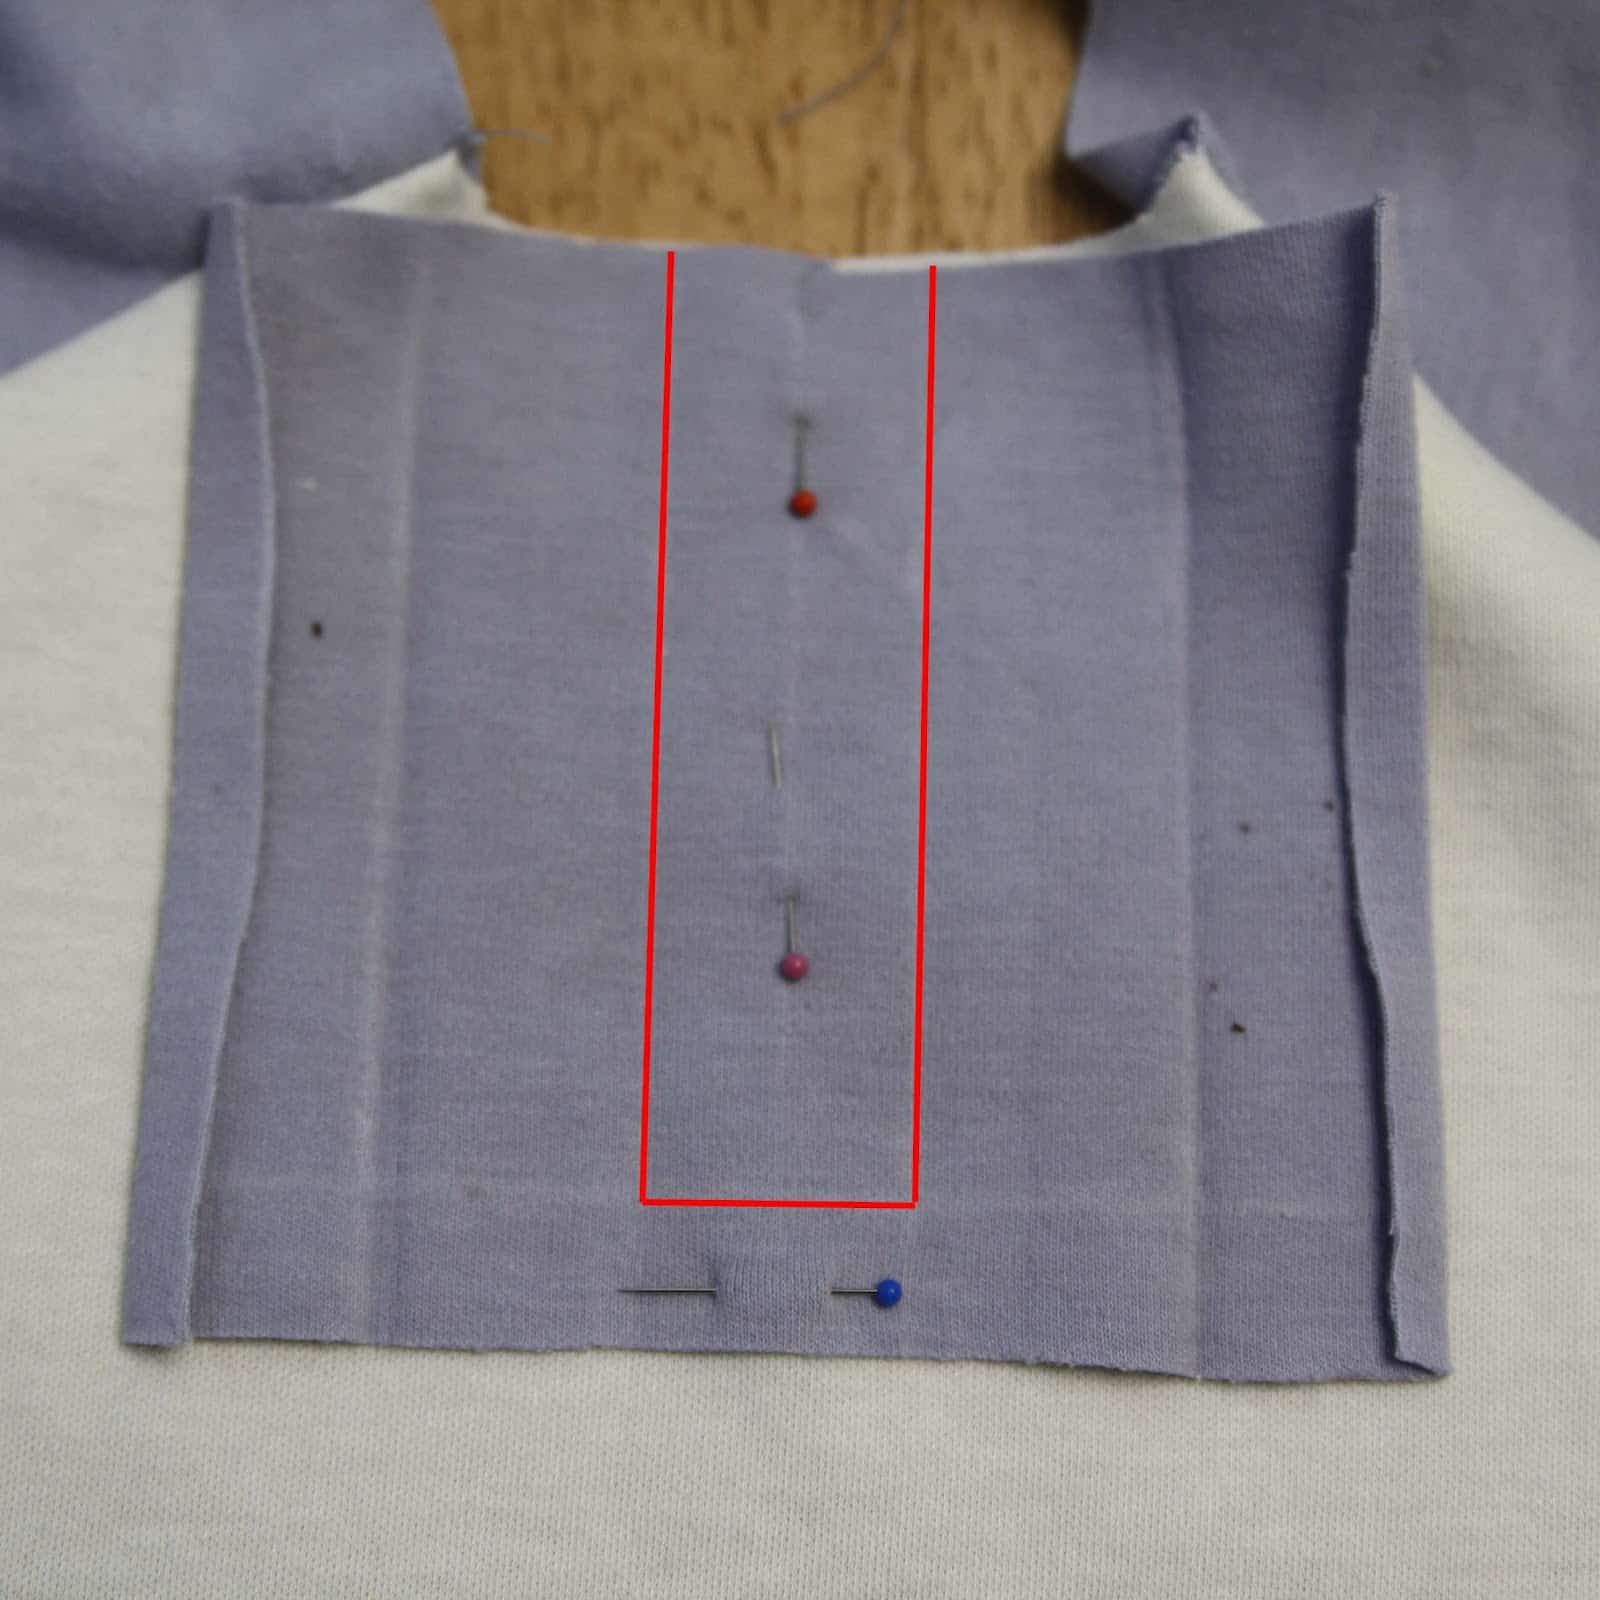
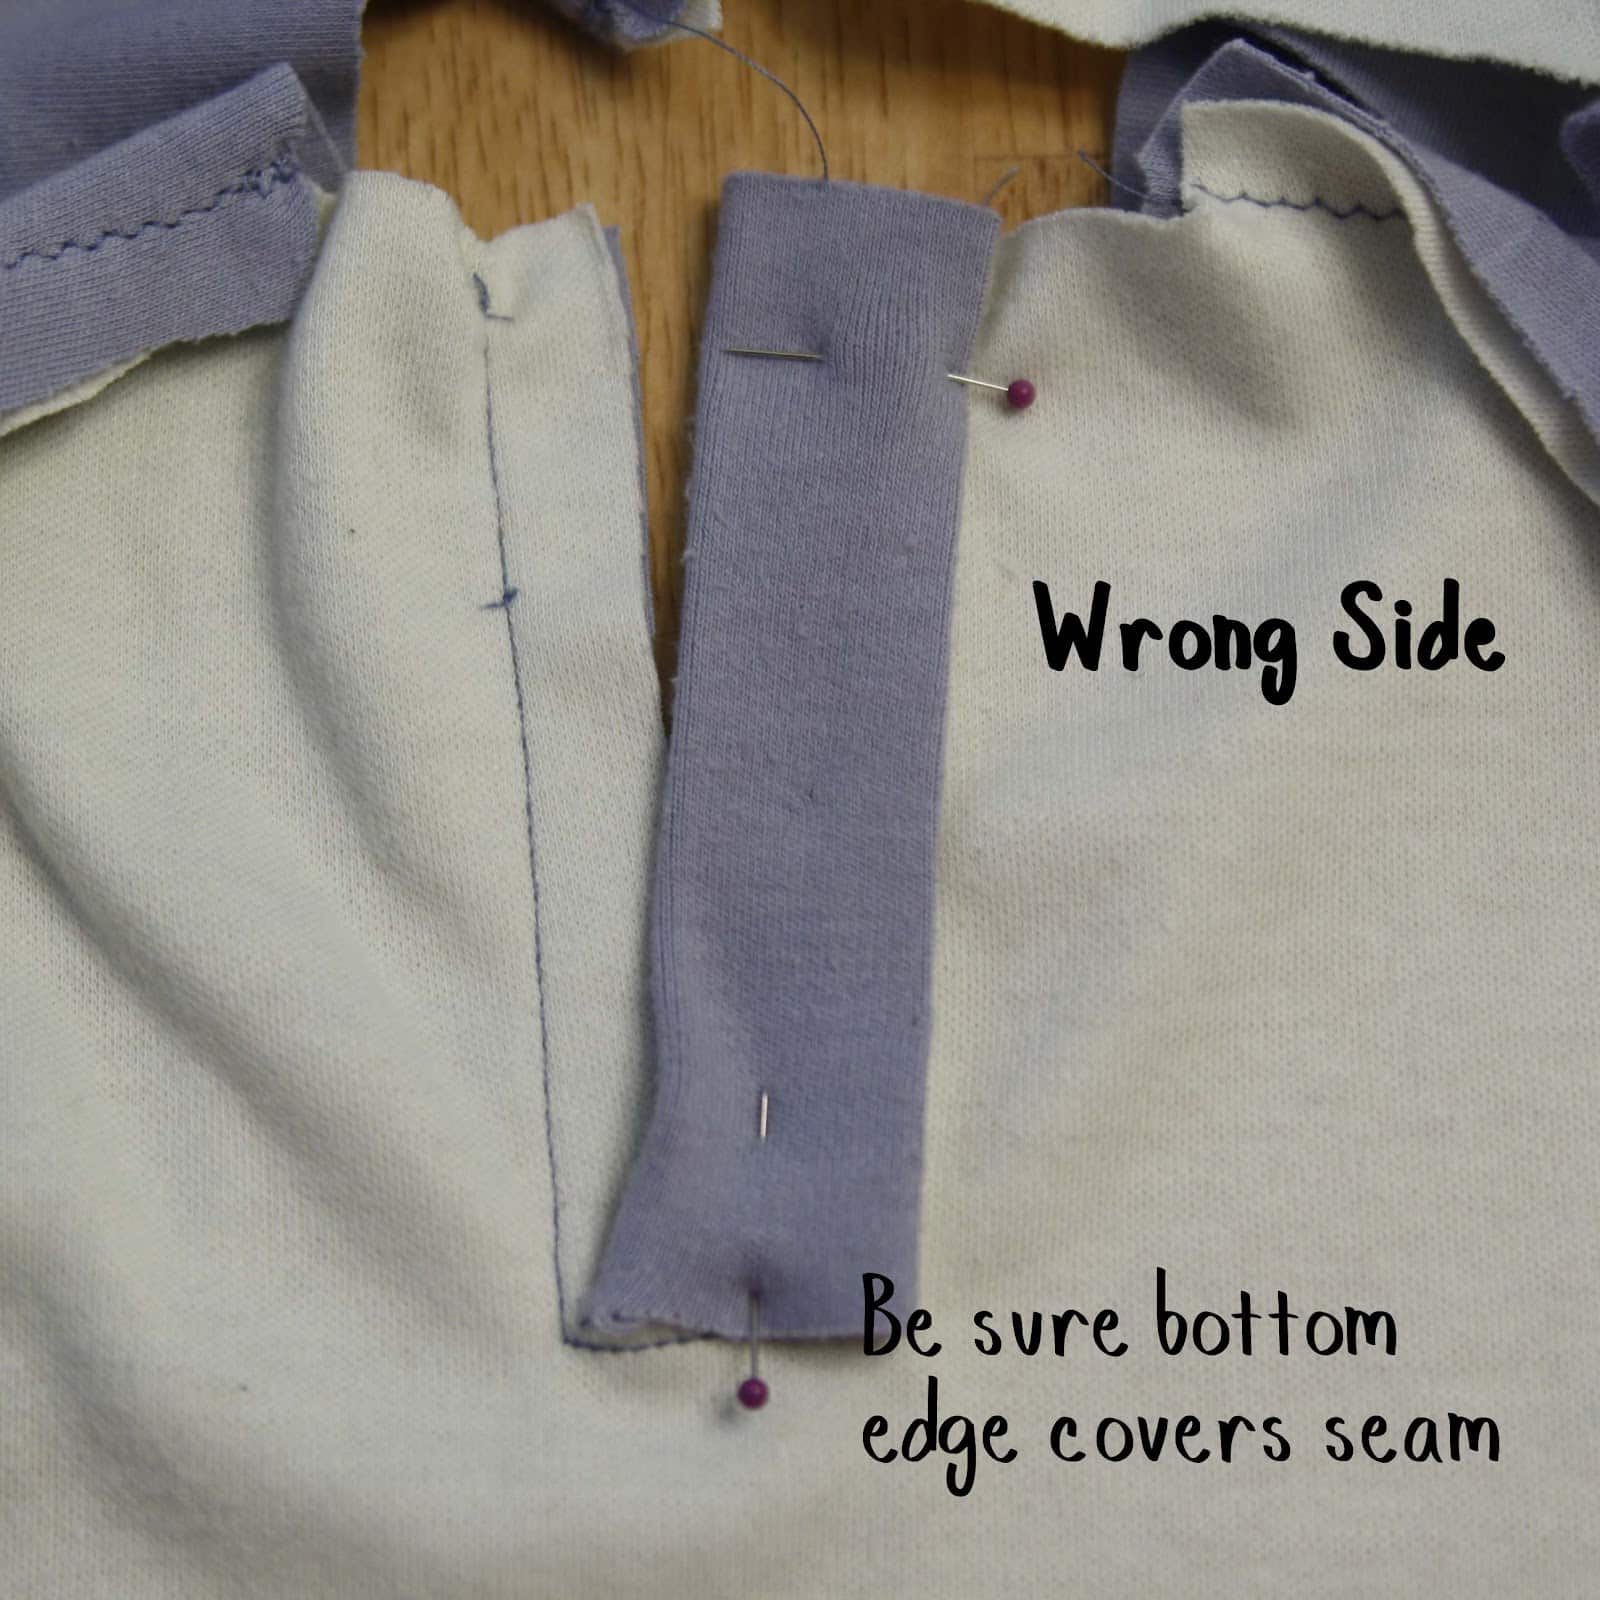
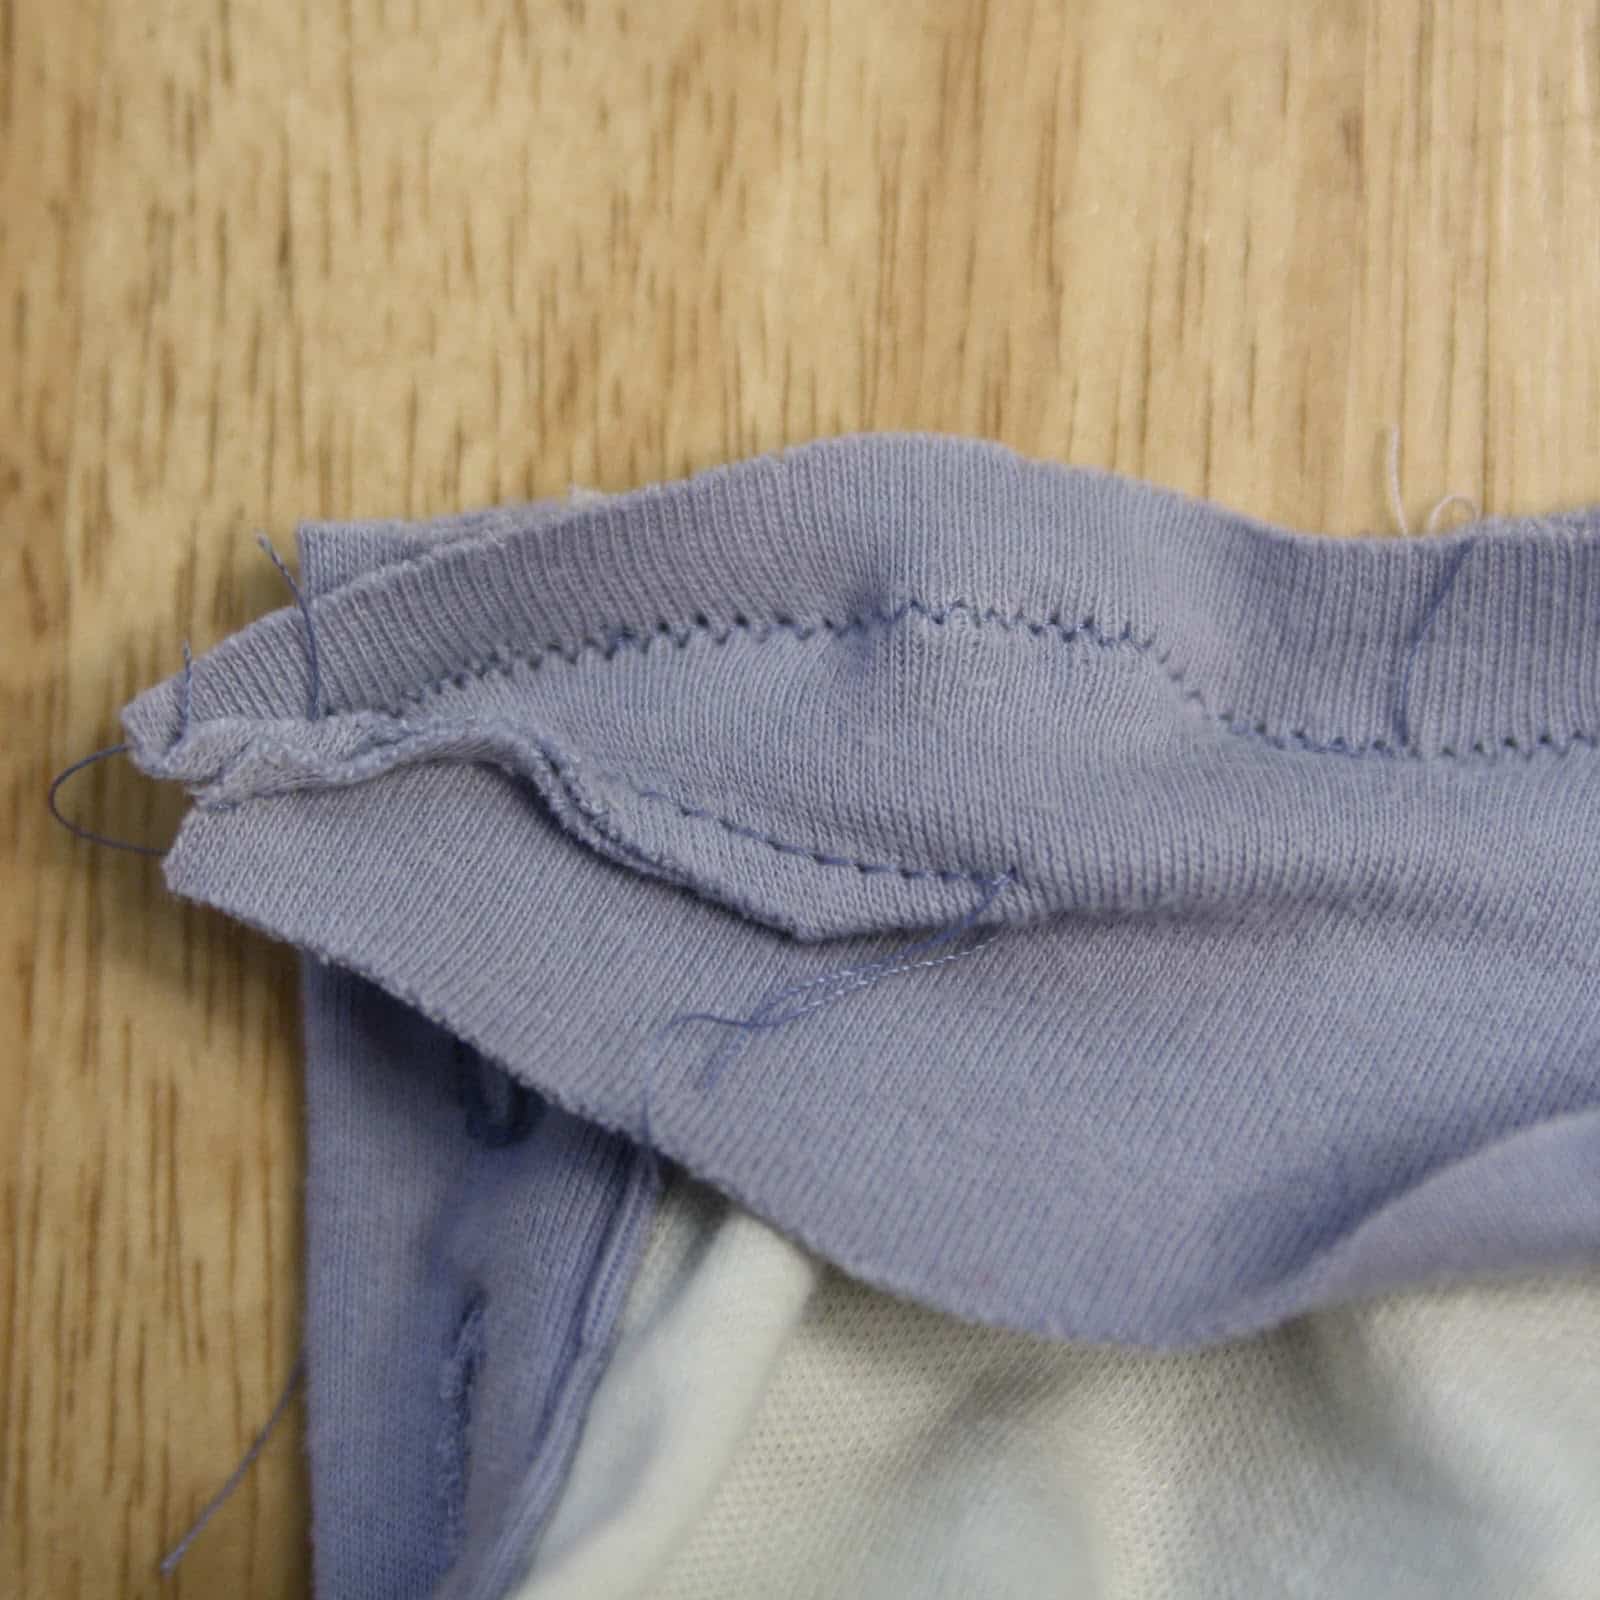
Unfold, leaving your creases from the iron. Line up the center of the placket with the center front of your shirt. Make sure you’re lined up all the way down the center front, so your placket doesn’t end up looking like it drifted off to one side. Pin this in place, then sew around the center section as shown with red lines below.
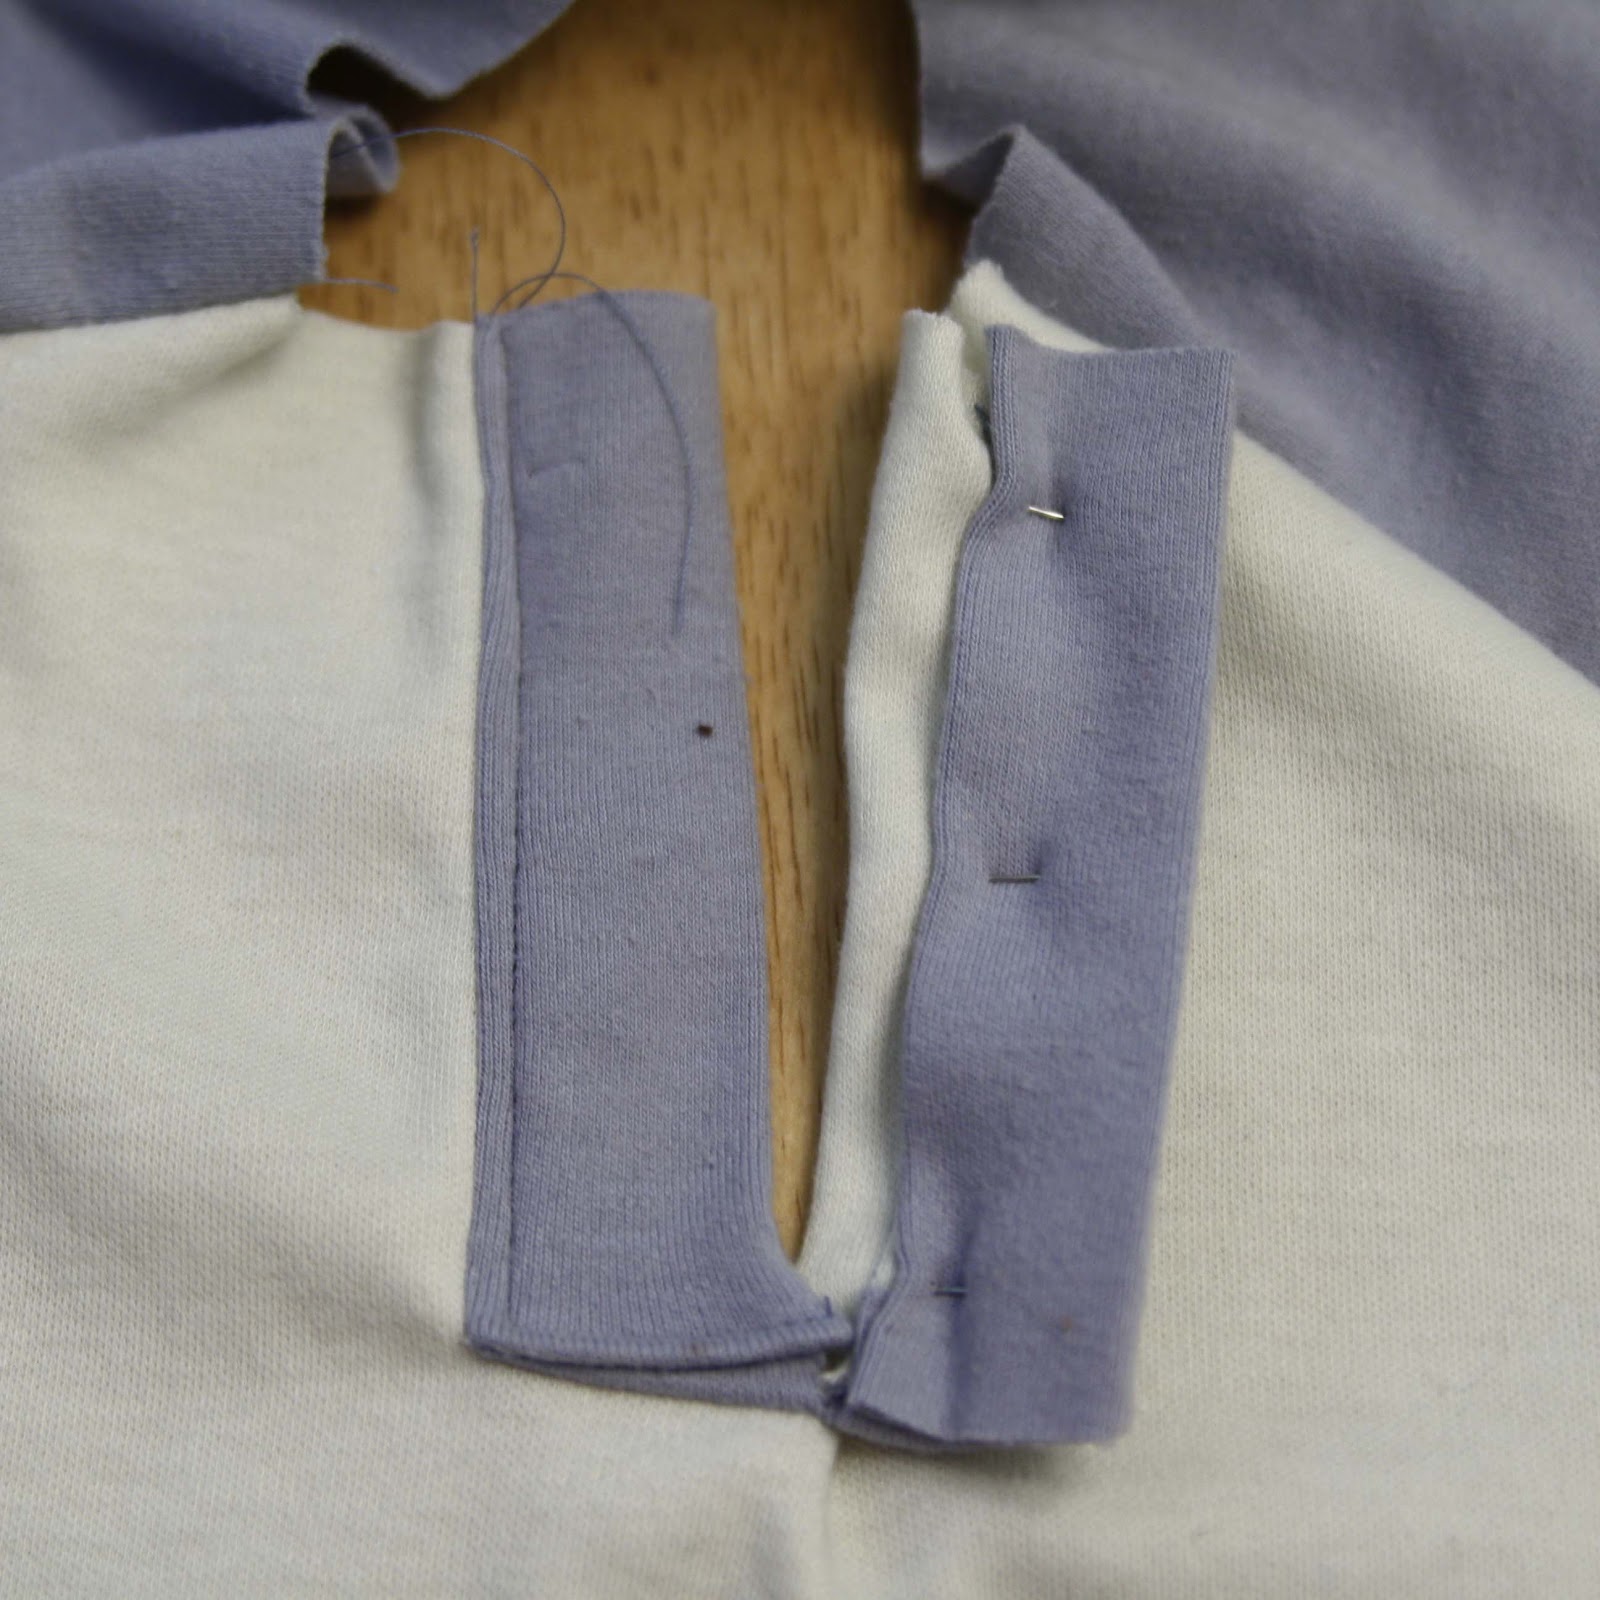
Next, you’re going to cut through your placket and shirt on the center line. Stop about 1/4″ from the bottom and cut into the corners, making an upside down Y shape. Cut as close into the corners as you can without going through the stitching.

Since this is knit, I cut out the rectangles at the corners of the end sections as shown below to reduce bulk in my placket. If you’re working with wovens, you can skip this.
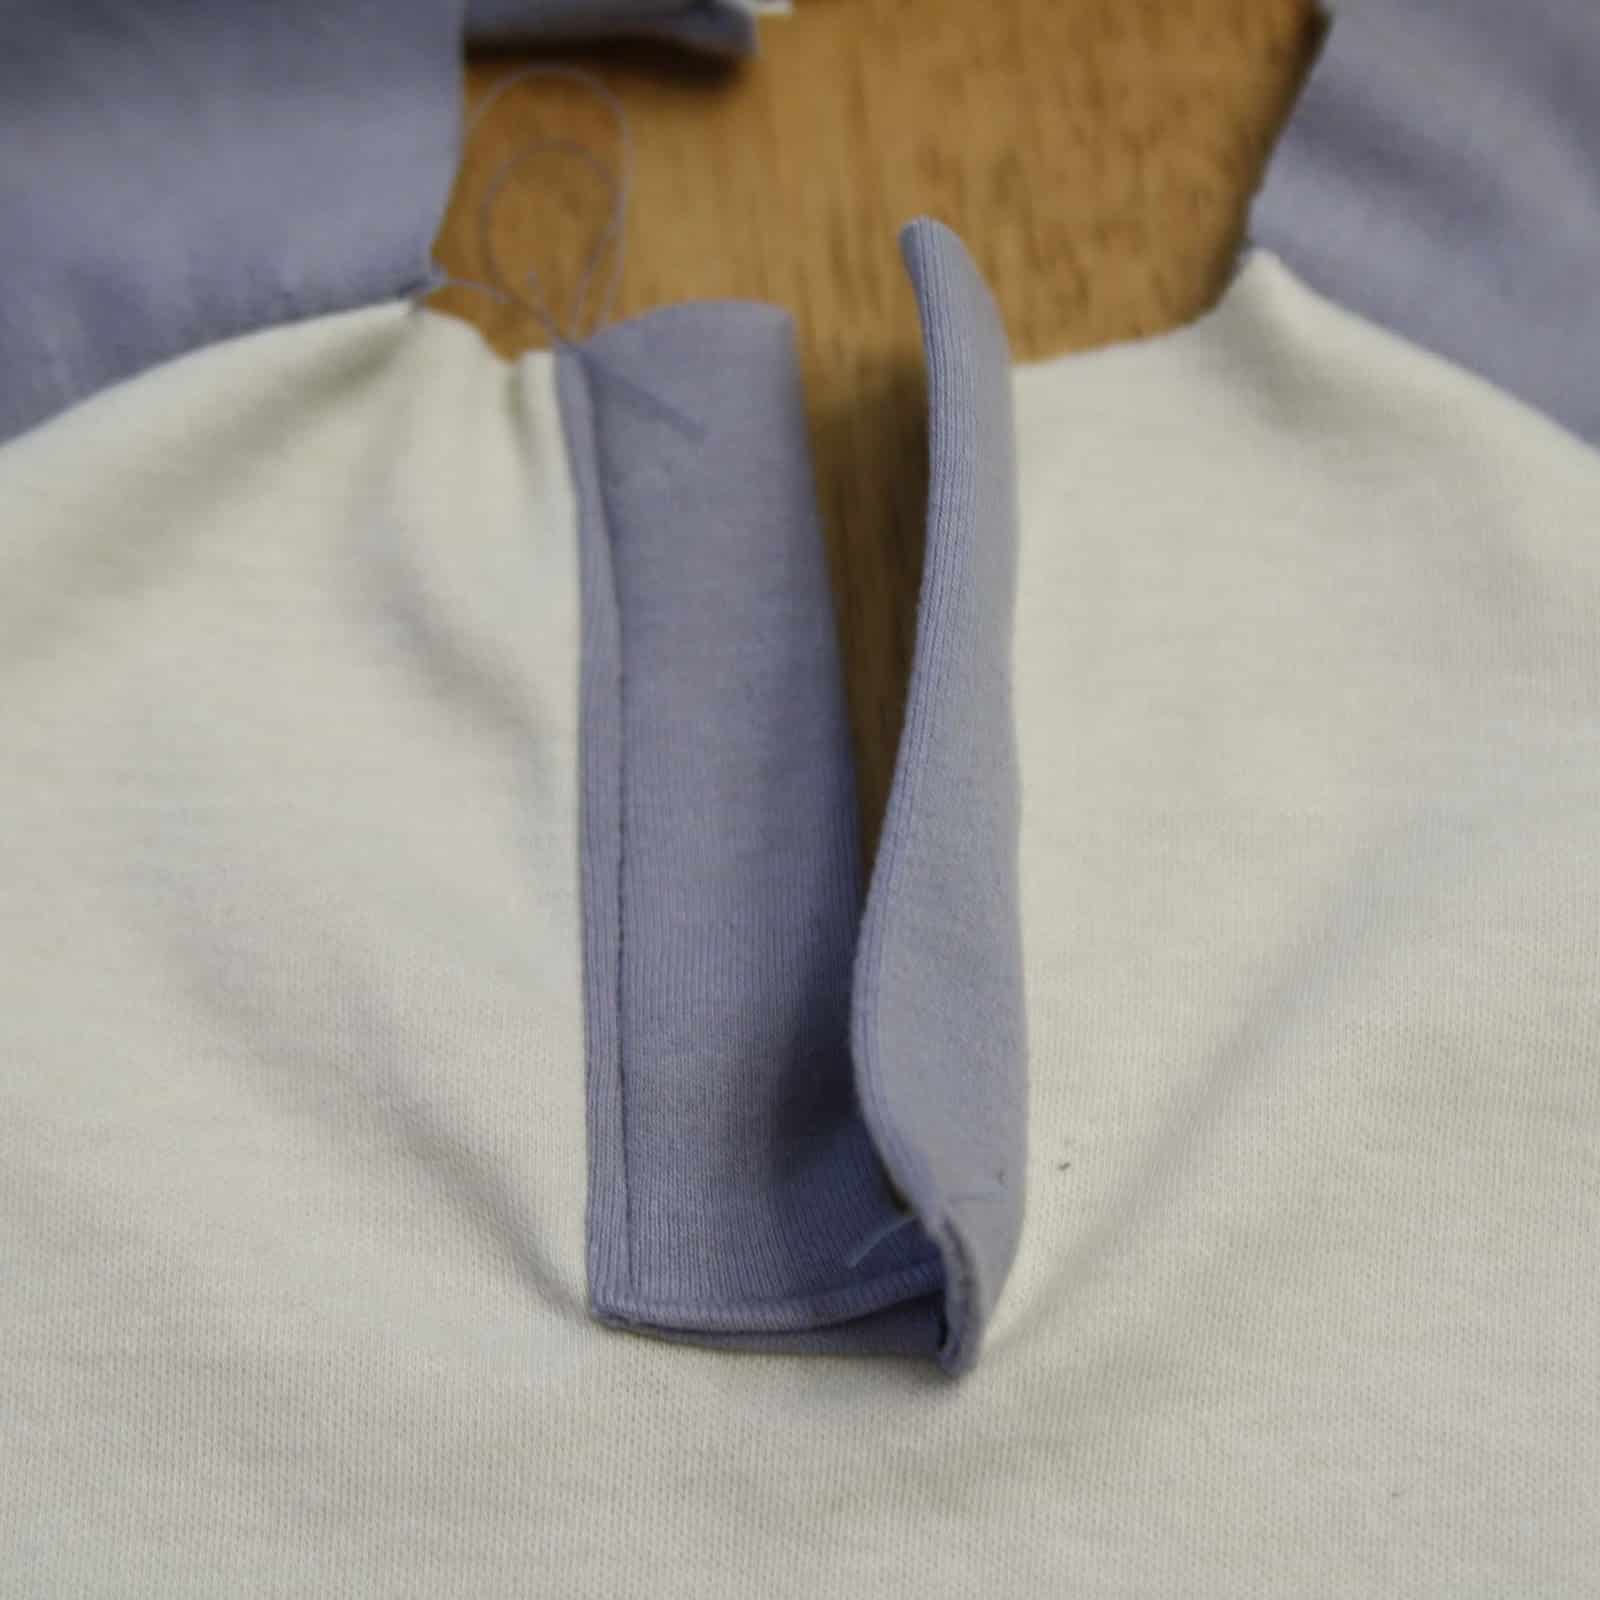
Woven or knit, you also need to cut two slits from the bottom straight up to the corners of your stitching.


youandmie
Awesome!! I’ve pinned this for future reference – thanks! And I can’t wait to see the rest of your outfit! I better get sewing . . .
Pam
Thanks for a terrific tutorial. I’ve pinned this…
Melanie
I’d love for you to come link this up at my Tuesday Time Out Party!
http://www.reasonstoskipthehousework.com/2012/02/valentines-day-tuesday-time-out.html#.Tzp_eJjlyGc
Smiles,
Melanie
Reasons To Skip The Housework {The Blog}
Tinker B Boutique {The Shop}
Lucija
This look so great!
Greatings rom Europe!
weltbesterkarlsson
I have been looking for a tutorial to do this for years – thank you so much!!!!! SO useful!
Abby
Awesome tutorial! I’ve pinned it to use later…so glad to find this. Thank you!!
Misa
Love it!
Stacy @ Cardigans and Crayons
Very cute!!
Alison @ Oopsey Daisy
I always look forward to seeing what you link up! Your sewing tutorials are so inspiring!! I just shared this link via Twitter! Thanks for sharing at oopsey daisy!
Brooke
this is a great tutorial! I just pinned it in my ‘to-do’ thanks!
Tara
this is such a great tutorial. I have been wanting to figure out how to do this.
Paxton
Wow, great tutorial! I never thought to do it that way! Thanks for all the pictures too! I’m going to have to try this soon!
Misty @Creative Itch
I hope I’m confident enough in my sewing skills to attempt this some day!
Thanks for sharing @’Sew Cute Tuesday’. I’ll be featuring you tomorrow, so be sure to stop by and grab a ‘featured’ button!
Nature's Corridor
Thank you so much for this tutorial. I just finished making a t-shirt for my son!
http://naturescorridor.blogspot.com/2012/03/week-2-sewing-challenge-completed.html
Rena
Great tutorial! Just a note… I interface the placket piece with fusi-knit. Keeps everything straight and neat. Since it has buttons, it doesn’t need to stretch.
mimismae
Great tutorial, thank you for sharing this!
Cheers,
Dorothee
Beth C
Thanks for the tutorial! It’s always nice to add some details to the clothes I’m making for the boy. I linked to you in my blog post where I attempted a placket for the first time!
http://bethbeingcrafty.blogspot.com/2013/03/fake-out-henley.html