
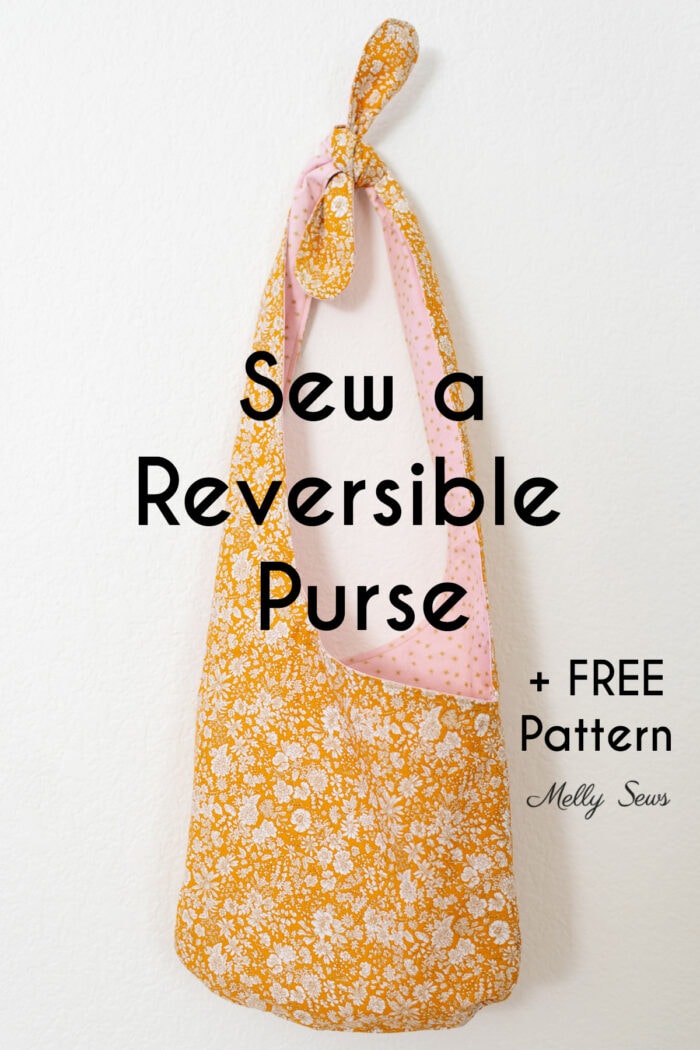
Learn how to make a reversible purse from scratch using only one pattern piece.
Hey y’all, today I’m sharing a free purse pattern PDF that is suitable for sewing beginners. You can use quilting cotton to make it. And it doesn’t have any zippers or buttons to make things tough, so this is a great project for newbies. With both curved and straight edges, plus one corner to pivot, this is a good practice piece for those learning to sew. And if you’re not a beginner, know that this sews up in very little time, using only one pattern piece, and makes a great gift. You sew this easy purse entirely on the machine; there is no hand sewing involved in the finishing.

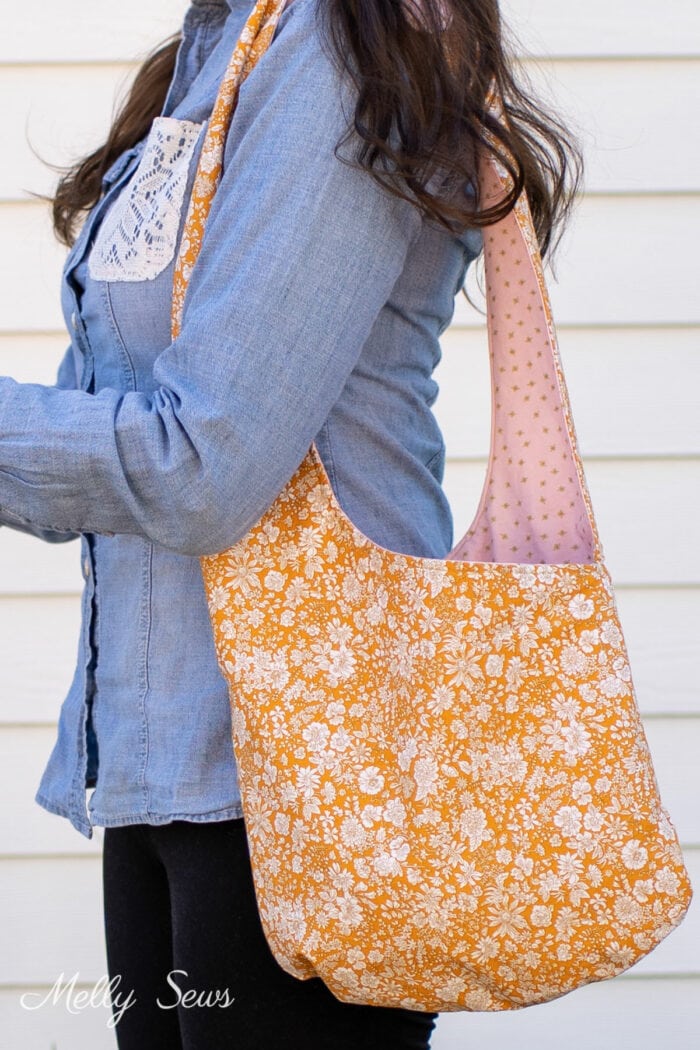
The straps of the bag knot at the top, so the length adjusts depending on where you knot it. If you knot it long, like I’m showing above, it’s a great DIY shoulder bag. Knot the straps more tightly to transform it to a tote bag you can carry by the hand.

Choosing your Fabrics
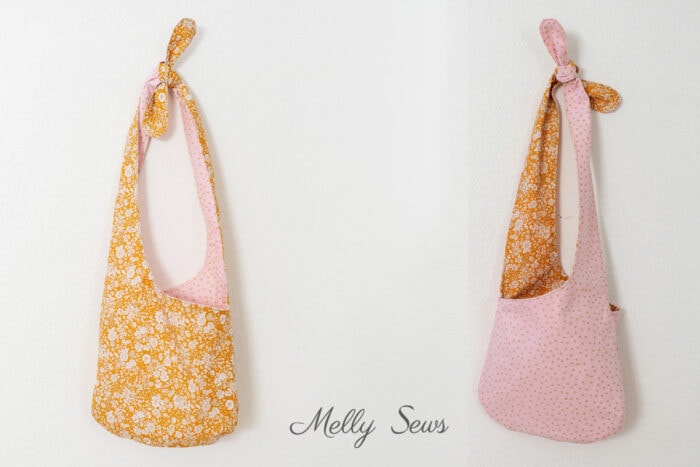
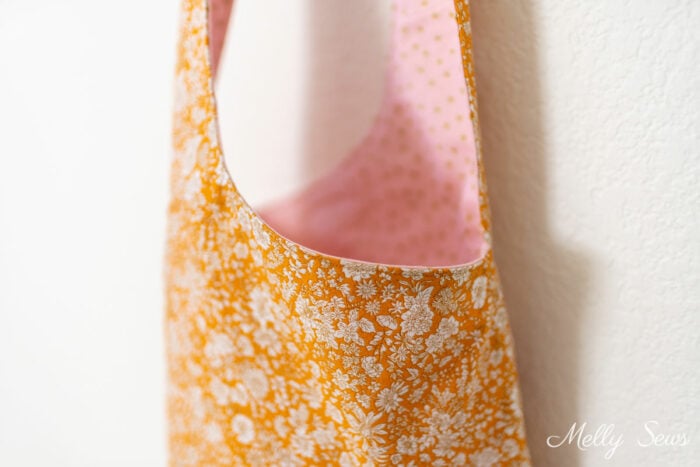
A fun thing about this free sewing pattern is that it is completely reversible. Pick two coordinating fabrics in your favorite colors and decide which you’d like to see the most, then put that side to the outside. Change your bag when you change your outfit and flip the other side to the outside. The fabrics I used are Liberty Fabrics Emily Belle Saffron and Riley Blake Stardust Sparkle Baby Pink.
While this free pattern doesn’t have pockets, you could certainly add patch pockets easily to both sides. As it is, there’s plenty of room for everyday necessities. You could also add a button or magnetic snap to the top as a closure if you’d like. However, the open top of this little bag makes it perfect as a shopping bag for me. I could also see using it as a good bag to carry my knitting projects with me.
Materials Needed
This post contains affiliate links. As an Amazon Associate I earn from qualifying purchases. All affiliate links are identified with (affiliate link) after the link or a commissions earned statement above the link(s).
Want to make your own bag? Here’s what you’ll need:
- 1 yard outer fabric, 45 inches wide I suggest quilting cotton, but linen, lightweight canvas and lightweight denim will all work. For heavier fabrics like canvas and denim you’ll likely want to skp the interfacing.
- 1 yard inner fabric, 45 inches wide
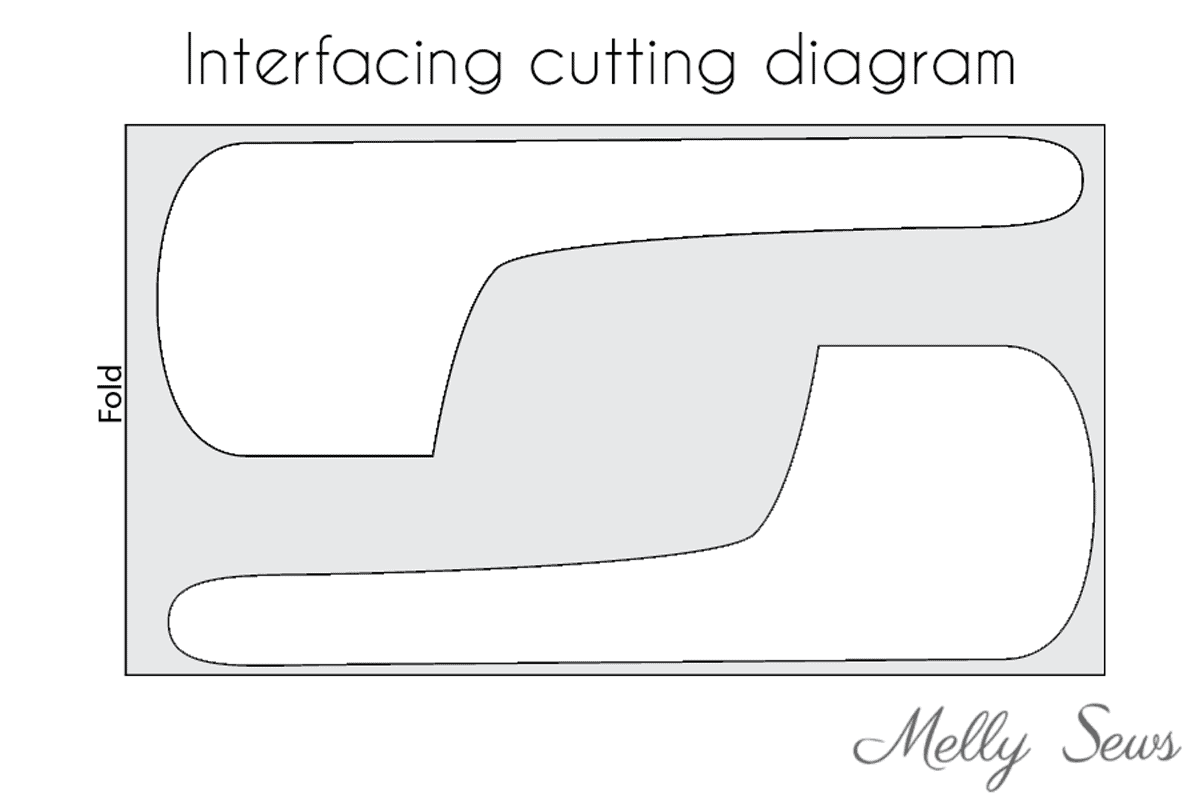
- 2 1/4 yards of lightweight fusible interfacing (more about interfacing here)
- Sewing machine, needle, thread, scissors, etc
- Optional: point turning stiletto (affiliate link)
- The pattern (see below for details to get it)
How to Get the PDF Sewing Pattern
To get this pattern, you must either be a free newsletter subscriber or have purchased a gallery access pass. Then click your preferred option from the buttons below. Existing newsletter subscribers should look at the bottom of the most recent Friday newsletter for the current free pattern gallery password. If you purchased the all access pass you’ll log in to your shop account to download the pattern. Note that the free version of the pattern does not have printable instructions so you’ll need to refer to this post for instructions.
 |  |  |
This pattern includes half inch seam allowances. The finished bag, when the strap is knotted, is about 27 inches long with the bag part about 9 inches wide by 11 inches tall, a good size for everyday use. Though I don’t recommend this with clothing, you can print this template at a smaller or larger percentage than 100% to make a larger or smaller sized bag.
Sew The Bag
To sew this bag, watch the video below or on YouTube here. IMPORTANT: watch the video BEFORE cutting out your fabric to avoid cutting your pieces incorrectly. A summary of written instructions is below the video as well.
Sewing Instructions for an Everyday Purse
Time needed: 1 hour
How to Sew a Simple Bag
- Cut out your pieces
Lay your lining fabric right side down in a single layer. Lay your outer fabric on top of it in a single layer. Place your pattern piece on it right side up. Cut out once, then move the pattern over and cut out again. You should have 2 identical outer pieces and 2 identical lining pieces that are a mirror image to the outer pieces. Fold your interfacing in half matching the short edges and cut out 4 total pieces as shown below.
- Sew the curves.
Place the two outer pieces right sides together. Sew around the bottom curve from one side to the other. Next, repeat this with the lining. Clip the curves.
- Sew the lining to the outer fabric.
Turn the lining right side out and place it inside the outer fabric, matching raw edges and seams. Stitch around the handles and bag opening, leaving a 3 inch gap on the straight part of one strap. Clip curves.
- Turn right side out
Turn the bag right side out through the gap in the strap. Push the lining inside, and then press all the way around the straps and bag opening. Press the raw edges of the gap in toward each other.
- Topstitch
Topstitch around both straps and bag opening, sewing the gap closed in the process. Knot the straps together and you’re done!

If you enjoyed sewing this project, check out this link for more free bag patterns and tutorials on my site, as well as other accessories to sew.
Beverly Largest
I’ve been needing to sew up a new purse, now I can thanks to you! Thank you! Merry Christmas to you and your family!
MarianneG
Hi Melly!
Great ideas. I like the prop up smart phone thing. I can’t find the pattern 🙁