
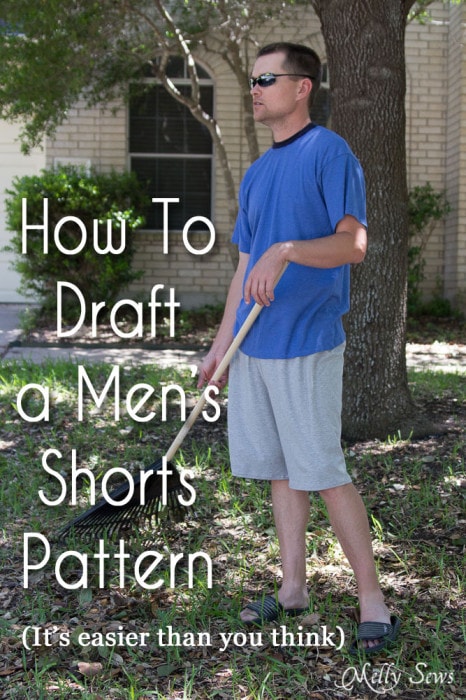
Long ago, when my husband and I were newlyweds, I made him a pair of lounging around the house shorts. He worn them to shreds. So I made him another pair. And these are SO EASY, so today I’m going to show you how both how to draft a mens shorts pattern and how to sew it. Bonus: you don’t even have to make him stand still for measurements (or take measurements on yourself if you’re one of my male readers) – you can get the measurements you need for these shorts from a pair of pants. Bonus number 2: If you like loose fitting shorts, you can also use this method to draft a pair for women.
To start, get a pair of pants. These should be pants that fit on their own, not pants that are a few sizes too big or too small and held up with a belt. Note the pant size – for example, 32×34 means that the waist is 32 and the inseam is 34. You’ll need those two measurements.
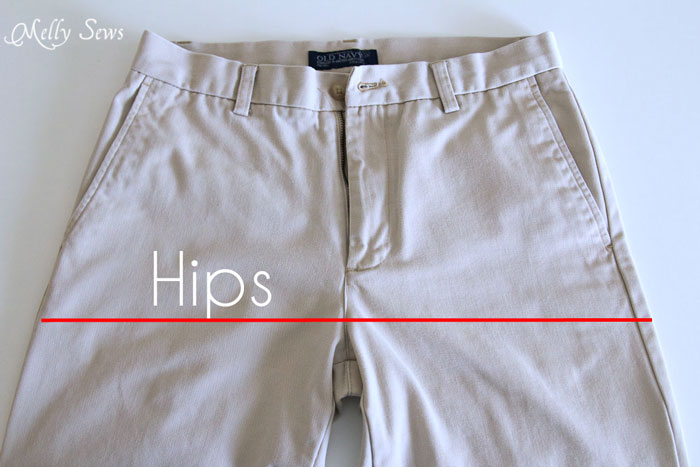
Next, lay the pants out flat and get a hip measurement – measure all the way around the pants at the hip level.
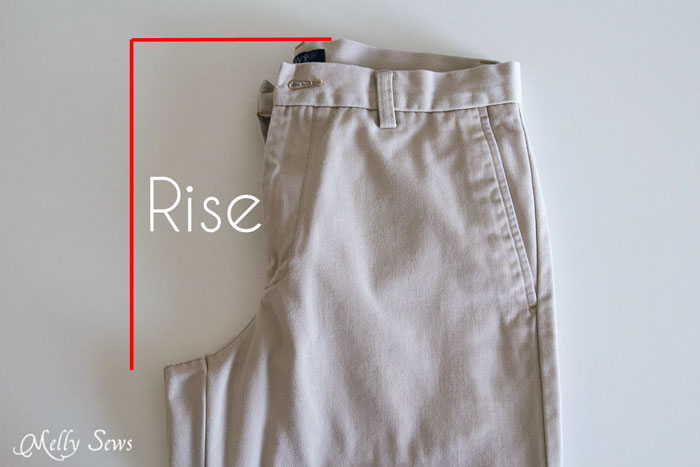
And then fold them as shown and get a rise measurement.
Now you’ll need a big piece of drafting paper. I use this (affiliate link), but you can tape printer paper together or use wrapping paper or freezer paper or anything else that works.
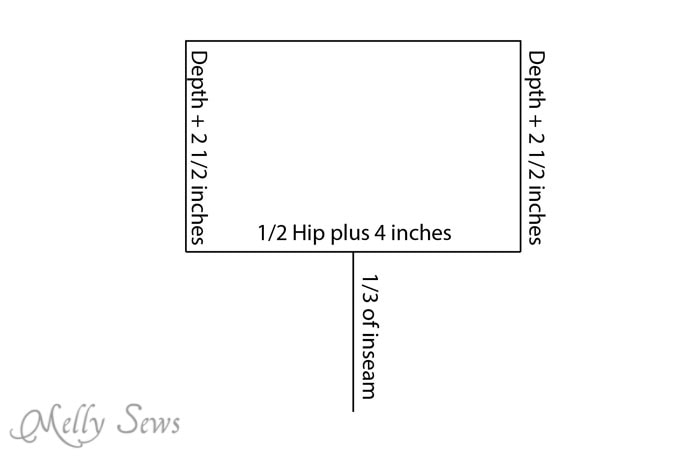
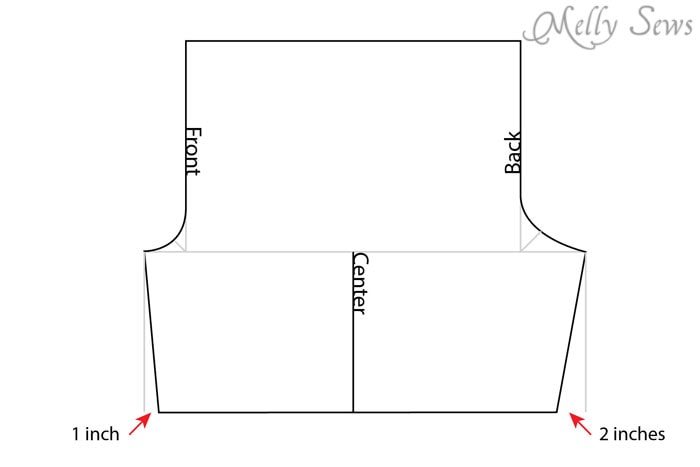
Now draw a rectangle that is 1/2 of the hip measurement plus 4 inches wide, and the depth of the rise plus 2 1/2 inches tall.
Find the center of the bottom line of the rectangle, and draw a line down extending 1/3 of the inseam length.
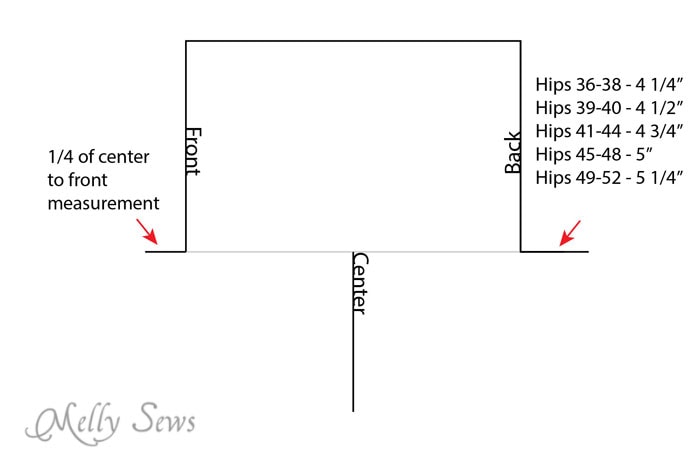
Next measure from the corner of the rectangle to the center, and divide that measurement by 4. Measure out from one side of the rectangle that amount. So for example, if your rectangle was 24 inches wide, from corner to center is 12 inches, and 12 / 4 = 3 inches. You’d draw out 3 inches on the front. On the other side, which is the back, measure out the amount listed in the image below. Label the front and back of the pattern as shown below.
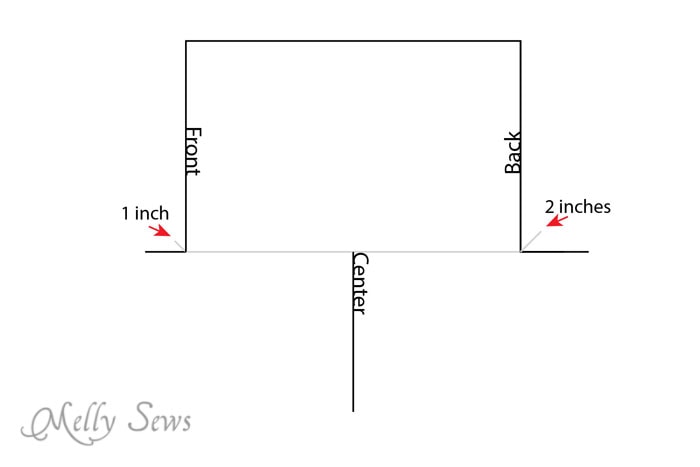
On the front corner, draw a 1 inch line at 45 degrees. On the back corner, draw a line that extends 2 inches at 45 degrees.
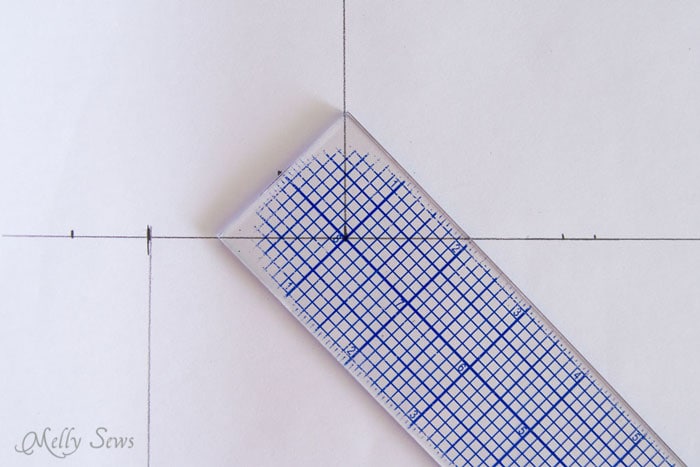
This is how I use my ruler to create a 45 degree mark. And who said high school geometry would never be useful?
Create a curve that touches your mark for both the front and back. Then add lines (1/3 of the inseam) down from the crotch point you’ve created – see the image below. These will be your inseams.
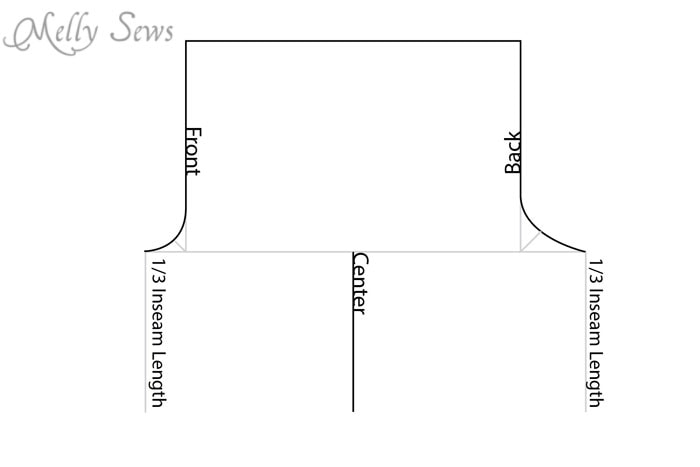
Finally, move the bottom of the front inseam line in 1 inch toward center. Move the back inseam line 2 inches in toward center. Connect the lines and you’re done drafting!
Cut out two of this pattern, with the fabric folded so you get a right and a left leg. You can use knit or woven fabric – these are loose fit, so either will work. I used a medium weight knit jersey.
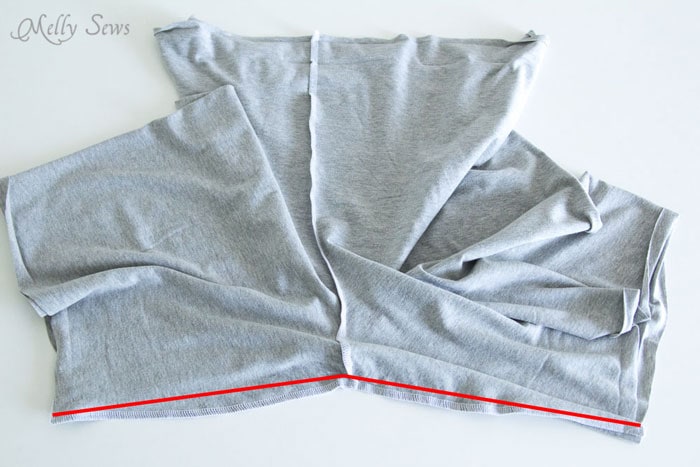
Now the way I’ve had you draft this pattern, a 1/2″ seam allowance is included already. To sew your shorts, start by stitching the center front and center back seams with right sides together.
Next, fold your shorts so the two seams you’ve sewn lay one on top of the other. Match the seams and sew the inseam in one long seam as shown below.
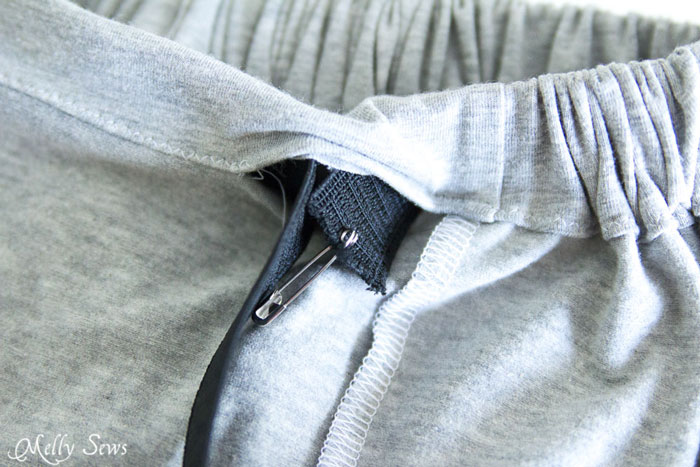
Fold the top edge over 1/4″, press, then fold again 1 1/2″ and press again to form the elastic casing. Stitch close to the bottom fold, leaving an opening to insert the elastic.

Insert 1″ wide elastic with a safety pin. Sew the ends of the elastic together, then sew the casing closed.
To hem the bottom, fold up 1/4″ then 1/2″ and stitch close to the folded edge. You’re done!
These shorts might make a great surprise Father’s Day gift.
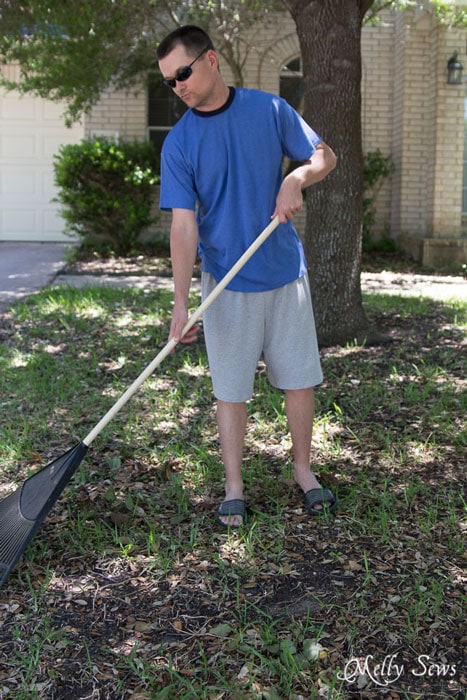
They’re great for both yardwork and sleeping after yardwork.
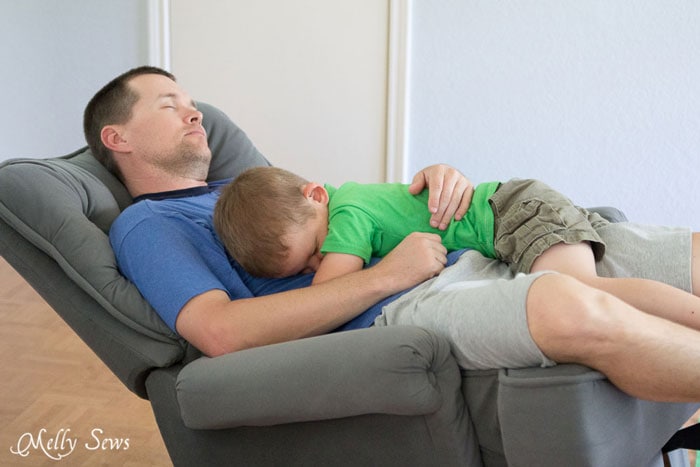
Or pretending to sleep. Bean’s smile is a telltale giveaway.

Anne
Great shorts!! My husband would probably love me to make him a pair or two. I’ve got a Craft Gossip post scheduled for this evening that links to your tutorial:
http://sewing.craftgossip.com/tutorial-4/2014/05/20/
–Anne
Dee
Great shorts pattern, I’ll be making these very soon for the guys in the family and probably myself as well, they look exceptionally comfortable. Side note, our youngest was always called Bean too, (he’s 28 now and six feet tall but he’s still “the Bean” to us.)
Dee
Emilia
Woven? Knit? Both! Love it.
Amanda
Thank you so much for the easy to follow tutorial. The pictures are simple and straight forward. I love it. These are my husbands FAVORITE kind of shorts, but he’s a big guy and hard to buy for. These will make him very happy. CHEERS!
Victoria
Thank you so much for this! It has helped loads in making some shorts for my xxxl husband! One question; he hates elastic at the front of the shorts as it rubs on his tummy… any suggestions on how I can alter it for that, or where I can find how to do a fly waist pair instead? Thank you again for a great post x
Melissa Mora
I’d construct them kind of like flat front pants, meaning you’d have to take quite a bit of width out of the front. http://mellysews.com/2011/11/kid-pants-with-mock-fly-and-pockets.html
You’d need to make at least one, but probably several, muslin pairs for fitting purposes. To save fabric you can avoid making the shorts the full length.
Zohreh
Great, i have made this for my bro and it was really nice and suitable. thank you so much.
Faiju malek
Very well explained. thanks
Janaki
I have been ollowing your blog and site ever since I came across your tutorial for a button front skirt – which i made for my daughter. Yhan you for this great pattern –you are a great teacher. Much appreciated…it cant be simpler than this. My son and sonin la will both definitely get a pair.
The crazy quilter
Thank you for the lovely tutorial! I’m going to be making these for my little guy. He only has a 25.5″ hip, sew i counted how many 3″ decreases I’d need to be in the ballpark of his size (he’s a growing boy sew a little extra room won’t be bad) and i needed 3 decreases. I noticed you decreased the back crotch length by quarter inches sew i did the same, 3 things. This allowed me to get a number for his back crotch length. Figured I’d share that in case there’s anyone else telling to figure out some smaller sizes.
Barbara C
I’ve been wanting to come up with pattern like this for all of the men in our family. I think this will work perfectly! I’ve read your instructions which were very easy to understand. I’m gonna try to make these real soon! Thank you so much!