
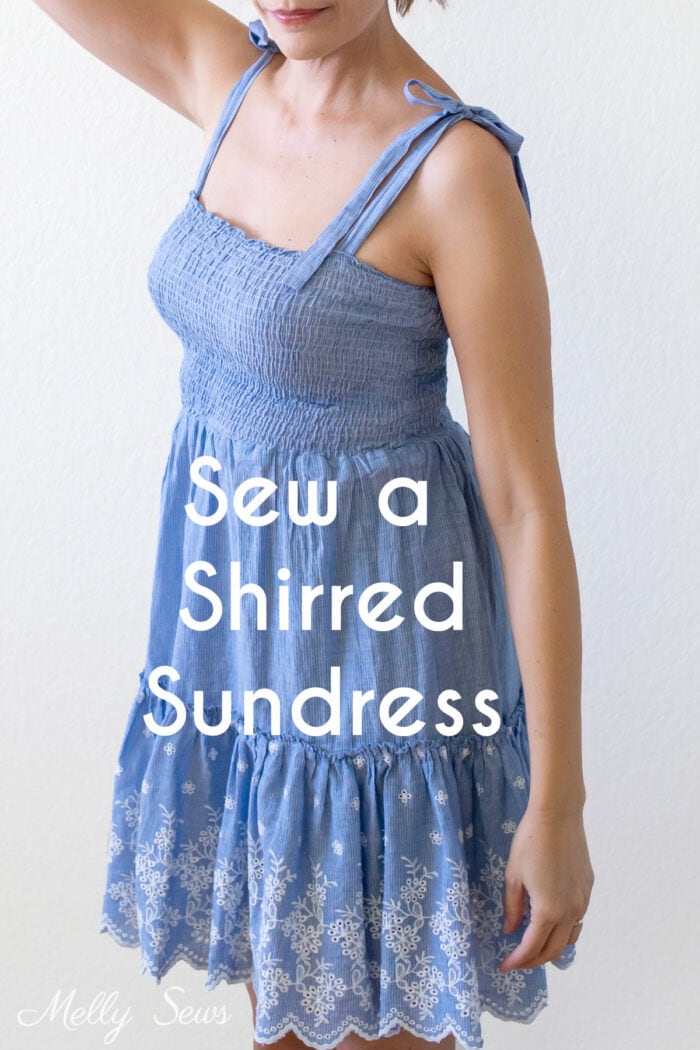
This easy step-by-step sewing tutorial will show you how to make a shirred sundress
Hey y’all, today I’m going to go over the process I used to make this DIY shirred dress. I used techniques from multiple different posts/videos that I’ll link here to get to this final result and it’s been my most worn sundress this summer.
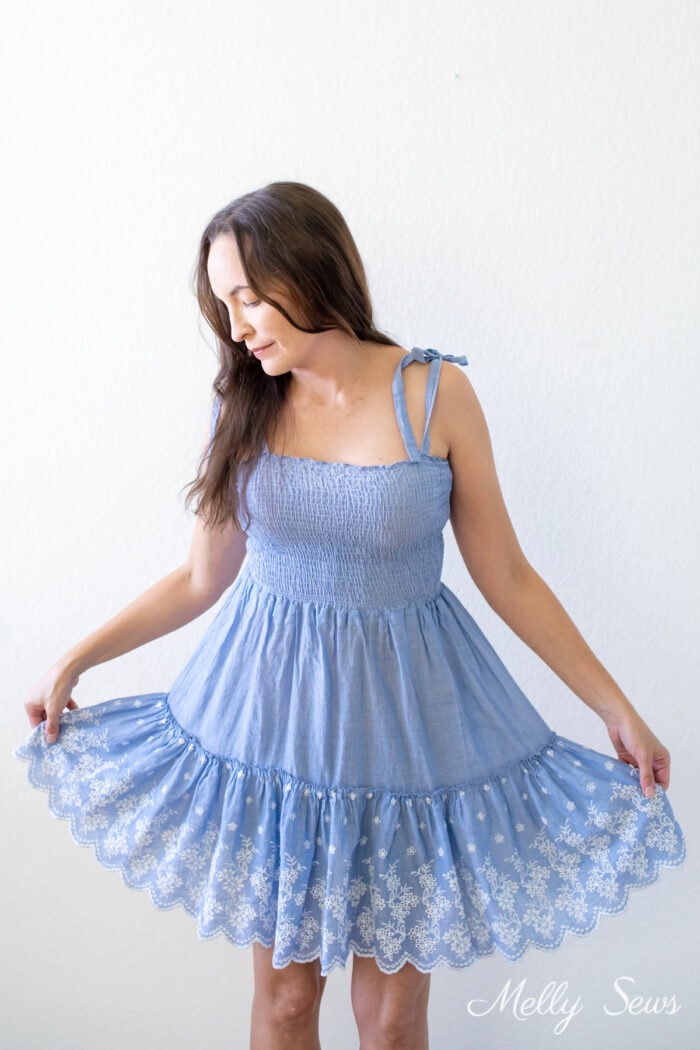
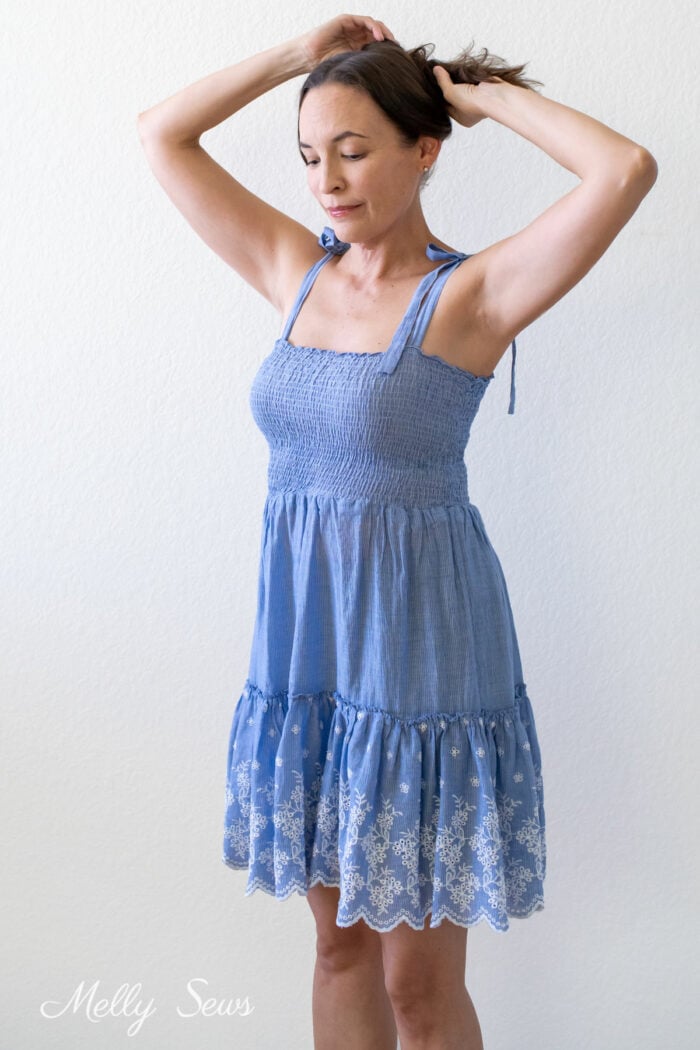
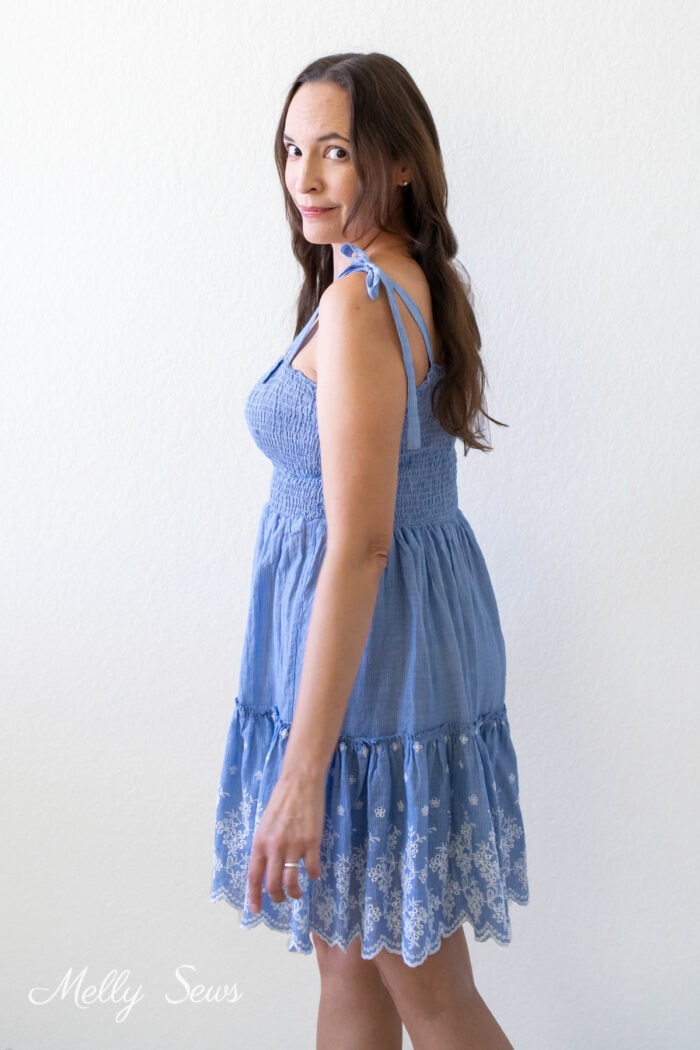
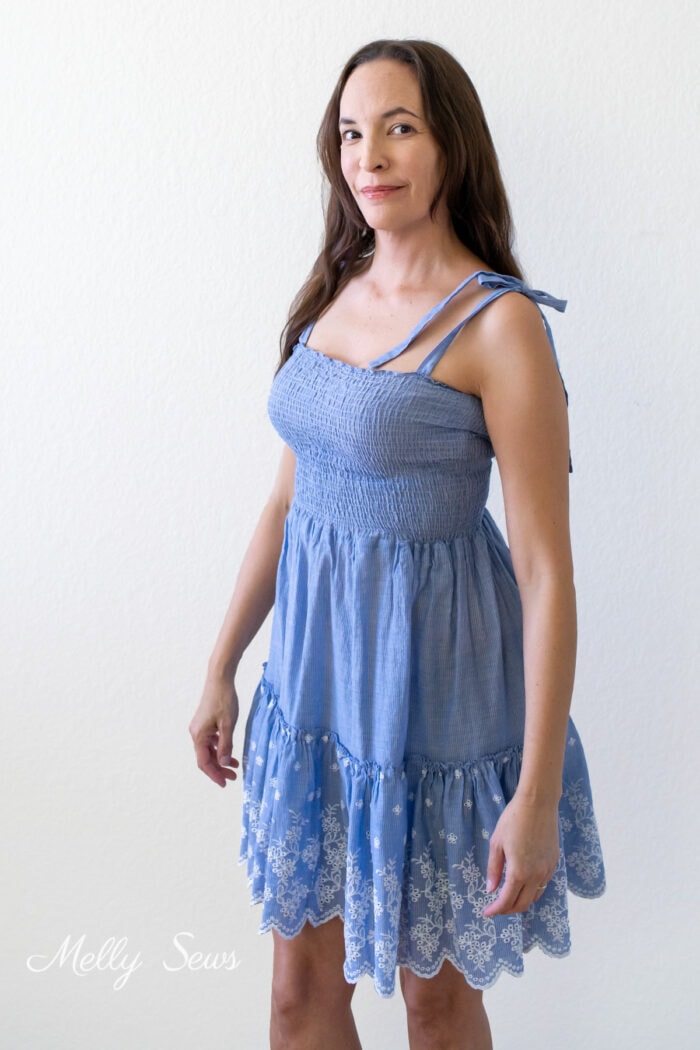
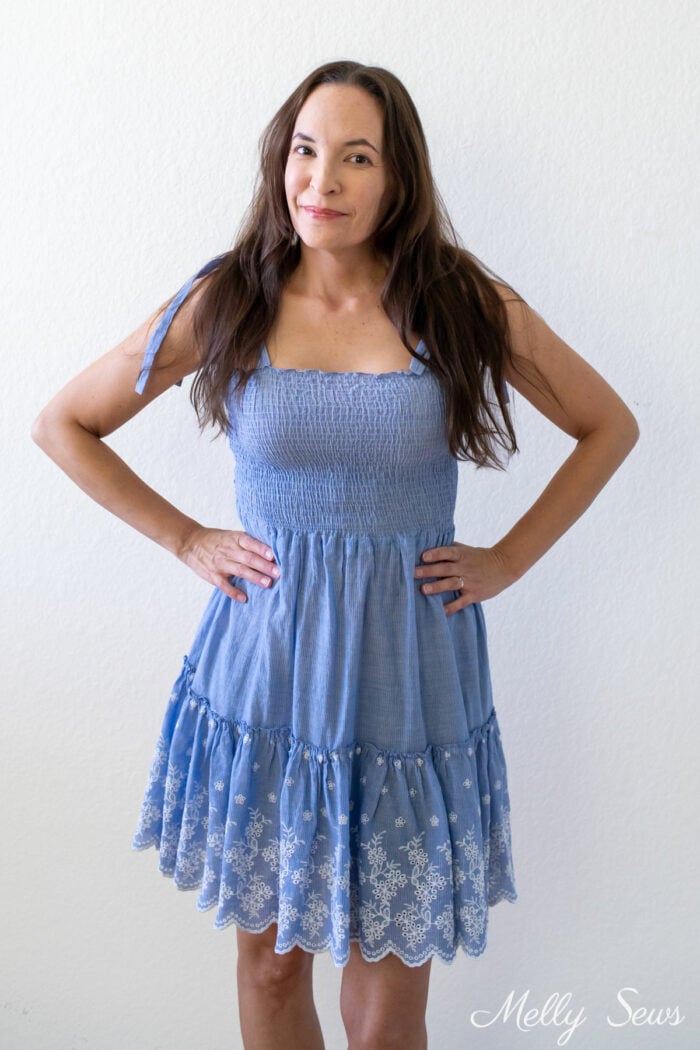
The shirring on the bodice of this summer dress makes it comfy. I love how it hugs but doesn’t squeeze my figure. And the tie straps are easy to sew and a pretty detail. The dress version of this definitely gets worn more than I wore the skirt only version.
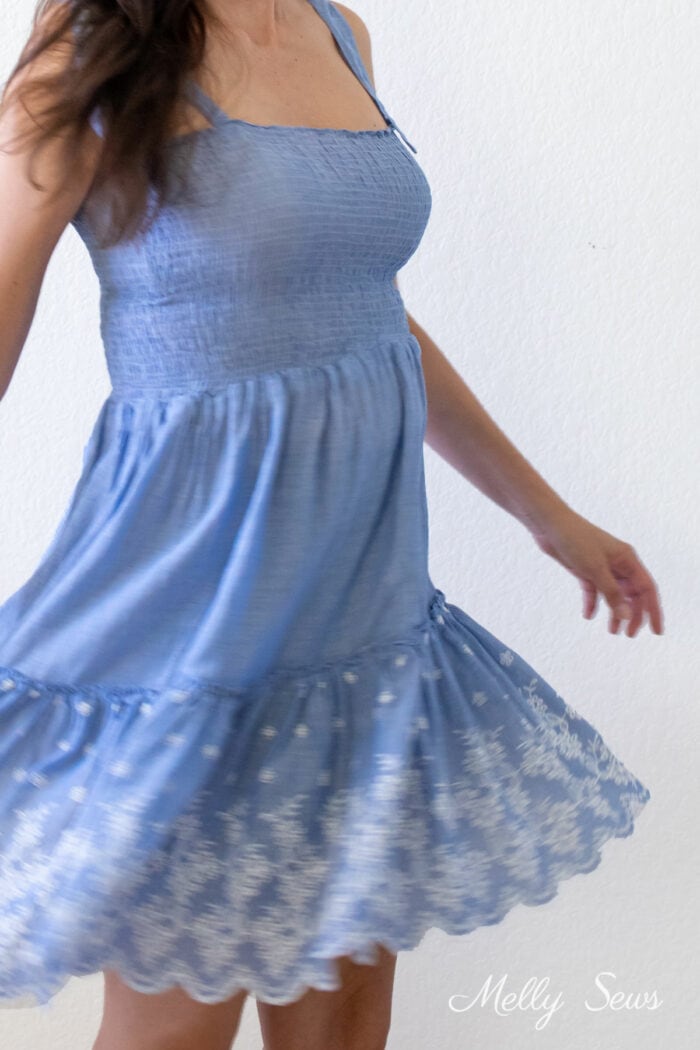
I’ll show the skirt only version when I get I that part of the dress sewing tutorial, in case you’re more a skirt than a dress girl. Both ways showcase this gorgeous embroidered cotton fabric. I had no idea what I wanted to sew when I saw the fabric in the store but I knew I needed it in my wardrobe. The embroidered edges made the perfect ruffle hem.
Quick Overview to Sew a DIY Shirred Dress
You don’t need a dress pattern to make this sundress – just some of your own measurements. Here’s a short video tutorial that shows the process. You can also watch this on YouTube here. And below the video I’ll get into the details of how to sew this dress with more written and video instructions.
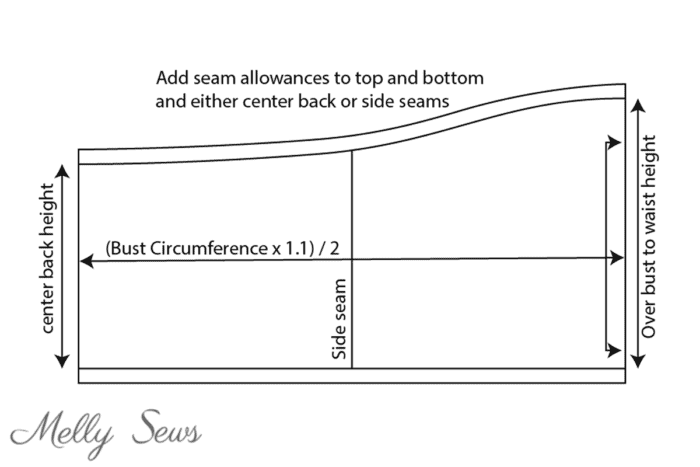
To draft your pattern for this, you’ll need measurements for your bust and hip circumferences, and also you’ll need to know vertical measurements from your high bust to your waist over your bust and your high bust to waist at center back. Those vertical measurements are the ones you can see me taking between the strings I tied on myself in the video above.
Here’s a diagram of the bodice pieces for this dress. Depending on the fabric width, you’ll either cut one piece on the fold, eliminating the side seams and adding a center back seam, or one front and one back on the fold.
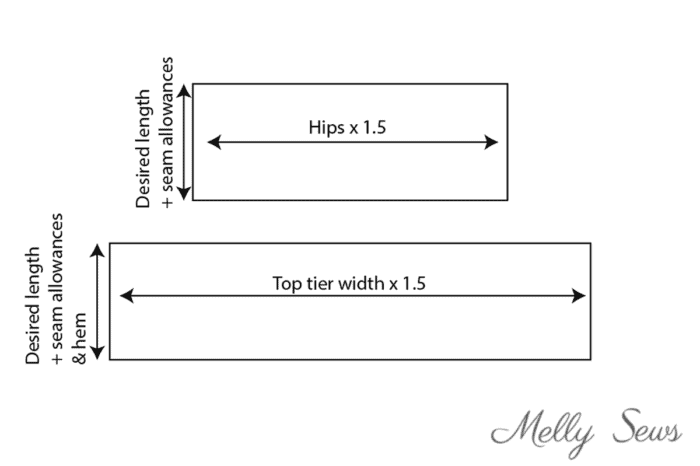
And here’s how the skirt is drafted.
The straps are the last pattern piece you’ll need, and for those I just cut 4 that were 18 inches long by 2 1/4 inches tall.
This post contains affiliate links. As an Amazon Associate I earn from qualifying purchases. All affiliate links are identified with (affiliate link) after the link or a commissions earned statement above the link(s).
Materials for a Shirred Dress
Here are the supplies you’ll need to make your dress
- Fabric – depending on how gathered and how long you want your skirt to be and your personal measurements, you could use anywhere from 2 to 4 yards or more. Check out this post to see how to calculate your yardage.
- Elastic Thread (affiliate link)
- Sewing machine and thread
How to Sew a Shirred Bodice
The first step for your bodice will be to sew it into a loop. Depending on your fabric width you can either use one center back seam or you can sew two side seams. Then sew a narrow rolled hem on the top edge. You can check out the video below or on YouTube here for more details on how to do that. For written instructions to sew a rolled hem, see this post.
After you hem the top edge of the bodice you’ll add the shirring. If you want more in depth details about shirring with elastic thread, check out this post. But I cover all the basics in the video below as well, which you can also watch on YouTube here. The simple version is that you wind a bobbin with elastic thread and sew rows with the elastic on the inside.
Because my bodice front is taller vertically than the back of the bodice, I spaced my rows of shirring stitches slightly further apart on the front than the back instead of sewing perfectly parallel rows.
How to Sew the Ruffled Skirt
Here’s the video that shows how I reasoned my way through the skirt drafting as well as how I sewed the skirt. For the dress, you’d skip sewing in an elastic casing and instead go to the next section here where the bodice is attached to the skirt. The video is also on YouTube here.
Finishing the Shirred Sundress
Once you’ve sewn the skirt and the bodice, all that’s left is to attach them to each other and add the straps. Quarter the bottom edge of the bodice and the top edge of the skirt. Match the quarter points and stretch the bodice flat as you sew it to the skirt. You will likely need to gather the top edge of the skirt to match the bodice.
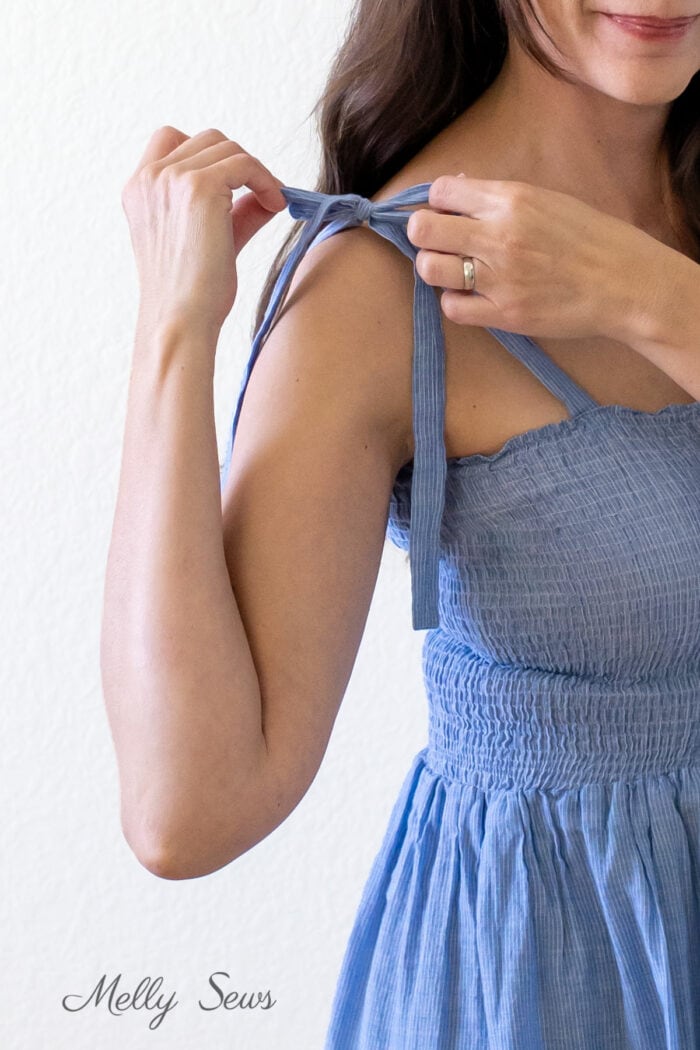
For the straps, fold each one right sides together, matching the long edges. Sew down the long edge and one short edge, then turn the tube. Put the dress on and pin straps where you’d like them to be. Tuck the raw edge under on the inside of the bodice and stitch a square around the bottom of the strap to secure it to the bodice. This step is shown in the overview video further up in this post if you need to see it.
And that’s it – enjoy your custom fit dress!
Leave a Reply