
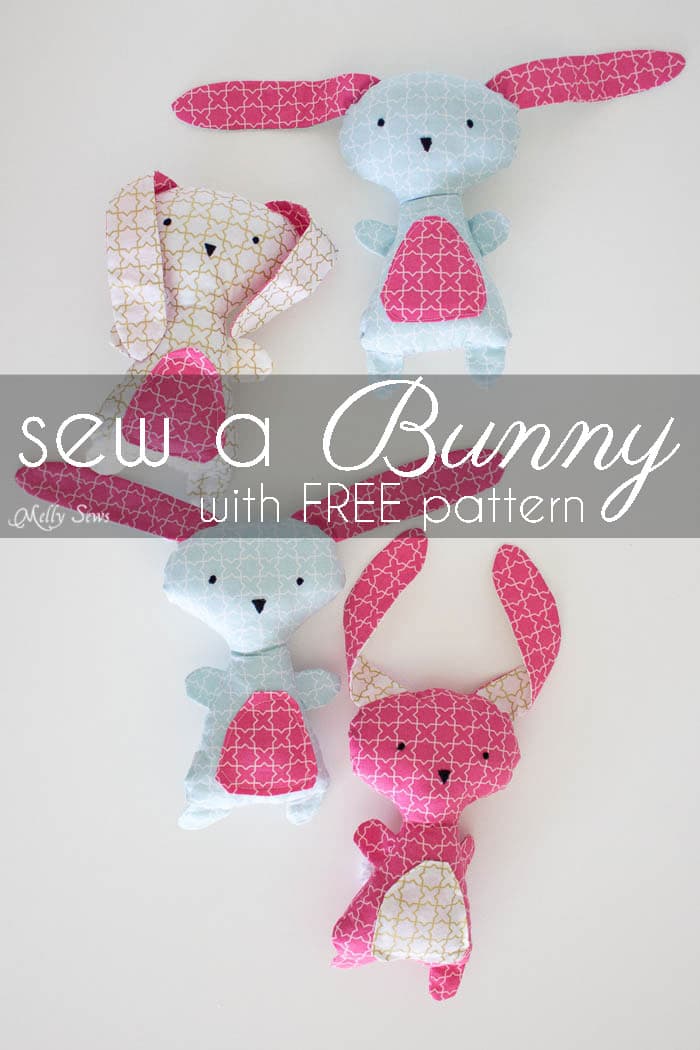
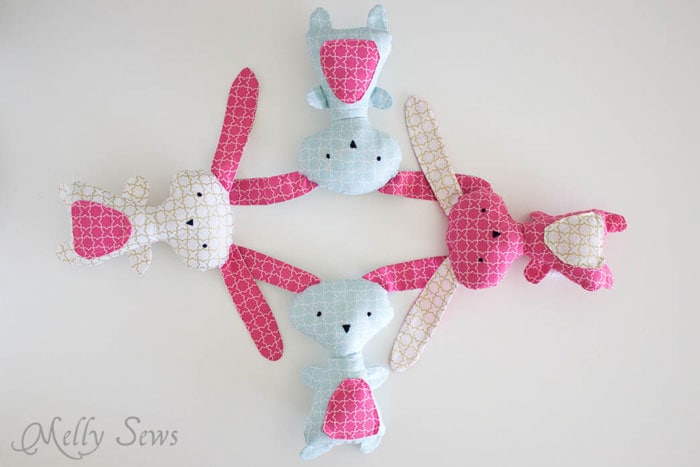
Hey y’all – today I get to share how to make a DIY Easter bunny – or, you know, if your scraps seem to multiply like rabbits (ha!), a few bunnies. I also got to use my friend Melissa’s Wonderland Fabric for these cuties, which should be shipping from stores right about now – just in time for Easter!
I have a tradition of making my kids handmade Easter bunnies of some sort each year, which is going to be challenging as they get older and maybe grow out of stuffed animals. But we’re not there yet, thank goodness. And you know, as long as I’m sewing 2 bunnies, why not sew 4 and make some for my niece and nephew too. Especially when they’ve got cute floppy ears like these!

Want to make your own? I’ve got a pattern option and a video and written tutorial to make these! You’ll need:
- 1/4 yard main fabric and 1/8 yd contrast for each bunny.
- White yarn (for the tail)
- White and black embroidery thread
- Polyester fiberfill stuffing
- The pattern. See below for options to get this.
How to Get the Free Bunny Toy Pattern
To get this pattern, click your preferred option from the buttons below as a newsletter subscriber or gallery access pass purchaser. Note that the free version of the pattern does not have printable instructions.
 |  |  |
Please note that all my free patterns are licensed for personal use only (no selling items made from this unless you purchase it) and by downloading you are agreeing to this license.
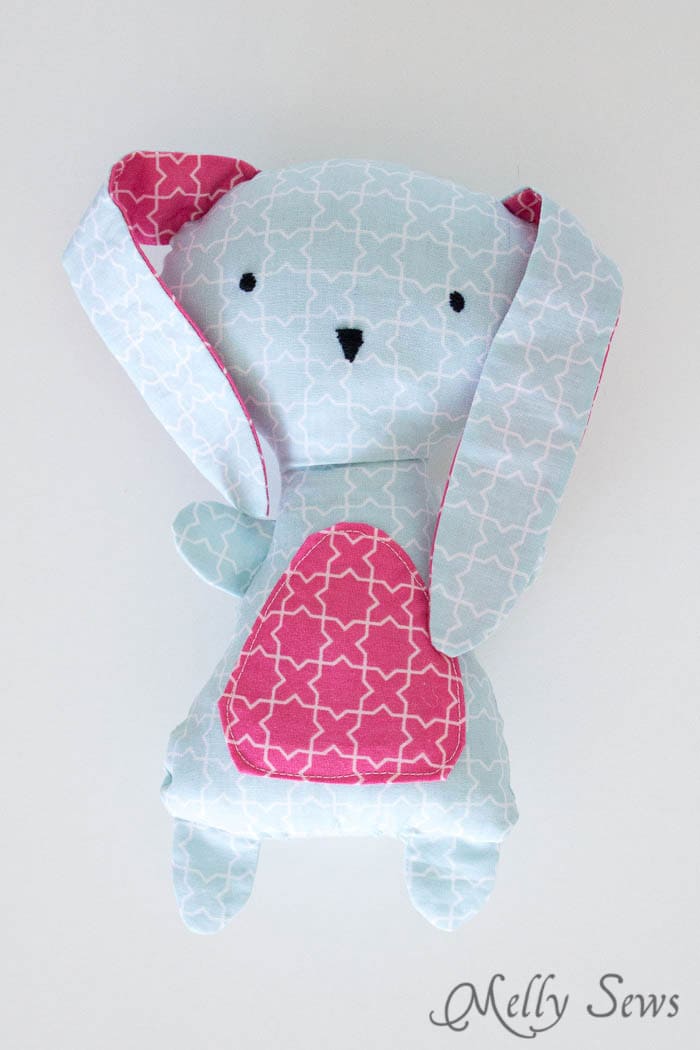
Cut your bunny pattern and fabric out, making sure to have 2 bodies, 4 ears (2 of main and 2 of contrast, mirrored), 8 paws, and 1 belly (contrast fabric).
I’ve got the video here to show you how to sew these, and if for some reason it doesn’t load you can also watch it on YouTube here. If you prefer the written tutorial, keep scrolling past the video to see it.
Start by using the black embroidery thread to embroider the face, using a satin stitch. Not sure how to do that? Check this post on embroidery stitches.
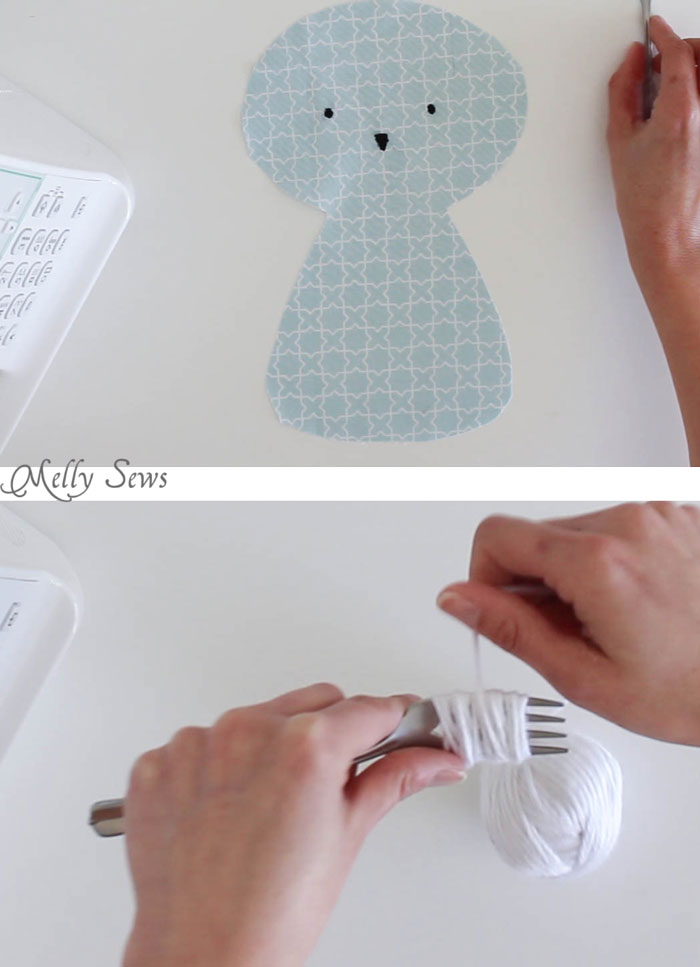
Next, wrap the yarn to make a pom pom. For small pom poms like this one, I like to use a fork for the wrapping. Wrap the yarn not too tightly a bunch of times, then use the white embroidery thread to tie it off in the middle, leaving yourself a long thread tail.
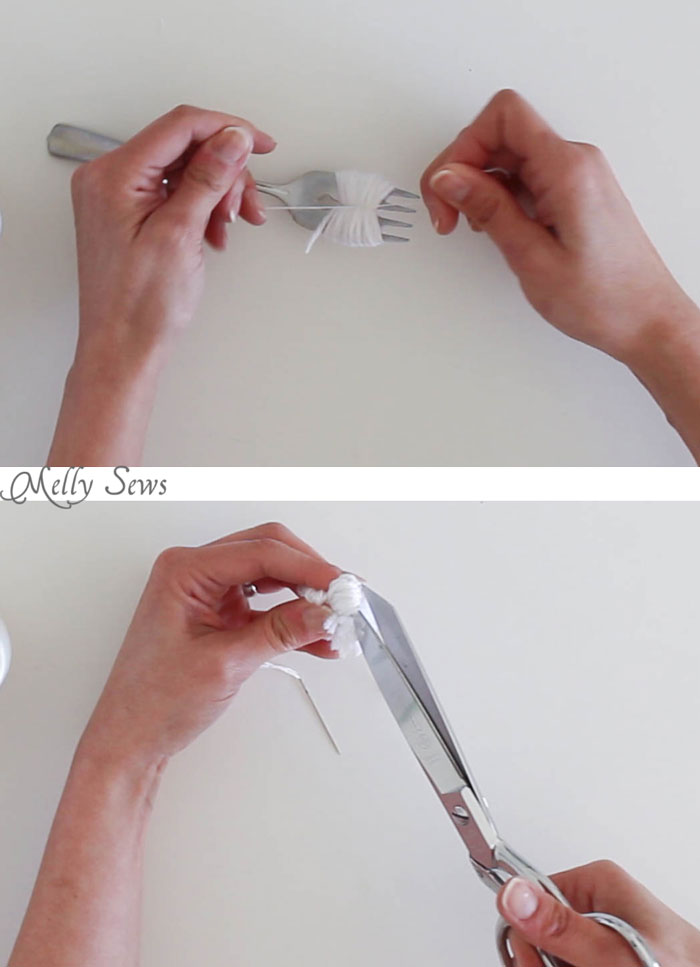
Slide the yarn off the fork and clip the loops to form the fluffy tail.
Then use the embroidery thread to sew the pom pom securely to the back of the bunny. Note: if you’re making this for a baby gift, you might want to skip the tail. Industrious babies might be able to get strands of the pom pom out and in their mouths.
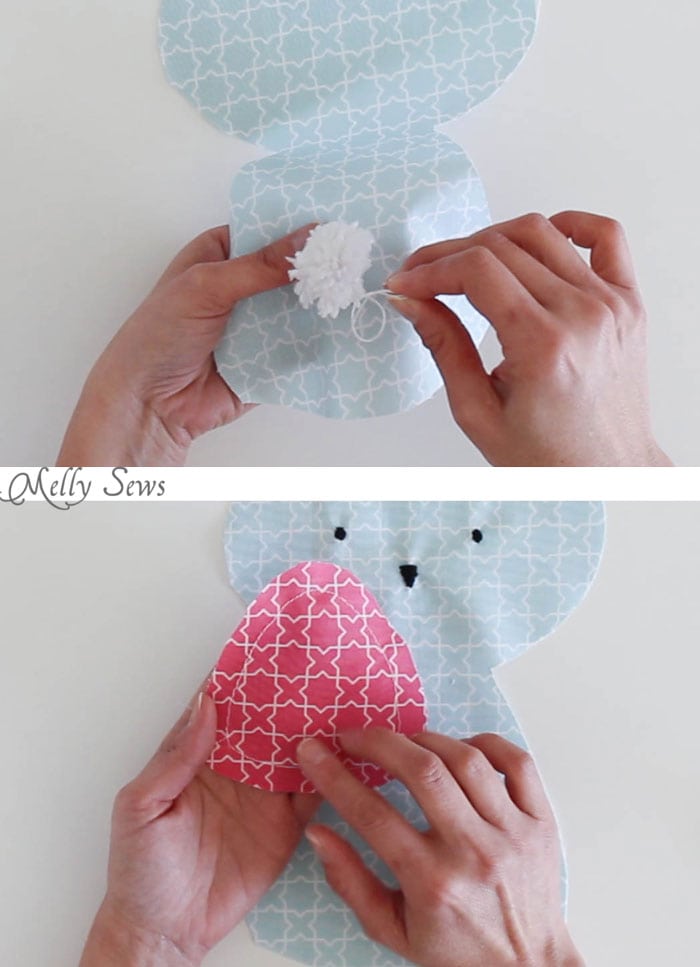
Next, sew a basting stitch 3/8″ from the raw edge all along the belly of the bunny. This gives you a stable edge to use as you press the raw edges of the belly to the wrong side. Once this is pressed (and the fabric will have wrinkles/puckers on the back side; just make sure the front is smooth) remove the basting thread. Center the belly on the front of the bunny and topstitch into place right along the folded edge.
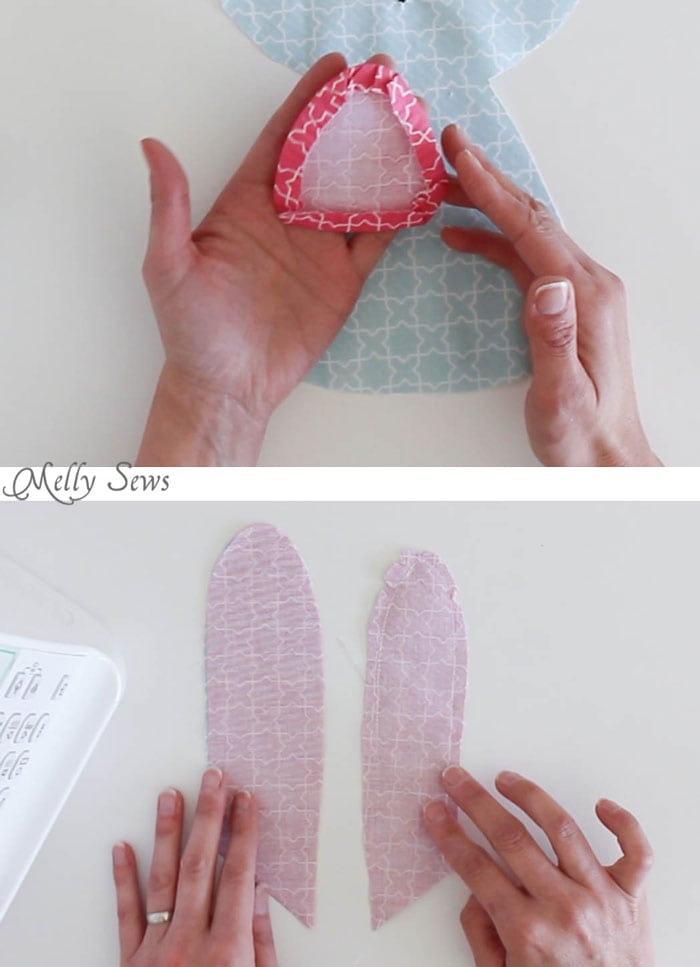
Place ears (1 main, 1 contrast) right sides together and stitch around the edges, then trim seams to 1/4″. Repeat this process with the paws. Turn ears and paws right side out and press.
Pin ears and paws to bunny front as shown below, pinning excess ears toward center so they don’t get stuck in the seams. Baste the ears and paws onto the bunny.
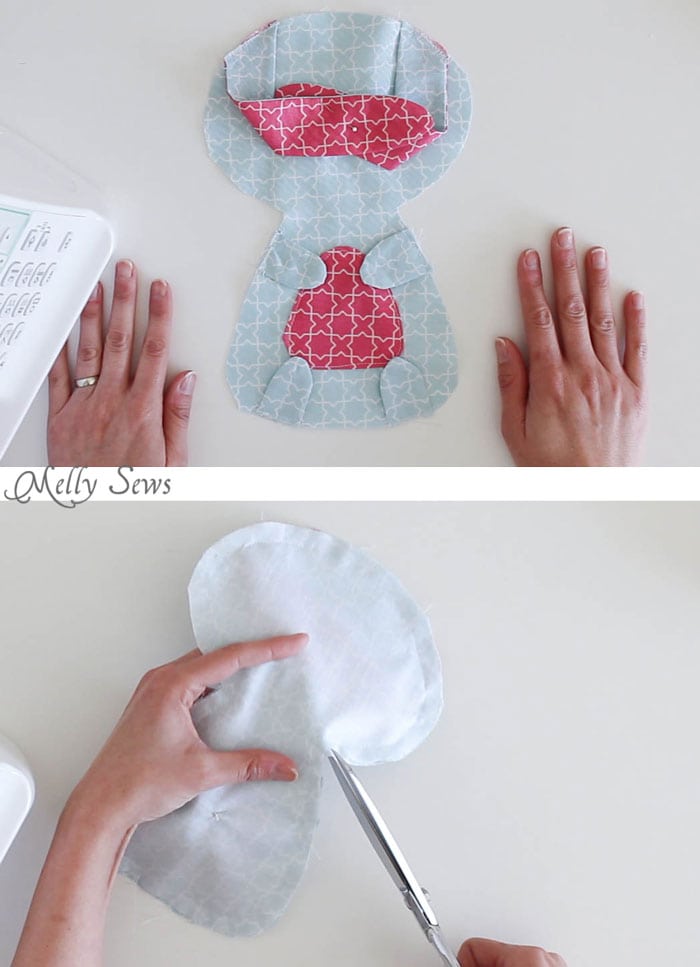
Place the bunny front and back right sides together and stitch, leaving and opening between the legs to turn the bunny. Clip into neck corners and trim seams down to 1/4″, except at the opening – leave the 3/8″ seam allowance there.
Turn the bunny right side out through the opening.
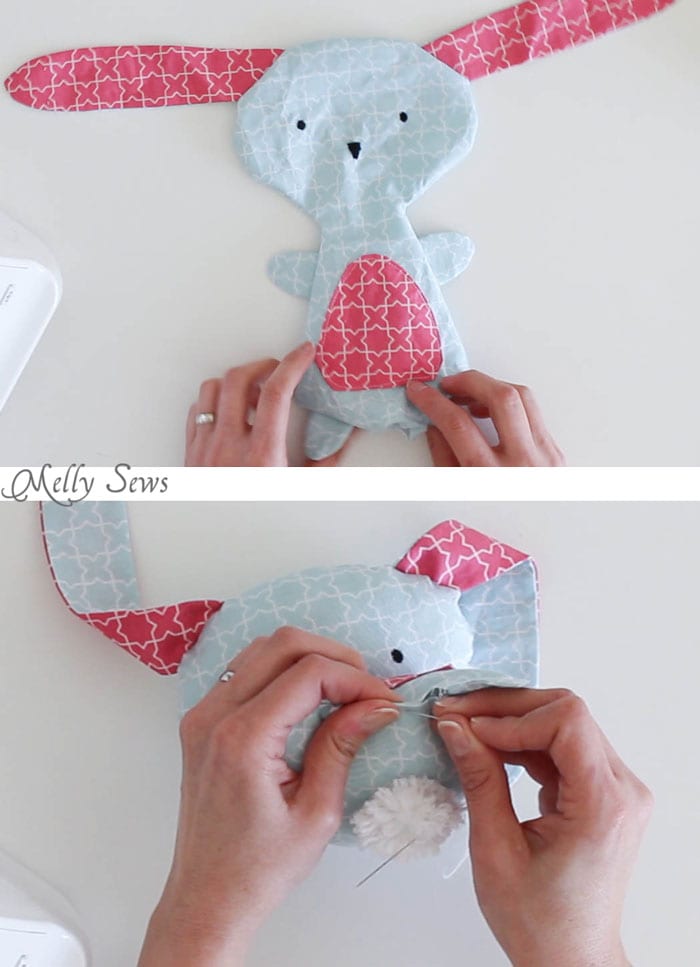
Stuff the bunny with polyester fiberfill and then use a blind stitch to sew up the opening. And done!

When Tater saw me making these, he wanted to help, so the bunny above was sewn partially by him. The belly was good practice for him to sew around small curves, and though he didn’t get as close to the folded edge as I would have, there aren’t any raw edges peeking out, so I didn’t make him seam rip. Why kill pride in a project over picky details like that? Especially when he’s a beginner.
April
Stinking cute!
Mary
Thank-you for sharing this sweet bunny pattern! My grand babies will love it!
Anne
He’s so cute!! I’ve got a Craft Gossip post scheduled for later today that feaatures your Wonderland bunnyhttp://sewing.craftgossip.com/?p=87147 –Anne
Bronte
I love this little bunny. We needed something to contribute to the preschool raffle so I whipped one up out of white polarfleece with orange ears and tum.
I am so much happier popping a bunny in the Easter basket, than yet more Chocolate.
Thanks
Jinny Newlin
Just as sweet as can be! Thank you so much for the tutorial! Here’s mine… http://jinnynewlin.blogspot.com/2016/05/playing-with-fabrics.html.
kathy
I just made this for a co-worker with a new little girl. It turned out sooooo stinking cute!! Easy too! Wish I knew how to add a pic.
K
Lynn Burkhardt
Super cute and a lovely gift idea. You are a wonderful teacher so reassuring to new sewers. I like the thoughtful sequencing you use in your demonstrations.
J
I added a gathered fabric circle lightly stuffed with polyfil to make a more baby-friendly tail. SUCH a cute little bunny and a perfect gift!
Maiah
I’m in the process of sewing this bunny and it is so fun and looks adorable already!♡ Thanks for the tutorial and pattern. Cant wait to give this to my baby cousin.