
Learn how to clone your favorite t-shirt by turning it into a sewing pattern in a few simple steps.

Today I’m going to show you how to clone your t-shirt and make a sewing pattern based off of your favorite tee. That will allow you to make a basic tee and as many copies of it as you’d like! Even though I’ve been sewing for decades, sometimes I find it easier to make a pattern from a piece of clothing I already have than to draft or find a new pattern. Using existing clothing to make a sewing pattern is called making a rub-off pattern.
This tutorial is one of the oldest on my site, originally from 2011. I updated it in 2024 to add some video and new images to make the process of creating a cloned pattern from your own t-shirt even more clear. The best part of using this method is that you don’t damage the original clothing! For the update of this post I’m combining some illustrations with images of some of my favorite shirts for everyday wear. The gray t-shirt was store bought and I love the classic fit that is neither too tight or too loose. So I copied it to make the white tee.


This tutorial is also the first of three parts. I’m going to show you the basic principal of rub-off pattern making with a boys t-shirt. After that, the second part will be how to alter that pattern, so I can show you how I made the Bean’s Baby V-Neck T-shirt. Finally, the third part will be a tutorial of making a pattern from a blazer – a lot more complicated.
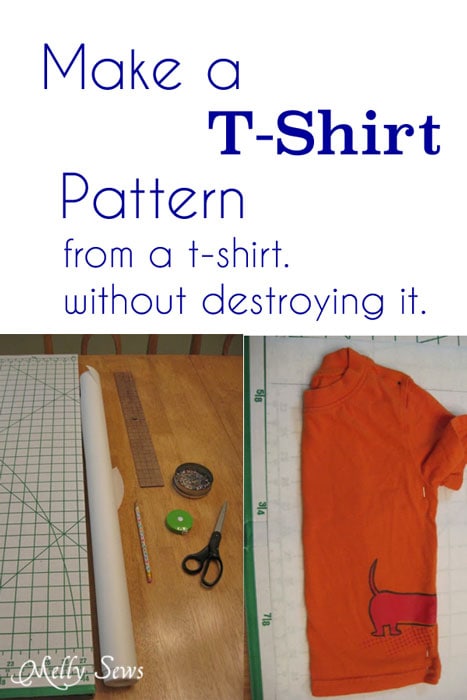
Materials Needed to Clone Your T-shirt
This post contains affiliate links. As an Amazon Associate I earn from qualifying purchases. All affiliate links are identified with (affiliate link) after the link or a commissions earned statement above the link(s).
Let’s get started. You will need:
- Straight Pins
- Pencil
- Large Paper – this can be kraft paper, pattern paper, medical exam table paper or even just printer paper taped together. However I like to use the back side of wrapping paper I find on clearance at Christmas, because it usually has a pre-printed grid that comes in handy.
- Garment to copy
- A large piece of cardboard – this can be any piece of cardboard large enough to fit under your t-shirt
- A ruler (affiliate link)
- A measuring tape
- Scissors

How to Copy Your T-shirt
You can watch a really quick overview of the process below or on YouTube here. There are more detailed instructions below the video.
Step 1: Trace the T Shirt
First, lay your paper on the cardboard. Then you want to draw a straight line on the paper if it doesn’t already have a grid for you to use.

Next, fold your t-shirt in half, front sides out. We’ll be making the pattern for the front first. Make sure you have the side seams (if there are any) together, and have matched the sleeve and shoulder seams. Sometimes I pin the shirt in half to make sure. Next, line up the center front of the shirt with your line. You can stick a couple of pins all the way through the shirt into the cardboard to hold it in place if needed. Now trace the side of the t-shirt and the shoulder seam onto the paper.
So far, so good. Here’s where the rub-off method comes in. Using pins pushed all the way through the fabric into the cardboard, outline the sleeve seam and the collar seam. These are the two seams you can’t trace easily since there is other fabric in the way. You could fold up the shirt some more to see these seams to trace, but it wouldn’t be as precise. It would work fine to do it that way for an easy garment like a t-shirt. However, when we do something more complicated, like the blazer, that won’t work. Your garment should look like this:

Remove those pins and you will have a pinpricked outline of the curved seam. By connecting the dots with a pencil, you can draw in the curves of the seam.

At this point you have an outline of the pattern without seam allowances.

The back piece will be created following the same process as the front. I like to cut the front piece out after I make it. Then I compare the side seams on the front and back before I finalize the back pattern. That way I can make sure they’ll match up.
For the sleeve, again draw a straight line on your paper or use your grid. Pin your sleeve together, making sure to smooth all the wrinkles so the seam is on one edge, the hems line up and the top line is flat. Match the fold of your sleeve up with your line. Then trace around the hemline and underarm edges. After that, pin trace the sleeve seam as you did for the other pieces.

You’re ready to flip your sleeve. Line the fold up to the other side of your line and trace the other side of the sleeve.

Step 2: True Seams and Add Seam Allowances
The next step is to make sure seemliness match. Measure along your sleeve cap and make sure that measurement matches your front + back armscye. If it does not, adjust. If you didn’t make sure your front and back side seams matched before, you also need to do that now.
At this point, you’re ready to add seam allowances, using your clear ruler. I like to add 1/2 inch allowances because that’s an easy mark on my ruler. On curved seams like the neck and sleeve, I trace a little at a time, constantly moving my ruler to create the same curve. You can also do this with a compass set to 1/2 inch wide. You’ll trace the curve with the point end, allowing the pencil end to recreate the curve plus seam allowance. Also, adding seam allowances lets you straighten out your tracing, which will always be kind of wobbly looking.

Remember not to add to the center front or center back seam since you’ll be placing the pattern on the fold of the fabric to cut out one piece. Also remember to add more for the hem. That is, unless you plan to re-use a hem off a repurposed shirt or you just want to serge the bottom edge without turning it.
When you’re done, you’ll have 3 pattern pieces that look like this:

In order to draft the neckband, I usually just measure the neckline of the shirt once I have 1 shoulder sewn. Next I cut a piece of jersey that is 0.85 that measurement long and double (the finished width I want + a seam allowance) tall.
Step 3: Cut Out The Fabric and Sew the Pieces Together
While updating the post you’re reading, I realized I’ve never done a video on how to sew up a basic t-shirt. So I need to do that! In the meantime you can visit this post for more details on a basic t-shirt including a tutorial to sew a crew neck shirt. For a tutorial to sew a v-neck t-shirt, see this post.
More Rub Off Patterning Tutorials
Tutorial for a Rub off Blazer
How to Rub off Pajamas
Learn to Rub off Jeans
kendascrafts
Great tip! I’ve always just folded the sleeves, etc. in to trace the piece that I needed, and you are right, its not as accurate. Thanks for sharing this new method for making a pattern!
Glamour Glory
this is great! Thank you for posting this! My son has gone through a growth spurt and I need to make him new shirts!
Reyna
http://www.glamglory.blogspot.com
http://www.facebook.com/glamglory
Seamingly Smitten
What a great tip about the pinning method to get those hard to trace curves!
Jenny @Seamingly Smitten
Tamanna
Thanks! I never realized that you have uploaded a free pattern 🙂
Becky S
I am brand new to sewing and my goal is to make dresses for my daughter (who is 9) I get frustrated because most people post tutorials on making dresses for toddlers. I am happy to see maybe I can make my own pattern to do the top part of her dresses and just follow the rest of the design. thanks for putting this up.
Becky
lynne
I am new at sewing and want to make a costume. The top for the costume is really like a vneck tshirt. Using your method to make my own pattern, I am free to choose the right fabric. What I need is tips on making the vneck neckline piece. I don’t quite understand what you said above about making a pattern for the neckline piece, so can you tell me in more details? 🙂
Thanks in advance. I love the idea of using pins to trace the curve of the sleeve too.
Melissa Mora
Look at the top of the post where I linked to Bean’s Baby V-Neck shirt – there are much more detailed instructions about the V-neck in that post.
kadasher
hi,
i really love your work, its been very inspiring. i have two boys 6 and 8 years, can i modify this patterns to their size? how do i go about it? thank so much.
llynnda
I have been doing this for years but usually just with knits. Didn’t know it was called Rub. I always thought of it as Rob! I was a stretch and sew instructor for years and frequently used this method for knit fabric when there wasn’t a pattern available. I have also used this method for woven fabric with some success. My estimate for ease does not always work out . Love your explanation and I will now call is Rub. It sounds so much better than Rob!
Silvia
Lovely tutorial, I just made the patter from a tshirt, but the back is a bit different from the front : longer and the shoulders are a big bigger and the curves where the sleeves are don’t really match with the front…what do you suggest me to do? Shall I just use the back and cut out the rounded part of the neck?
Thanks
SILVIA
Melissa Mora
The front and back arm curves should be different; usually there is more curve to the front than the back. The shoulder width should match, however. You need to modify your pattern to make sure the shoulders are the same width and that the length of the side seam is the same.