
What to do if you’re not all one size in a sewing pattern – blend sizes or grade between sizes
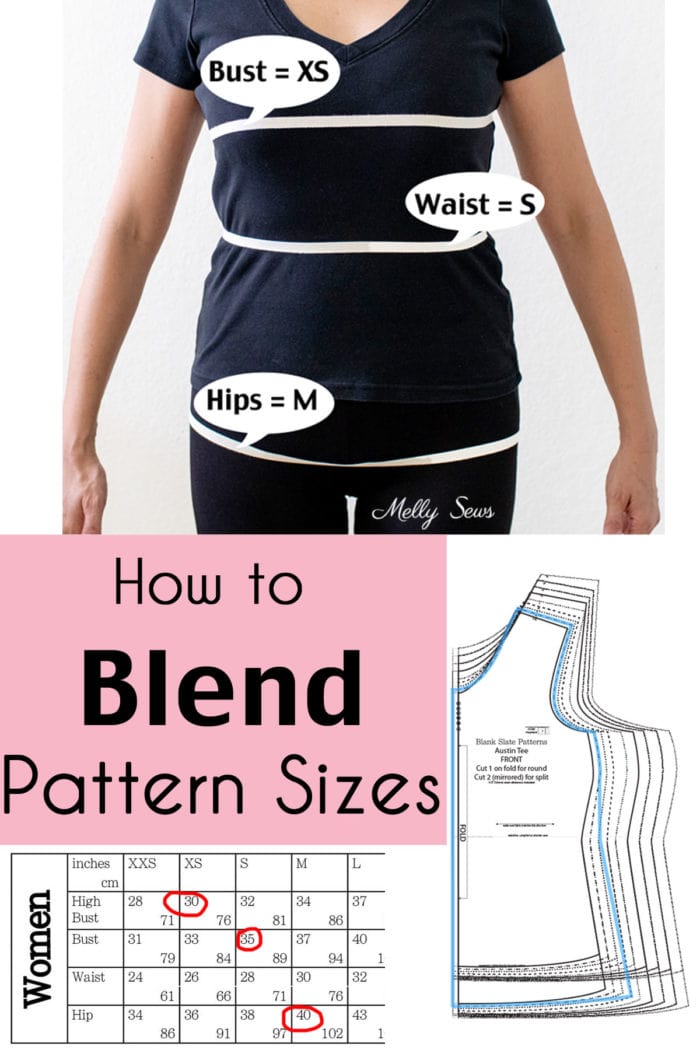
Hey y’all, today we’re going to talk about how to choose your size and how to blend sizes on a sewing pattern. A question I get a lot from those new to sewing clothes is, “How do I choose what size to make?” This question gets especially tricky when your personal measurements fall into more than one column on the pattern size chart. How do you choose the right size to sew when you’re not even one size?
Your Ready to Wear Size and Sewing Size Might Be Completely Different
Before we go further, let’s talk about clothes sizing. Standardized clothing sizes happened in the first half of the 20th century as clothing production moved from home to factories. A sampling of people were measured and their measurements were averaged to create standardized sizing. Later, clothing retailers steeped in diet culture discovered that vanity sizing (the practice of marking clothes in a different size than the standard measurements would indicate) sold clothing. That’s how my size 4 jeans from the 1990s are the same width as my size 0 jeans from 2015. But while clothing retailers were doing that, the big pattern companies were not, so you still see measurements corresponding to the charts from the 1940s – not the standard measurements from today.
To add one more level of confusion, in the last 10 years independent sewing pattern companies (like mine) decided to take modern standardized measurements and use those when drafting patterns. Between all those factors, YOU CANNOT ASSUME YOUR SIZE IS THE SAME in ready to wear and sewing or even between different sewing pattern companies. BUT all sewing pattern companies tell you what body measurements they’re using for their patterns, so to find your size measure yourself correctly then compare to their chart.
But What if You’re More Than One Size?
It’s very common to have body measurements that fall into different columns on the sewing size chart. When that happens, I say to make a custom size! After all, that’s the beauty of sewing – you can make it in exactly your size, not some pre-determined ready to wear size. Remember that being different sizes in different parts of your body isn’t a problem with either the pattern or with your body. Instead, it’s just a starting point so that you can create a personal size.
How to choose your size for sewing
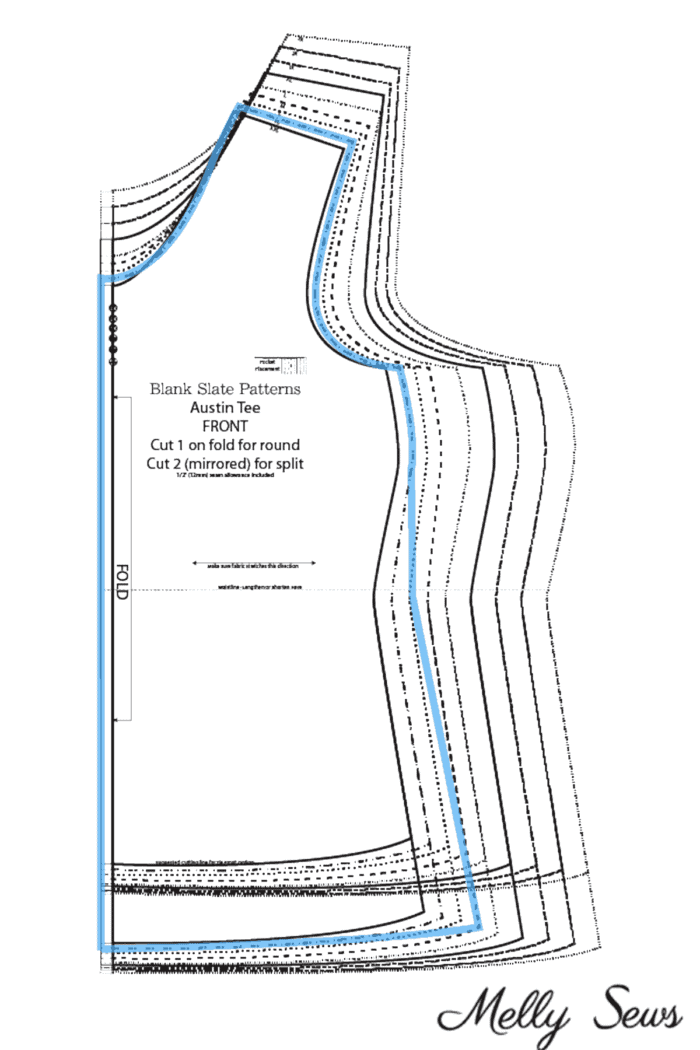
I made a video that you can watch below showing how to blend sizes for a top pattern and a pants pattern, including which size to start with as your base size for a piece. You can also watch on YouTube here if it won’t load below for some reason.
So as shown in the video above, you simply mark your different sizes in the corresponding areas, then smoothly connect the dots to make a custom fit pattern.
Before you grade your pattern, make sure you measured yourself accurately. I have found many people measure their waists incorrectly, so see how to make sure you’re not making that mistake in this post.
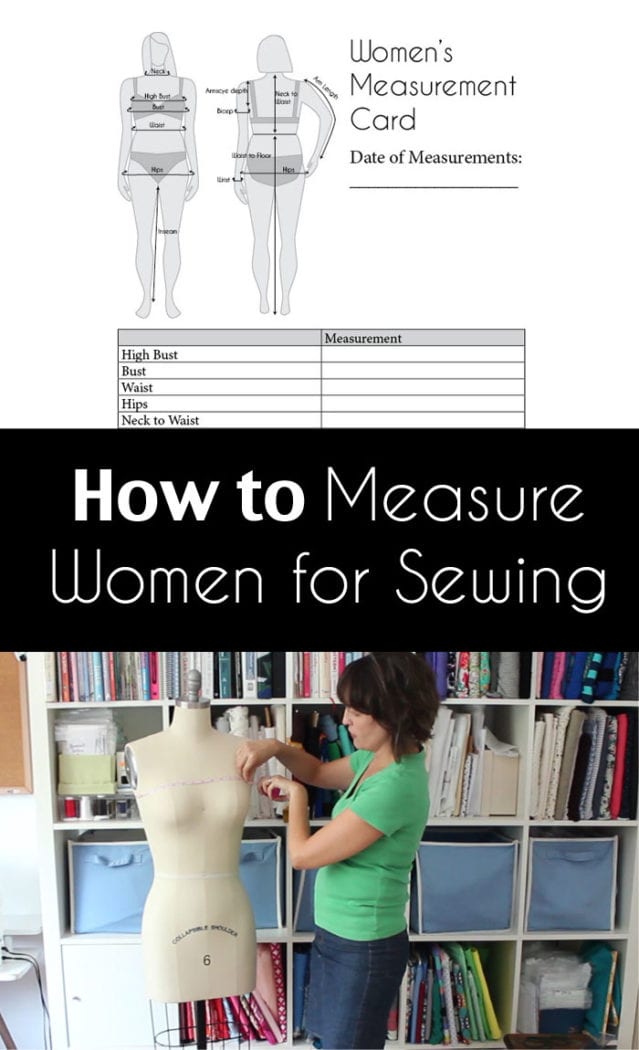
In addition to grading between sizes, you might need to do a bust adjustment. The reason for this instead of just grading between sizes is that a bust adjustment deals with both the horizontal and vertical changes you need for different bust sizes. If you’re grading at the side seams, you’re only adjusting the horizontal. You can find out all about bust adjustments here.

Gayle Gissing
Thankyou so much for your blog information, it is always clear and easy to understand.
Karen Marsh
I have only really made clothes for children so this has really inspired me to have a go at making something for myself xx
Viv
Hi Karen, like you I have made children’s clothes for years. The only difference is I have made numerous things for myself to just throw out. I was really despondent. However Melly’s pattern are great.
Helen Jankul
I echo Gayle Gissing’s comment. Your blog information is very helpful. Thank you so much !
Connie
Thank you