
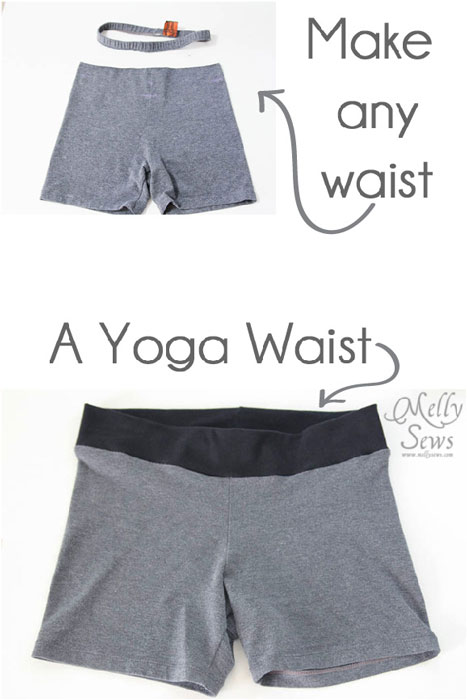
A yoga waistband is a wide band of fabric that goes around your midsection and keeps your pants from falling, and can be more comfortable than simple elastic.
Do you have any of those ancient workout clothes in your closet that you don’t wear because they make you feel even fatter that you already feel? I have a LOT of those. So today I’m sharing this yoga waistband tutorial.
I’m not sure if it’s because some of my workout pants/shorts are so old, or because for some reason activewear manufacturers seem to think you want TIGHT elastic so those pants aren’t going anywhere. But I have workout pants I didn’t try before buying (gifts, a lot of the time) and I avoid them like the plague.
Why do manufacturers do that? When this is so much more comfortable and flattering? I think I wore these shorts all of 2 times ever before I altered them. And I I got them YEARS ago.
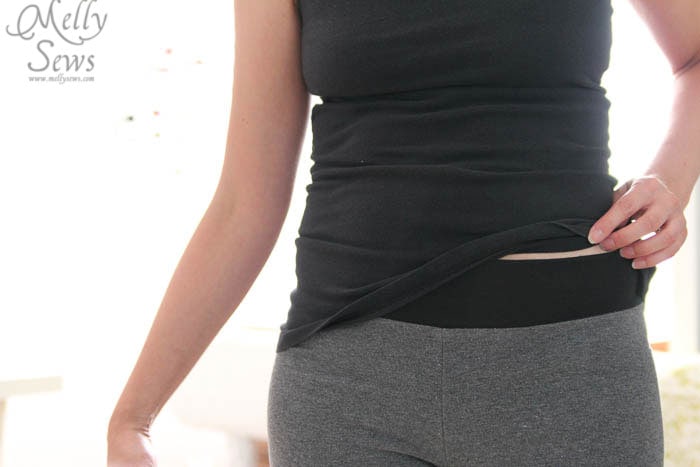
The unfortunate thing about the super tight elastic waistband is that it does this. It pinches and creates lumps and rolls. I probably should have just thrown these away, but I thought they could be saved.

And I was right, so hopefully this tutorial spares you muffin top and posting unflattering pictures of yourself on the internet. With a simple bit of sewing you should be breathing much more comfortably than I was in this picture.
Wide Band or Yoga Waistband Tutorial
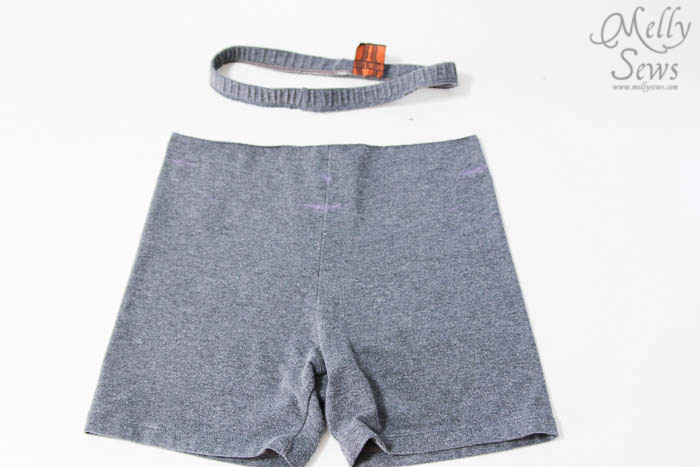
Start by cutting off the elastic squeeze of death.
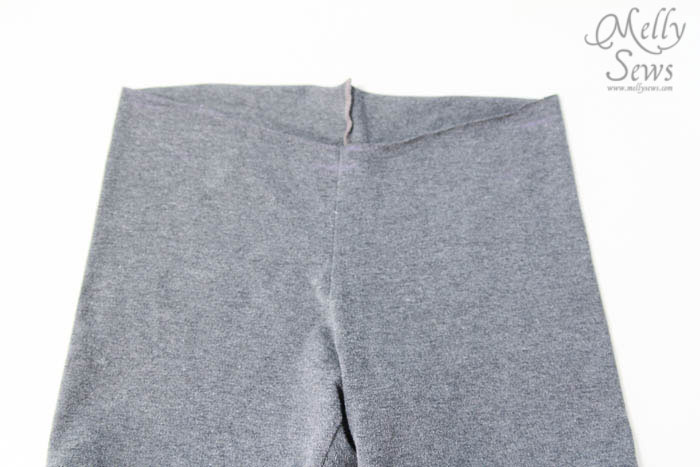
Using a pair of pants that you like for reference, or trying these on and marking where you would like the bottom of the waistband to sit, mark off the extra fabric. I cut my pants in a V in the front – I like the front of my pants/short to sit lower than the back.
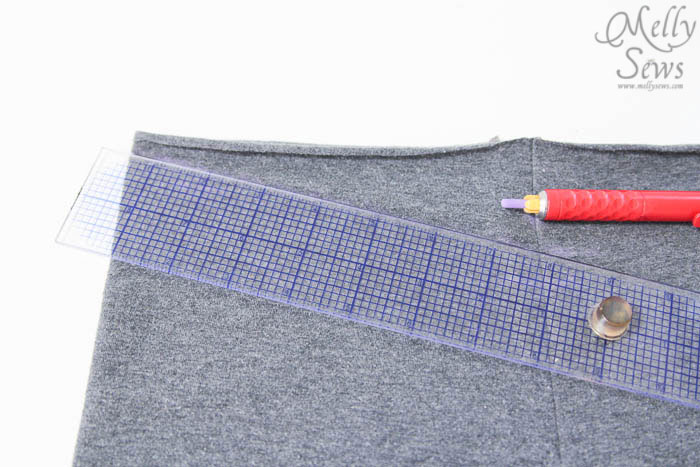
Cut, making sure you’ve left a seam allowance.
Cut a strip of ribbing or interlock knit for your waistband. Jersey might work too, but it doesn’t usually have the same stretch and recovery as ribbing or interlock. (Not sure what ribbing and interlock are? See this post.)
To figure out how long your waistband should be, measure where it’s going to sit on your waist and subtract 1.5″.
Your waistband width should be double the height of what you want your final waistband to be, plus seam allowances.
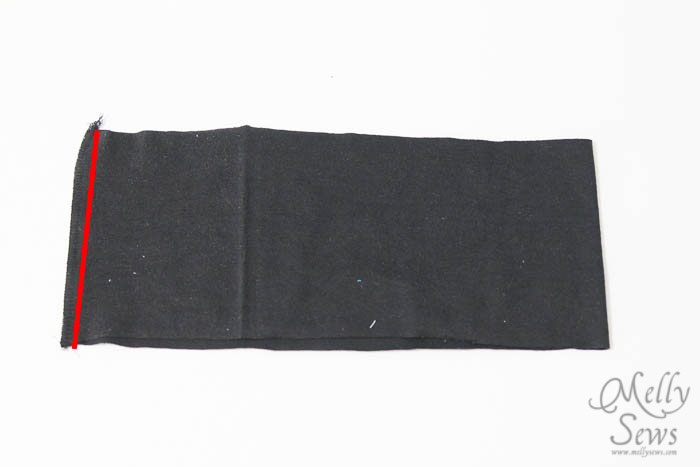
Fold waistband, matching short ends, right sides together and stitch (red line)
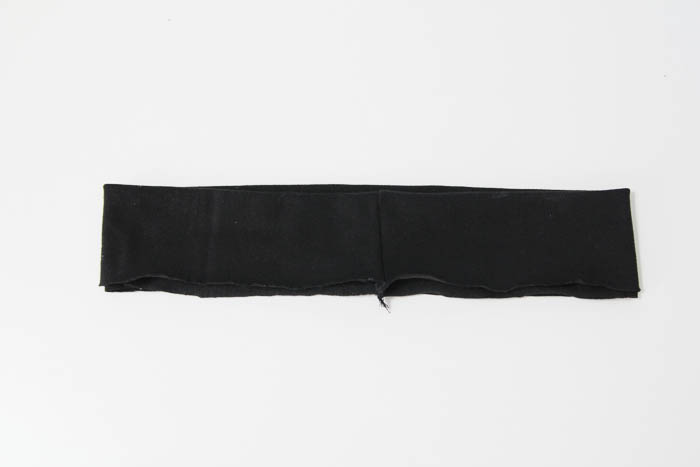
Now fold your waistband wrong sides together, matching the long edges so you have a loop with the seam inside. The folded edge will be the top edge of your waistband.
Put your waistband on the shorts or pants, right sides together, matching the raw edges (There are 3 raw edges – 2 from the waistband and 1 from the shorts). Match the seam of the waistband to the center back seam on the pants or shorts.
Stitch, using a stretch stitch.

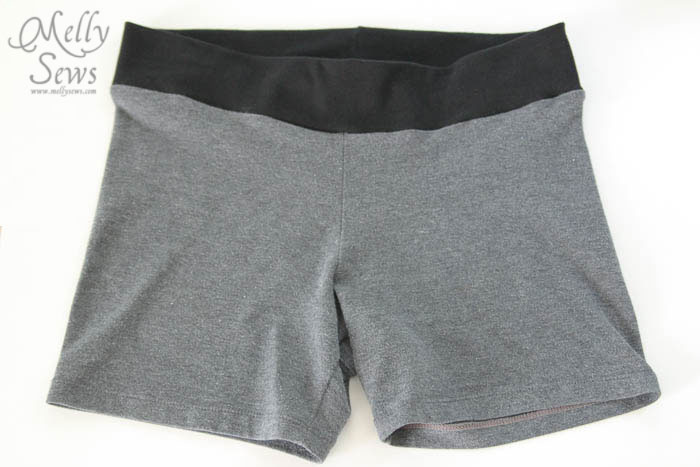
Turn the waistband so the seam allowance points down, and you’re done.
MUCH more flattering – no more weird lumps and bumps and now they sit below my belly button.
So go on, rescue those pants you’ve been avoiding. It might even be an incentive to work out. I fell off the running wagon over the summer, despite all my New Year’s Word of the Year and all, but I’m climbing back on. I’ve made it to week 5 of the Couch to 5K program – yay!
What about you – are your workout clothes a motivator or a reason to avoid exercise?
Laura J.
Wow, I am actually wearing a pair of pants with the elastic squeeze of death right now… time to grab the scissors!
Lisa A
Much better! It’s amazing that one little change could alter the look drastically
Gari
OMG! Awesome! Did you use your serger or your Singer on these? Thanks so very much for the inspiration and showing how it is done! I can’t wait to try this!!!!! And your “before” picture, though informative, really isn’t as bad as you think it is!!! 😉
Anne
I was just today wearing a bathing suit bottom with a yoga waistband and deciding that all my bathing suit bottoms from now on must have that same type of waist. LOL! I’ve got a Craft Gossip post scheduled for tomorrow that links to your tutorial. When it goes live, you can find it here:
http://sewing.craftgossip.com/tutorial-make-a-yoga-waistband-and-lose-the-muffin-top/2013/10/02/
–Anne
Velosewer
I’m about to do the same to some gym pants too. But I have to take the tummy fullness out first. Fingers crossed, it all goes to plan.
Thanks for the tute again.
June
Squeeze of death, seriously! Pantyhose makers, I’m looking at you! Nice save to otherwise unwearable shorts. 😀
Anne
SQUEEZE OF DEATH!!!!! Hahahaha! I love that there’s finally a name for these evil monsters! Now where are those filthy things…. I’m gonna chop you off when I find you, you little quarter inch stretchies…… 8D
Thanks for sharing! I love it!
Elisa from CharmingDoodle
This is SO great! I’m off to rescue some shorts. 🙂
Heidi
Thank you for this wonderful, simply tutorial! Thank you, too, for posting that tiny picture of the bad exercise shorts. I got a huge laugh at it because I have the exact same look going on when I don my old exercise pants. Thanks, I needed that today!
Sheryl
This is great!! Thanks!
Kate Meyers
As a beginner sewer, I can’t tell how to sew something stretchy…any hints?
I’d also like to add these waistbands to non-stretchy materials since I have never (even at 125lbs! -5’7″) had an indented waist…more of empire only.
I cannot wear belts and always wear my waistband covered anyway, so all my jeans and trousers, chinos, etc should have these wonderful waists!!
Martha
Kate, I can’t tell whether you got a reply to your question. I’ve been studying waistband makeovers, because I want to put a similar waistband on a pair of jeans. It’s not so much that they are too tight, but the denim waistband is uncomfortable on the sensitive skin on my tummy and waist. I bought a pair of cropped jeans for summer that have a soft waistband, and I’d like to add the same kind of waistband to my old jeans. Like you, I wear my shirts untucked.
The non-knit pants need to fit your hips, which are probably a little bit larger than your waist. If the stretch band is made for your waist size, you’ll need to stretch it a little to match the non-stretch fabric of the pants: After you’ve made the “loop with the seam inside” (above), divide the waistband into four equal parts and mark the dividing points. Match the four marks to the center back, center front, and side seams of the pants and pin it. Stretch the waistband to fit and pin it in between the other pins. Then stitch as described above, using a knit stitch or a zig-zag stitch, stretching the knit waistband to fit as you sew.
I think I’m going to put a loop of wide elastic (maybe pajama elastic) inside the knit waistband to reinforce it.
Best wishes,
Martha
Chas
Omg. Ya I have a bunch too haha this is awesome! I will definitely be doing this.. I will also be doing it to some skirts! Thanks for this brilliant idea!
Lorraine
This is brilliant. I have some short that the waist is way too high one me (I am shorter than average) this will make them much more comfortable. Thanks very much for posting this tutorial!
Toni
Thank you so very much for this tute. I am trying to solve two problems. Mother Nature is rearranging my figure now that I am in my 60’s. I have no waist line anymore. Oh I’m still basically a size 8 things just don’t fit as well. Problem number 2 is my 4 year old granddaughter’s long waist. She is very slender and very tall. If it fits her she has exposed tummy and back well you know.
This just might make the difference. I will try something tomorrow. Maybe start with pajamas for her and exercise pants for me.
Thanks again,
Toni
Pennyp
I can tell what your most popular post of 2015 will be!!!! THIS ONE!!! I think we are all high-fiving and saying “oh yeah! You squeeze of death everythings are gonna go!!” Kate, if you will check through older posts (try searching her blog for sewing knits) she has tips on sewing knits. You can do it!!!! You have to use a zig-zag.
Can’t wait to hack up a bunch of stuff that I’ve been avoiding!!!
Rita McCart
How difficult would it be to do this to blue jeans? 🙂
jax
@Rita McCart: it shouldn’t be too difficult, but you will need to sew up the fly and maybe remove the zipper. That’s how they make newer maternity jeans without the giant panel. Just be sure you cut the waist low enough so you can pull them up over your hips or only try this with really stretchy jeans.
Laura
Pajama bottoms — sooooo much more comfortable now!
Judy
Thank you Kelly. I want to do this to jeans.
Debbie
I’m a little late to your blog… I absolutely LOVE this tutorial. Thanks for sharing even though it is a couple of years old!!
Julia Avers
I love everything I have read on your blog. Please keep up the great instruction and projects. For me at least are valued and look forward to whatever comes next.
Nikki
Ahhhh-mazing! I’m going to do this to many a pant and short! Thanks for the idea and the tutorial.
Debby
Great tutorial. I want to try this on flannel pajama pants for my grandkids. Think they would be so much more comfortable than 1″ elastic!
Donna
Thank you so much for this tutorial! I know this post is 7 years old, but it’s still impossible to find pull-on skirts that don’t have that tight elastic waists. I’m going to convert some pajamas and then I’m going to try making some lightweight woven cotton A-line skirts for summer.
Liz B
Hi I found your post when looking… for this exact info 😉 my husband, at 70 who has always been athletic, finally admitted his PJs were a bit… uncomfortable. I’m going to try the method on RL Polo (non-stretch) pajama bottoms, I hope with your info and what I ‘think’ I can do. Thank you!
Catherine
Thanks for this tutorial and for explaining rib and interlock knits. You have a wonderful teaching method and I appreciate the thorough explanations.
brendalynne1
wow all those tried on once and flipped them into the basket for donations to our local charity shop…. oh well no crying over spilled milk, I will be prepared for the next pair. It seems this could be an excellent pattern revision as well. THANK YOU