
Try these ideas to help you organize and store your sewing patterns. Make them easy to find and reuse.

Hey y’all, do you ever find yourself stumped on sewing pattern storage? If you’ve been sewing from patterns for any length of time you might soon find piles of them in your studio if you don’t have an organization system. Today as a post in my studio declutter and organization series, I wanted to talk about how to store sewing patterns, especially how to store PDF patterns once you print them. In the 10 years I’ve been writing this blog, I’ve seen various ideas for what to do with the patterns you print out to make sure they don’t turn into clutter. I’ve tried several methods and have definite opinions on my favorite storage solutions.
Key Takeaways
If you want to store your sewing patterns to make them easy to find and reuse later, you’ll need to
- Have an organization system
- Make sure the system works with your budget
- Make sure the system works with your storage space
- Bonus: if aesthetics matter to you, then you want your storage system to be aesthetically pleasing as well
Sewing Pattern Storage Overview
I made a video showing 3 of the DIY sewing pattern storage methods I’ve tried. In the video I talk about why I abandoned one method and only use the second method sparingly. You can watch the video below, or you can also watch it here on YouTube if you prefer.
This post contains affiliate links. As an Amazon Associate I earn from qualifying purchases. All affiliate links are identified with (affiliate link) after the link or a commissions earned statement above the link(s).
So here are some supply options for storing your patterns using my favorite method – boxes of upright envelopes:
6×9 envelopes (affiliate link)
Storage Boxes (affiliate link)
Note that I couldn’t find the exact box I have pictured here, but these are close and the right dimensions. Plus they fold flat, which mine doesn’t.
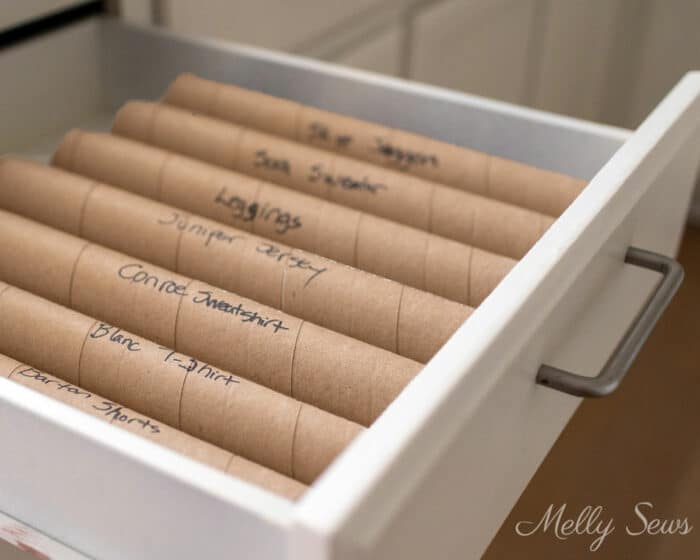
Method 1: Cardboard Tubes
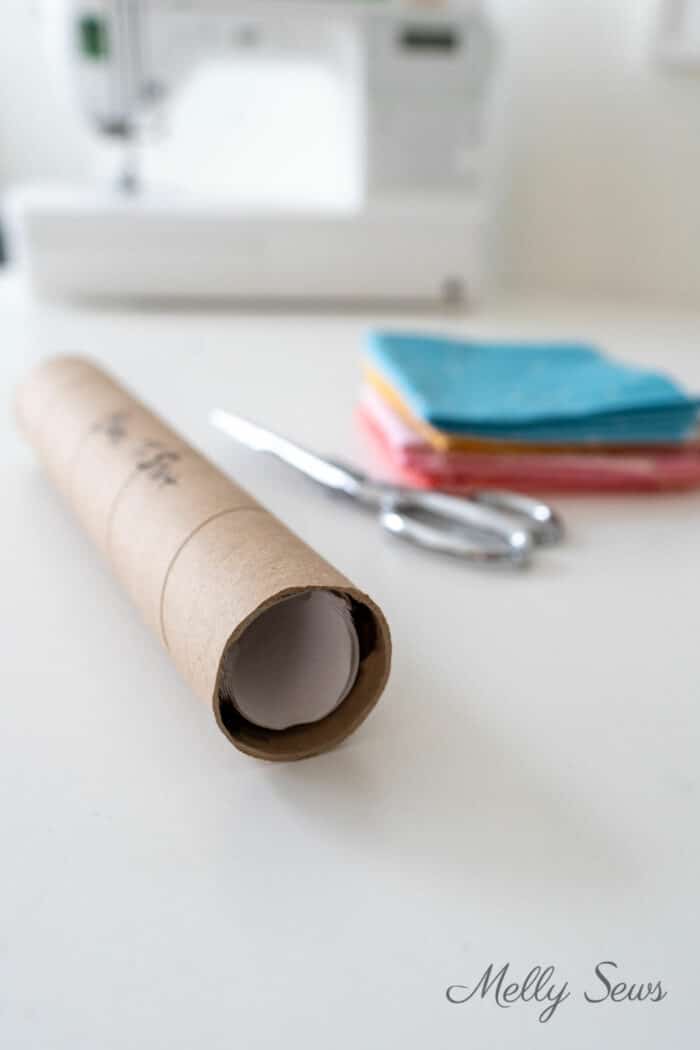
The first method of sewing pattern storage I tried was to roll my patterns up and place them inside cardboard tubes from paper towels. Here are the pros and cons to storing your patterns this way.
Pros to the tube storing method:
- Lightweight
- Easy to label on the outside of the tube
- Free materials – you can collect the tubes from friends and family as well as save your own
- Keeps all the pattern pieces together without a lot of folding
- Easy to throw in a drawer or bin
Cons for the tube storing method:
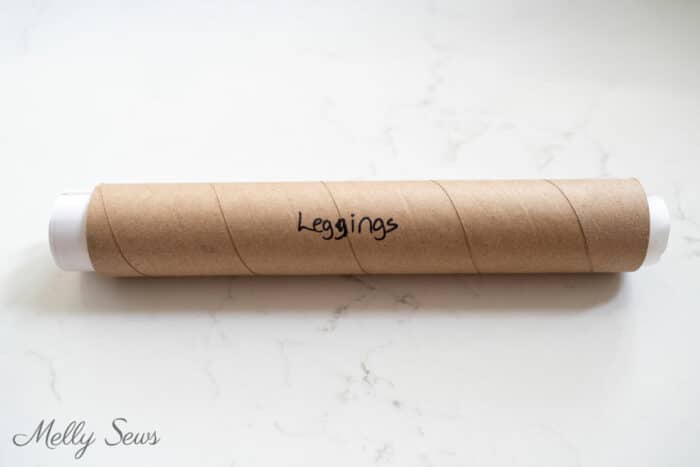
- Takes up a lot of space since each tube also has empty air in the middle, so this isn’t the best idea for small spaces
- You do have to fold the pattern paper to the same width as the tube or you’ll have paper hanging out of the ends that can get crushed and damaged
Method 2: Hangers

I use the hanging method for works in progress and my slopers. An advantage to this this method is that it takes up little horizontal space. It’s easy to flip through patterns stored this way and you can organize by category or simply alphabetically. My patterns stored this way are very easily reachable for working. I also liked that the pants hangers I use for this were free from my kids clothing. You can also do this with curtain clips or binder clips and hangers.
However, it’s too messy looking for my taste to use for all my paper patterns. Thin paper tends to curl on hangers like this. It can be easy to accidentally rip patterns stored this way too. And I’d rather use my closet space for fabrics
Method 3: Envelopes and Pattern Storage Boxes
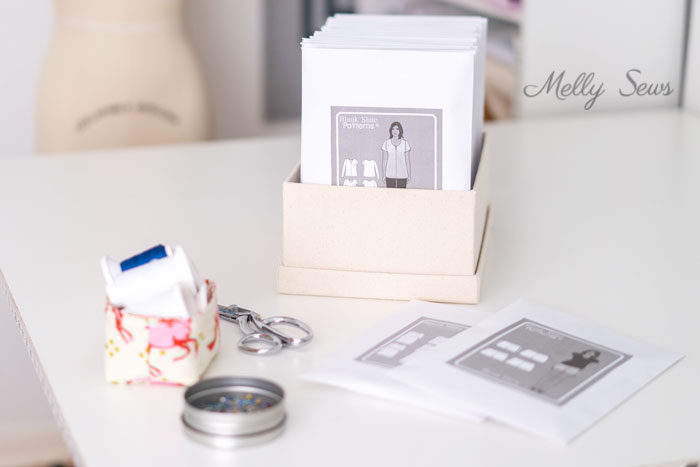
My current favorite method is to use cardboard boxes and envelopes to organize my pattern stash. As I mention in the video, you can look on Amazon, at big box stores like Target or IKEA, or even specialized stores like The Container Store for boxes. It’s even possible to find boxes with handles if you’d like. Or you can go as inexpensive as shoeboxes from your shoes. You can make shoeboxes prettier by wrapping them with gift wrap or fabric scraps. Not only will that make a shoebox prettier, it could make the box more sturdy.
My current sewing room has shelving in the closet that is perfect to store these boxes without lids. However, if you need to stack yours in your sewing space, look for deeper boxes than the one I show here. And as mentioned in the video, make sure that the inside of your box is 7 inches wide if you’re using 6 by 9 envelopes, because those envelopes are actually 6.5 inches wide.
Before I landed on making my own sewing pattern envelope for each printed pattern, I used to use plastic bags to keep my pieces together. I switch because the sandwich bags were smaller than the envelopes I now use and because they didn’t stand up as neatly.
Linda Nelson
I have used sheet protectors and put the pattern in there and then put them all in a binder. But I love your envelope idea!
Wendy King
I use the sheet protectors – the full pages fit in nicely and allow room store the pattern pieces folded after I use them. I then store the in the stand up magazine boxes that you can buy at Staples.
Judy
I put the pattern pieces in a 9 x 12 manila envelope and the are stored in a file cabinet by number. I put a picture in a sheet protector and put those in binders sorted by category, such as women, children, home dec, craft, etc. When I’m looking for a pattern, I get the binder, find one I want to make and then pull the actual pattern from the file cabinet. This method has saved me a lot of time.
Linda K
I LIKE it.
Linda B
Me too!
Maria Stahl
Judy, I do nearly the same except I have PDFs of the pattern envelopes (front and back) in a Dropbox folder so it’s on my phone. Great for when I see the perfect piece of fabric which may or may not actually be perfect if it doesnt match the amount needed for a particular pattern. Also keeps me from rebuying patterns I already have. :/
Patricia Pfeiffer
I have worked out a system for all my patterns. Gallon sized zip-close storage or freezer bags fit into file drawers, so I use a file cabinet to store my patterns. The zip-bags are roomy enough to hold the pattern pieces. The patterns themselves along with the instructions are stored in the zip-bags and filed by number. If they don’t have a number I give them one, and it doesn’t matter what number it is. The pattern envelopes are slipped into a page protector and put into a ring binder. If there is no envelope as in downloaded patterns, I download and print out an extra page with the picture of the garment. These can be arranged in any order that makes sense to you, all tops together, all pants in another section, dresses in another, or summer clothes together, jackets, etc. whatever you like. Easier to flip through than a large file cabinet or box of patterns. When I decide which pattern I want to use it is easy to find by number in my file cabinet.
Lorraine
I save the zippered plastic cases that linens come in. It’s not as neat as your system because the size of the pouches varies. I file them in file size containers and label manilla folders to sort into categories.
Theresa in Tucson
Because of the pattern modifications I must make I tend to trace my PDF patterns. I assemble each pattern piece using weight and then tape using removable tape and trace off the pattern one piece at a time. The printed sheets are then stored in a labeled pocket folder and filed on a shelf. I don’t print until I’m ready to do the tracing. I also keep a copy of the instructions; picture; layout; etc. The traced off copy is hung over a wire clothes hanger and clipped with a clothespin awaiting it’s turn as a WIP (work in progress). Tissue patterns of successful makes get carefully folded and put in a 5×9 mailing envelope, labeled and then placed in a pattern box. I get my pattern boxes from Nancy’s Notions. I toss unsuccessful patterns unless there’s something about the pattern that makes me want to try again.
Suzanne
Super idea!
Kim
I always appreciate plastic-free solutions, thank you for this!
Marly Correia
Thank you for this tip. I was looking for a way to sort my patterns, and this is awesome. Can’t wait to put in place