
 Hi, it is Miranda from Inspinration and today I am showing you my take on the Zinnia Jacket. Although I am still recovering from the heat wave that we had in the Netherlands, I am already thinking towards fall. Our weather is normally rather chilly especially in the the mornings and evenings, and there are usually only a few weeks in the year that you do not need a jacket in the morning. The Zinnia jacket is a perfect pattern to add one layer to your outfit that you can easily remove during the day.
 The Zinnia is a great staple pattern for your wardrobe and there are already several extras available to customize your Zinnia. There is a tutorial on how to add a hood, a tutorial on how to make it reversible and how to add a zipper pocket. I needed a rather simple and versatile jacket so I decided to make it in denim colored French Terry. The blue makes it possible to combine it with almost anything and the French Terry gives the jacket some extra warmth. In the Zinnia that I am showing today I made two small hacks. I changed the pockets and the collar.
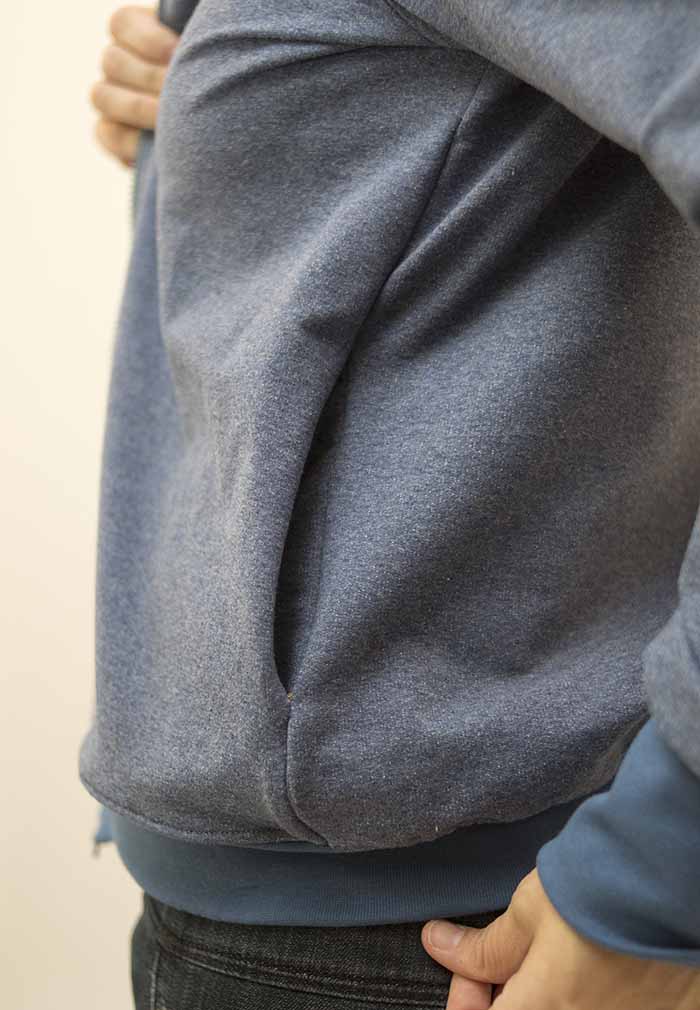
Instead of using the included Zinnia pockets I went for inseam pockets. This way the pocket is not really visible and they are extra roomy. To do the same, you cut two pairs (mirrored pieces) from the pattern’s pocket piece. You use the pieces as standard inseam pocket. In this post you can find more information if you’ve never sewn an inseam pocket. The idea is that you sew one pocket piece to the front and one to the back bodice (you do this on both sides). Flip the pockets next to the bodice and when closing the side seams, you sew around the pocket. The pockets in the Zinnia are closed on the bottom with the waistband, so you will need one extra step compared to standard inseam pockets. You also sew one vertical line from the bottom of the bodice upwards, making sure that the hole that you leave is big enough for your hands.

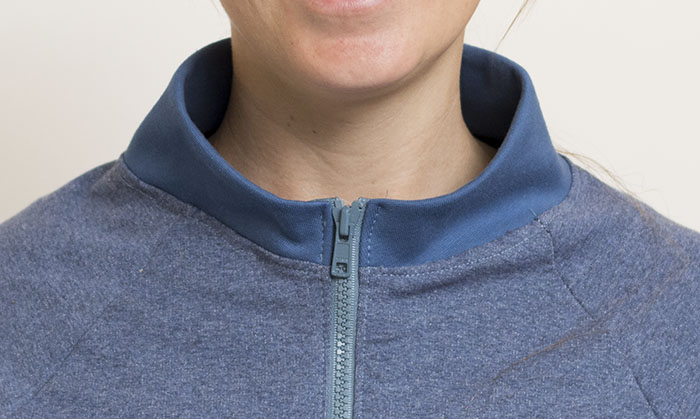
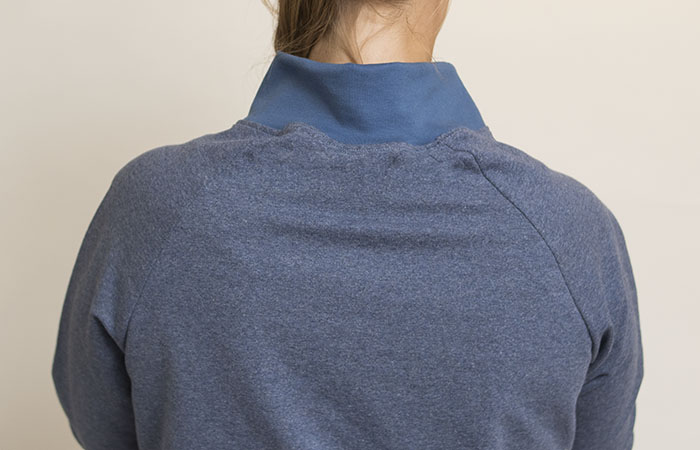
 The second hack that I did was to the collar. I wanted the collar to stand up all around to protect me from the wind and it had to be higher on the back than on the front. I therefore redrafted the collar pattern piece a bit. I kept the original length and height but made the bottom of the pattern piece straight (such that I could cut that on the fold) and let the sides curve downwards. I cut the collar on the fold from ribbing, because the French Terry would not have stretched enough. With the wrong sides of the fabric folded together, I sewed the curved side of the collar to the neckline. After sewing on the collar I sewed the zipper in. This way the zipper is not sandwiched between the layers of the collar, but it looks the same on the outside.

 This was my third and therefore last post as Blank Slate Sewing team member, thanks so much for having me. If you liked my hacks, you can find me in the future on the links below.


Leave a Reply