
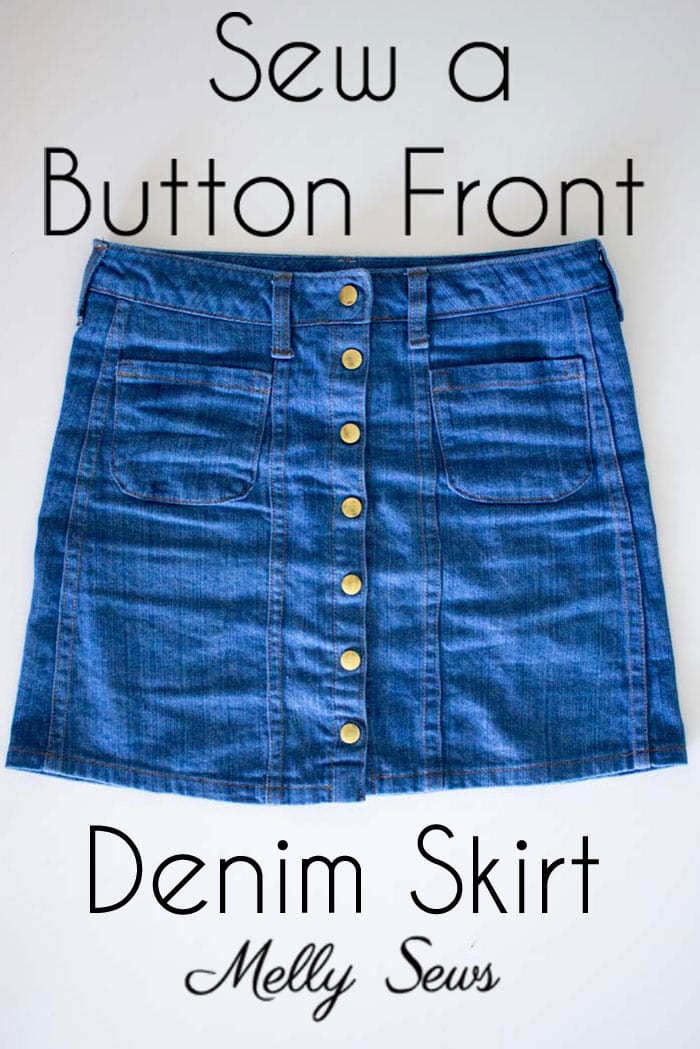
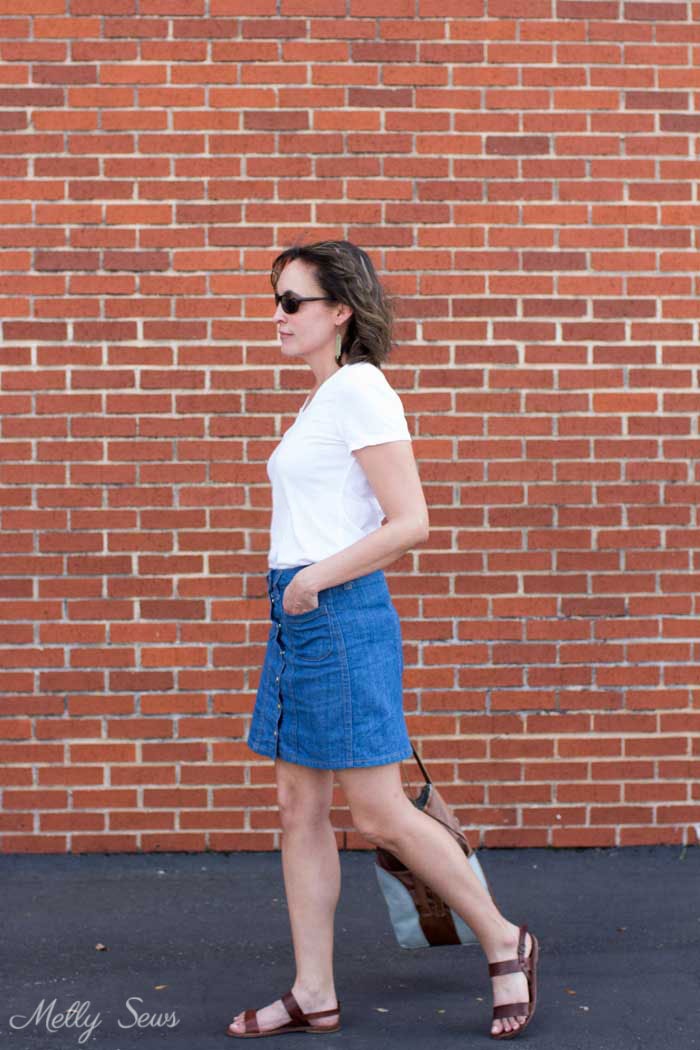
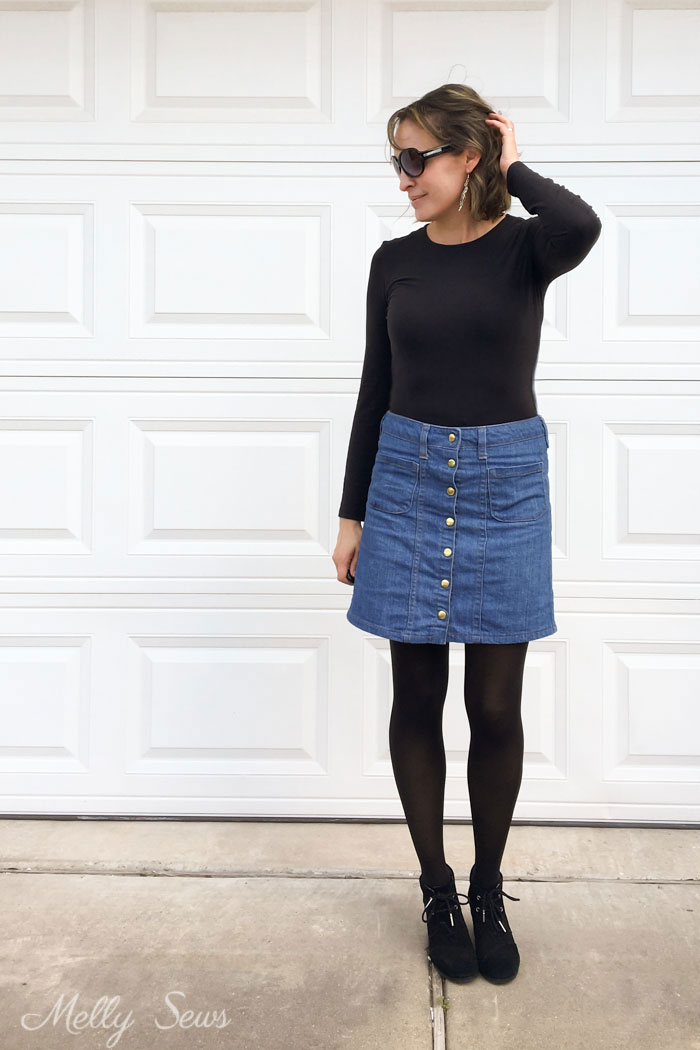
Hey y’all, welcome to skirt month on the blog! And today I’m going to show you how to make this button front denim skirt in any size – all you need are your measurements!

One of the reasons I love skirts as we move toward spring where I live, is because I think skirts are the perfect transitional clothing items. Add tights and you’re ready for cooler temps, take them off and add sandals on warmer days.

To make your own button front denim skirt you’ll need (affiliate links):
- About 1 yard of 58/60 inch wide denim
- About 1/2 yard of fusible interfacing
- About 1 – 2 yards of double fold bias tape (depending on skirt size)
- A skirt block for yourself. See this post to learn how to make a skirt block
- Topstitching thread
- Denim needles
- Heavy duty snaps
- Snap setting tools – You only need these if your package of snaps doesn’t come with them, so check your snap purchase.
- Large pattern paper. I buy this or you can use the back side of wrapping paper
And good news – if you don’t want to draft your own pattern, you can buy my Tillery Pattern here instead! It comes in sizes 0-26 (waist 25-48 inches, 61-112 cm; hips 34-55 inches, 86-140cm) and you can even order a large format print of it.
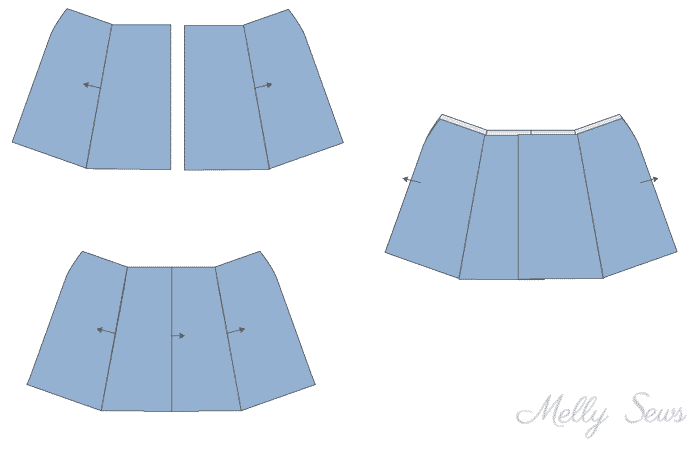
Start by tracing your front skirt block onto the paper. Draw a line from the bottom of the dart to the hem, then cut out your traced block, and cut along the line, so you have two front skirt pieces. Then rotate the side front piece out to close the dart, as in the image on the right below. 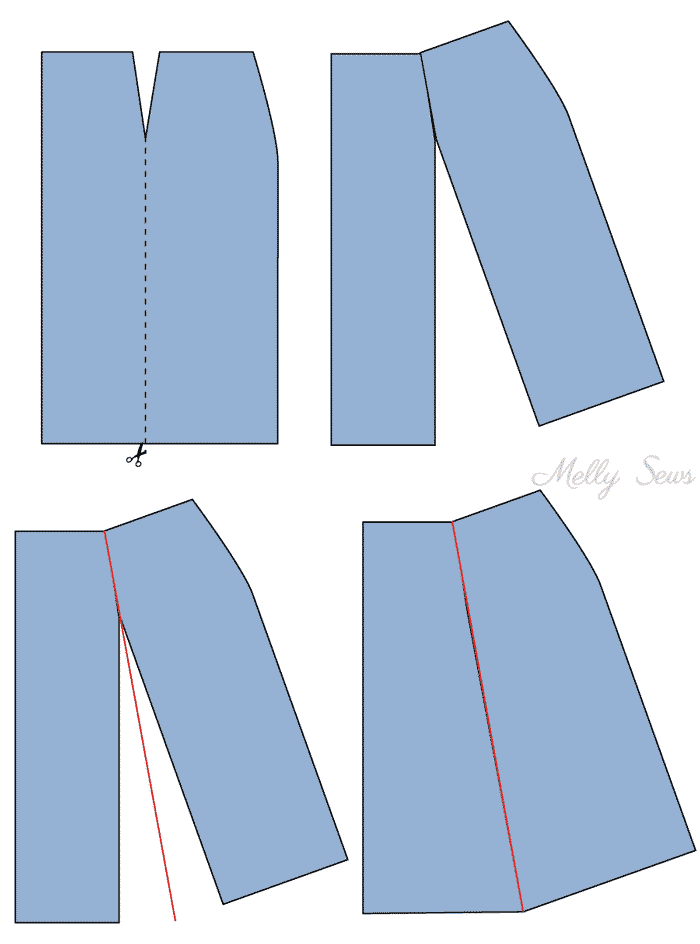
Draw a new line from the center of the dart to the center of the gap between the front and side front pieces, as shown by the red line above. Then lay your pieces on the tracing paper again, and trace out two new skirt front pieces as shown above at right.
Finally, trace off the top 1 1/2 inches of your skirt pattern as show by the yellow line below. Then cut that piece off – that will be your new waistband. You now have 3 pieces – a skirt front, skirt side front, and front waistband. Repeat this process with your skirt back block, so that you end up with a skirt back, skirt side back, and a back waistband.
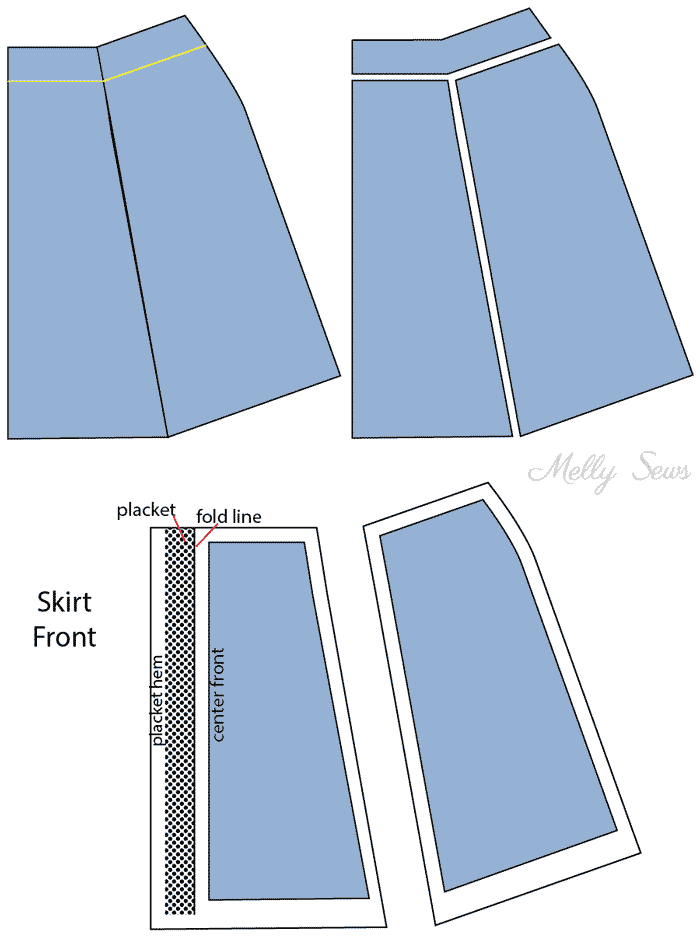
Modify the front pattern pieces as shown above – add 2 inches at center front for the placket, then add 1 inch at the bottom of each front piece for the hem, then add seam allowances to the remaining sides.
Modify the back pattern pieces as shown below – add 1 inch at the bottom of each back piece for the hem, then add seam allowances to the remaining sides.
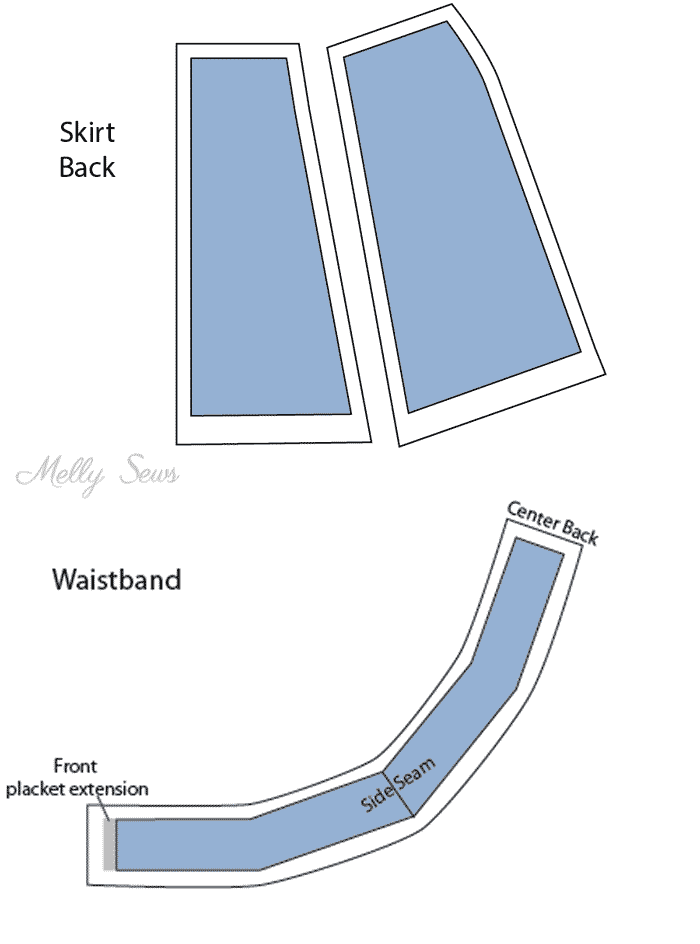
Modify the waistband as shown above – tape the front and back waistband together at the side seam, then add 1/2 inch to the center front for the placket extension, then trace seam allowances around the entire waistband, smoothing out the curves.
Cut 2 of each skirt piece, with the pieces being mirror images of each other. Cut 4 waistbands ( 2 sets of mirror images). Cut 2 mirrored waistbands out of interfacing, and cut 2 strips of interfacing 1 inch wide and the length of the center front of your skirt. Finally, if desired, cut 2 pockets. Mine were 5 1/2 inches by 5 1/2 inches with the lower edges rounded off, but you can make yours any size you want.
Sew your skirt – sew each side front to its corresponding front piece, right sides together. Then sew each side back to its corresponding back piece, right sides together. Sew the center back seam, then sew the skirt fronts to the skirt back at the side seams, right sides together.
I sewed all of these seams with a flat felled seam. To see how to sew a flat felled seam, watch the video below, or, if it doesn’t load for some reason, you can also watch on YouTube here.
The diagrams below show which direction I flat felled the seams; pay attention to this as you sew.
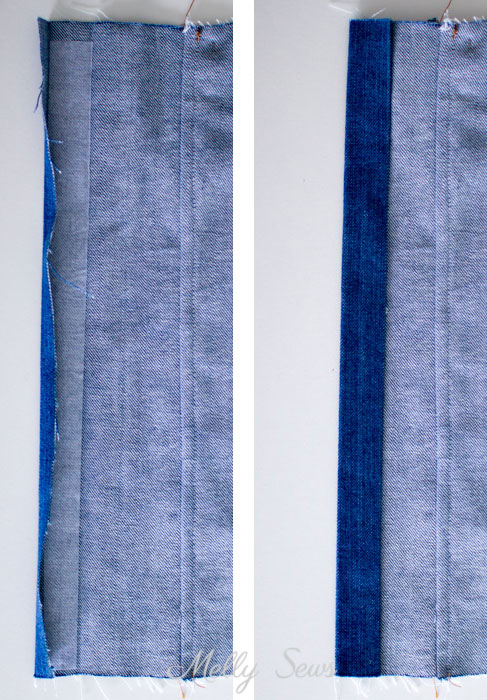
Prepare your skirt plackets. Fold in 1/2 inch to the wrong side on each center front edge and press. Then fuse the 1 inch wide interfacing strips with their edges lined up agains the crease lines you pressed on each center front. Then fold the center front edges again 1 inch to the wrong side and press again. Now you have two 1 inch wide front plackets.
At the bottom of each placket, turn the placket back so it is right sides together with the center front, and stitch across the placket only 1 inch from the bottom edge.
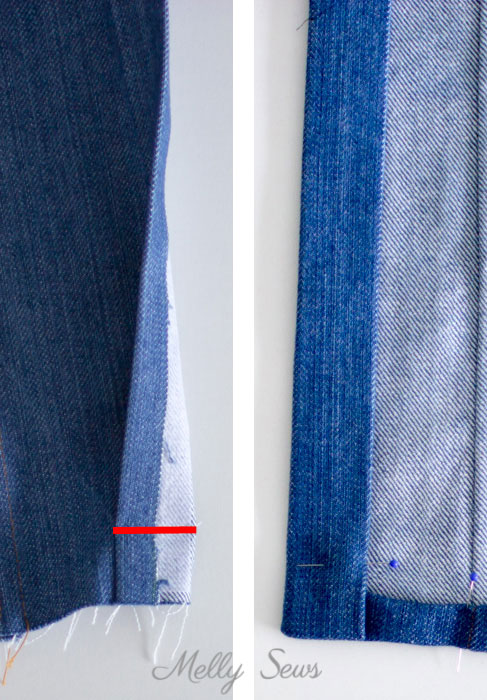
Turn right side out; this gives each lower front corner a nice finish without a turned hem there. Topstitch down each edge of the each front placket. You can pin and stitch the rest of the hem at this point, turning the raw edges 1/2 inch to the wrong side twice and then stitching.
Next, fuse interfacing to one of your waistband sets, then sew your waistband sets each together at center back, so that you now have 2 long waistbands. Take the waistband without the interfacing, and line up the center back seam with the center back seam of the skirt. Pin the waistband to the skirt along the waistline, right sides together, then stitch. The waistband will extend 1/2 inch beyond the skirt at center front.

Press the seam toward the waistband.
Finish the lower edge of the other waistband piece with bias tape. This post covers how to sew on bias tape if you’re unsure.

Pin the waistbands right sides together and stitch across the short edges even with the center front fold and then across the top. Clip the corners and turn the waistband right side out. Press, then topstitch along all 4 edges of the waistband.
Finish the edges of the pocket with an overlock or faux overlock stitch. Sew a basting stitch around all but the top edge of the pocket, 1/2 from the raw edge. Use this as a guideline to press the edges of the pockets to the wrong side. At the top edges, press 1/4 inch to the wrong side, then again 1/2 inch to the wrong side. Topstitch along the top folded edge of the pockets as shown below. (Tip: start stitching a tiny bit in from the pocket edge, then backstitch to the pocket edge, then forward stitch across. This eliminates the loose threads at the edge of the pocket that can come undone.)
Topstitch the pockets in place – you may wish to pin the skirt on to determine pocket placement. If you’re having trouble visualizing how the pockets get sewn and attached, check this post.
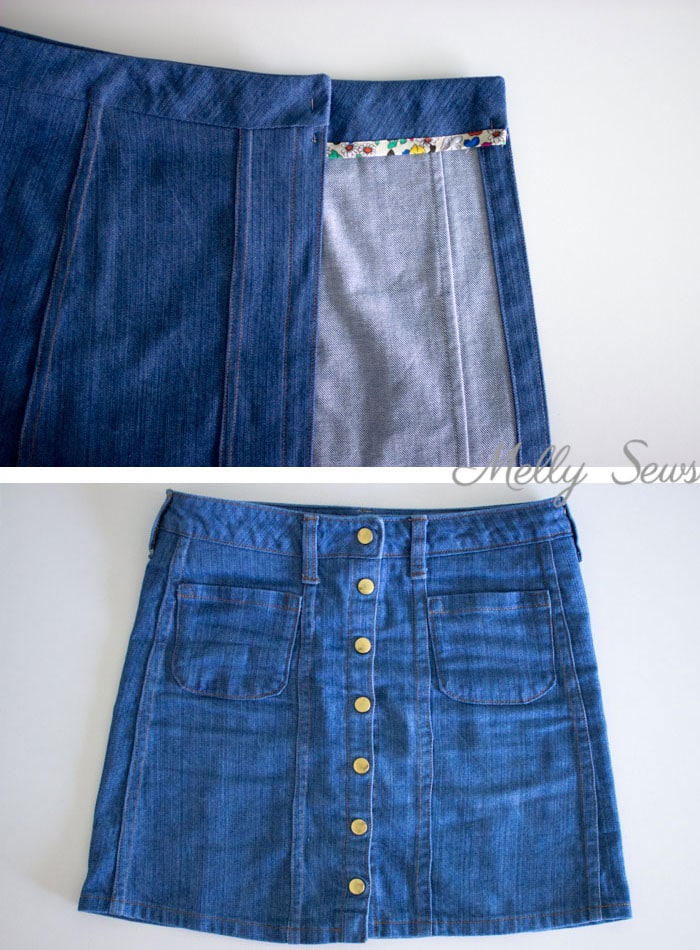
Finally, set the snaps on the skirt following the package directions.


And you’re done! One of the great things about sewing a basic like this is that you can wear it over and over.

Alice
So cute! I’m going to love skirt month!
Barbara
This is so classic, with real denim and real flat felled seams. Your tutorial is so clear. I’ve got to make this one.
Sharon
YAY!!! I love denim skirts!! I usually buy as many different styles as possible. I hope I’ll have the time to make this soon!!! Thank you soooooo much!!
Kate
Thank you so much for this tutorial! I can’t find any skirts like this anywhere online, so I decided to sew one, but it’s also ridiculously hard to find a pattern like this! This is exactly what I’m looking for.