
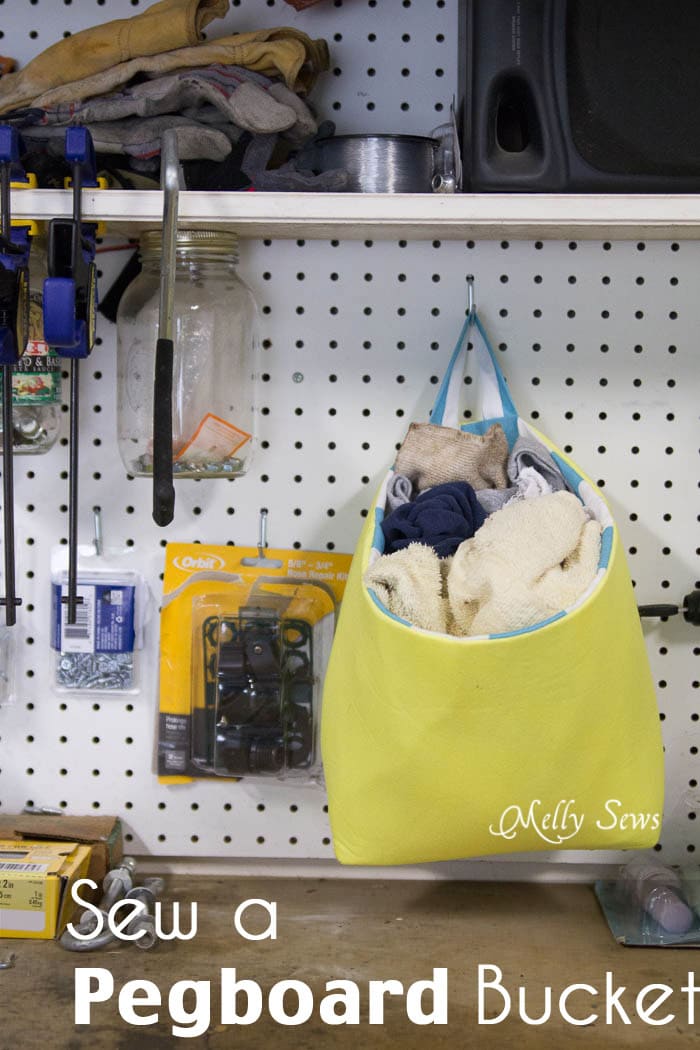
Hey y’all – today’s post moves into what is mostly my husband’s domain – the garage, where I took it upon myself to do some pegboard organization. Both the Coach and I grew up out in the country, where parking indoors was not an option (and, in fact, where I lived parking on pavement wasn’t even an option). So one of the things we were pretty excited about when we bought our first house was parking in the garage.
And at this point, we’re getting to be a rare breed in our neighborhood, where garages are getting taken over with…stuff. Which means that to maintain our parking spots, we have to be vigilant about the encroachment of stuff. Luckily, neither of us minds decluttering and we’re both pretty neat. So I could tell that the state of the Coach’s garage workbench was getting to him. That came to a head recently when we were screening in our patio and constantly couldn’t find tools/materials that had gotten swallowed in workbench clutter.
In my experience, clutter is either because of 1)things not getting put back in their place, or 2)things not having a place to be put. If you check the before photo of his bench, you can see both things going on. A bunch of kids pool toys had gotten thrown on the bench, and then there was a pile of rags that belonged there but didn’t really have a place to go. That’s actually an easy fix!

I corralled the pool toys back to where they belonged, added a few more pegboard hooks to hang things that had piled on the bench, and sewed a rag bucket to contain all the garage rags in easy reach.
Want to make your own pegboard bucket? It was really easy. You’ll need:
- Home dec weight fabric, 1/2 yard of outer and lining. I just used leftover fabric I had from other projects. You could also use something lighter weight for the lining.
- 1 yard of Pellon FF78F 1 sided fusible Flex Foam. If all you can find is the two sided fusible kind, you can use that too, just make sure to protect your ironing board with a press cloth or something to peel away from the other side of the fusible glue.
Fold your fabric, then cut a rectangle on the fold that is 15 inches wide by 12 3/4 inches tall. Repeat this with the lining fabric and the flex foam EXCEPT cut the flex foam to only 14 1/2 inches tall (that way there isn’t foam in the seam at the top of the bucket).
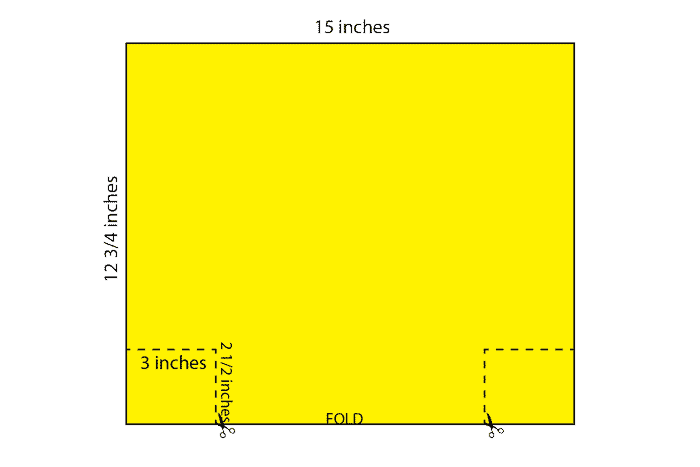
Cut out the folded corners, 3 inches in and 2 1/2 inches tall, as shown above and below. I cut my lining and outer fabric at the same time, then used this as a template to cut the flex foam.
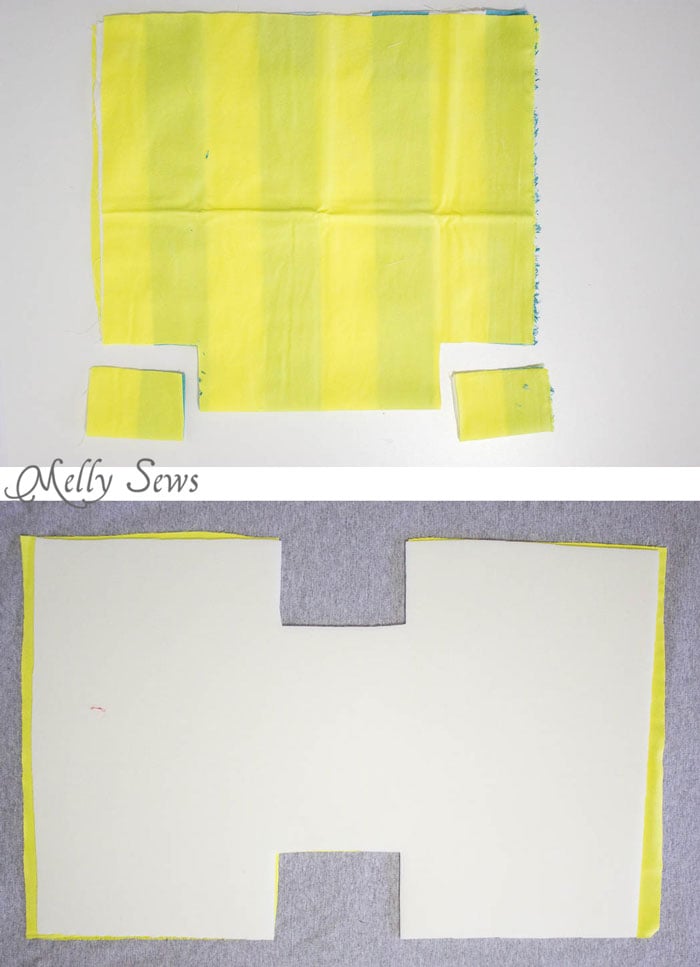
Fuse the flex foam to the wrong side of the outer fabric. The fabric should extend 1/2 inch beyond the foam on each long edge.
Also cut a piece of fabric 5 inches long by 3 inches wide. Fold it right sides together, matching the long edges, then stitch using a 1/4 inch seam. Turn the tube right side out and press; this is the hanging tab for the bucket.

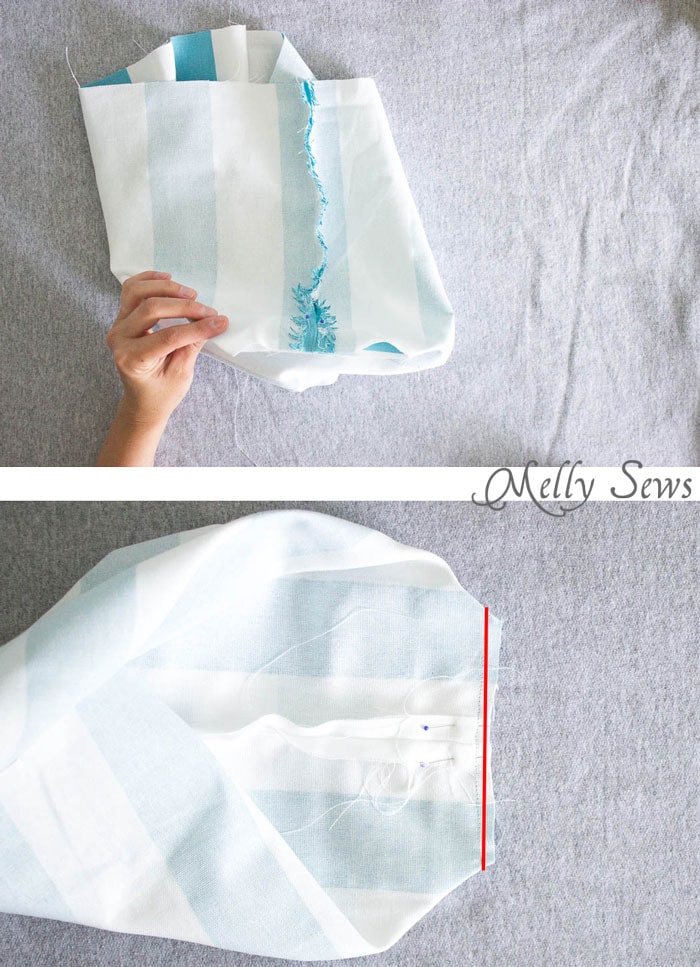
Fold your fabric right sides together, then sew up the side seams as shown above, using a 1/2 inch seam allowance. Repeat this step with the outer fabric/flex foam combo. Press the bottom folded edge so you have a crease.
Fold the side seam to match the bottom crease at each lower corner, matching raw edges of the cutouts you made.
Sew across both of the outer fabric/flex foam corners and ONE of the corners on the lining using a 3/8 inch seam allowance. This creates the boxed bottom shape of the bucket.
With the outer fabric/flex foam WRONG side out and the lining fabric RIGHT side out, place the lining inside the outer fabric. Form your hanging tab into a U shape and insert between the outer fabric and lining on one side of the bucket. Use pins or Wonder Clips (affiliate link) to hold the fabric layers together and the hanging tab in place, then stitch the lining to the outer fabric around the top edge, using a 1/2 inch seam allowance.
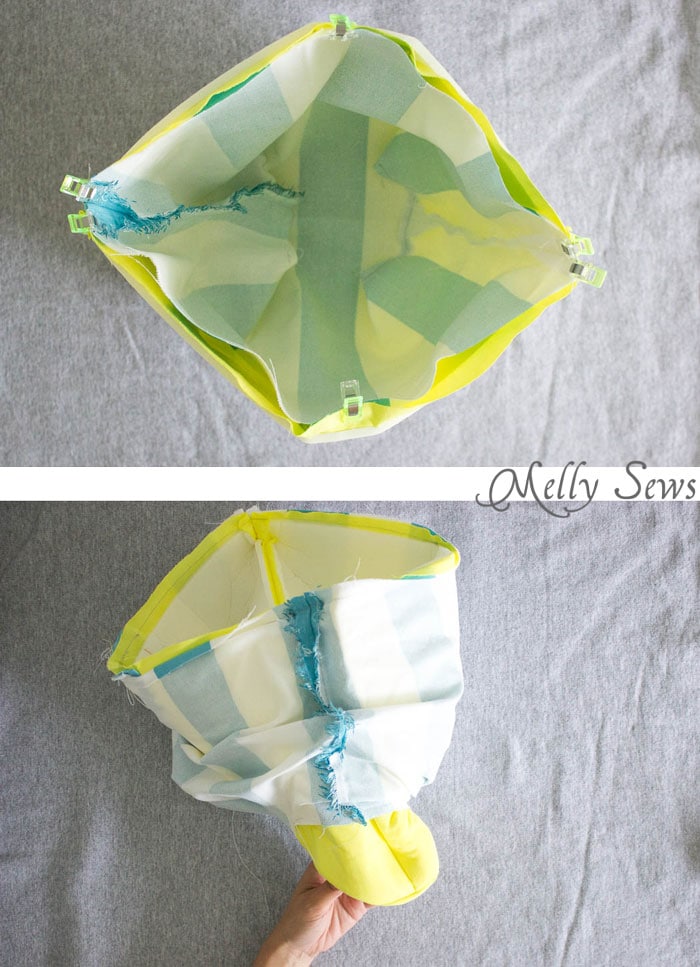
Turn the bucket right side out through the open corner of the lining.
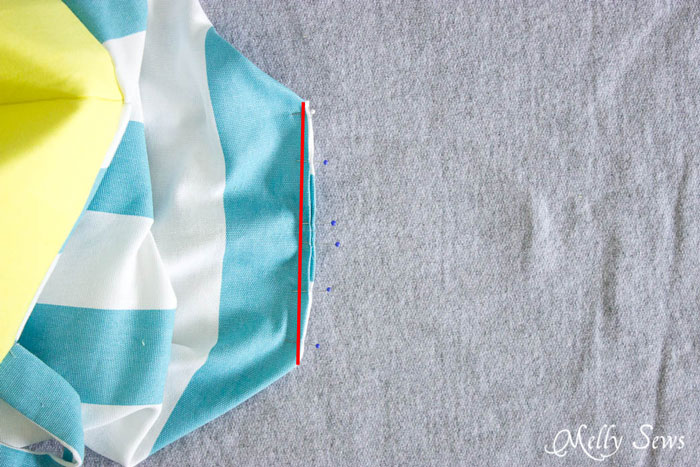
Fold the raw edges of the lining corner in toward each other, then blind stitch or machine topstitch the corner closed.
If desired, you can topstitch around the top edge of the bucket, but since I knew this was going in the garage, that finishing touch seemed excessive to me.

Fill your bucket and hang from a pegboard hook!
Anne
Oooh great idea!!! We could use one in my husband’s workshop. And one in our kitchen t o hold all of our cloth towels. I’ve got a Craft Gossip post scheduled for this evening that features your tutorial: http://sewing.craftgossip.com/?p=88105 –Anne