

Guys and their gadgets – it’s hard to separate the two, isn’t it? And while I’ve seen quite a few ways to make an iPad case, most of them are things I would love but not ones that my husband would carry. Plus I wanted a book style cover for the iPad we share, so this is what I came up with.
To make your own, you’ll need:
- Cardboard
- Leather, vinyl, pleather or oilcloth for the outside of the cover
- Fabric for the inside of the case
- 3/8″ wide elastic to hold the tablet
- A button
- 1/4″ wide elastic to go around the button
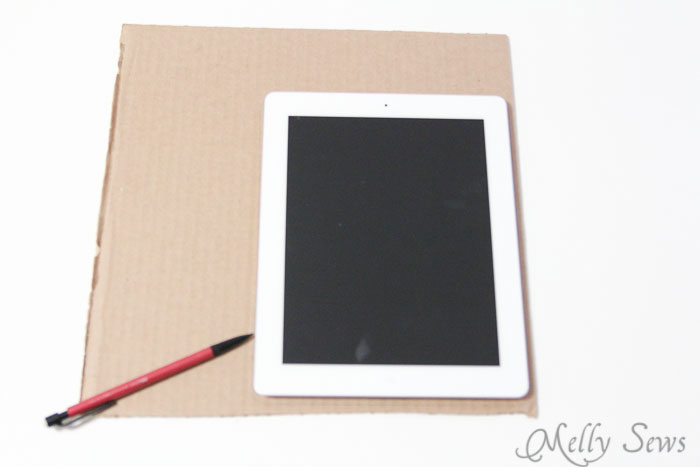
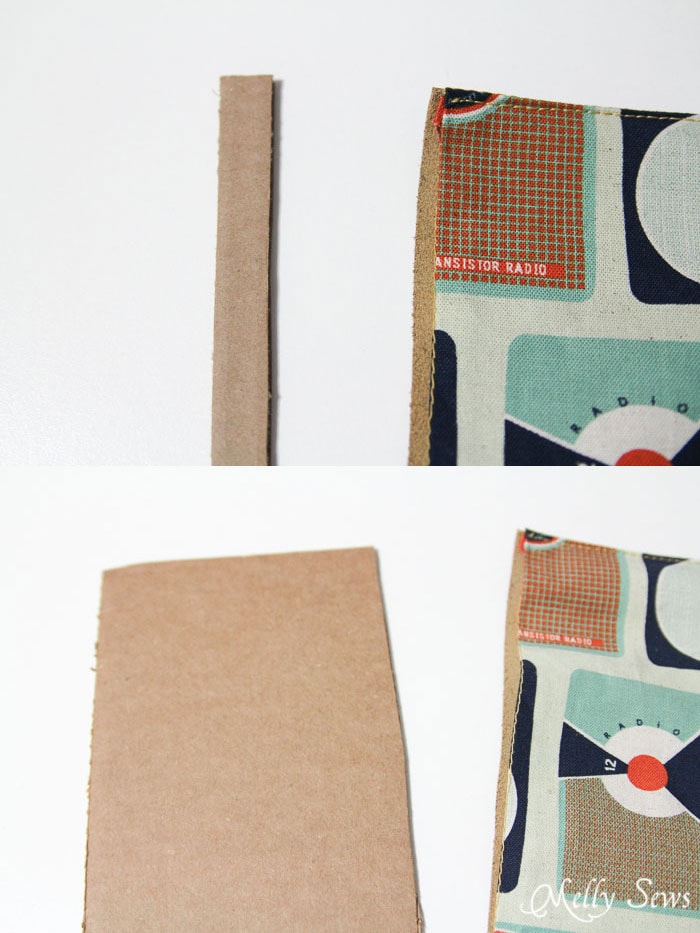
To start, lay your tablet on the cardboard and trace around it. You want the cardboard to be just a teeny bit bigger all around than the tablet.
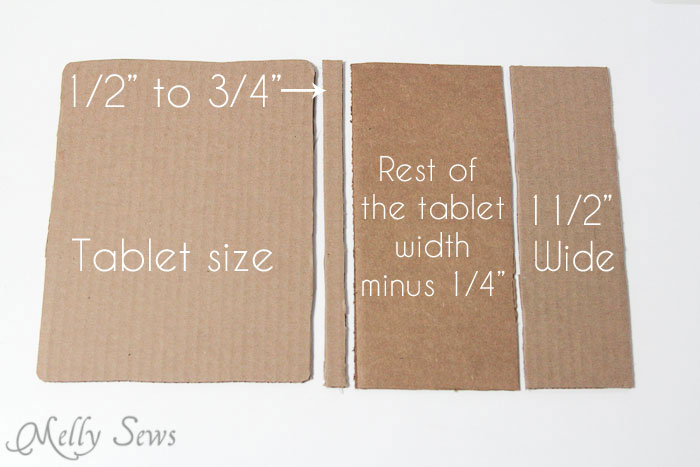
Once you have the back cover cut, use it to help you cut the rest of the pieces to the same length. The “spine” of the case should be 1/2″ to 3/4″ wide, and the piece that will be the base when the tablet is standing should be 1 1/2 inches wide and then the other front piece should be the rest of the tablet width minus 1/4″.
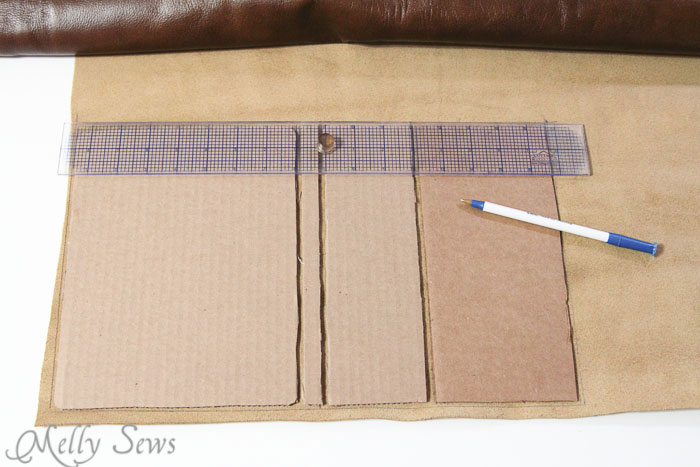
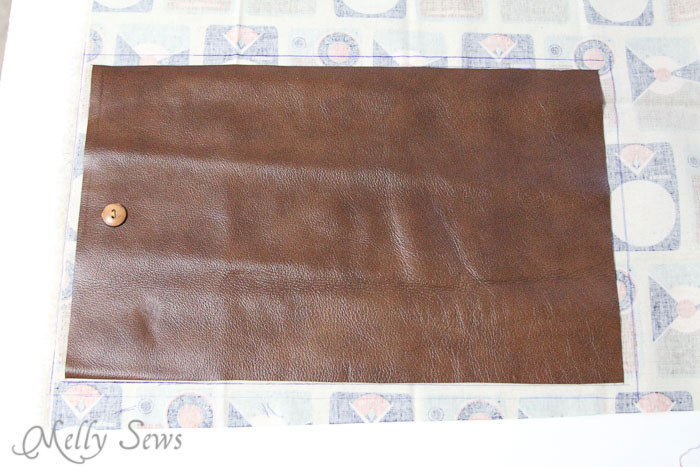
Lay your cardboard out on the wrong side of your leather, spacing the pieces about 1/4″ apart. Trace around the outside of the cardboard on your leather, adding about 1/4″. Need some tips for cutting and sewing leather? Check this post.
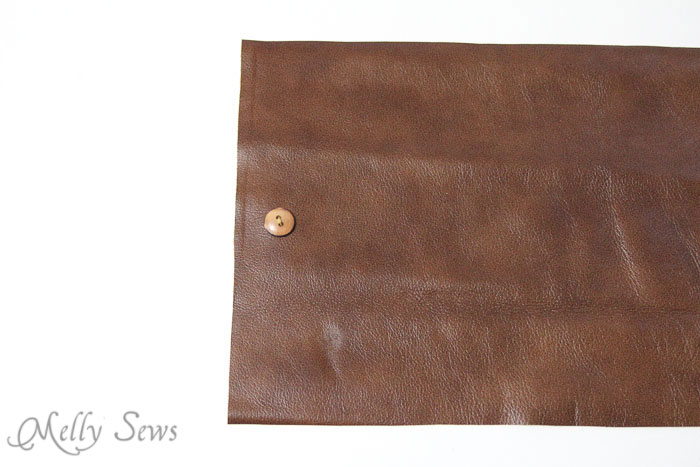
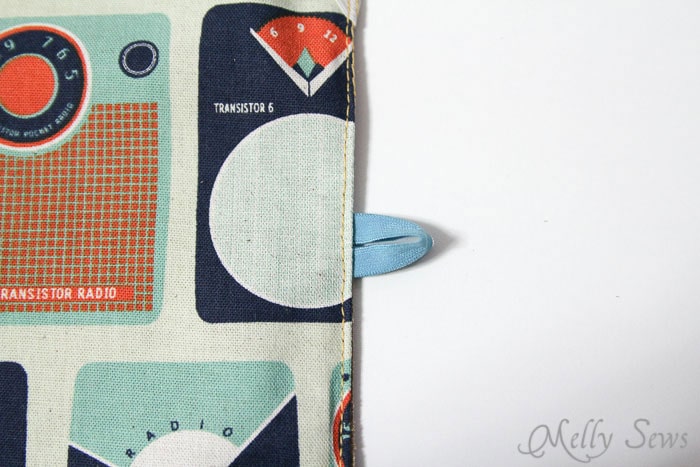
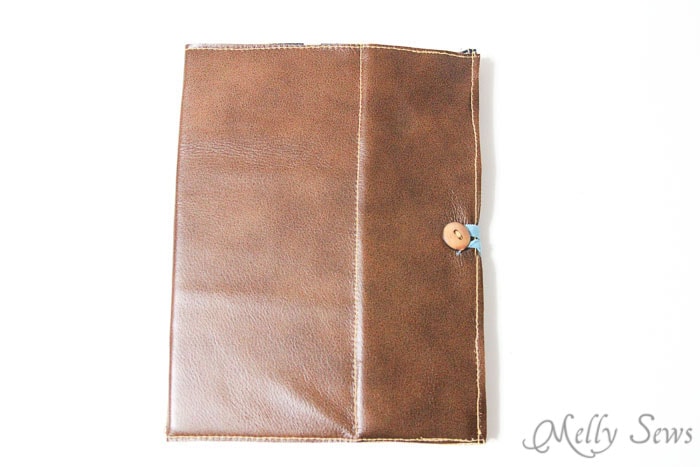
Sew your button onto the leather, making sure it is 3/4″ away from the edge.
Use the leather piece as a guide for cutting your lining fabric, but make sure to add 1/2″ all around on your fabric.
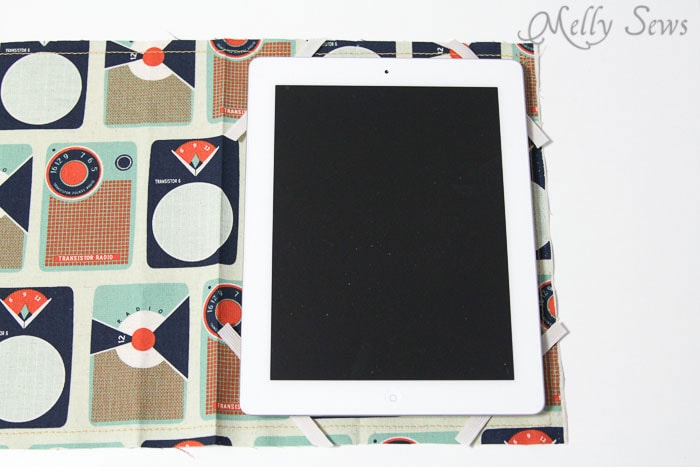
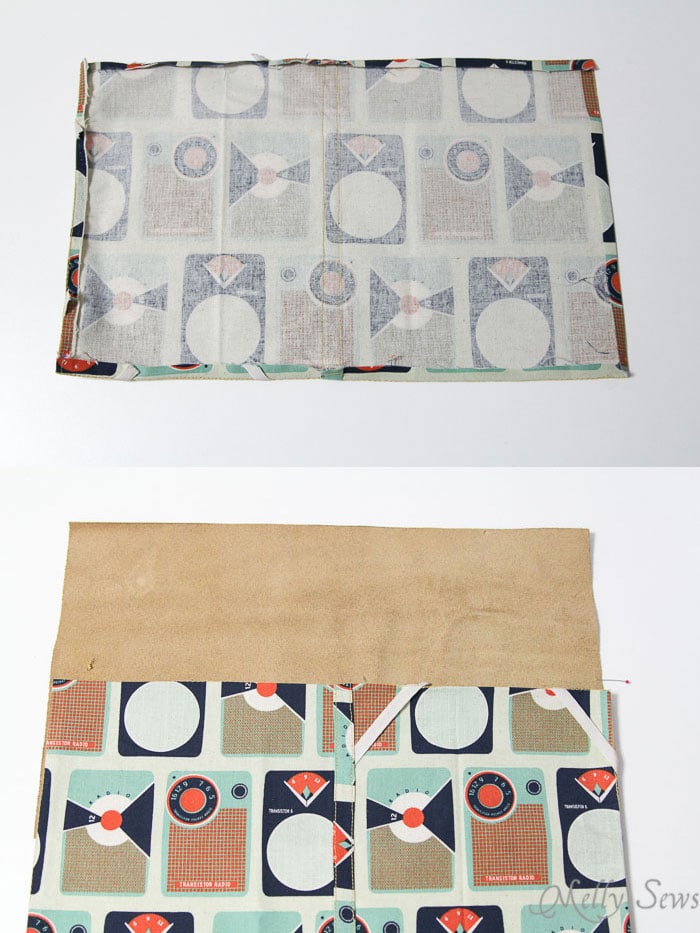
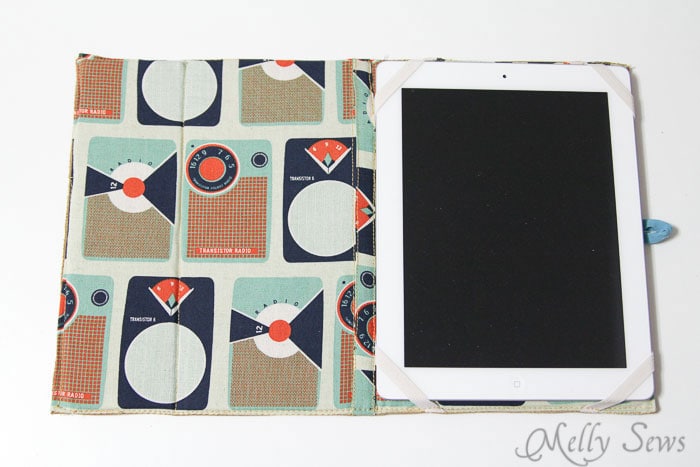
Baste a line around the edge of your fabric using a 1/2″ seam allowance. Crease the fabric down the center, so you can see where the spine will go. Then cut 4 pieces of the 3/8″ elastic that are about 4 inches long. Use your tablet as a guide and place them across each corner. Pin the elastic.
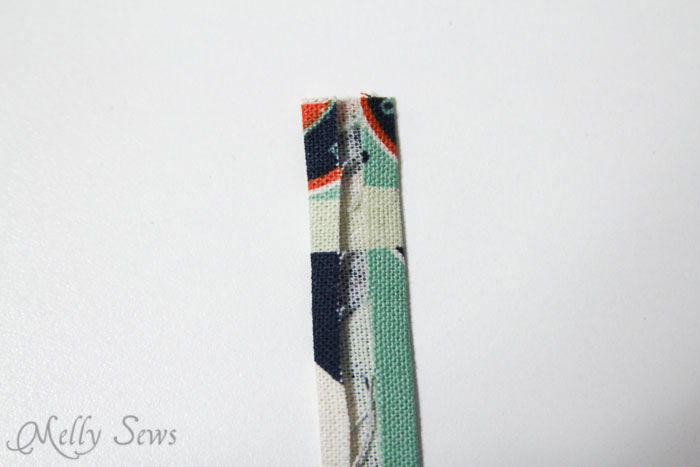
Make a piece of binding for the center of the lining by cutting a strip of fabric the same height as the lining fabric and 1 inch wide. Press the two long raw edges to the wrong side 1/4″, so you have a 1/2″ strip of fabric with folded edges.
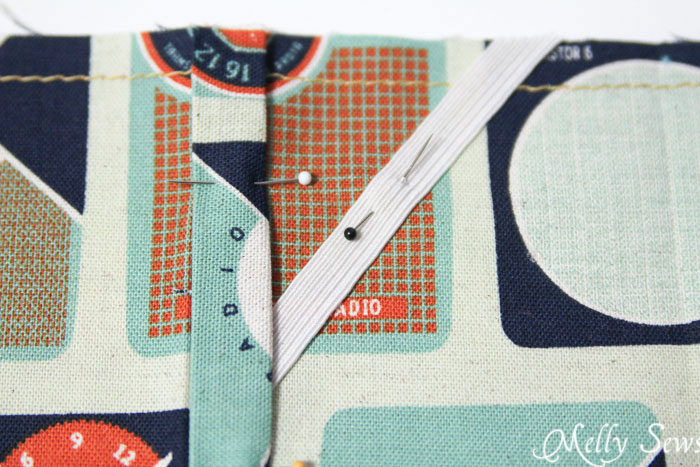
Place the binding strip down the center of the lining fabric, over the elastic. Trim the elastic if necessary to make sure it doesn’t stick out beyond the binding. Sew the binding in place. Stitch the other edges of the elastic to the fabric.
Press the edges of the fabric toward the wrong side on the stitching line you basted earlier. Place the lining and the leather wrong sides together.
Place a small loop of elastic (enough to go around the button) between the leather and the lining fabric on the edge without the button. Topstitch the leather and lining together down the two long sides and the side without the button, stitching very close to the edge.
Slide the largest piece of leather into the the fabric.
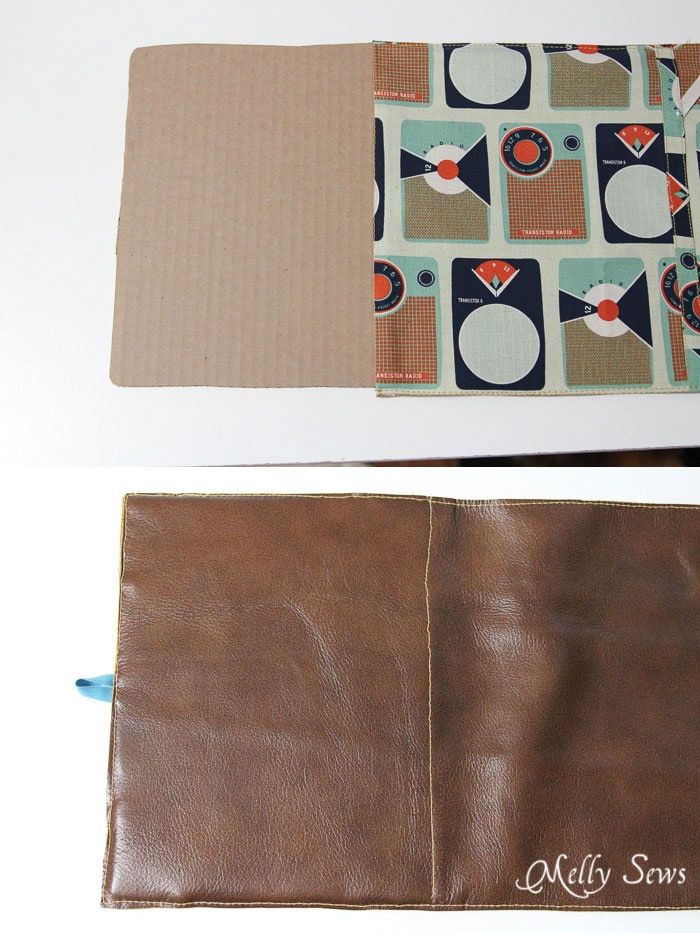
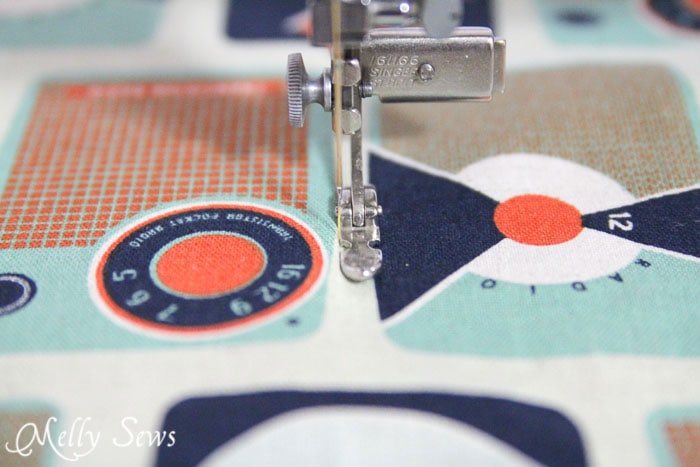
Stitch right next to the edge of the cardboard to hold it in place. I found it helpful to switch to a zipper foot for this and press the edge of the foot against the edge of the cardboard.
Slide in the spine cardboard, then stitch, then slide in the next piece of cardboard, stitch, repeat. The last piece you insert will be the most difficult to stitch, as you will need to stitch right next to the button to finish.
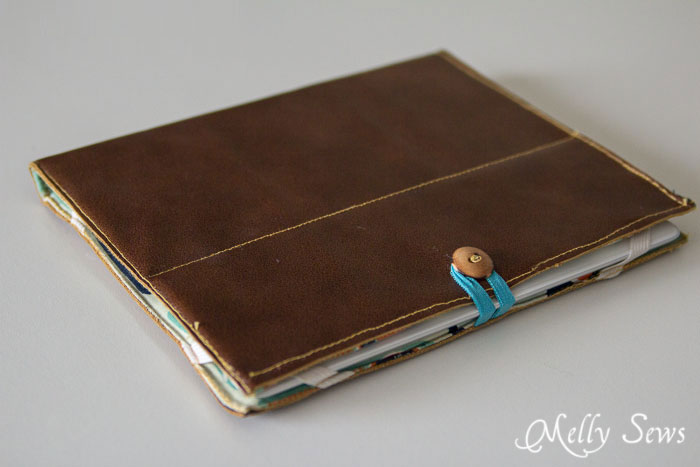
When you’re done, your cover will look like this, and you can insert your tablet under the elastic which will hold it in place.
The elastic loop around the button will hold the case closed.
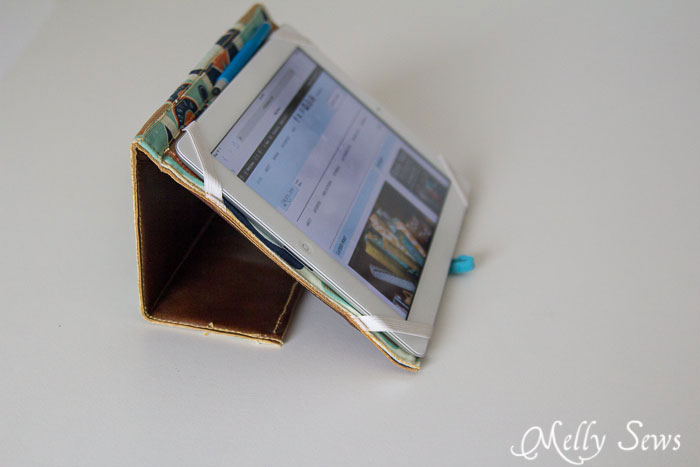
To stand the case up, you’ll prop it like this.
Vicky
Wow! It looks like it took some time and effort to figure this out but well worth it! How great to be able to have a customized case. Thanks for sharing instructions in such great detail.
Anne
Awesome case!! I’ve got a Craft Gossip post scheduled for today that links to your tutorial:
http://sewing.craftgossip.com/tutorial-ipad-or-tablet-case-for-a-guy/2014/05/13/
–Anne
Nancy Lee
Just stumbled on this project and wanted to add my 2 cents.
It’s almost election season once again and those corrugated plastic signs that will be popping up in front yards all over make perfect ‘boards’ for electronic holders, they cut like a dream and never bend or crease like cardboard has a tendency to do over time.
So, keep an eye out for election signs and ask those running for office if you can take a few signs off his/her hands after the votes are counted!!!!
Nancy
Sandy
I just found this as well. I plan on using ambox that a laptop came in since it is the corrugated plastic. To make it more feminine (I’m a techie), my plan is to use light quilting for my project. Perhaps even add an exterior pocket because there’s always something that needs to go with me for my tablet.
I have numerous uses for a tablet for sewing and craft projects. I download pattern envelope “printouts” I want so at the fabric store I pull out the tablet for reference— much easier to know you have a picture to verify it’s what you seek. Or download a picture of the fabric you are hunt (or PDF the page) and shop personnel can often take to the item. Works for any item you need from a specific store with their goods online.
With pattern envelope info with you in PDF, it’s simple to highlight details such as size, yardage and notions needed so you won’t forget them.
If it’s an older pattern, simply take a picture front and back. I haven’t figured out an efficient way to highlight the pattern back for reference but I’m working on it 🙂