
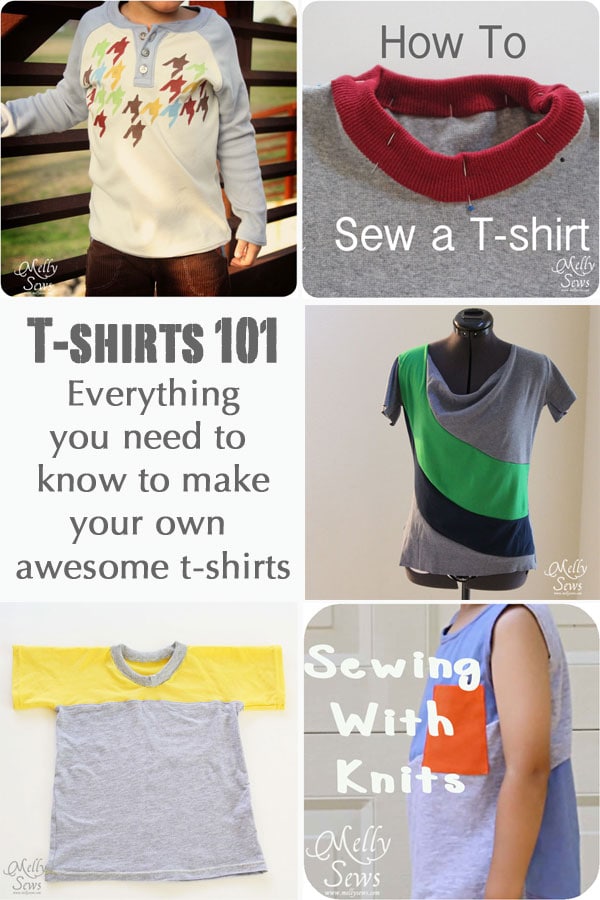
Is there anything more iconically American and readily available than a t-shirt? I probably wear them at least 80% of the time, and I bet you do too. So why don’t we sew more of them?
Well, I bet one answer is that they are so readily available and inexpensive. And that’s true. But this article gave me food for thought about the sheer volume of clothing in the US and what happens to the stuff we no longer want, and I haven’t bought one of those t-shirts new in quite a while, preferring instead to thrift them, make them, or a combination of the two.
I also sew t-shirts because I like to have unique clothing, especially for my boys. If you have boys, you know it’s hard to find t-shirts for them that don’t have awful graphics all over the place.
Another reason you may not sew t-shirts is that you’re scared of sewing knits. Maybe you’ve heard that it’s hard or you’ve been burned by a bad experience. Well, I’m here to tell you it is not hard, and sewing with knits is actually great because knit garments are so forgiving of pattern and figure issues.
Finally, maybe you’d love to sew more t-shirts but you’re stumped about where to get your knits to sew them. I’ll talk about that too (although you can probably guess that I do a lot of thrifting fabrics).
So, let’s start with basic t-shirt construction and variations – every single one of the shirts in the pictures in this post started out from a basic t-shirt pattern. It is the single most used pattern I’ve made myself.
If you’re a gold star type of student, I’d encourage you to make your own pattern – see this tutorial. But if you don’t want to make your own, read to the end of that post and I have a free pattern for kids sizes 2-4.
So, are you on board to tackle your fear of knits and sew up a t-shirt? Get ready to get addicted!
Hey y’all, I’m back to show you how to sew your own t-shirt, and how to make variations to a basic t-shirt pattern to customize it.
First: how to sew a t-shirt. I wrote a tutorial about that here. It’s super easy; once you get the hang of this you can knock these out in 30 minutes or less.
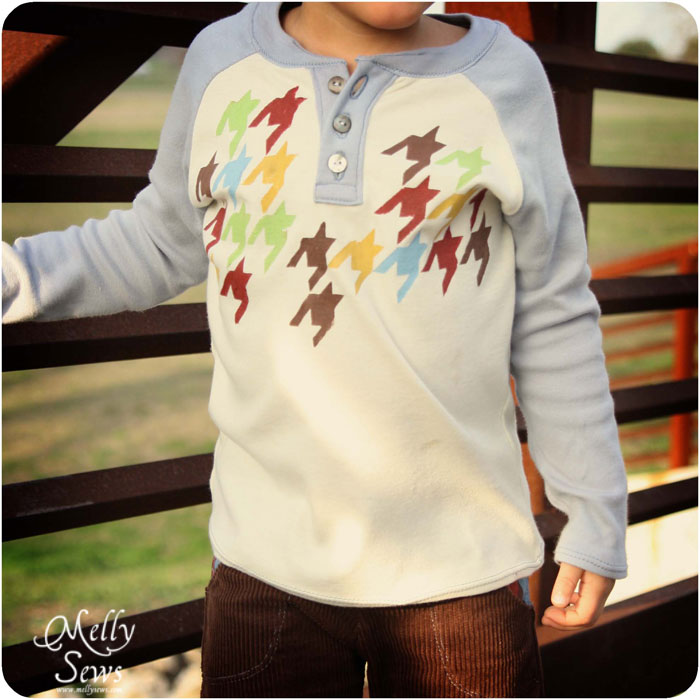
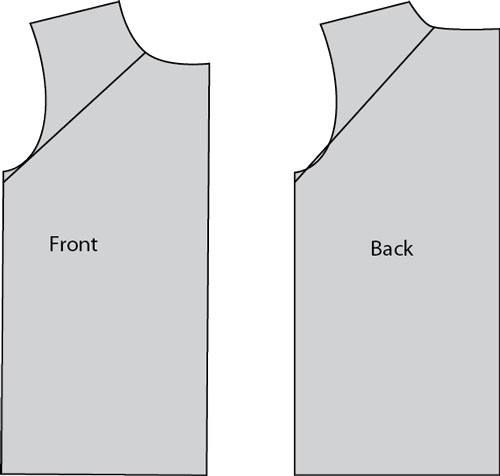
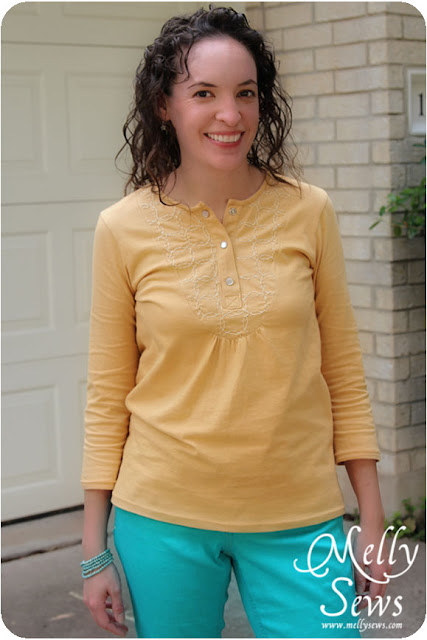
Next we’re going to talk about how to modify a basic t-shirt for raglan sleeves. Raglan sleeves are the sleeves that go all the way up to the neckline, as seen below.
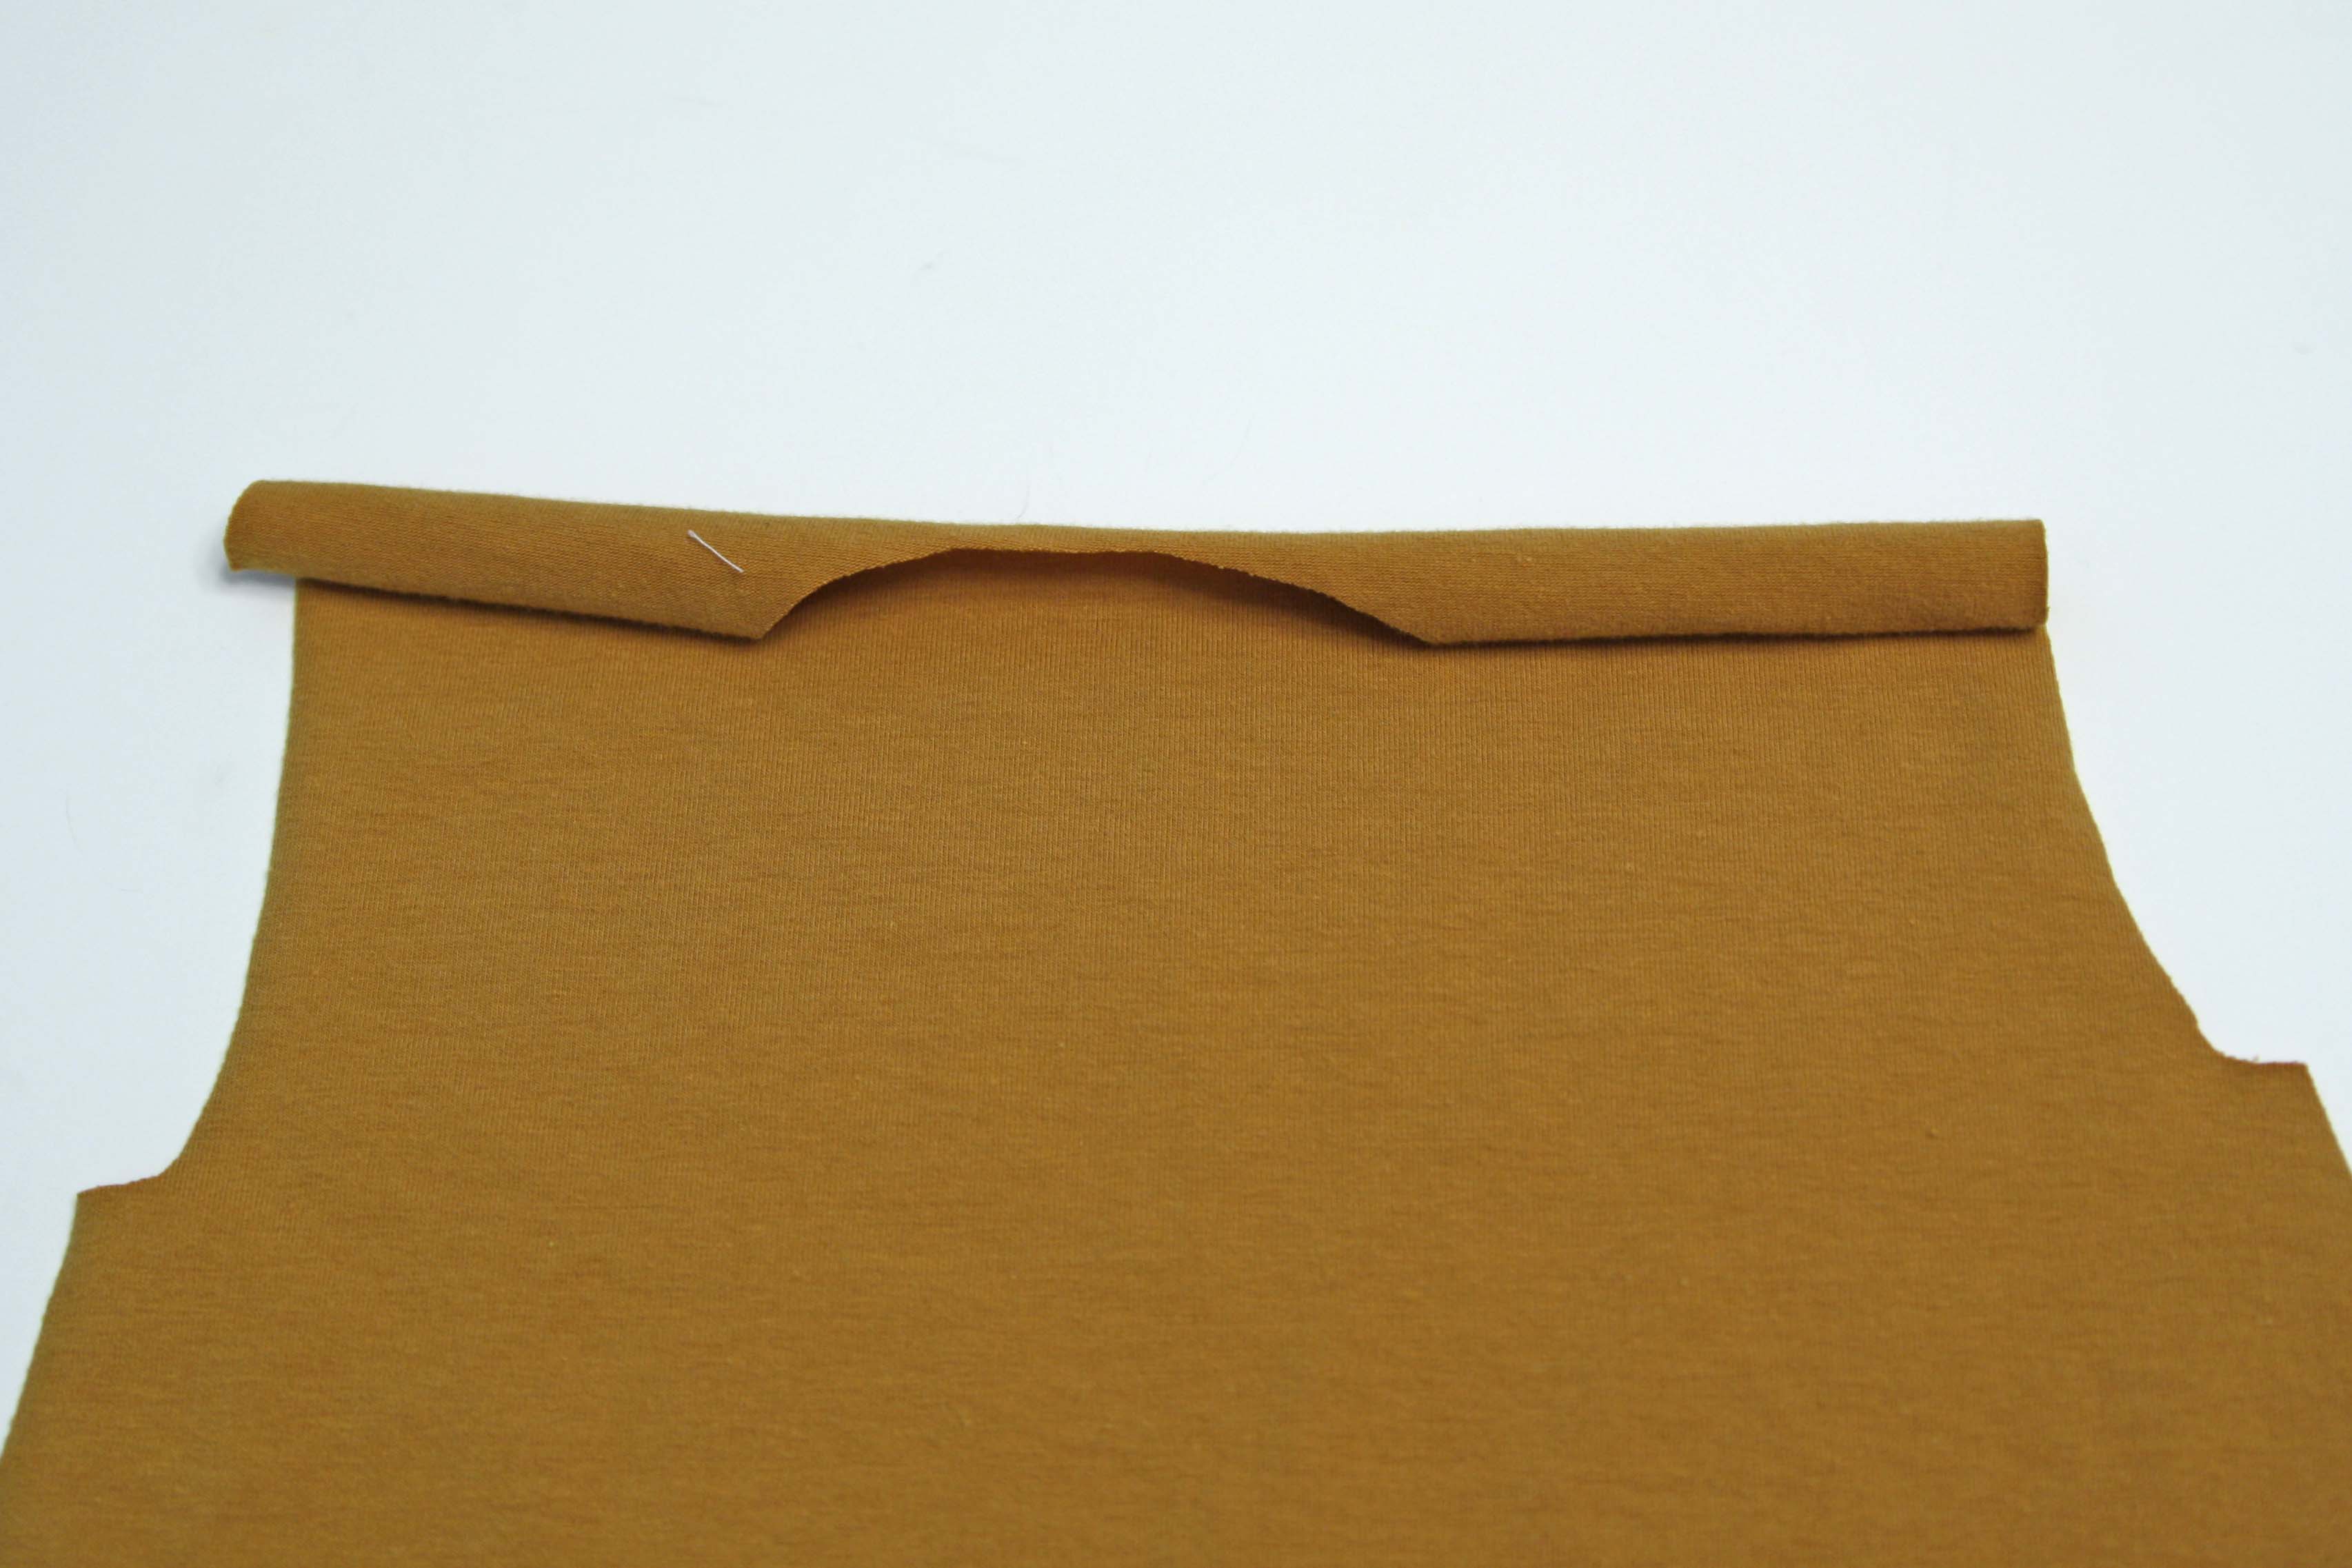
So, start with a copy of your basic t-shirt pattern. Draw a line from the neckline to the armpit, as shown below. Do this on both the front and back pieces.
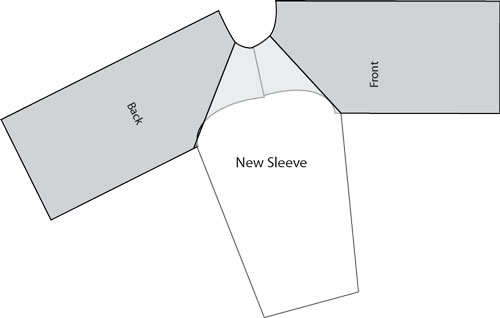
Then I actually sew through the paper to attach the pattern at the shoulder. Lay these out under your paper and trace as shown below to make your raglan sleeve.
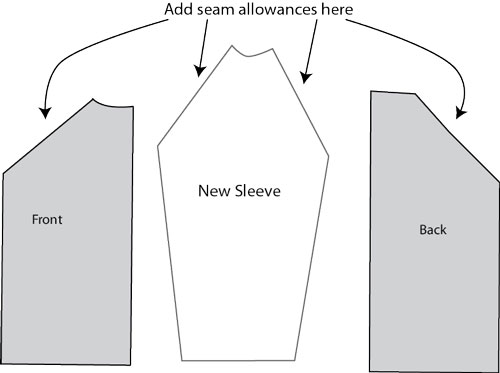
Add seam allowances to the shoulder edges of your shirt front and back pieces and then cut on the seam allowance for your front and back pattern pieces.
Because the raglan sleeve is part of the neckline, when sewing this type of shirt together, you sew the sleeves to the front at the shoulder edges first, then sew the shirt back to one sleeve, leaving the other side of the back open.
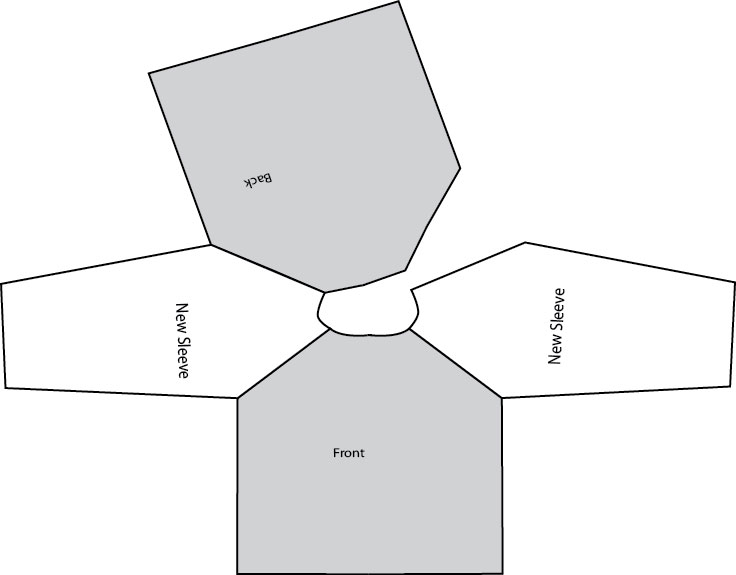
Then add the neckband as in the tutorial for the basic t-shirt. Finally sew the underarm and side seams all in one seam.
Want to add a henley button placket as seen in the picture above? Try this tutorial.
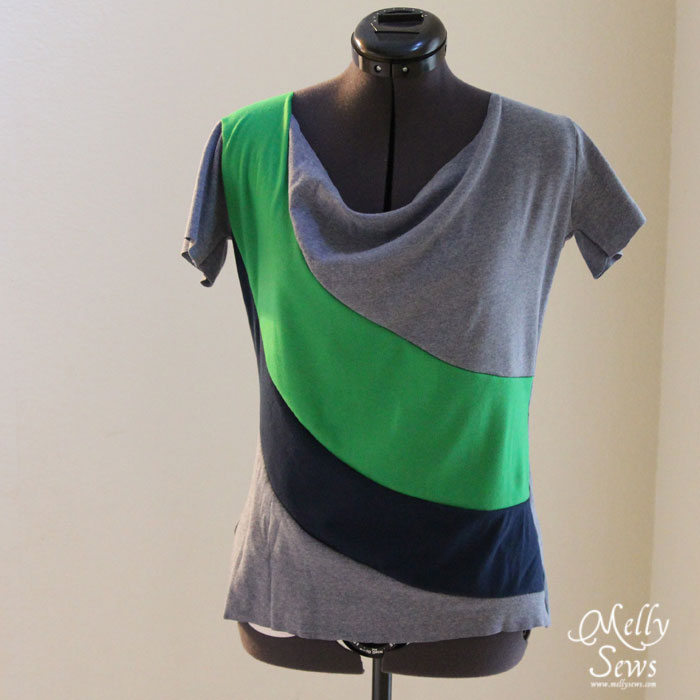
Finally, lets talk about changing the basic t-shirt pattern to something like this drapey t-shirt.
This is actually much simpler than it looks. Start with a copy of the t-shirt pattern front. Slice it down the center. Rotate the pieces out like this and redraw the neckline and hem.

When you sew this piece to the regular shirt back, you will get that draped neckline from the extra width you added there.
To colorblock, you take your t-shirt pattern and cut it into pieces. Add seam allowances where you cut, and voila! You have a pattern for colorblocking.
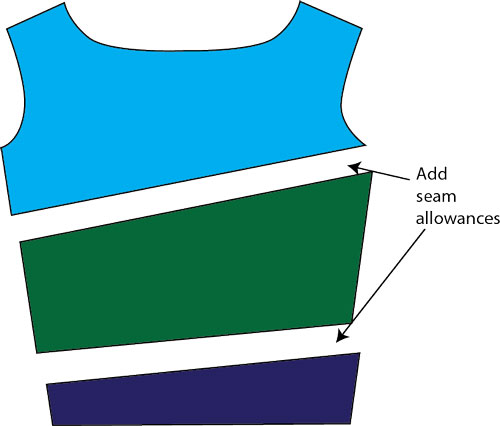
The things you can do with a basic t-shirt are really endless.
Finally, I’m going to talk a little about tips for sewing with knits, and then I’m opening the comments up for your questions.
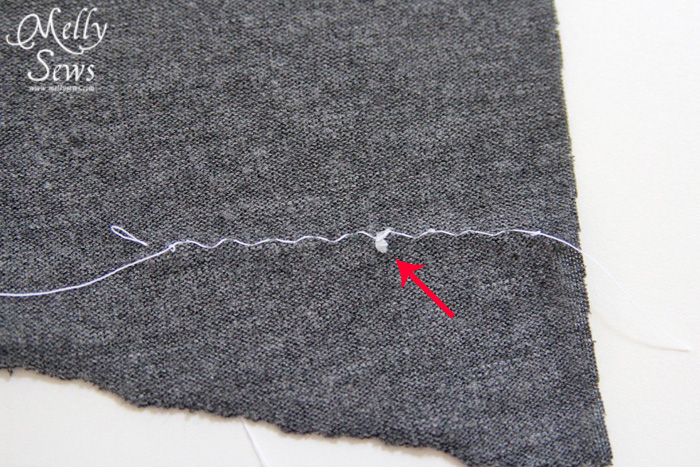
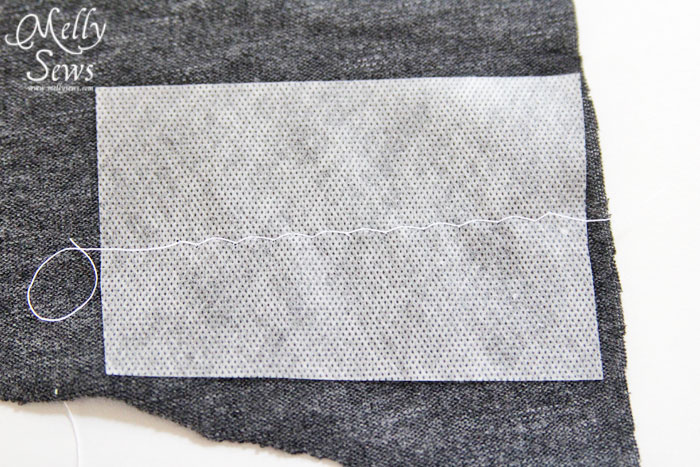
So, tips for sewing knits – here’s the biggest one: DON’T STRETCH THE KNIT WHILE YOU SEW. Because if you do, this happens

Yup, I am responsible for that ugly, wavy seam. For a long time I thought that if you stretched the knit slightly while you sewed, it would counteract the fact that thread isn’t stretchy (unless you’re using wooly nylon or elastic thread which is a whole ‘nother mess). But this is WRONG.
USE A ZIG-ZAG STITCH
The way you deal with stretchy fabric/non-stretchy thread is to make sure your needle is doing some sideways motion. This is why a zig-zag stitch is perfect for sewing knits – the back and forth movement adds extra slack to the thread, so it doesn’t break when the fabric is stretched. It’s why sergers handle knits so well – the way the thread wraps around the edges is naturally stretchy. So use a zig-zag, a built in stretch stitch, or a serger.
UNDER PRESSURE
The next stretching culprit is often the presser foot/feed dog combination on your sewing machine. Sometimes this stretches the fabric just slightly as it is sewn, even if you’re not stretching it. There are a few ways to combat this. First of all, look for a presser foot pressure adjustment on your machine – it’s often a knob on top – and lower the pressure. This solves the problem for me on my machine.
If you don’t have a presser foot adjustment or it doesn’t fix the stretching, there are some other things you can try. You can try putting transparent tape on the bottom of your foot, so that the fabric slides easier. You can try putting tissue paper under your fabric (against the feed dogs) to try to achieve the same thing. You can try a walking foot, which “walks” across the fabric, reducing the chance for stretching.
If all else fails (say you’re working on a really thin, very stretchy knit) you can use a fusible, wash away stabilizer. Pellon sells a new one called Stitch n’ Washaway by the yard. It looks like interfacing, and you iron it on. It will make your fabric behave like regular, non-stretchy fabric, and then when you wash, it dissolves and is gone.
NEEDLES MATTER
Finally, if you’re running into issues with thread breakage, it’s probably your needle. Universal needles can handle most knits, but thread breakage is a sign you need to switch to a jersey or ballpoint needle.
For stitching that will show, if you prefer a straight stitch look to a zig-zag on the outside or your garment, you can try a twin needle. I wrote a tutorial about using them here.
So, in summary
- Don’t stretch
- Use a zig-zag, stretch stitch or a serger
- Reduce the pressure
- Use the right needles
Use them and instead of a wavy mess like above, you can have a t-shirt that looks like this (my favorite t-shirt I’ve sewn myself):
Some knit FAQs I’ve received:
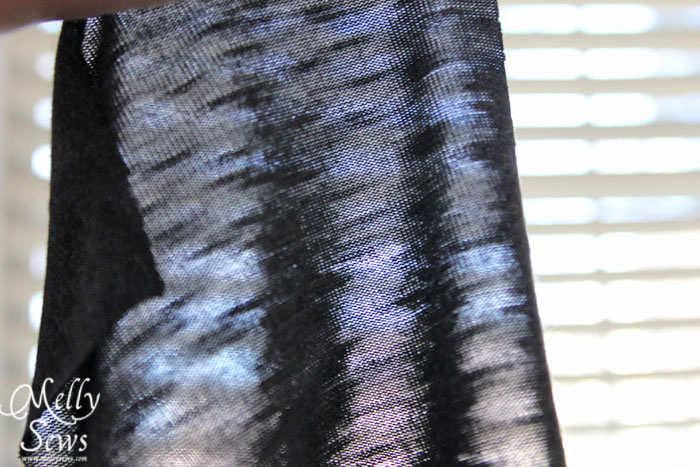
Q: What do I do about my knits curling on the edges?
A: Knits like jersey definitely tend to do this, and especially when they are lightweight:
What works for me is spray starch – I use Faultless heavy spray and spray the heck out of my edges, then iron them. The starch adds just enough body to keep the edges from curling too much, and it washes out.
Q: My machine tries to eat my knits – what do I do?
A: First, check your needle. It seems counterintuitive – if my needle is shoving my knit down through the throat plate, shouldn’t I use a sharper needle? NO! Make sure to use a ball point or jersey needle – it is made to slide between the stretchy threads instead of catching on them and shoving. You may also need to change to a smaller size; very fine knits need thinner needles.
Next, tissue paper can be your best friend here. Let me show you. This is some lightweight rayon jersey:
To sew this without my machine eating it I used a size 70 jersey needle, and I placed a piece of tissue paper under it.
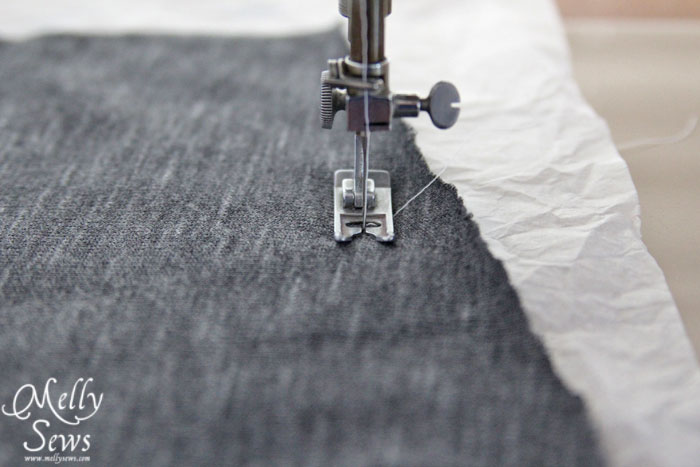
The tissue paper helps keep your needle from pushing the fabric down through the hole in your throat plate. When you’re done, you tear it off the back. Unfortunately, this can leave small pieces of tissue paper behind. A tweezer is helpful here. Or you can try the next trick.
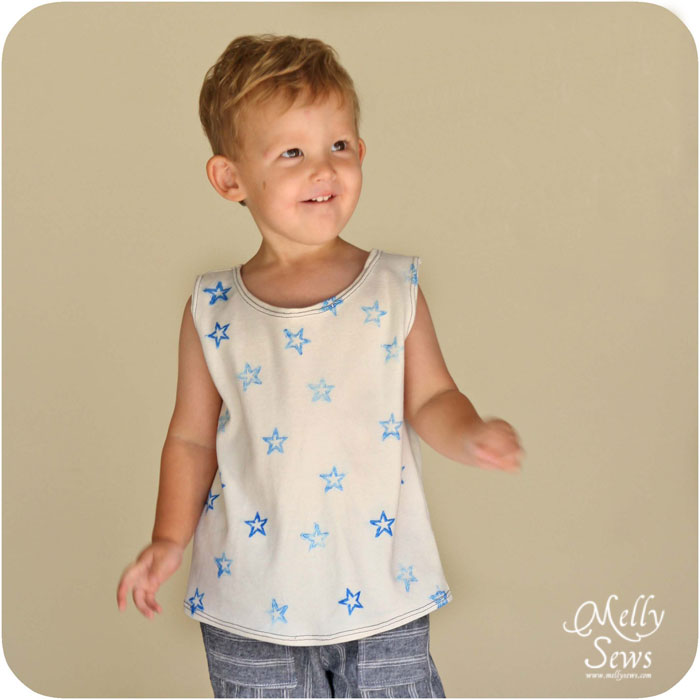
Q: What do I do when I want to embroider on my t-shirt?
This will work both for embroidering and for knits when you don’t want to pick tissue paper (or tear away stabilizer) out of your stitches. Pellon has a great new product called Stick n’ Washaway. I used it in this project for embroidering some t-shirts – my kids drew on it with washable markers and I sewed over their drawings. (Full disclosure: I am a Pellon Project Artist and received the Stick ‘N Washaway for free, but I think it’s awesomely useful stuff regardless and will be buying it when my free sample runs out).
It looks and feels kind of like interfacing with a sticky backing that you peel off.
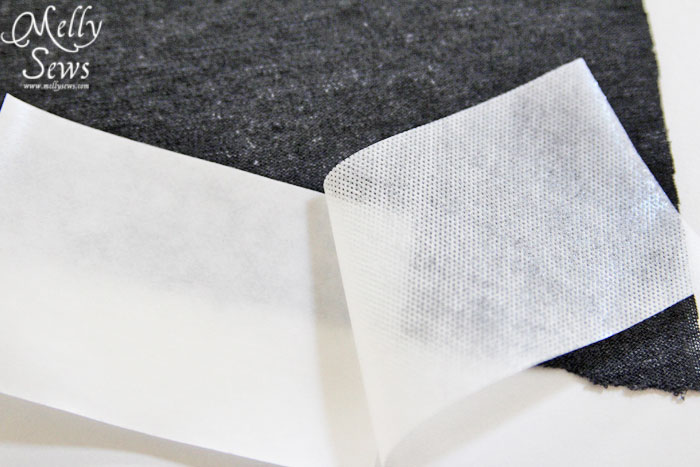
Then you stick it to your work and sew right through it.
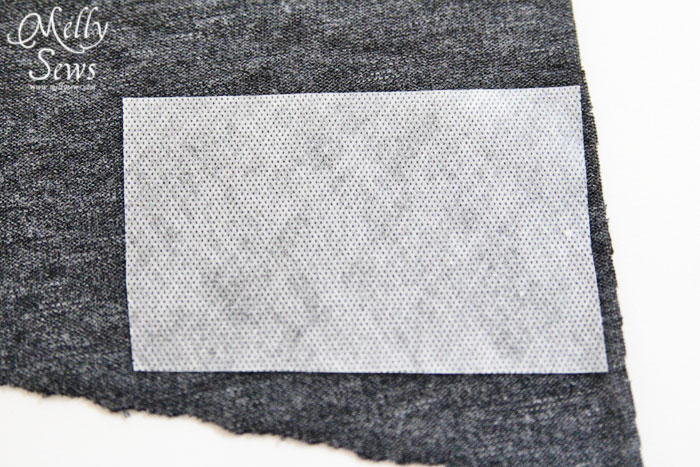
Wrong side of work
I used it on the wrong side of my fabric for this example, but in the other project I did I stuck it right on the front (right side). The great part about this stuff is that after you’re done sewing, you just throw the project in the wash, and when you get it out it’s gone, like it was never there.
This is a brand new Pellon product, so it may be a little hard to find at first. Joann just started carrying this in 8.5 x 11″ packages; if those do well maybe they’ll start carrying it to buy by the yard. Otherwise you can ask your local fabric store to order it; they can get it in 10 yard bolts. If you want 10 yards of it, you can also order your own big bolt through Amazon.
Q: What size zig-zag do you use?
A: Well, it depends on how much stretch I need. My default is to go to the longest stitch length and narrowest zig-zag my machine will do (see above) this looks almost like a straight stitch. But it’s not the stretchiest of zig-zags, so I use it for side seams and things like hems that don’t have to be too stretchy. For a high stress area like a neckline, I’ll use a slightly wider zig-zag (mid-range on my machine) and a shorter stitch length (around 10 stitches per inch). This is much stretchier.
So, I hope that helps you and you conquer your fear of knits – I’d say at least half my fabric stash is now knit!
Now get to sewing on those T-shirts!
Theresa
Awesome round up of tips and how-tos. I was working on a dress this weekend. Everything was going decent until I tried it on. For some reason the side seams had a horrible pucker. I’m going to try some of the techniques you mentioned and see if I can fix this problem. Thanks for sharing!
TerriSue
What a wonderful post. I feel ready to go tackle anything made of knit fabric. Thank you so much!
Tawnya
You are amazing! Thank you so much for posting all of this information. I will be bookmarking this page and know I will refer to it often!
Abby S
YAY! You’ve solved my broken-thread mystery. Guess it really IS worth the time to swap needles. Better dig up where I stashed my ballpoint one…. Thanks for the stitch recommendations too! Cleared it right up for me.
sorahart
Two questions for you:
1. Do you ever topstitch along the seams when you are colorblocking? Just curious. Colorblocking is my favorite way to use up the remnants of really nice knits I can get for cheap!
2. I usually sew up both shoulder seams before putting in the neck ribbing. What would you say are the advantages of doing the way you showed in the tutorial of still having one shoulder seam open when you attach the ribbing? I always have a hard time matching up the shoulder seam and making it look good when I do it this way. Just curious again.
Melissa Mora
1. I haven’t, but if I did I’d use a narrow zig-zag and a long stitch
2. The advantage for me is that it seems to make the collar go in more smoothly, since I can stretch the ribbing more evenly. It is a little tricky to match the shoulder seam; I put a pin right through the seam to help match and sometimes baste that seam on my regular sewing machine before serging it.
Trish G
Great tips! I like sewing with knits. They are the most worn things I’ve made in our house. This gives me a little push to tackle the ever growing pile of things to work on!
emilia
The tissue paper helps keep your needle from pushing the fabric down through the hole in your throat plate. When you’re done, you tear it off the back. Unfortunately, this can leave small pieces of tissue paper behind. A tweezer is helpful here. Or you can try the neck trick.
what is the neck trick?
marjie
Great hints! I look forward to making more tees!
nancy elswick
Such a great article. Thank you so much for posting this. I have just decided to dive into knits and am kinda scared. I bought my walker foot and my ballpoint twin needle and need to just do it lol. This article came at the perfect time because I was actually going to search for tips but saw this pinned on my board I follow. Can you say a sign lol? I also read the article with the waste of clothes you linked up. I hate to admit that I was one of those people that donated and just thought the clothes would be reused. I didn’t think they were being thrown away still or gave to the highest bidder. This makes me rethink donating now because of the landfill waste. I am going to upcycle more and looking for stuff at the 2nd hand store to upcycle more often. Especially when fabric is expensive anyways lol.
Ashley
My favorite stretch stitch is the one that is 3 lines (lll) on my machine. It works great and just looks like a slightly thicker straight stitch!