
I’ve decided on a new series I’m going to be running weekly for a while, and I’m calling it Project Redecorate.
We’ve lived in our house for 9 years now, just enough time to have (almost) finished the original to-do list we made when we bought the house and start over. So I’m going to use this series to show you my progress as I go room by room through the house, updating. Some of this will be sewing, some will be decorating, some will be projects. I hope you’ll enjoy this as we go.
A little background on our house: Hubby and I bought this house as a foreclosure, and it is our second house. Our first was a foreclosure as well, and so we were semi-experienced in making a foreclosure liveable and then updating and upgrading. But our first house was nothing compared to the challenges of this house.
Over the time we have lived here, we have pulled down hundreds of square feet of wallpaper, painted every wall, replaced 80% of the flooring, and tore the carpet off the double staircase and replaced that with solid wood stairs. We have retiled the master bath and installed a new shower, added and replaced most of the light fixtures (this is the one area we’re not finished with – we have 4 ceiling fans we’d still like to replace that we’ve been tolerating for 9 years), had a new roof put on and installed a sprinkler system. With the exception of the sprinkler system and the roof, Hubby and I have done the rest of this ourselves, with help from family. And the majority of the improvements weren’t done because of cosmetic preference but necessity. The carpets that came with the house were the filthiest I’ve ever seen, there were holes in walls, and wallpaper torn.
But this round, the improvements are all things Hubby and I want to do, not things we have to do. So I think this is going to be a lot more fun.
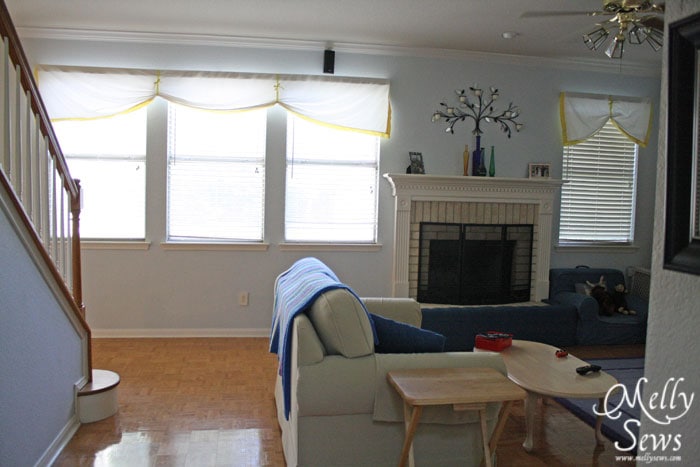
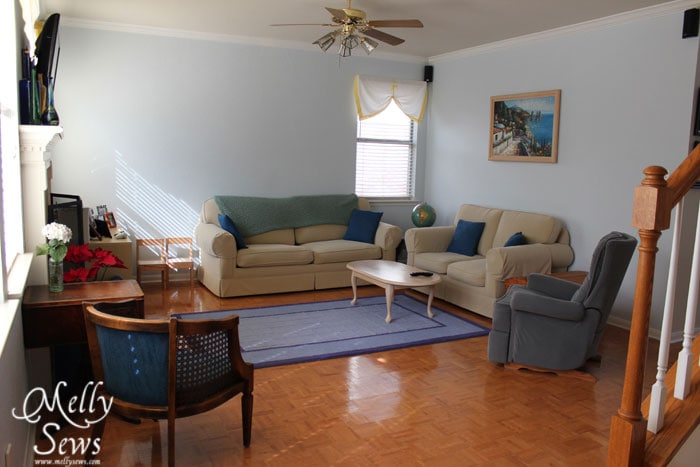
So, let’s take a look around my family room before, shall we?
This is how the room looked when I started; this picture is taken from on the stairs so you can see the layout.
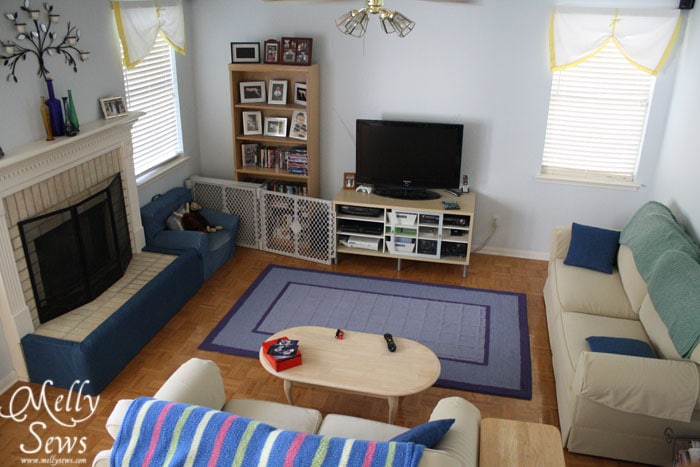
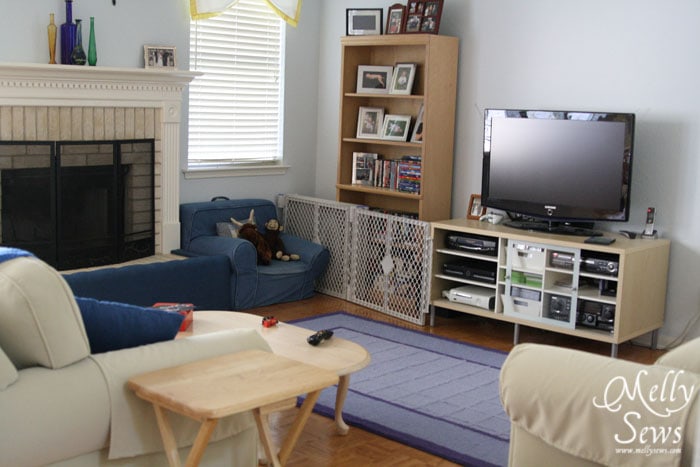
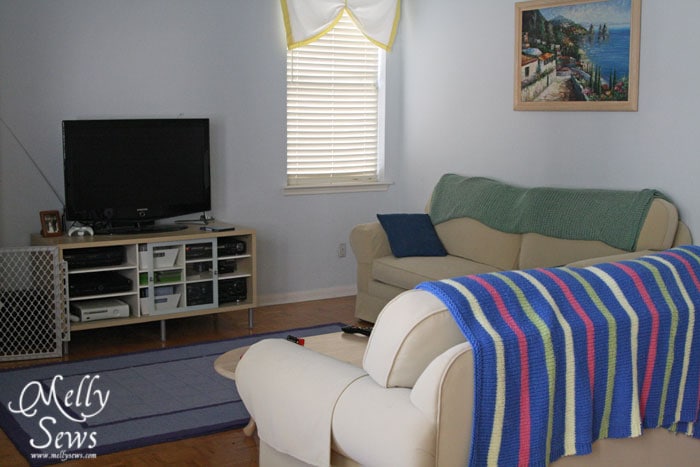
This is one of the few rooms that we didn’t have to replace flooring; the wood parquet was in good shape. We did repaint the walls to light blue, and I sewed the valances. Hubby and I also made the padded bumper for the fireplace when Tater gained mobility, to prevent toddler accidents and injuries. Other than that, we just added furniture. Here are a couple more views:
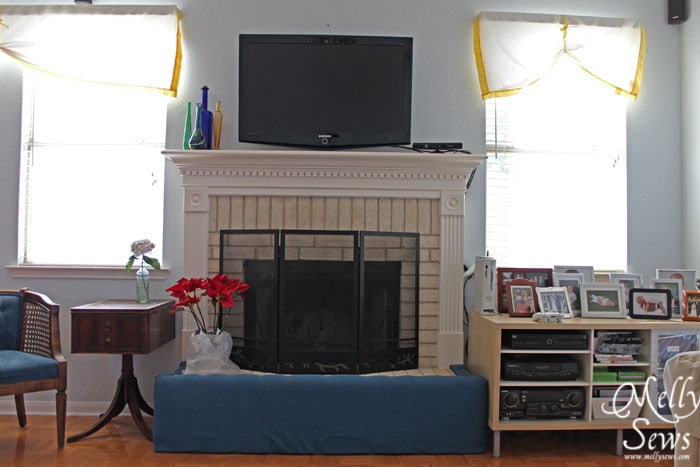
So the first step to redecorating this room was to rearrange it. This step cost us a total of $63. The first thing we did was take the TV off the console and wall mount it over the fireplace. That was free because my parents happened to have a wall mount they weren’t using and they gave it to us.
This is what the room looked like after:
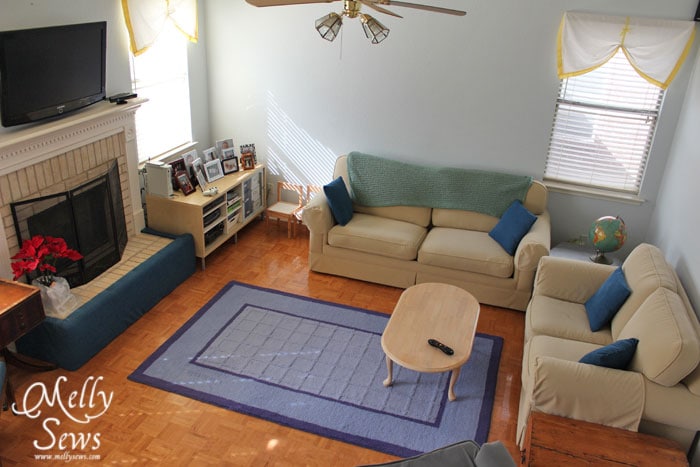
I love how much more spacious it looks and feels, and that you can now see more of the nice flooring in here.
As you can see, we took out the boys’ chair (I sold it) and put the console in its place. We took out the bookcase and moved that upstairs to our office, where I had run out of shelf space. We got rid of several non-functioning electronics that were in the console so we could store all the DVDs that used to be on the bookshelf inside it. And since the TV moved to the wall, I was able to keep all my framed photos that were on the bookshelf on top of the console.
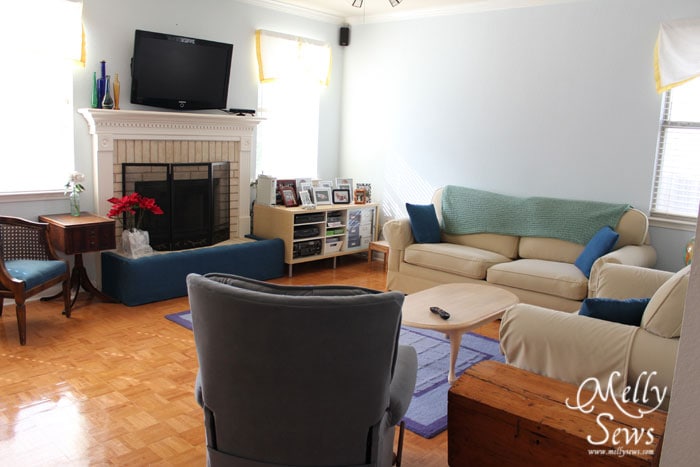
There is also some new furniture in the room, and I’ll talk about these pieces. They’re all thrifted or craigslist finds. The trunk in the picture above I already had, in fact it’s in the room in the before photos, but on the other side of the couch where you can’t see it. It was a craigslist find -$25 – and when I researched it, it turns out it’s an immigrant trunk over 150 years old.
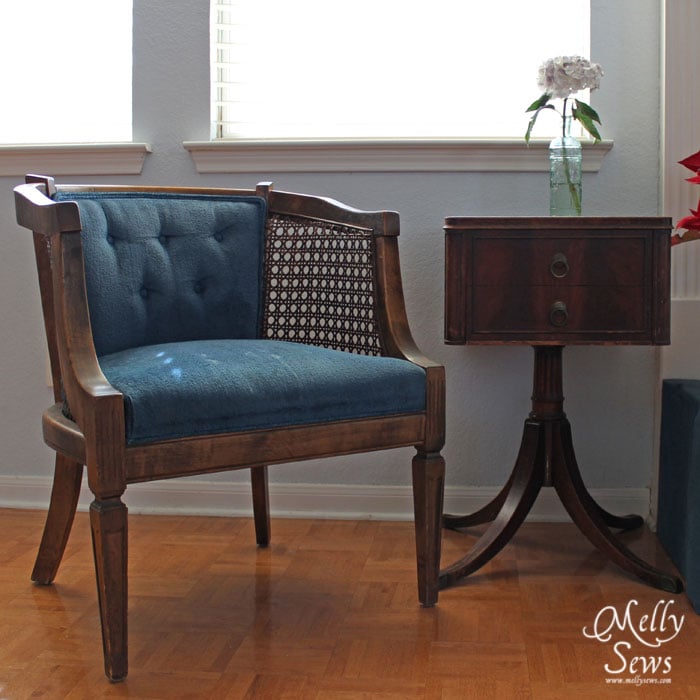
These two pieces are where I spent the $63. The table was a craigslist find for $45, and the chair was $18 at the thrift store. I thought I’d reupholster it when I bought it, but then I got it in the room and the blue went so well with the rug that I decided to leave it alone. Also, the wood is solid, and I’m one of those girls that can’t paint solid wood without a lot of arm twisting, so it’s also getting left alone.
You might also notice the new gray chair and that there’s a table back behind the couches. Those were both craigslist finds that I have redone, so I’m not going to show you more about them yet. Instead I’ll feature them in upcoming parts of this series.
Things I still need to do (that will be the subject of future posts)
- Artwork for the very very big blank wall where the bookshelf and the TV used to be
- New valances
- Floor pillows to make up for the boys’ chair that I sold (while they weren’t home – what an awful mommy I am! In my defense, they would.not.stop.fighting in, on and around the chair).
- Redoing the coffee table to go better in the room
- New accent pillows and accessories
I hope you won’t mind following along with me, and one last favor if you’ve read this far – do you have any artwork suggestions? I haven’t decided what I want to do with such a large canvas to work on. Something with character, as this room is still lacking a bit.
Next Wednesday I’ll show you the reupholstered chair before and after (you may have caught a preview if you follow on instagram; @mellysews). Hope to see you then!
Update: I’ve had a few comments asking about the hearth guard at the fireplace. I talk more about it in this post.
jan
my artwork suggestion is…….
i love the super black and white enlargements of people’s kids that are always on pinterest….like a series on that bare wall…..i think it would bring lots of personality to the room especially since it’s the room you live in!
Jessica McLard
Don’t you love how just moving furniture makes the room so much bigger??!! We did the same thing with our kids rooms. As for the kids chair you got rid of, I made one for each of them so there wouldn’t be fighting and they still fought in, on and around them!! We just switched to bean bags and they are slightly better 🙂 Can’t wait to see the rest.
jonquil
Do you think your boys could be guided into painting a mural (on stretched canvas bought at art store)? You could get the paint colours to work with the decor & maybe flank the boys’ work with b/w photos of the artists themselves.
Amanda
I know it’s not as personal, but I love the large prints at ikea. We honeymooned in New York and found a nice shot of the flat iron building. They have many options. I also love to shop for frames there. Simple and versatile. Another idea would be three big frames that can hold maybe a family picture in the middle and a custom piece of art from each boy on the sides. These can rotate or change as the kids get older.
Rosemary
My thoughts about the wall . Have the family paint on a big canvas. One of a kind art work. I prefer t hem my self.
Also about the floor pillows for the boys. Use fabric crayons and have them color on painters drop cloth. the floor cloth is very derable and washable. Again one of a kind and they can say I help make it.
Marixa
I think a gallery wall would look great. It’s a good way to take upa lot of visual space and have pictures, art and such. You could start it with those enlarged prints like the others suggested then add to them.
Doesn’t it feel so much better to freshen up a room!
Emily
I’m impressed you guys did so much work yourselves!! How about a large engineer’s print? Or a bunch of large white matted frames with pictures of favorite people/places/things that get switched out. Here’s my pin board of what I’m kind of trying to say. . . . http://pinterest.com/emilysupposes/photo-gallery-inspiration/
Ajaire
We too bought a foreclosure, but are only 2.5 years in to the changes needed to be done. We are very excited about some projects planned for this spring. I’m looking forward to this series. It’s nice to see there will be an end to the needs and a switch to the wants hehe.
Lauren
I have a collection of frames on a big wall that I fill with kids’ artwork. The matching frames bring the whole thing together and the kids love to see their stuff displayed. Easy to change out when they bring home new favorites too.
Carlee
I know this is an older element but I love the padded bumper around the fireplace. I have a 17 month old, who is about as clumsy as they get along with being all boy and climbing on everything. I also am about to have our third child so I will need to do something like this. Right now the edges are just covered with ugly grey foam. Any chance you would tell me how you did it? Or maybe a post on it? Thanx so much.
Nicole
Yes, please!! We are about to move into a house with a fireplace, I would love to hear how you did that bumper!
Nicole
Oh! Found it- September 2013 post.
Katie
Amazing what a difference you can get just from rearranging furniture! I like the idea of a series of black and white photos on the wall. Photos of kids or family are good, but you already have a lot of family photos displayed. In our old house, my husband and I took a series of photos that we had taken on our travels — more architectural photos — converted them to black and white and hung them in a series. They were still personal to us and reminder of our freedom-filled pre-kid days, but not so obviously personal photos on the wall.
Each of my kids have one of those chairs, and they rarely get used for sitting! My son jumps on his and his sister’s every which way he can imagine, but never sits in it! I can understand why you sold it!
Kate
I love the wall colour and the new/old chair. I also have a huge problem with painting solid wood, probably why my house contains a mismash of different coloured woods as i love vintage/ second hand pieces.
As for the blank wall, I really like the idea of this photo clock i found on pinterest. It will definately be added to our lounge when i decorate. http://pinterest.com/pin/385409680581115880/