
How to use a twin needle – double needle sewing
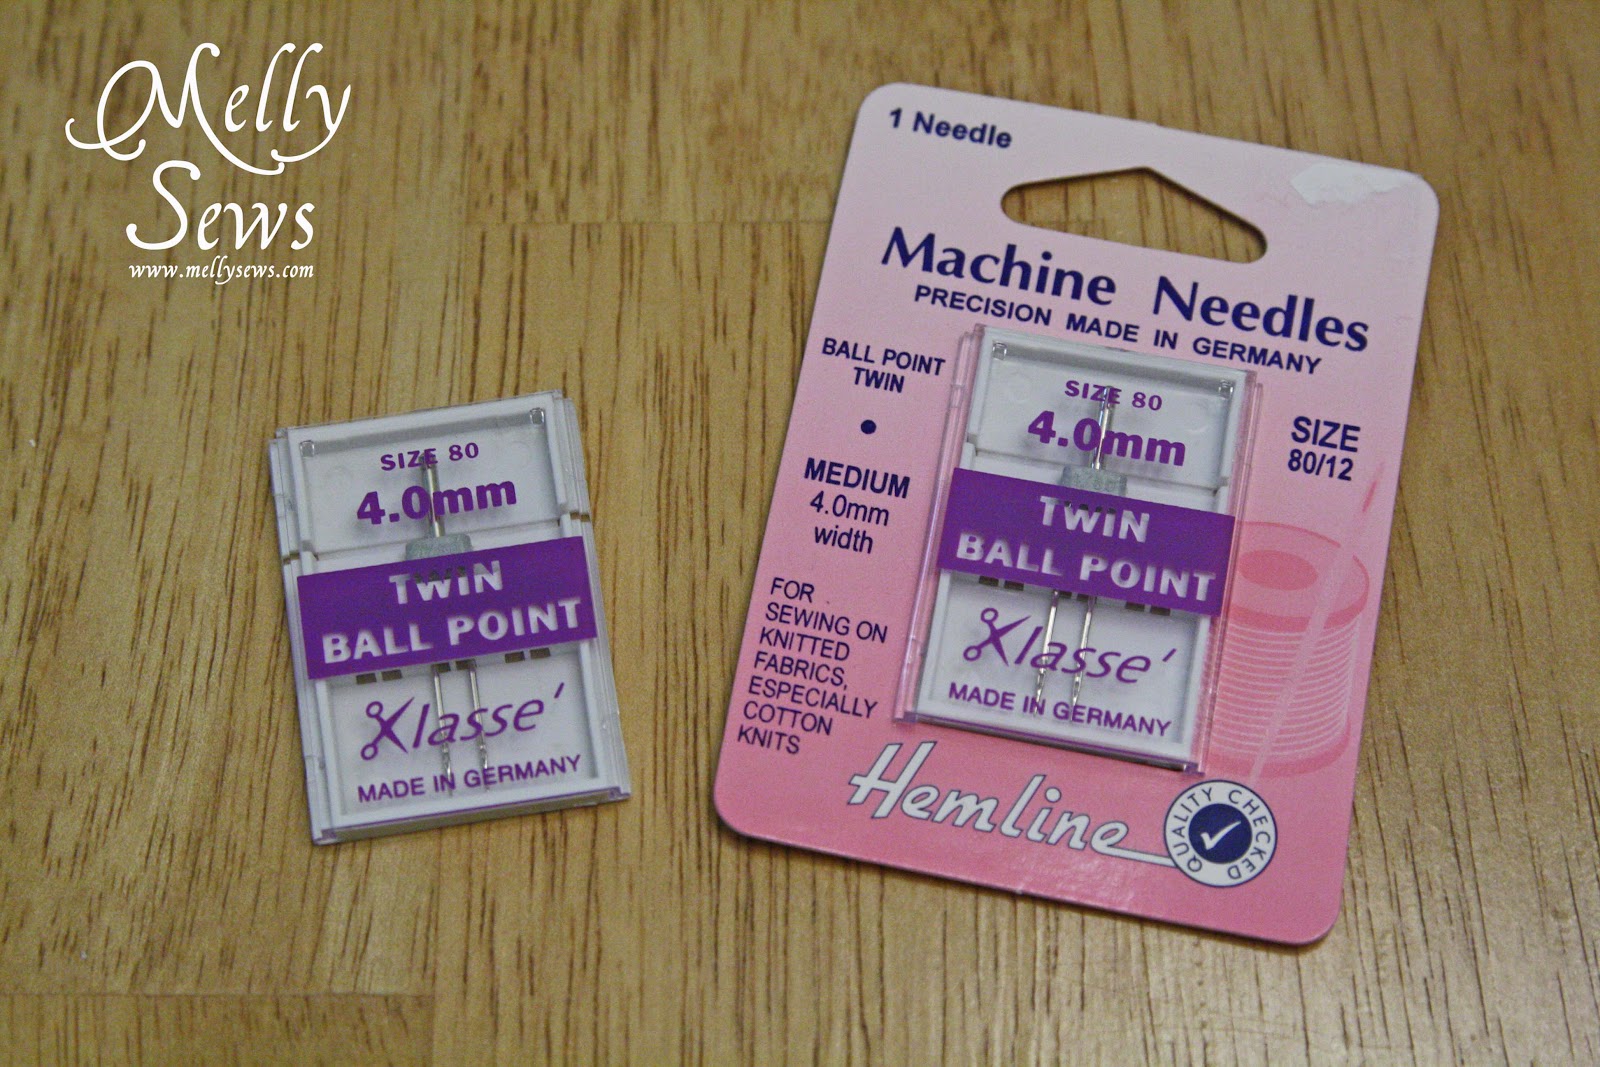
I use my twin needles on my regular sewing machine mostly for hemming stretch fabrics, and therefore I prefer Klasse’ Twin Ballpoint Needles Size 80 – 4.0mm. The universal twin needles they sell at Joann sometimes work and sometimes don’t – like when I was sewing my tankini.
I’ve updated this post with a video that includes sewing with a twin needle. If you want to skip to that part, forward to 5:50 in the video below or on YouTube here.
I read several blog entries about using twin needles that were pretty helpful when I first started using these, but there were several things I had to discover on my own. So this is a summary of my best tips for sewing with twin needles.
- Buy ballpoint needles if you’re going anywhere near knits for this.
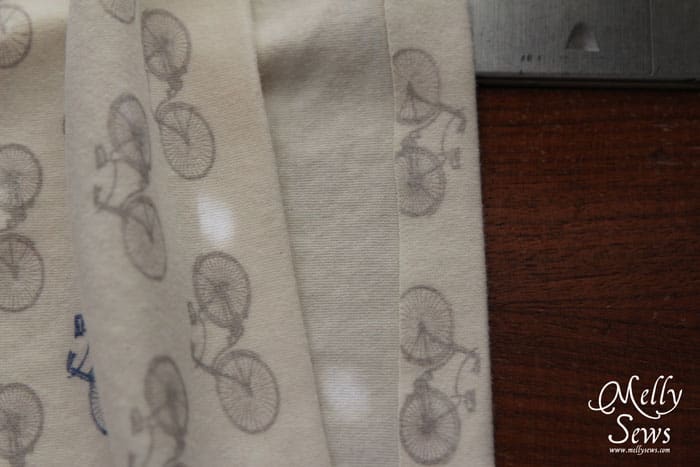
- Pay attention to the width (the mm number; 4mm in the picture above). Some extra wide-set needles won’t fit with the standard foot on vintage machines. I learned this the hard way.
- Leave loooooong tails when you start and stop sewing, and don’t backstitch (see below)
- Set your machine to a long (if not the longest) stitch, and use the straight-stitch, not zig-zag
- Give your stitching a tug every 6 inches or so if you’re doing a long hem to prevent puckering.
As I mentioned, I mostly use my twin needles to sew knit hems. Here is a step-by-step of how I do that:
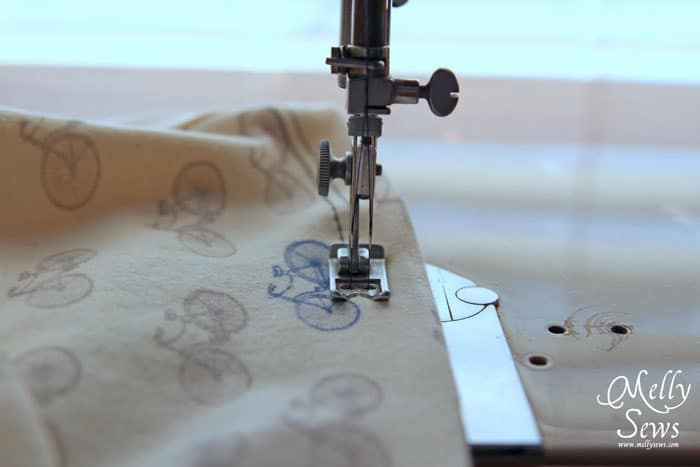
First, replace your needle with a twin needle. Then put the thread and a bobbin of the same thread on your machine. Make sure thread is unwinding the same direction off both. Here are two configurations of what that might look like (please excuse the mismatched thread in the first picture).
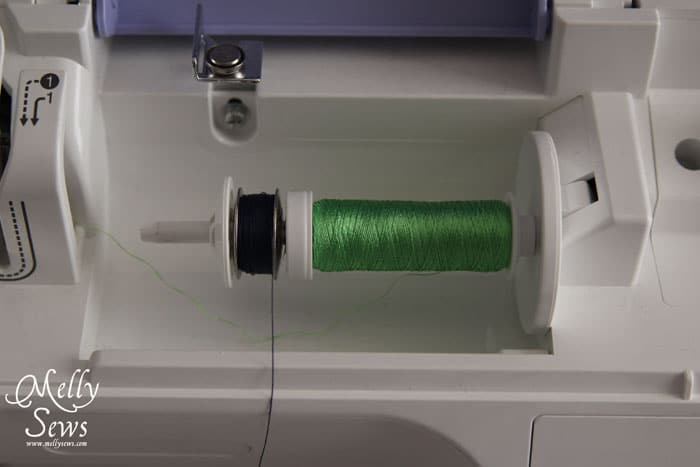
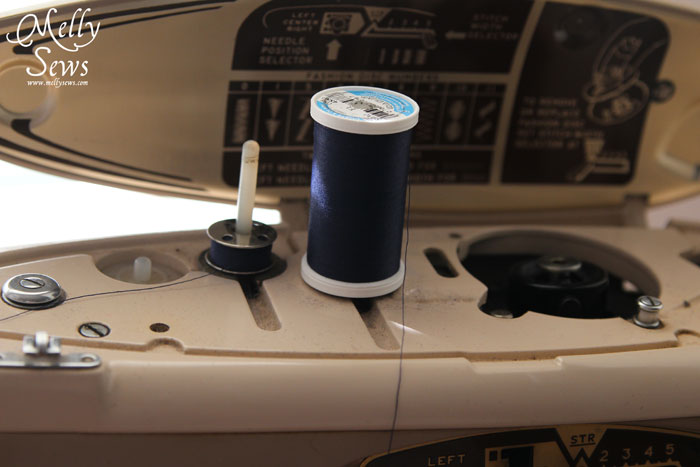
Holding the two threads together, thread the machine as if you were only using one thread until you get to the needles, then separate the threads. Tug one to see if the left or right thread unwinds, then thread the corresponding needle. Iron your hem. If you HAVE to, pin it. But you don’t want to sew over the pins. Two needles = 2 x the chance you will hit a needle.
Sew with the top side of the hem up. I use my finger on the left hand to feel the seam as I feed the fabric. Remember to leave LOOOOONG tails before you start stitching.
Stitch around to where you started. Don’t backstitch or overlap your stitches. Leave long tails again before cutting. Give your hem a good tug. You’ll notice that the bobbin thread tails in particular may get a lot shorter. Thread your long tails through a needle, two at a time. Use the needle to pull the threads to the wrong side.
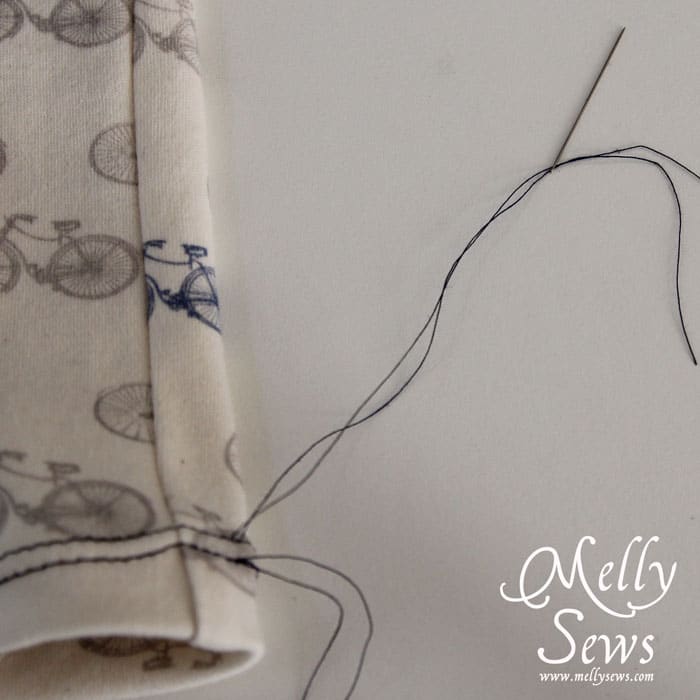
Knot all the threads on the wrong side before cutting.

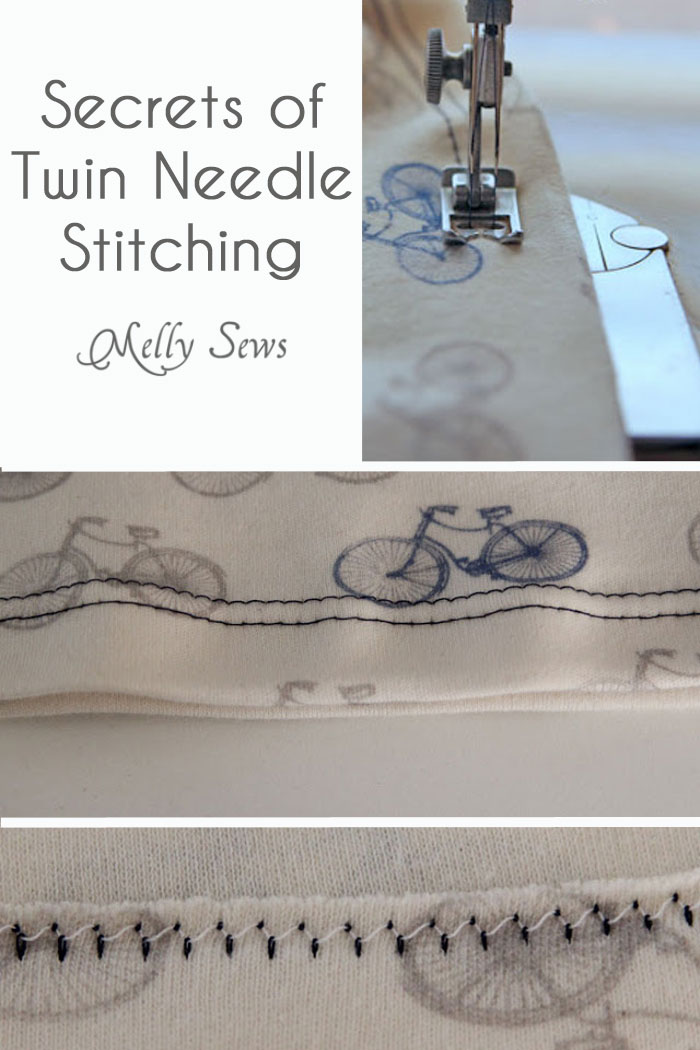
Your stitches will look like this on the front.

And like this on the back. That zig-zagging of the bobbin thread is what gives the hem its stretch.

Mae
i just want to say THANK YOU THANK YOU THANK YOU x1000. This has answered nearly every question I have had about a double needle and probably 99% of why i was getting frustrated. I didn’t know not to backstitch, and also that i had to tie the ends, which meant my hems were coming out & i couldn’t figure out why, OR i would be extra sure to backstitch more & my machine would go nuts. whew. I’m going to have a great weekend now. lol
Norma's Clay
Thank you for showing this. It’ll be very helpful for me. I like to sew knits but have things to learn and haven’t use double needle yet.
Heidi
Thanks for sharing this, Melissa. I’ve never used double needles, but I’ve always wanted to try. I think I’m think I’m ready to after reading this!
Caila
WOW, this is so helpful! Thanks, Melissa!
Valley of Wolves
Thank you Melissa! This was SUPER helpful!
Alicia
Wow this is super helpful!!! I sewed up a dress for my daughter using knit fabric and had to hem the bottom of three rows of ruffles. I did a rolled hem and wow if I had read this tutorial in time I would have saved myself a lot of headache!! Thanks again! Can’t wait to try this on my next knit project!
Lauren
Thank you so much! I just tried my double needle for the first time tonight, and I ended up scratching my head more than sewing. You answered all my questions very thoroughly. Now, I am excited to try again. 🙂
Helen
This is great. Just about to start twin needling my knit hem and have all the info I need. Thank you!
Naomi
Thanks for the tip. Several years ago I tried with the universal twin needles,from Joann’s and didn’t have much success. Your post motivated me to try again maybe with the better needles this time
Rebecca
I tried this approach tonight before finding your post. It was really close to what I was hoping would happen, but not quite. I felt like the bobbin thread needed less tension so it could stretch better, but I didn’t see a way to reduce bobbin tension. Your photo looked the same as the underside of my garment. Any tips for getting that bobbin as “loopy” as possible for max stretch?
Nicole
I went and bought a second bobbin casing and set it super low. It looks great on the back now. This tutorial is SUPER helpful though! Thank you!
Silvia
Thanks for this tips… I’m tying just now, the only problem is that when I pull the twin needle down it doesn’t want to get the bobbin thread…. I already wasted lots of thread and this is giving me headhache… Any suggestion?
Thanks
S
lyn o'meara
Thank you. I have been afraid to use the twin needles i bought. You explained it very well. I will be reading more. I have been sewing over 50 years it is great to learn new techniques. Lyn
Emilia Erickson
This is my go to blog post when I am helping someone figure this out. Thanks for being such a helpful gal!!!
Beryl
Very, very helpful. Easy to follow explanations.
Thank you.
Beryl
Eileen
Thank you so much for posting your tips, Melly especially about the Klasse needles and leaving long tails.
Mary Wiklander-Williams
This is exactly the information I needed, thanks!
Zoe
Thanks a lot have been trying to figure this out
Dalia
Thanks for this. Another tip that saved me so much headache is to use the walking foot with the twin needle for very stretchy, slippery fabrics. Make.sure the needle is narrow enough first.
JoAnn
Thank you for your tutorial, it was very helpful while I made a knit top
Susan Pearce
Thank you so much. I have been wanting to know how to hem T shirts/stretch fabric for a very long time. Nobody knew. And I thought the twin needle was for sewing decoratively only.
Cindy
After years of trying different methods, I finally took the plunge and tried the double needle hem. Your advice is WONDERFUL!!! I used a narrow diameter drinking straw to stack my thread spool and then my top bobbin on top of my sewing machine. I also used a product called “Wooly Nylon” for my bobbin thread. I highly recommend it; works like a charm!!! Thank you so much for your help!
Tina Jefferies
Hi Melissa – Hi from the UK. Your post is very helpful and I love your YouTube videos. One thing that helps me enormously when using twin needles, is to thread the needles before fitting to the machine! As a lady of a certain age, my eyesight for threading needs is not good (thank heaven for machine automatic needle threaders!). I use the wire needle threaders to thread both needles but leave long tails so they don’t unthread as I put the needle on the machine. It was a game changer for me.
Samantha
Just found this on my first try for a twin needle! Thank you thank you, finished hemming neck, arms, and bottom in less than a half an hour, but didn’t read all the way to the bottom so I guess I’ll have to tie some knots later, though I did stitch over for about an inch every seam so maybe it’ll hold up? Anyhow, you saved me because the video tutorials didn’t make sense.
Susan Wong
This was super helpful. I’ve had some success with twin needles before, but still had some tiny tunnelling. Your suggestion of using a long stitch (I used 4) along with lowering the top tension a bit (I went to 3 from 4) did the trick. NO tunnelling! And no need to do all the fancy stuff like fiddle with the bobbin tension, woolly bobbin thread etc. THANK YOU!!
Laura
Thank you for this! I know this post is old, but it (and the one on knit stitches) has helped me understand and be less intimidated to try sewing knits. I bought some old t-shirts from Goodwill to use as my practice material.