
Last week, for Project Run and Play, I made a polo shirt for Tater. I couldn’t find a good tutorial on how to do a polo shirt placket, so I figured it out on my own, and this is how I did it.


1. Determine the size you want your finished placket to be. I wanted 1 inch wide by 3 inches long. Remember that this placket won’t stretch if you’re using woven fabric, and account for that with your measuring so you won’t be stuck with a beautiful shirt that won’t go over your kid’s head (speaking from experience, ahem). Now cut a fabric strip that is twice the width of your placket plus 1/2 inch, and twice the length of your placket plus 2 inches or so (you can cut it down to length later).
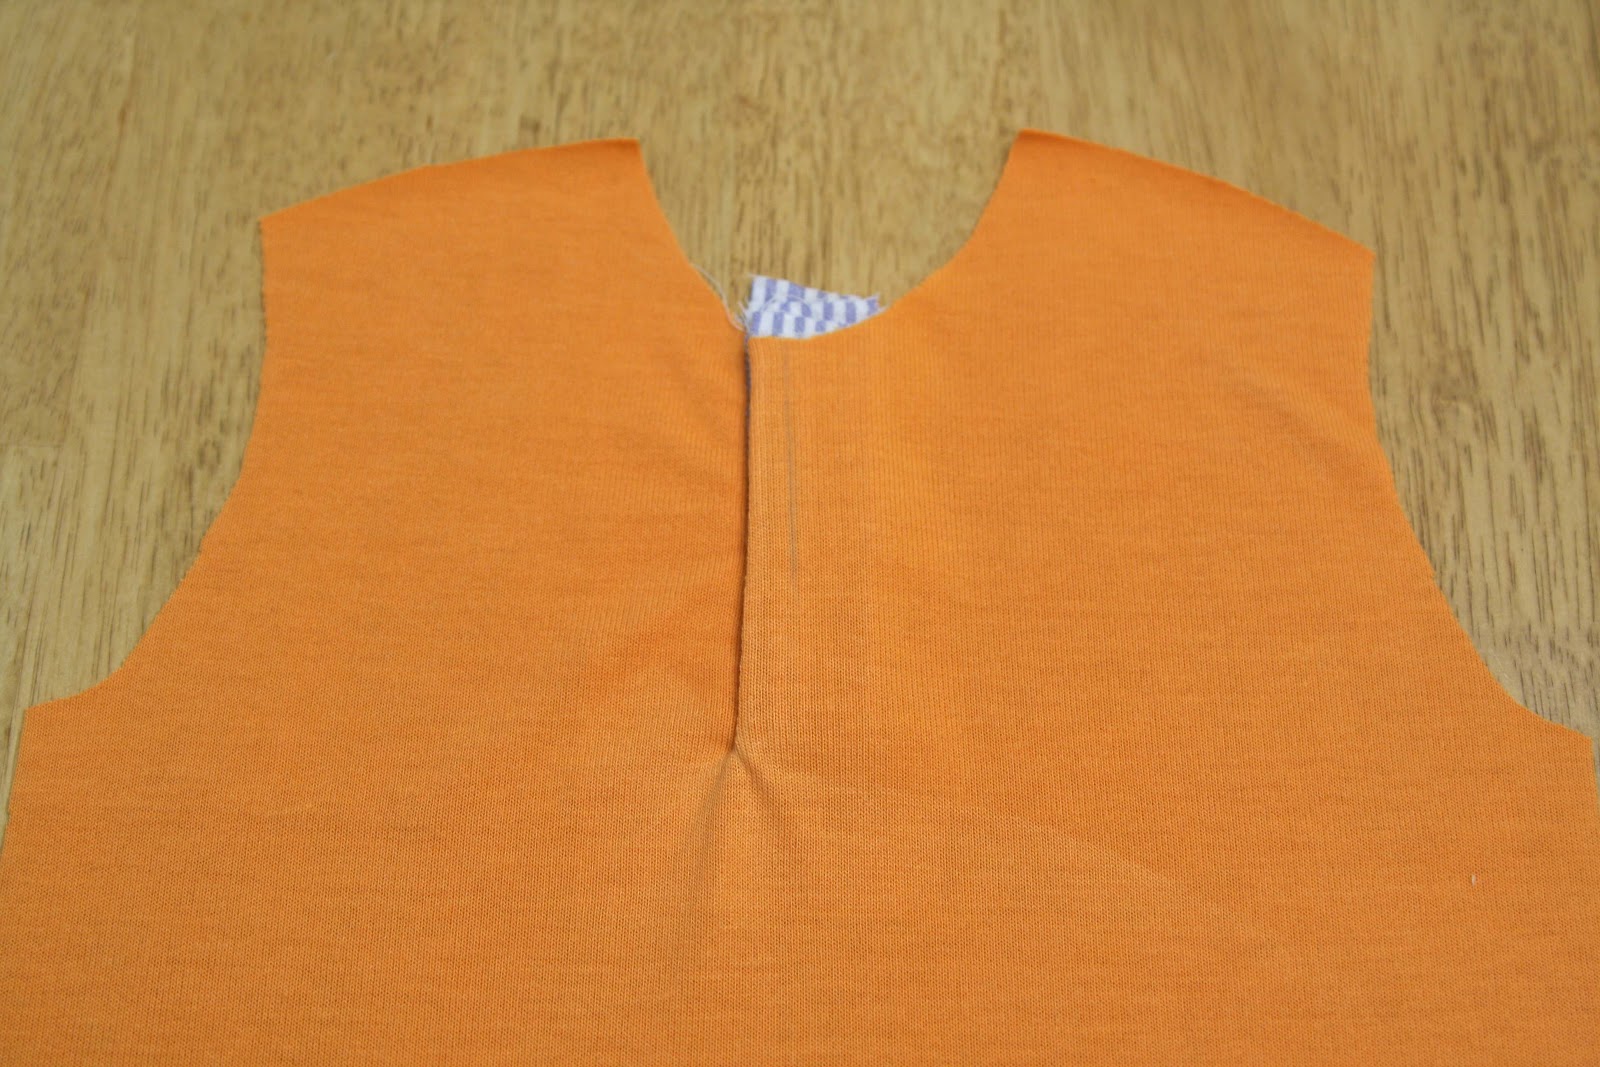
2. Find and mark the center front of your shirt. This is a regular old t-shirt front, cut out the same way I would if I was making a regular t-shirt.
3. Mark a line parallel to your center front 3/8 inch over (if your placket is wider than 1 inch, you need to mark further over). This line should be the same length that you want your finished placket. In the picture below, this is the white line.
4. Using your ruler, draw a diagonal line on each side of your placket mark. It should be 1/4 inch away from your placket line at the top. These lines are black in the picture below.
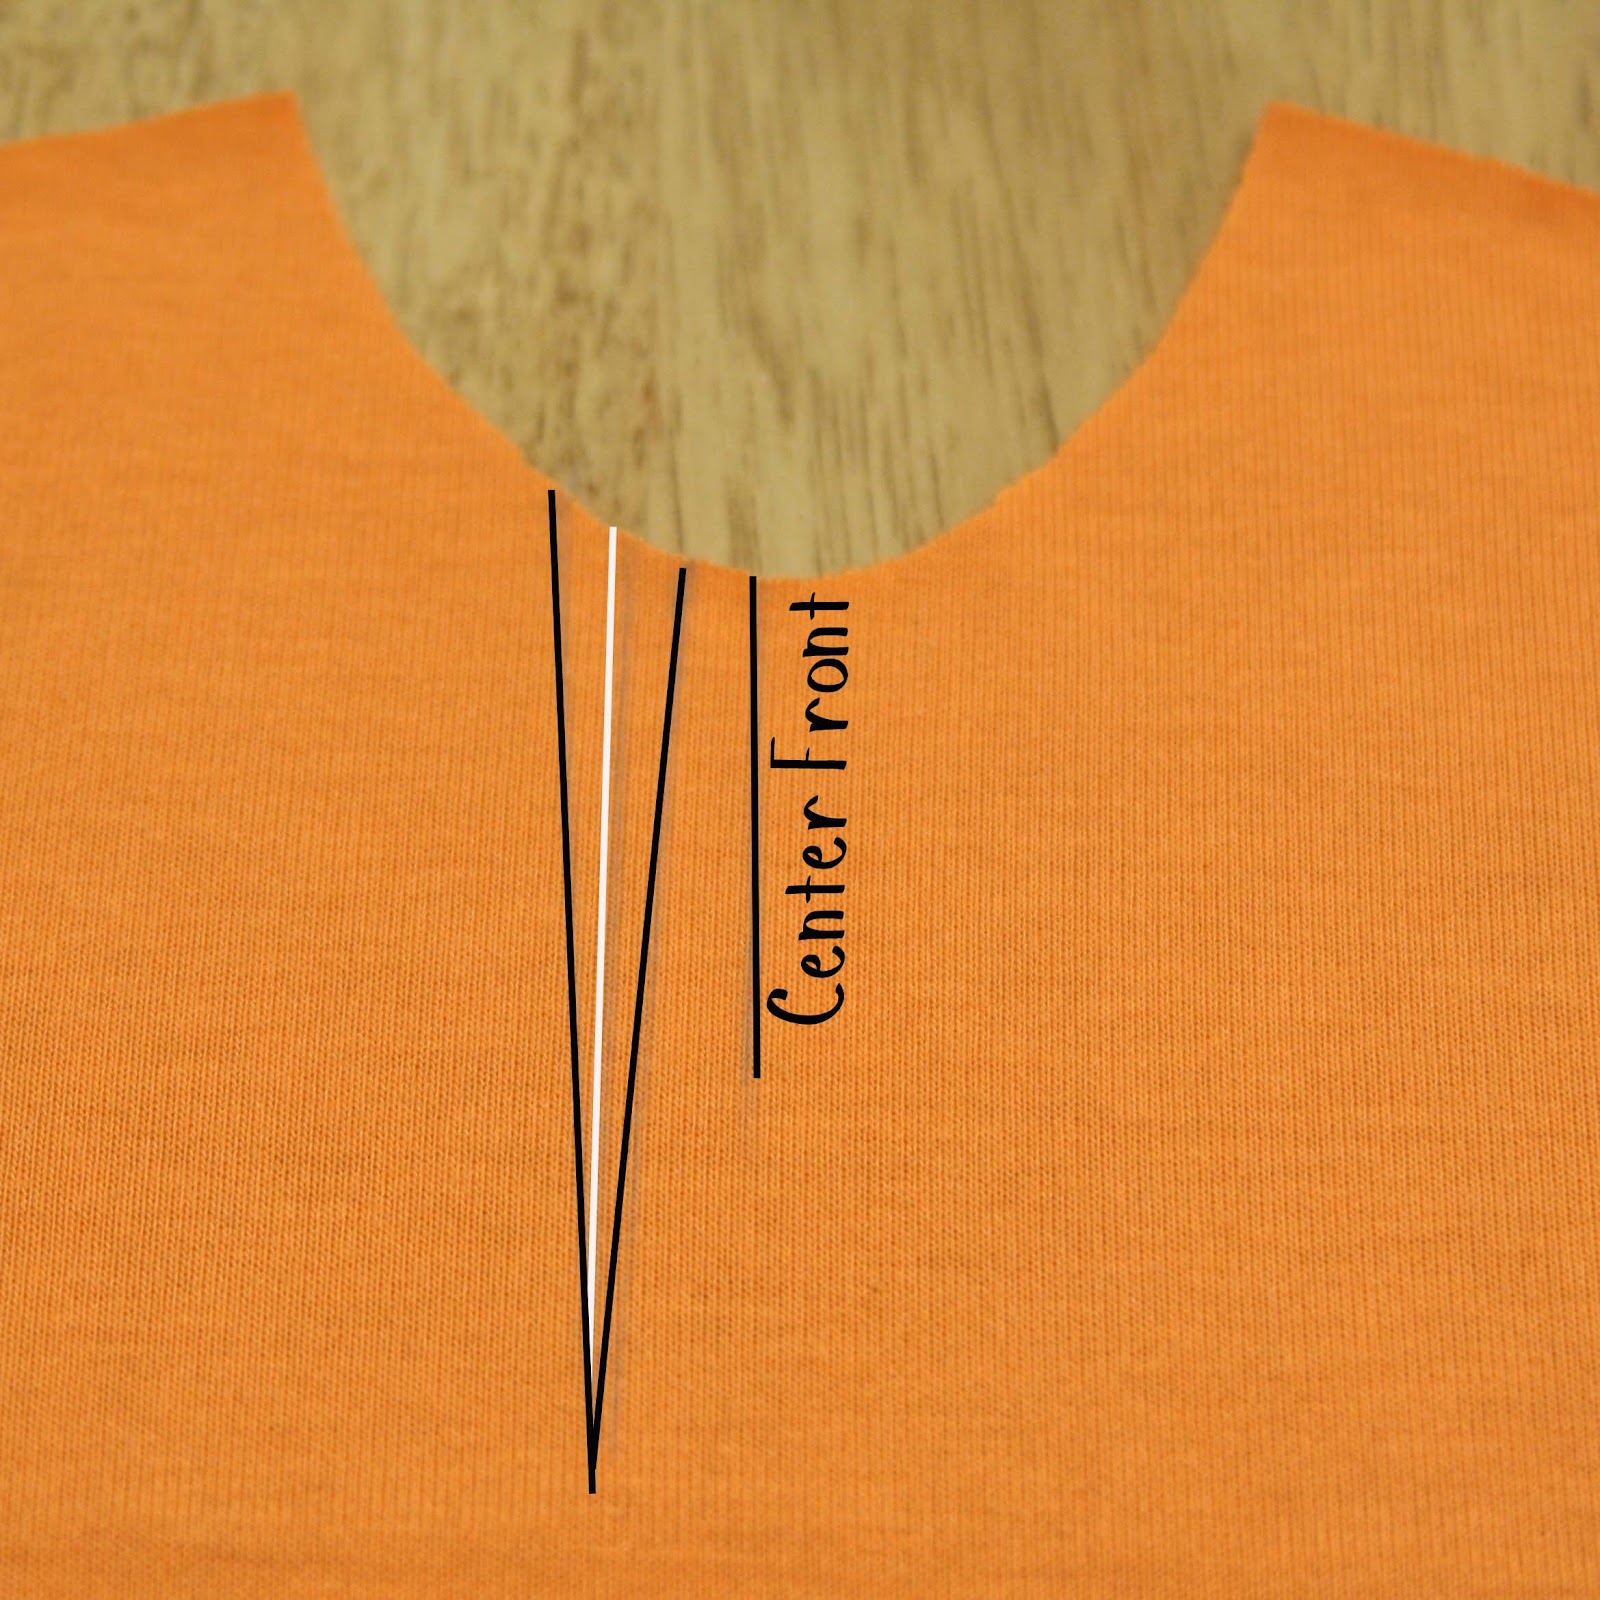
I know it looks funny to off-set your placket from the center, but you’re doing this so that the buttonholes will be centered later.
5. On the back side of the shirt, iron on some lightweight interfacing. Notice this is off center as well.

6. Iron down 1/4 towards the wrong side on the long sides of your placket fabric.
7. The scary part – cut the white line for your placket.
8. Open your placket by pulling the shoulder edges apart, so the placket edge is now a straight horizontal line. Pin your placket fabric to the outside of the shirt, right sides together, lining up the fold line from your 1/4 edge with the black lines that you drew on your placket. It will look like this – hardly any seam allowance in the middle of the placket, and 1/4 inch on the edges.
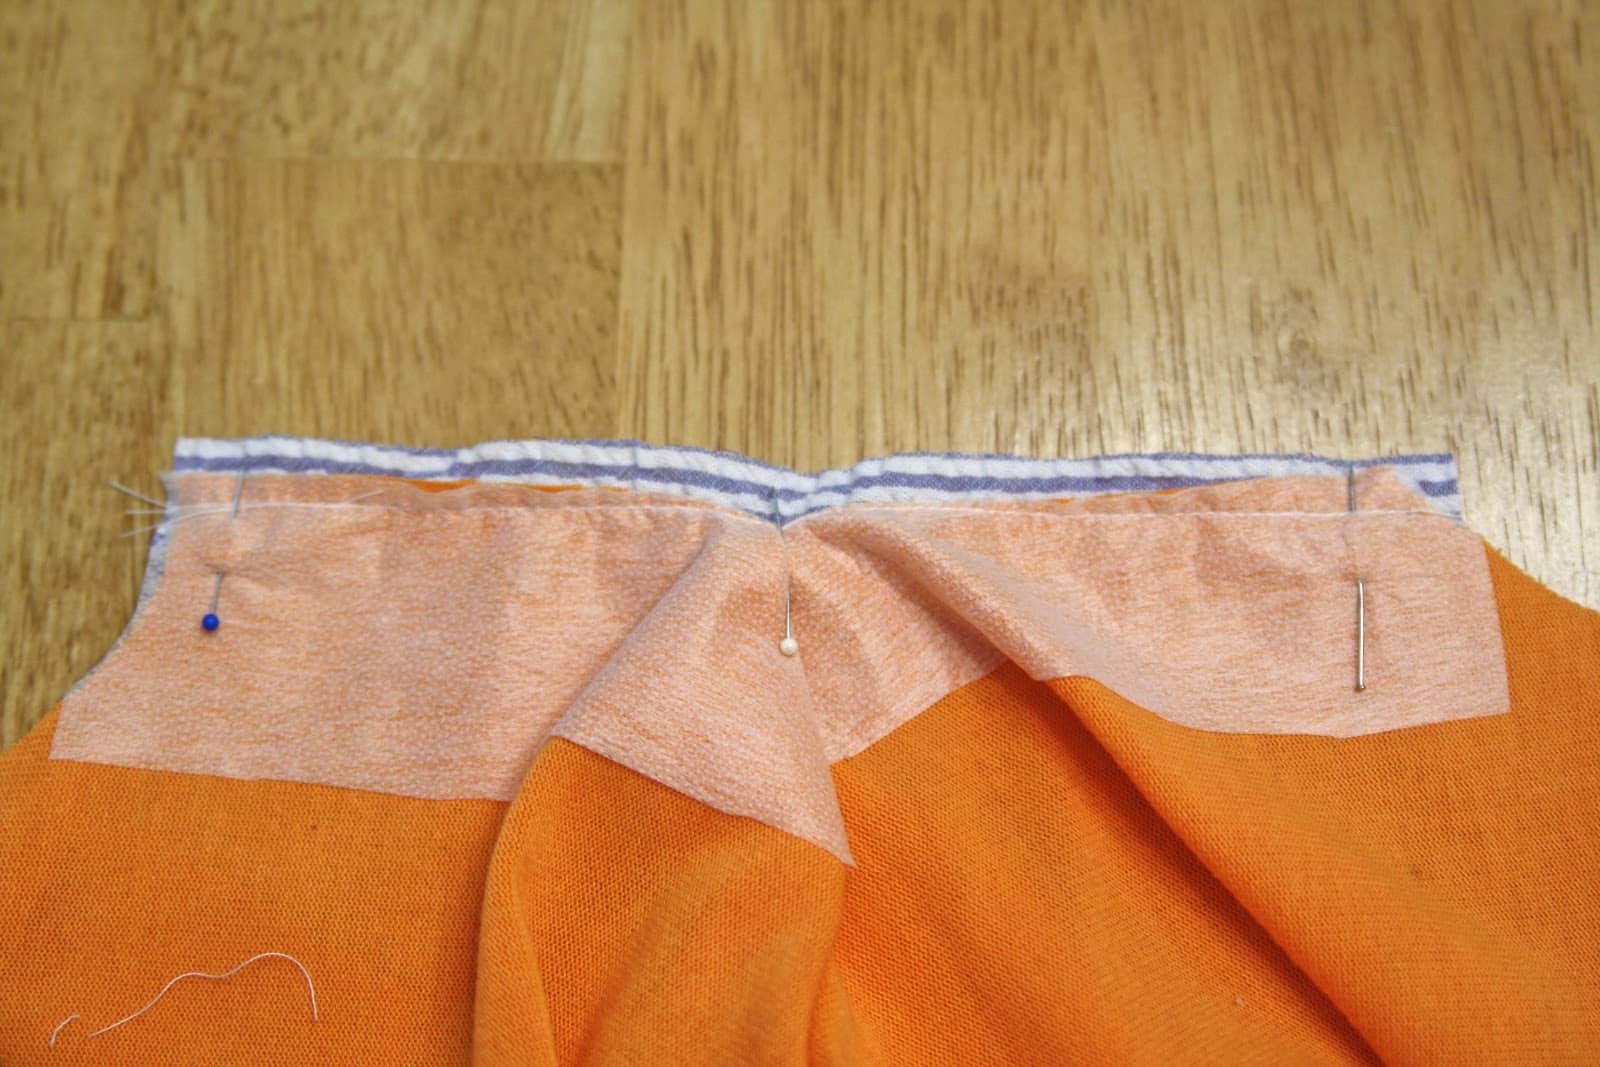
9. Sew the placket to the shirt. Stop with the needle down at the point and lift the foot to shift the extra fabric over, so that you don’t end up with a pucker in the middle. Bring the rest of the placket up.
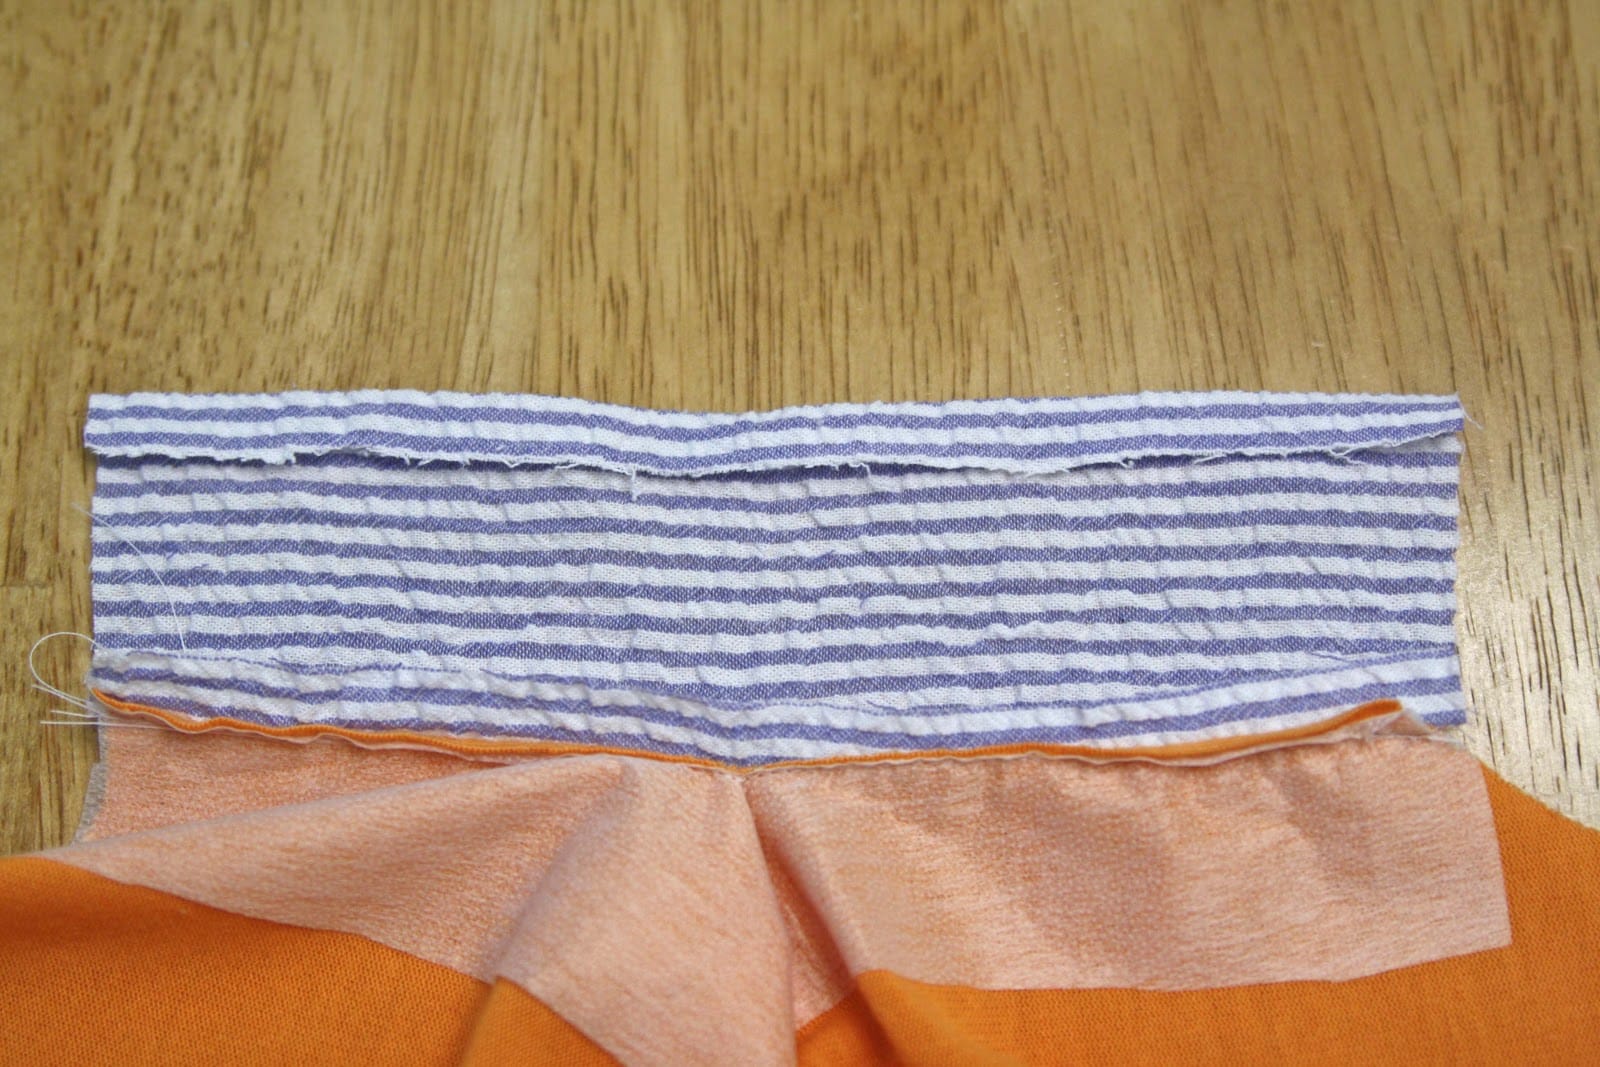
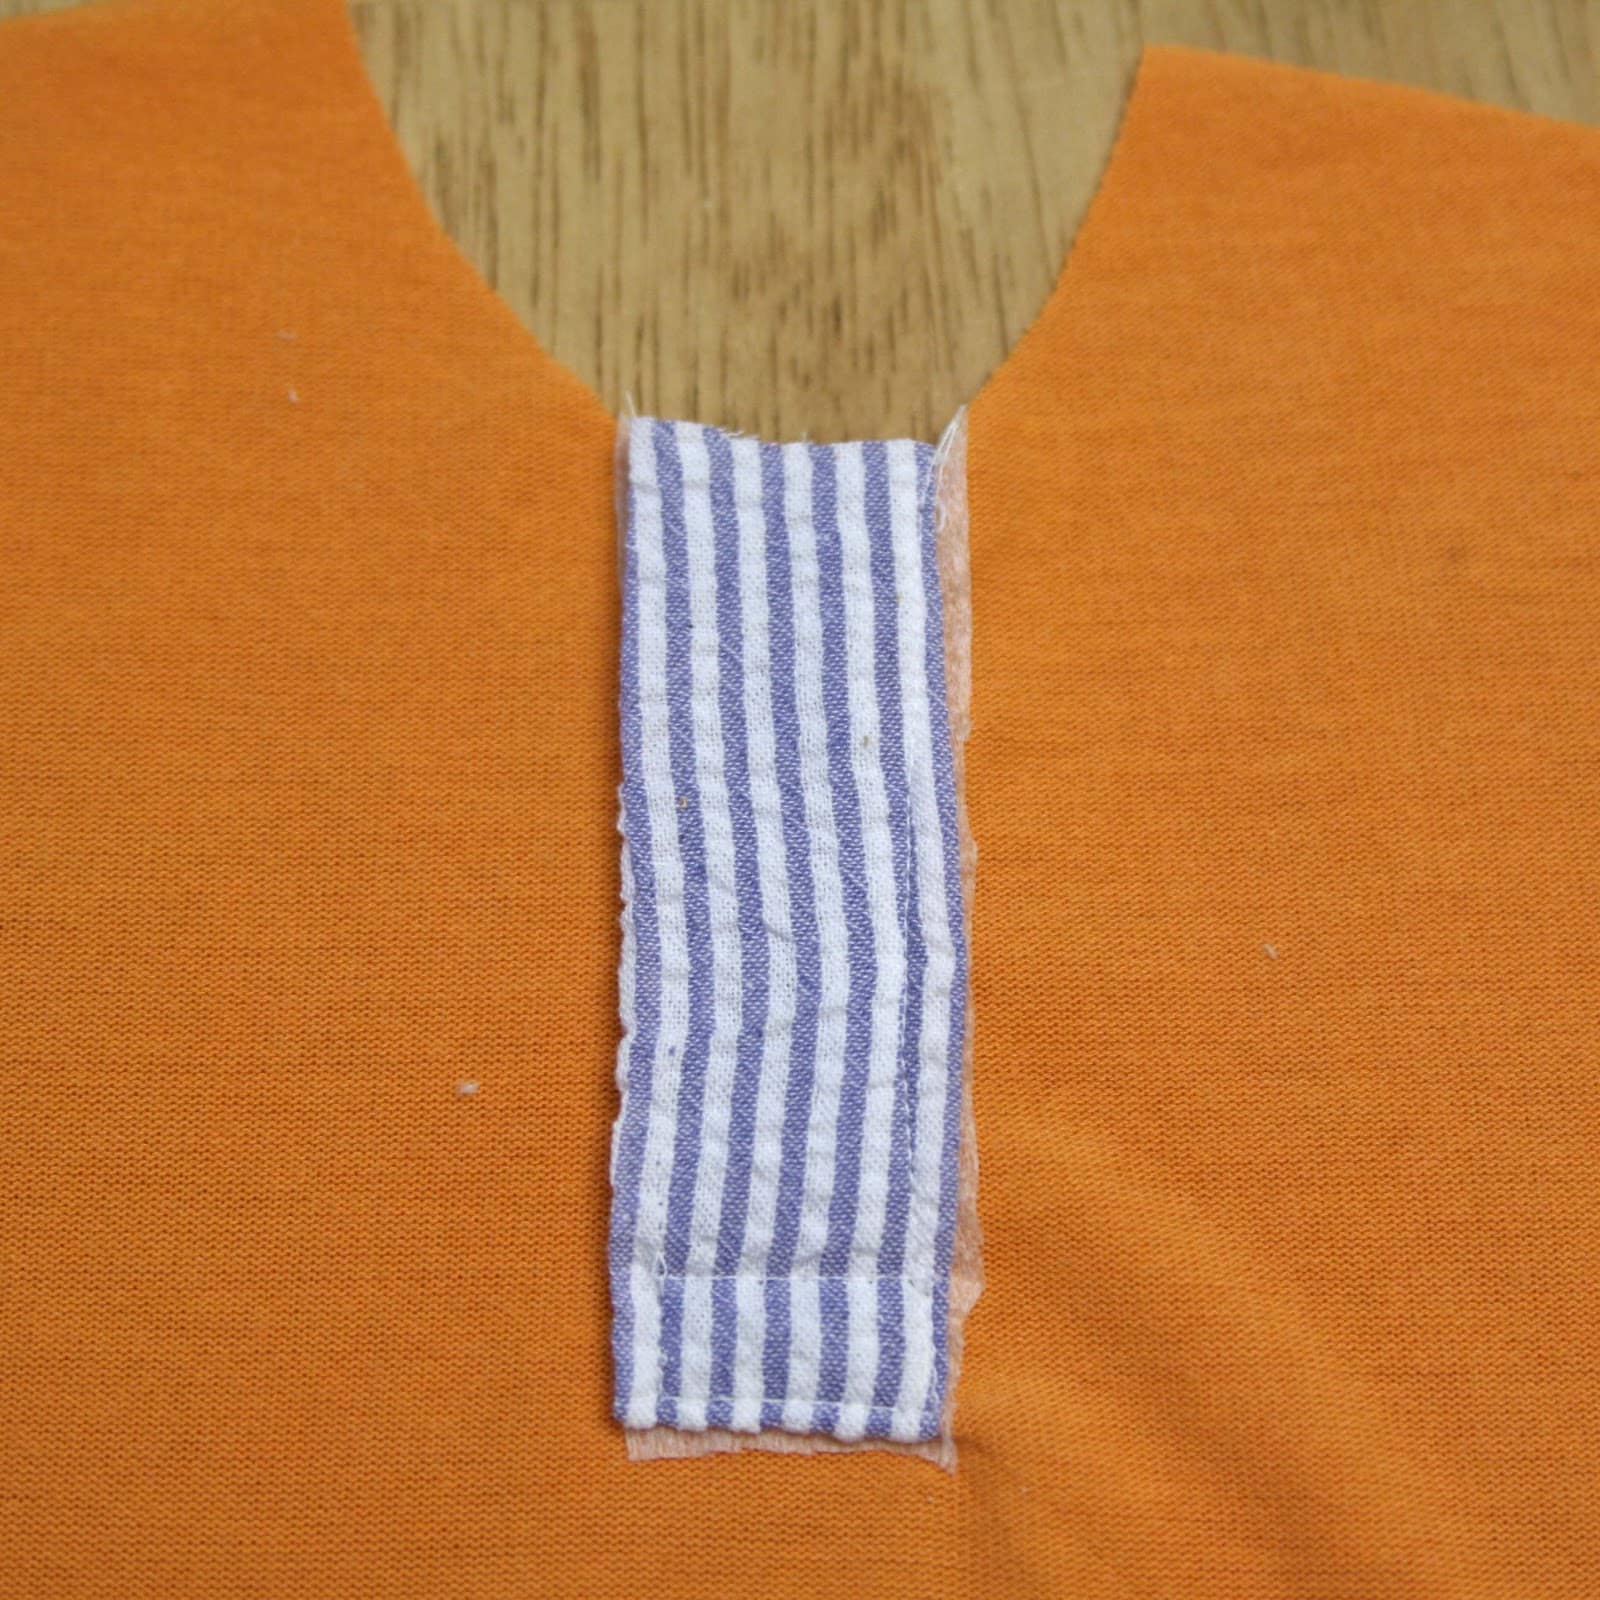
10. Placed the ironed down folded edge just over the stitching line, and pin.

11. On the OUTSIDE of the shirt, sew along the edge of the placket, making sure to catch the folded edge on the bottom. Note that in the picture below I rotated the shirt, so now the placket is vertical.
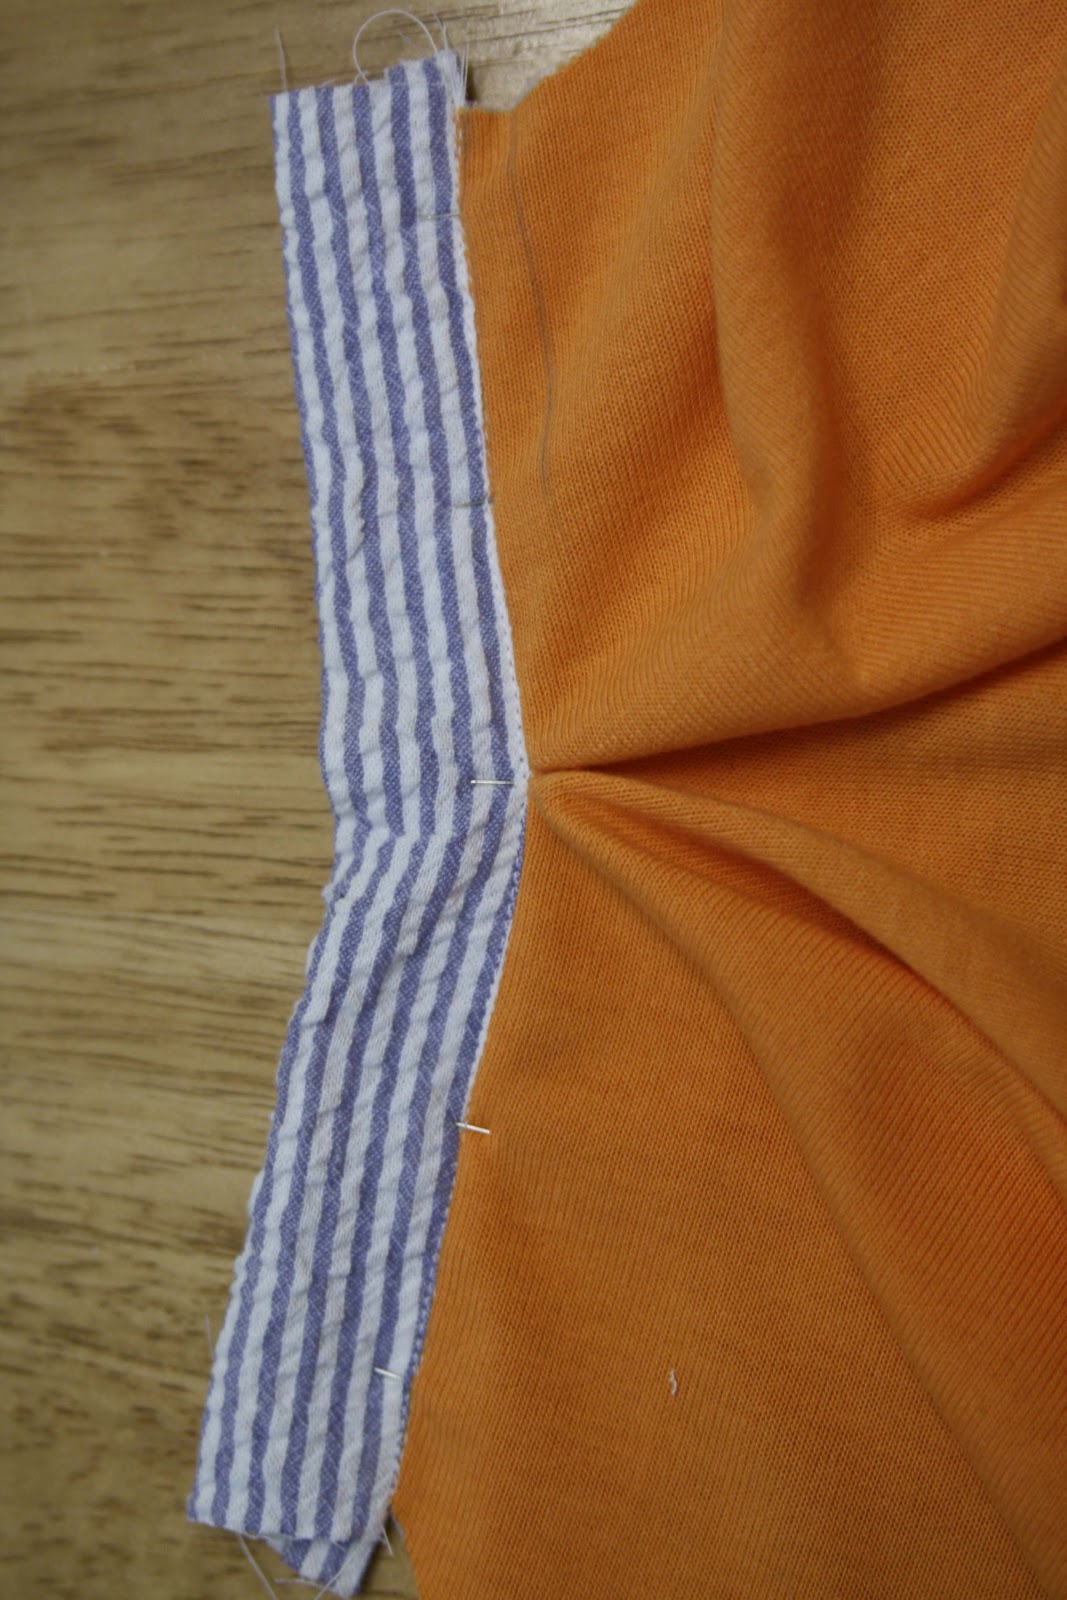
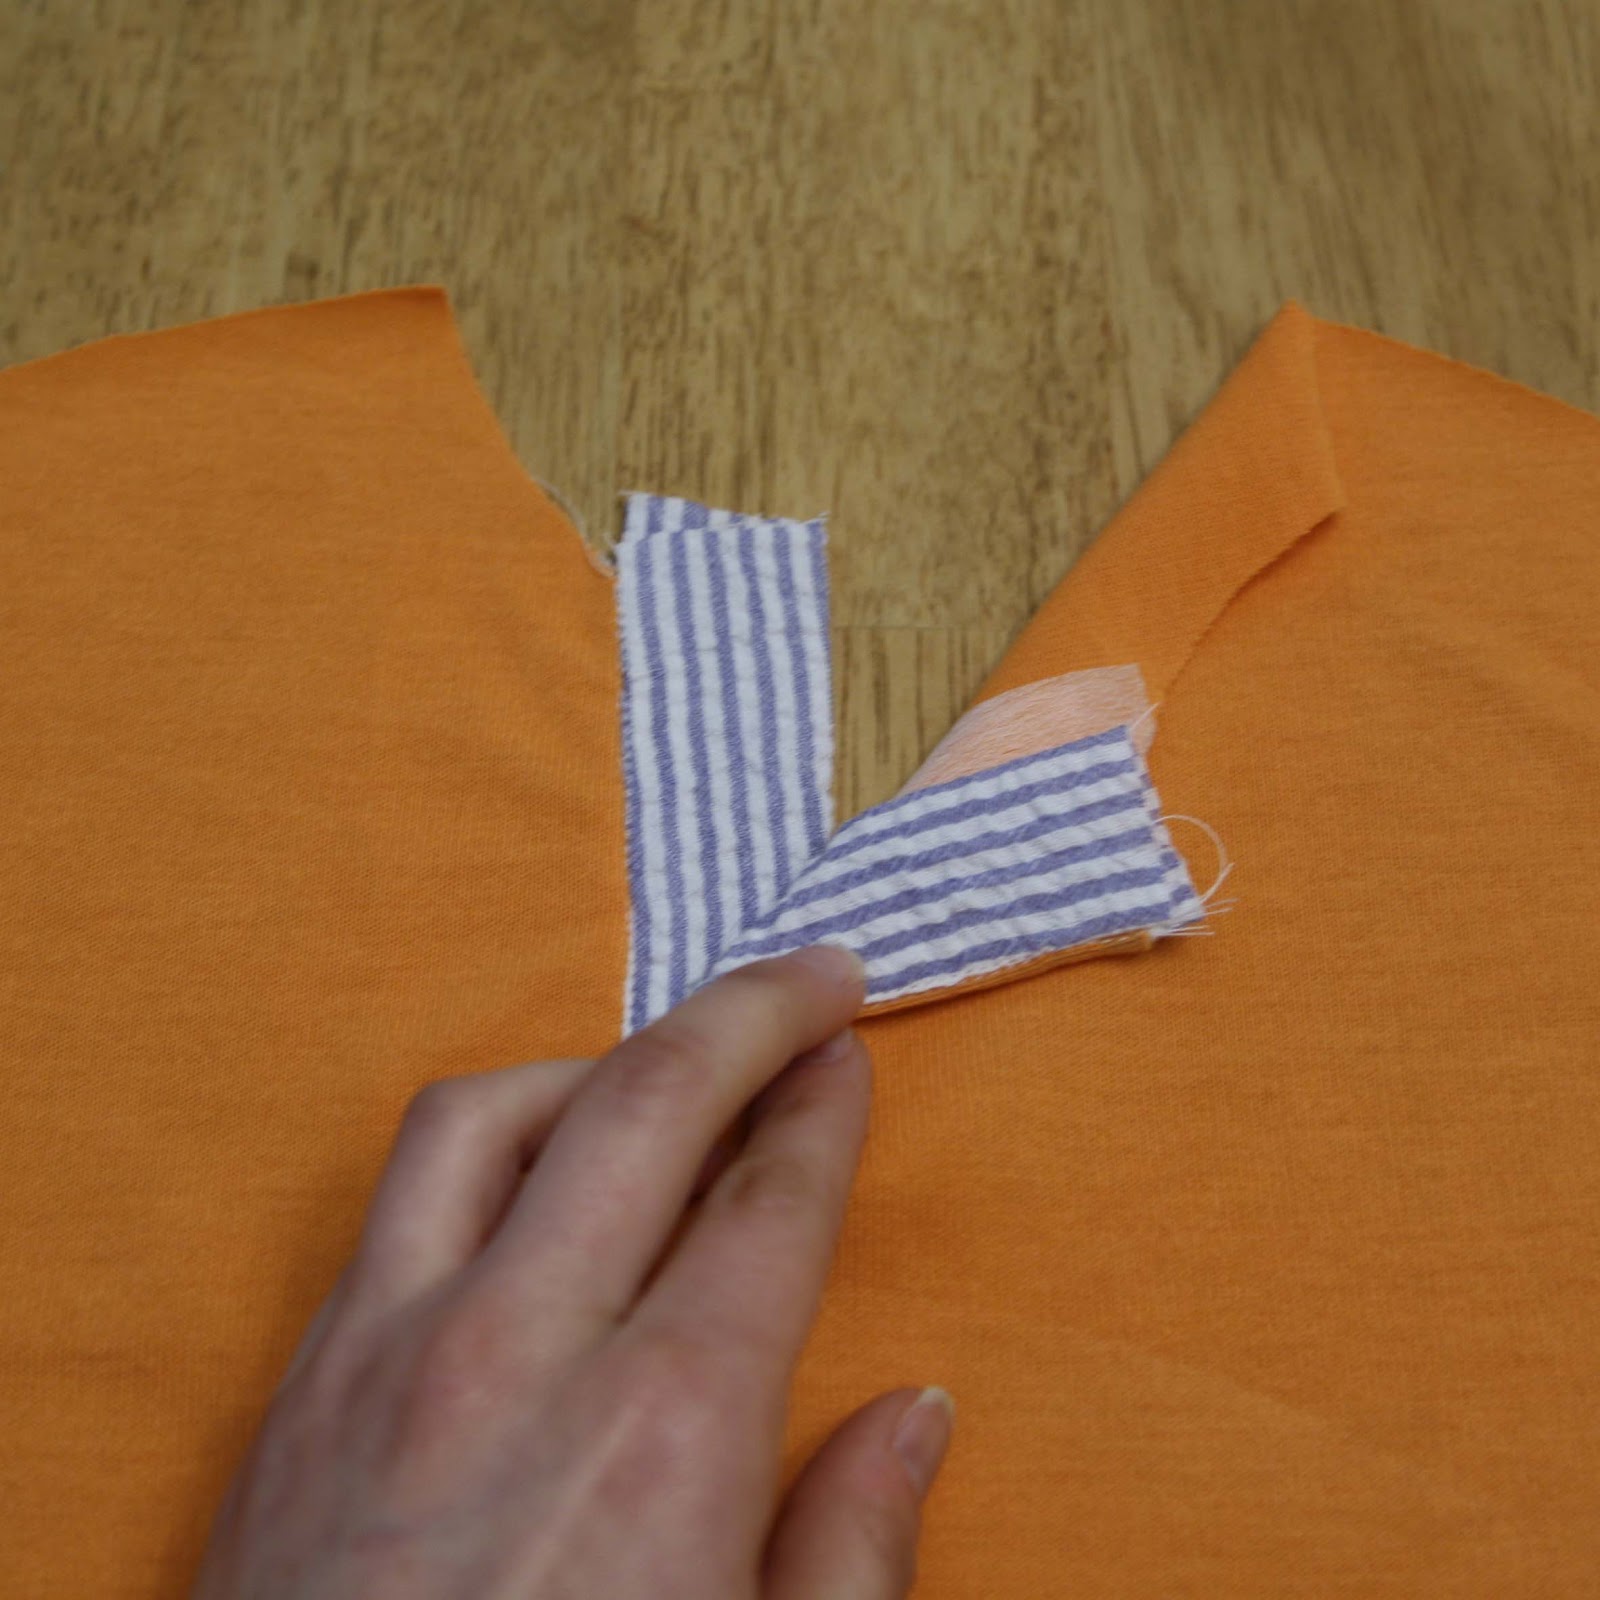
12. This is what the shirt looks like now if you lay it right side up.

13. Fold the right edge up and it looks like this:
14. And the picture below shows how the woven fabric will peek out. You can trim off the extra placket now.
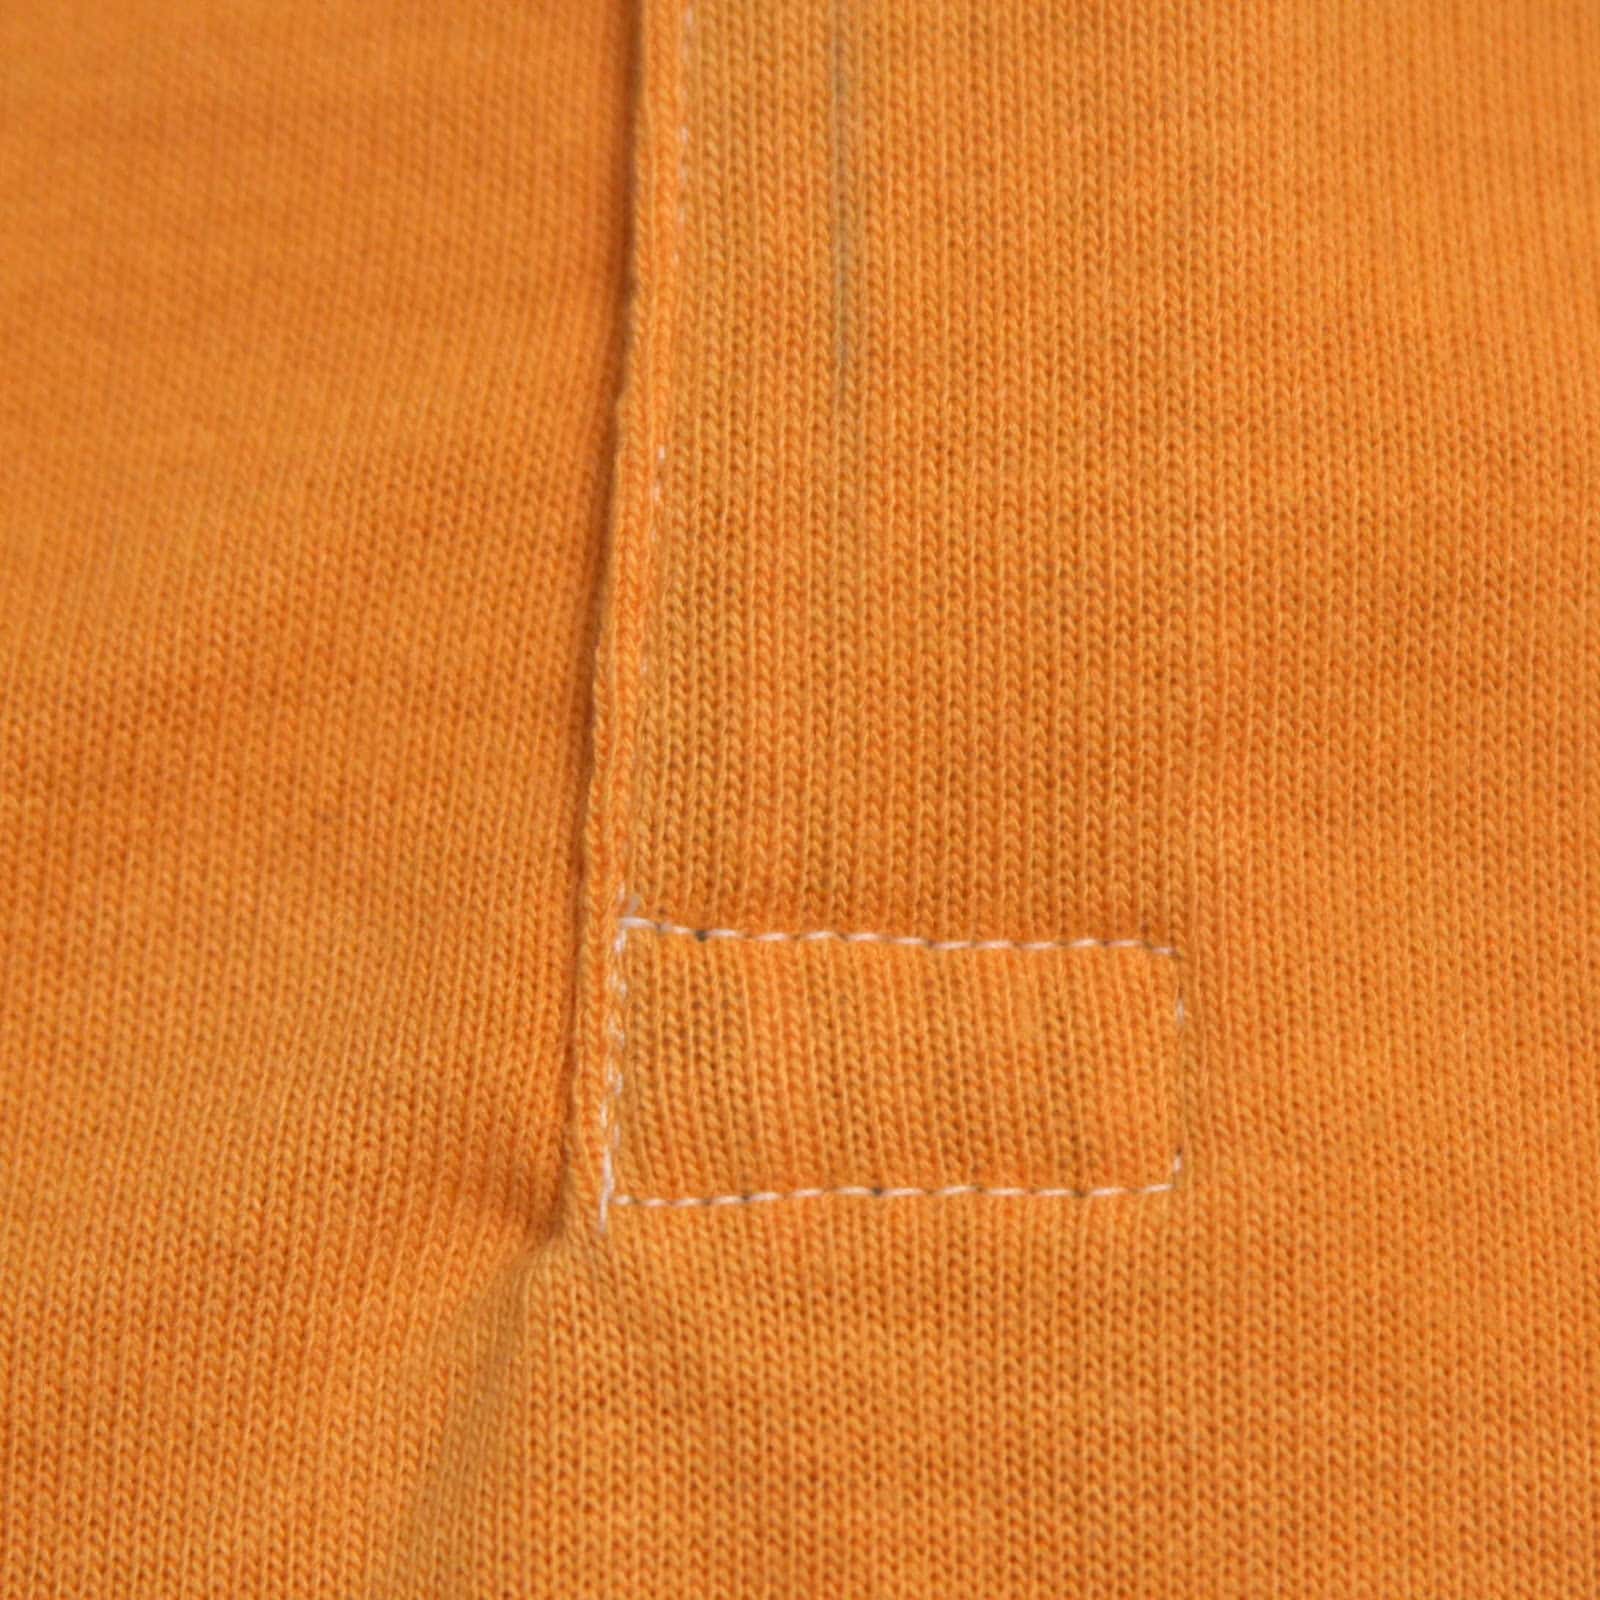
15. Sew a rectangle across the bottom of the placket to secure it. Topstitch the folded edge of the knit.
16. On the inside, pull up the interfacing around the placket edges and trim it off.

This is what the finished inside looks like. Now sew the buttonholes in the top side of the placket, and then add the collar stand and collar as normal.
Amy
This is really cute! Thank you for breaking down the placket, it makes sense to me! LOVE the reverse applique!
Anonymous
I like the tutorial. Thanks for sharing it, I shared it on my page “Sharing Tips”.
Jessica
Melissa, how are you so awesome?! I’m totally using this tutorial one day… you know when I get to leisurely make whatever I want for my kids again… one day 🙂
folkhaven
Thank you for showing how to do this. I’ve pinned it for future reference.
Leslie
Great tutorial, I’ve pinned it to my techniques board!
Jenilyn
Thank you for this! I’ve wanted to tackle making a polo for my little girl, but was scared of the placket!
http://www.gritsandgiggles.blogspot.com
Sparkle and Co
Thank you for sharing this tutorial!!! have a nice day
Katie @ Little Becky Homecky
This is awesome! My daughter has to wear polo’s with her uniforms at school so this is a life saver!! Thank you so much for sharing this tutorial!!
Metrix
Nice one Melissa. It’s exactly what I’ve been looking for.
Thanks.
Susie @Bowdabra
Very cool idea! We are your newest follower. It looks easy but we would have never thought of it!
If you have time, we’d love for you to stop over at our new Saturday Showcase. Today is Fashion and this would be the perfect project to link up. We hope you can visit! http://bowdabrablog.com/2012/05/05/saturday-showcase-diy-fashion-ideas/
We’ll be back to see more of your creations!
Susie @Bowdabra
JenniLoryn
I would love to know what patterns you used for the polo and shorts. I especially like the fit of the shorts. Can you link me to them or did you draft them yoursel? I’m loving all your tutorials, thanks for sharing!
Patricia Milton
Thanks for sharing, I have been wanting to add this to my ponchos, but didn’t even know what to call it. Your tutorial is great and very easy to follow!
Laura
Thanks. This is exactly what I was looking for. I am going to pin this blog on my frugal crafts pin on pinterest. Great job with the tutorial.
Mikea
How’d you know I was looking for this yesterday?! I went through all my patterns but none were this. Im planning to use it to alter the neckline of my daughters’ rash guard (my kids heads do not fit in that little little neck hole) as well as alter rae’s skinny tee for more rash guards. Im planning to use snaps and will need an interfacing. Any suggestions since i cant iron swimsuit fabric? Thanks for the tutorial!!
Pat Rivard
Thank you for posting the clear instructions! I am going t0 try this for myself, and will let you know how it turns out. Just wishing I had some eyelet for the contrast!
lisbet guldbøg
You Solved My problem. Thank you. ????????????